Account Setting
- How do I change password for my CloudPanzer Account?
- How do I set up Two-Factor Authentication in CloudPanzer?
- How do I update my company information in CloudPanzer?
- How to add Shell Aliases Groups in CloudPanzer?
- How to add Source Controls in cloudpanzer through the website?
- How to add User SSH Keys in CloudPanzer?
- How to change email address in CloudPanzer?
- How to change Encryption Pin in CloudPanzer?
- How to change Encryption Pin in CloudPanzer?
- How to check Account Activity in CloudPanzer?
- How to create cloudflare Integration in cloudpanzer?
- How to create forge Integration in CloudPanzer?
- How to delete Integration in CloudPanzer?
- How to delete my account permanently in CloudPanzer?
- How to delete Shell Aliases Group in CloudPanzer?
- How to Delete Single Session in CloudPanzer?
- How to Delete User SSH Key in CloudPanzer?
- How to Edit Integration in CloudPanzer?
- How to edit Shell Ailases Group in CloudPanzer?
- How to edit User SSH Key in CloudPanzer?
- How to Navigate Account Settings in CloudPanzer?
- How to set Advance Alerts in CloudPanzer?
- How to View Archived Servers in CloudPanzer?
- How to view Sessions in CloudPanzer?
- Where you can see Referrals users list in CloudPanzer?
How do I change password for my CloudPanzer Account?
It's essential to keep your password secure and not share it with anyone. If you suspect that your password has been compromised, change it immediately. Regularly updating your password and using strong, unique passwords can help protect your account and personal information.
Tutorial :
You can watch the Video or Continue reading the post.
Follow the steps below to change password
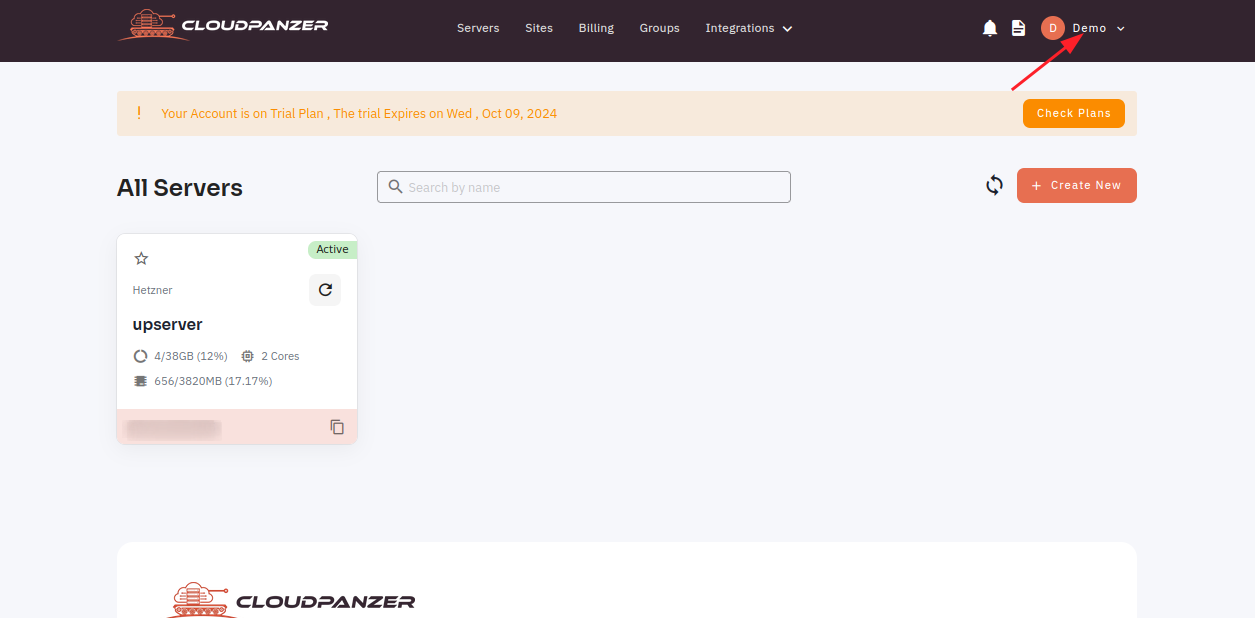
1. Once logged in, go to the user profile.

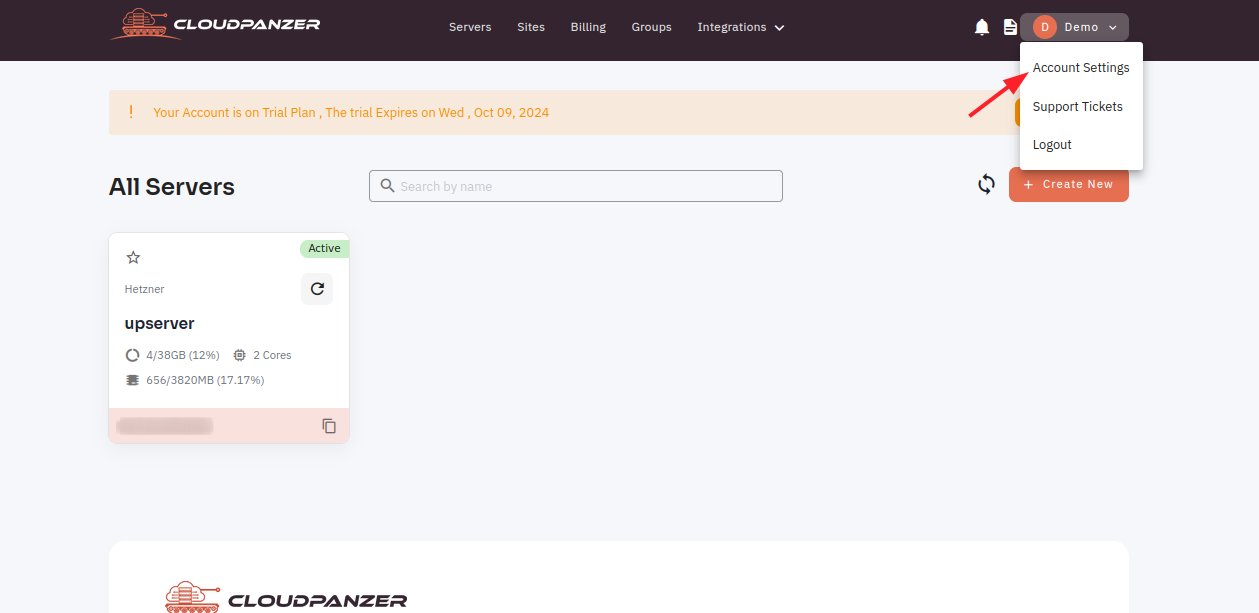
2. Go to Account Settings.

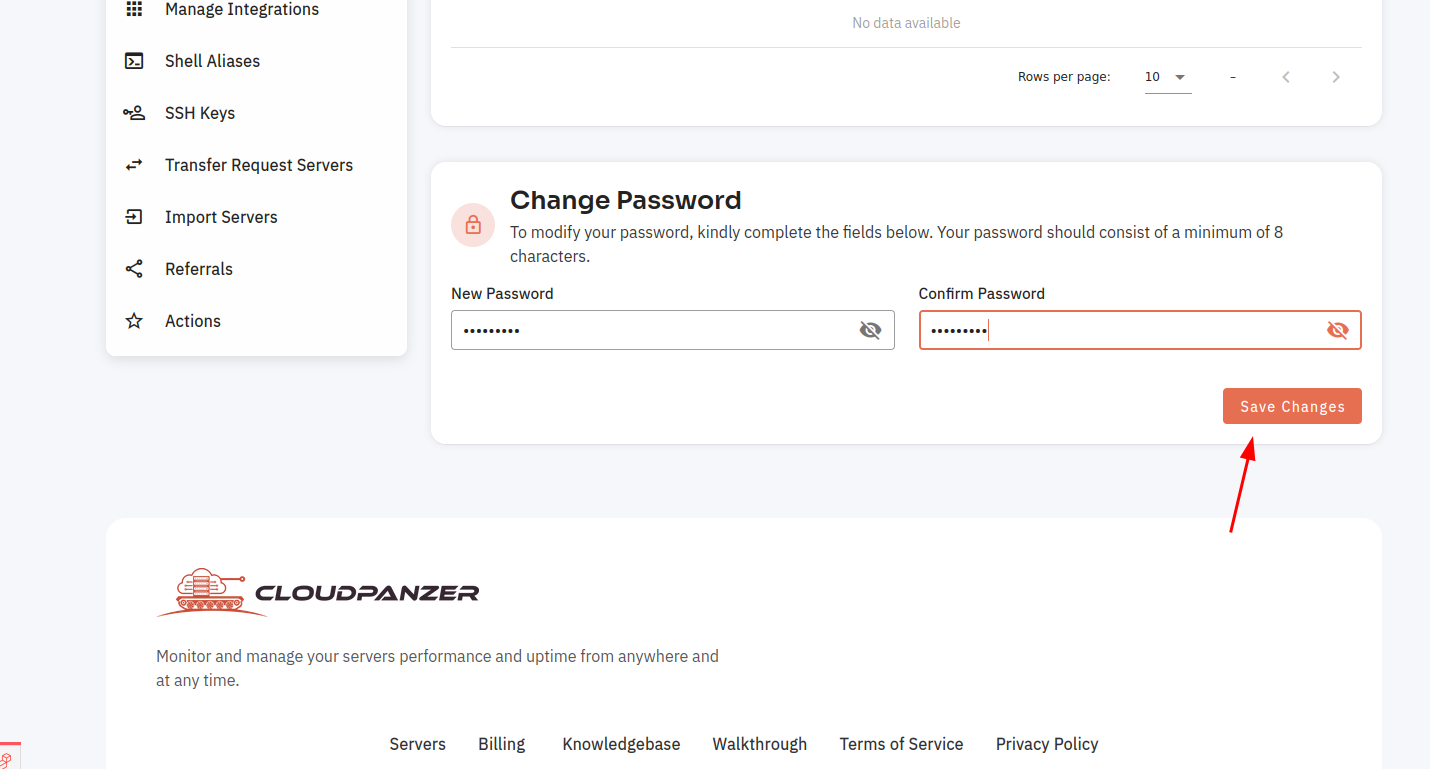
3. Please adhere to the prompts provided in order to set your new password. Selecting a strong password that is distinctive and not easily predicted is recommended. To confirm the new password, kindly enter it again. Finally, to update your password, click on the "Save Changes" button.
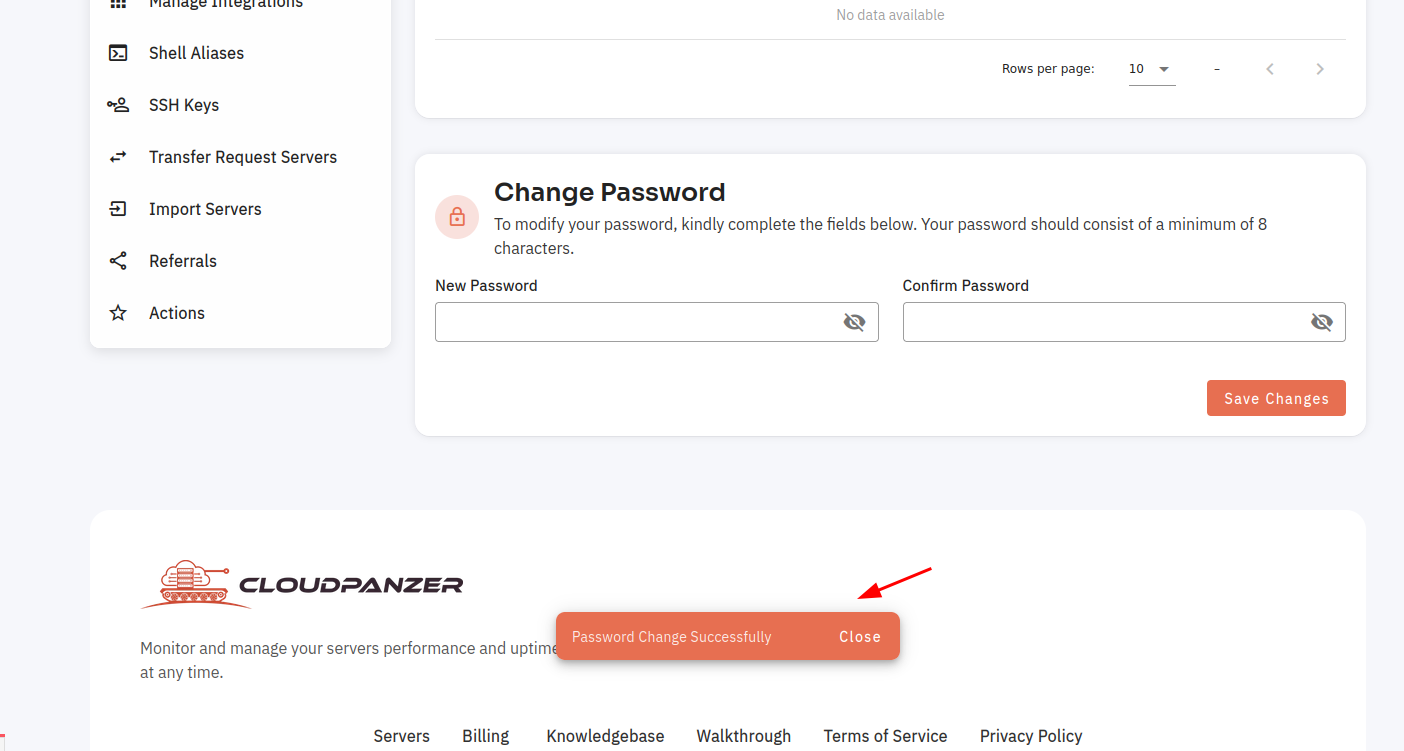
4. The password has been changed successfully.
How do I set up Two-Factor Authentication in CloudPanzer?
Two-factor authentication (2FA) is an extra layer of security that requires a second form of authentication in addition to your password to access your account. Setting up 2FA is a simple process and can help protect your account from unauthorized access.
It is important to keep a copy of your backup codes in a secure location in case you lose access to your 2FA method. You can also choose to set up 2FA for specific actions, such as accessing sensitive data or making changes to your account settings. By enabling 2FA, you can help ensure the security of your CloudPanzer account.
Tutorial :
You can watch the Video or Continue reading the post.
Follow the steps below to set up Two-Factor Authentication
Navigate to the Account Setting
Use this link to view How to Navigate
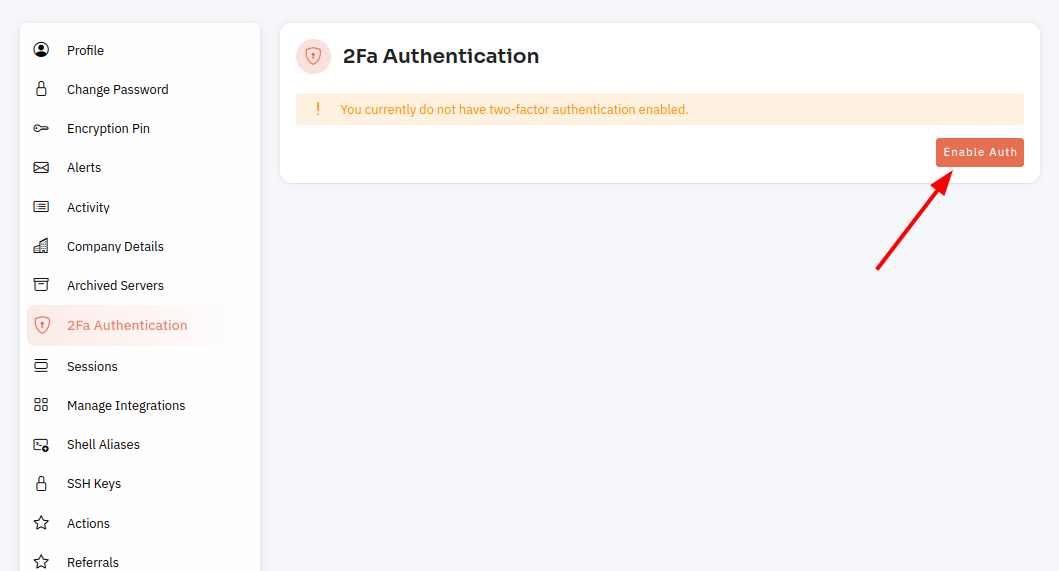
3: Select 2Fa Authentication Option.

4: Click on the Enable Auth Button.
6: Configure 2FA by following the instructions provided, utilizing preferred methods such as a mobile authenticator app or SMS text message.
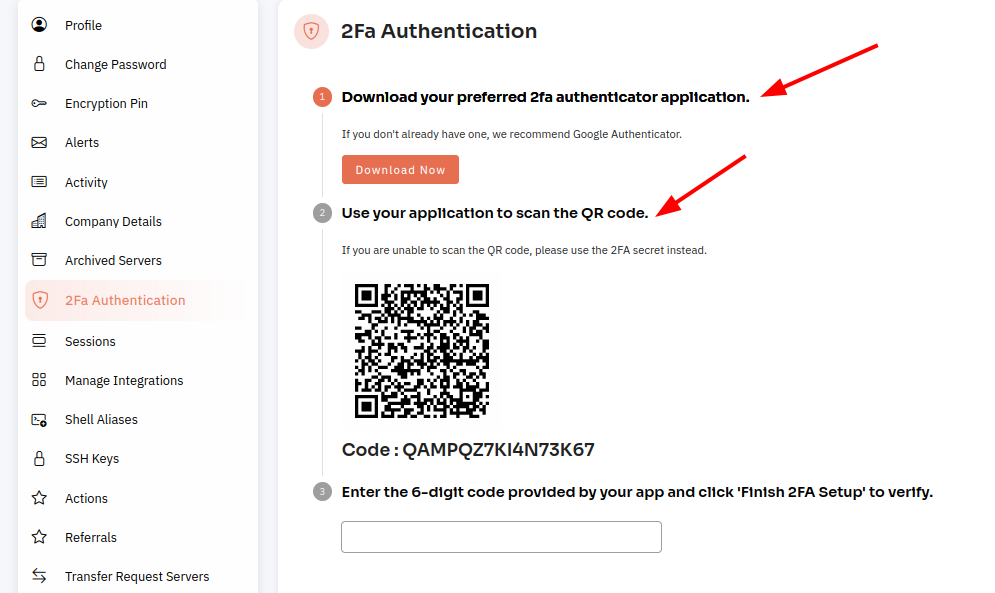
7: After configuring 2FA, a code will be required every time you access your account.
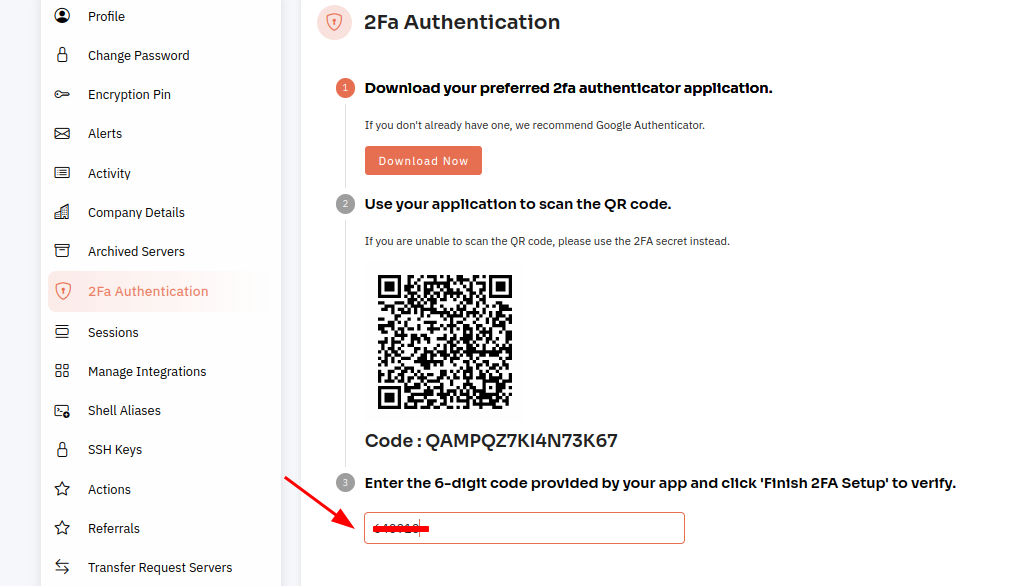
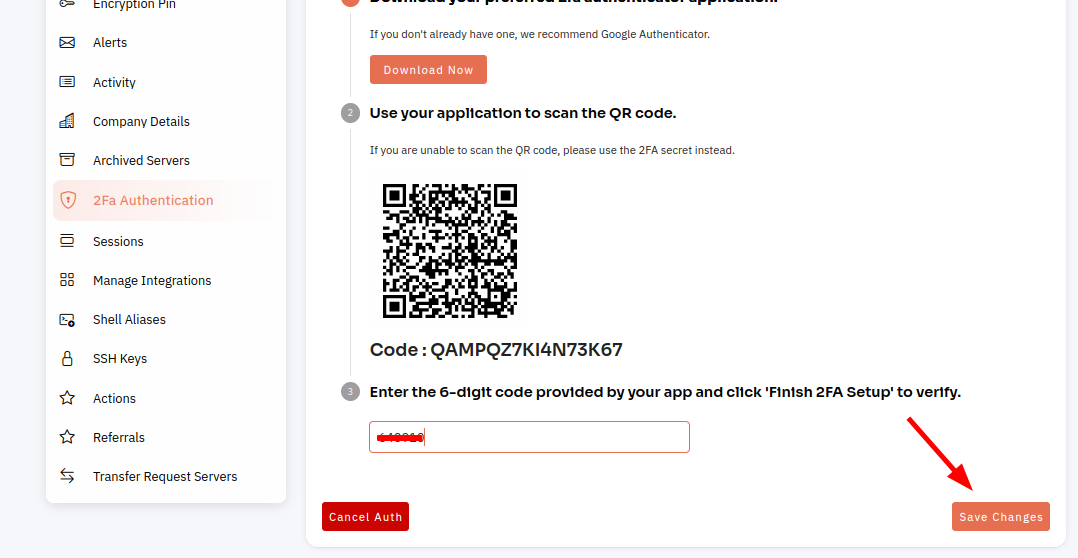
8: Click on the "Save Changes" button.
How do I update my company information in CloudPanzer?
Updating your company information is an important task that helps ensure that your business is accurately represented online. Whether you are making changes to your company's name, address, or contact information, it's important to keep this information up-to-date to avoid any confusion or misunderstandings with customers and clients.
Tutorial :
You can watch the Video or Continue reading the post.
Follow the steps below to update company information
Navigate to the Account Setting
Use this link to view How to Navigate
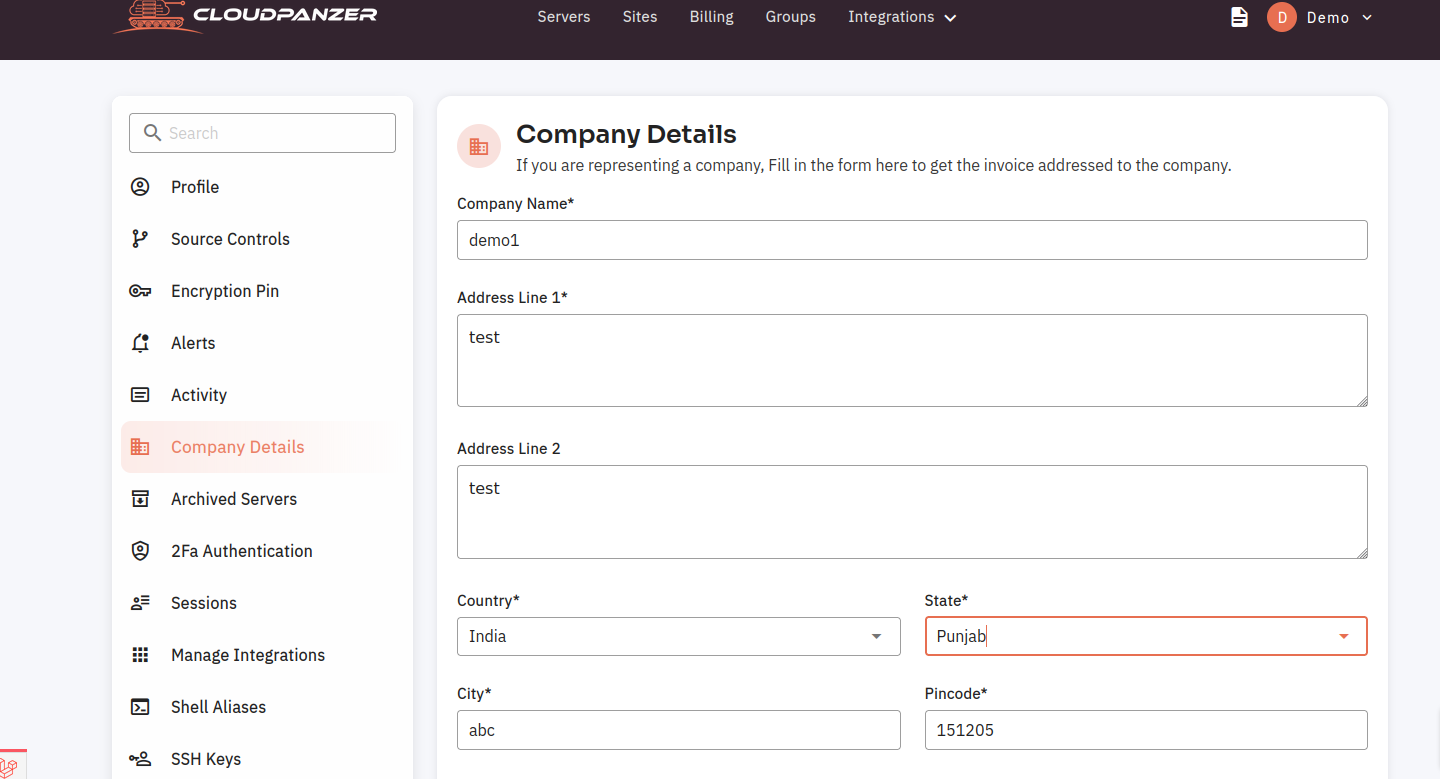
3: To update your company's information, please navigate to the "Company Details" option and select it to access the corresponding form.
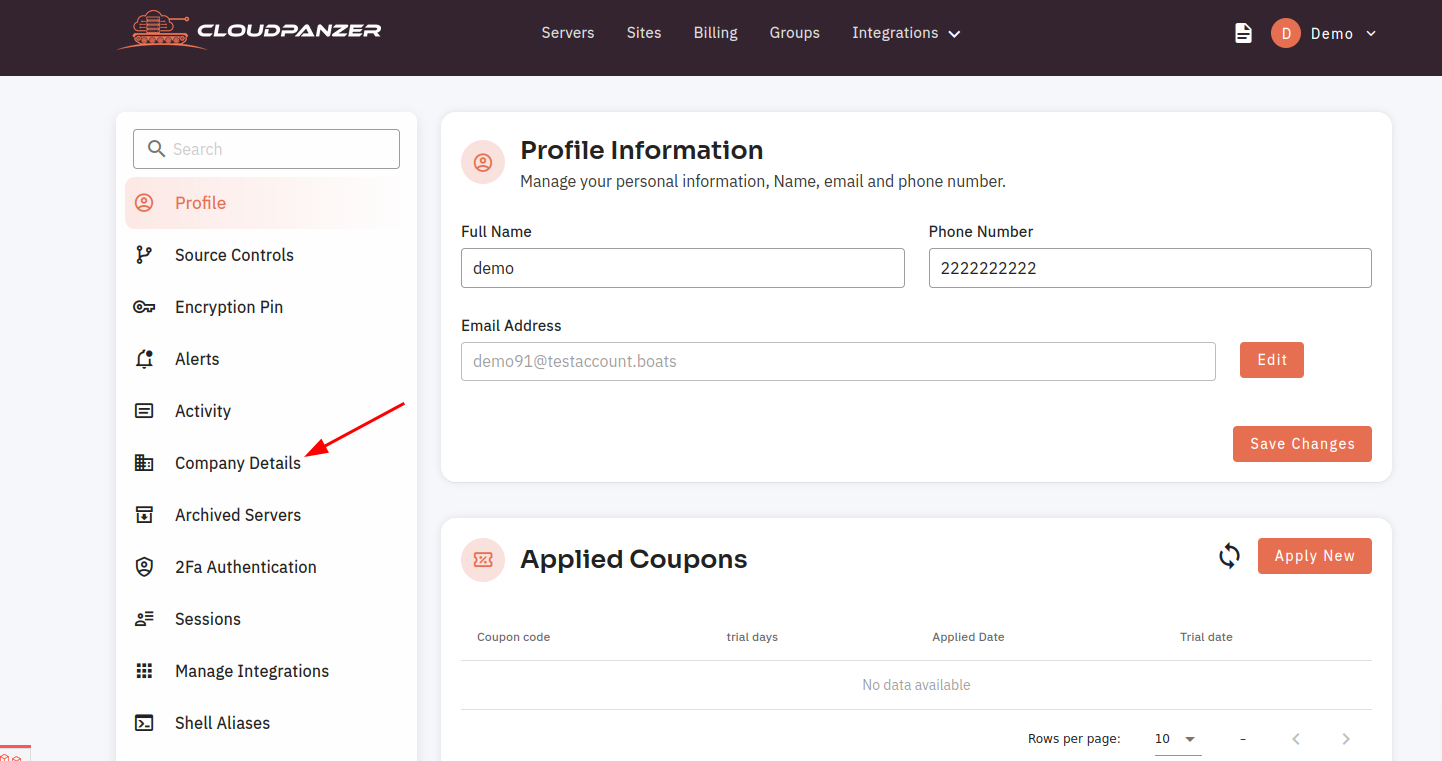
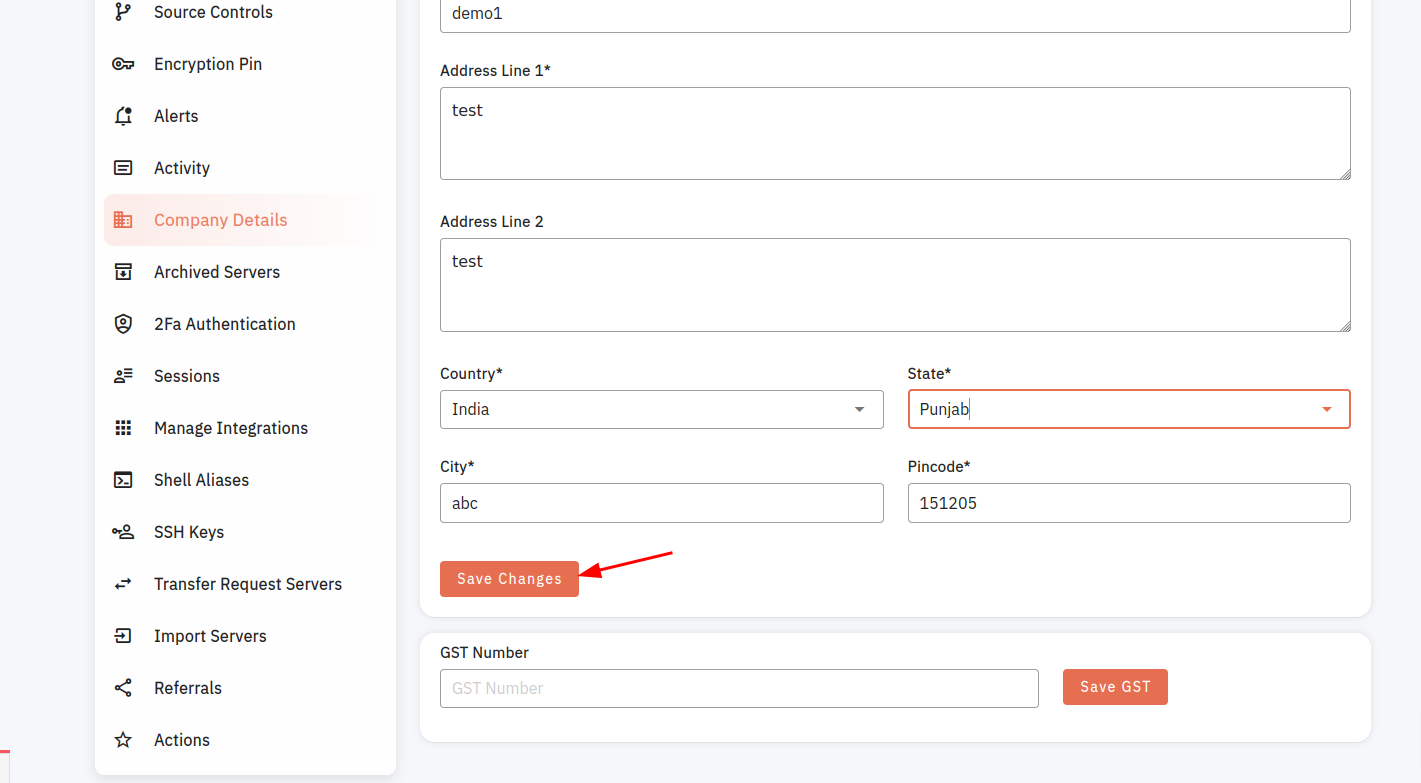
4: Please make the required modifications to the provided fields, including the company name, address, phone number, or website. To save your modifications, click on the "Save Changes" button.
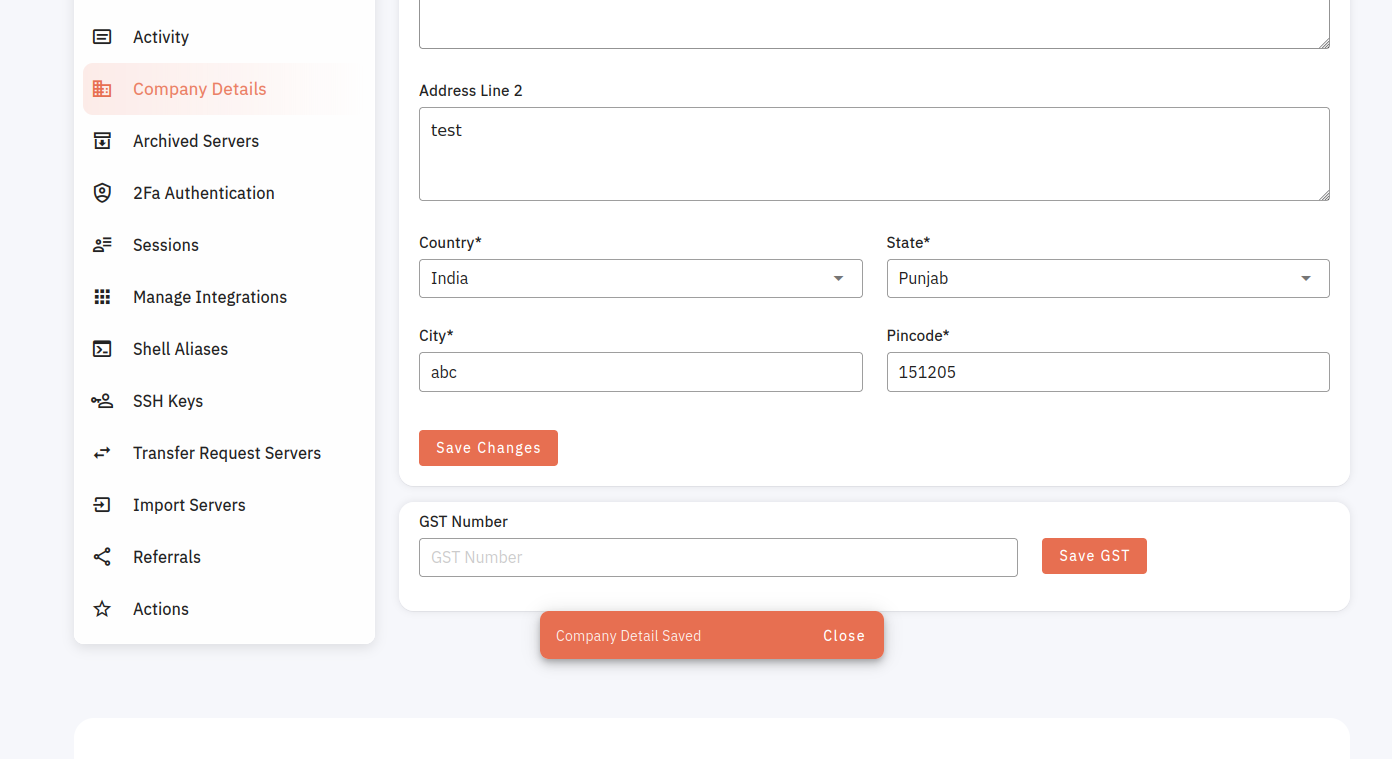
The system indicates that the company information has been updated successfully.
How to add Shell Aliases Groups in CloudPanzer?
A shell alias is a shortcut that represents a command or a series of commands. By using aliases, you can save time and reduce the amount of typing required to execute common tasks.
Tutorial :
You can watch the Video or Continue reading the post.
Follow the steps below to add Shell Aliases Groups
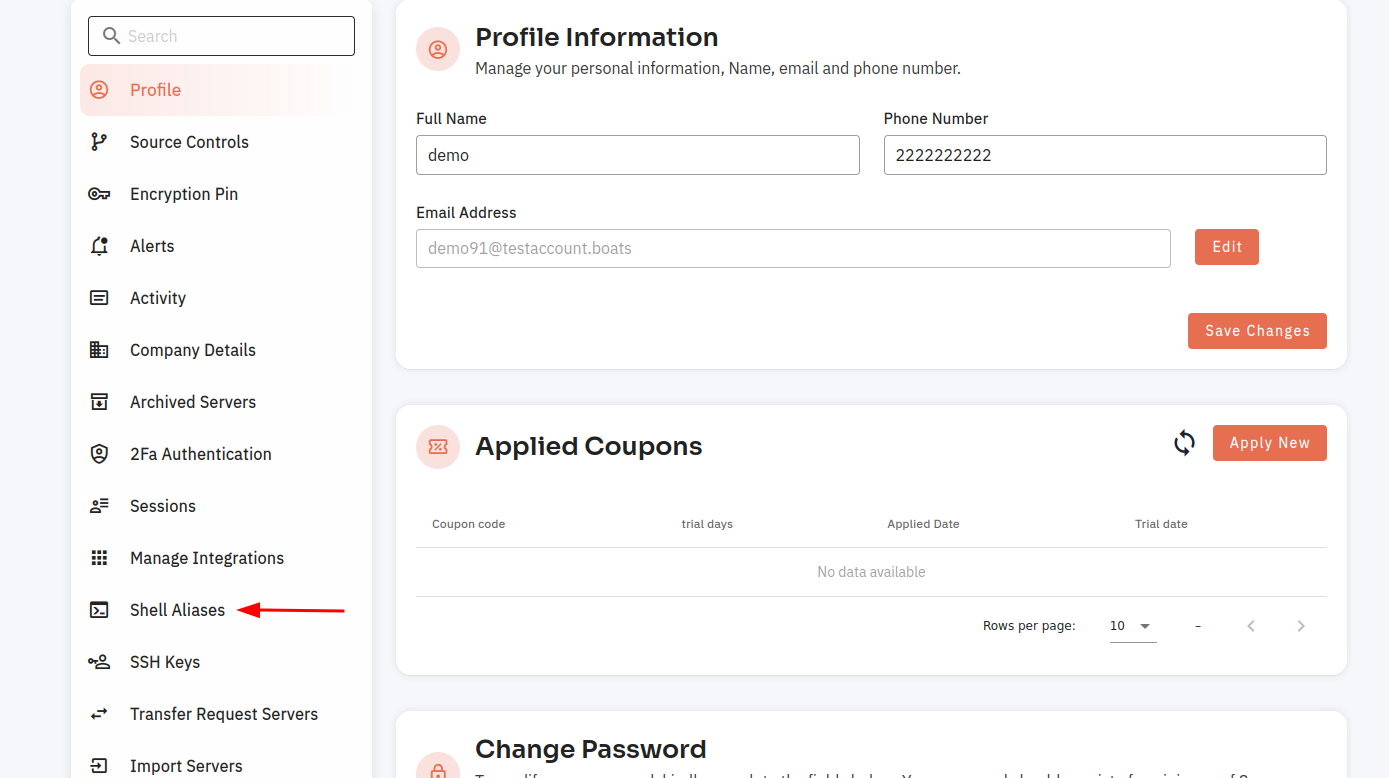
1. Click on the User Profile.

2. Go to Account Settings.
3. Click on Shell Aliases.

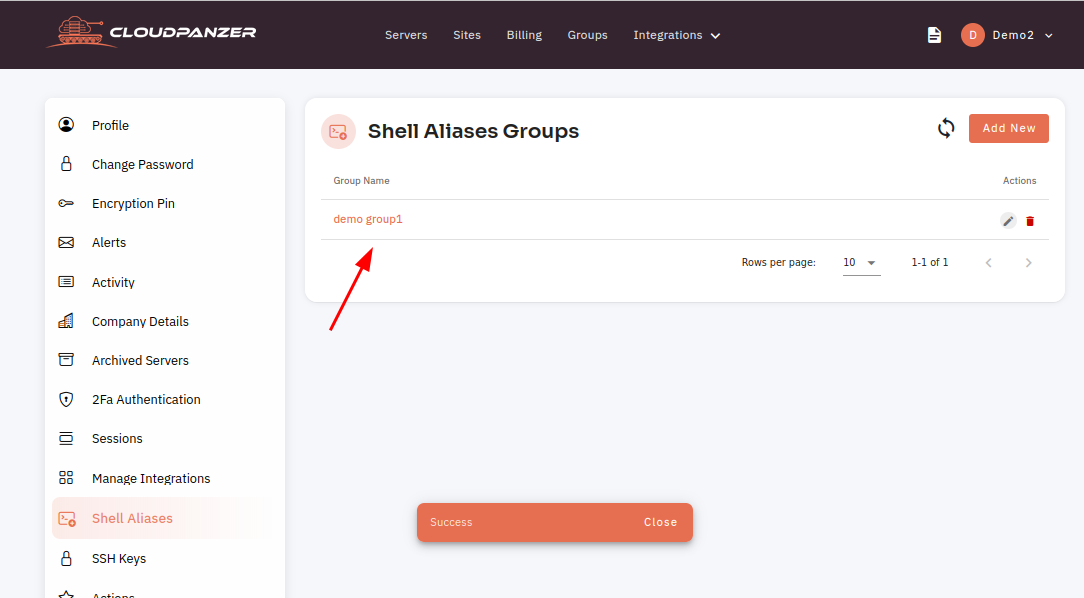
4: Click on the Add New button.
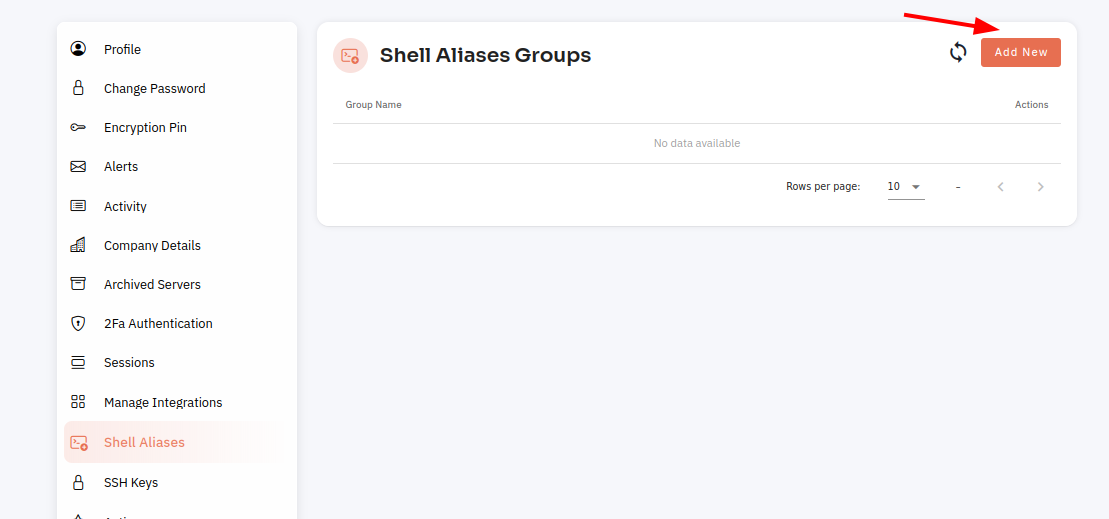
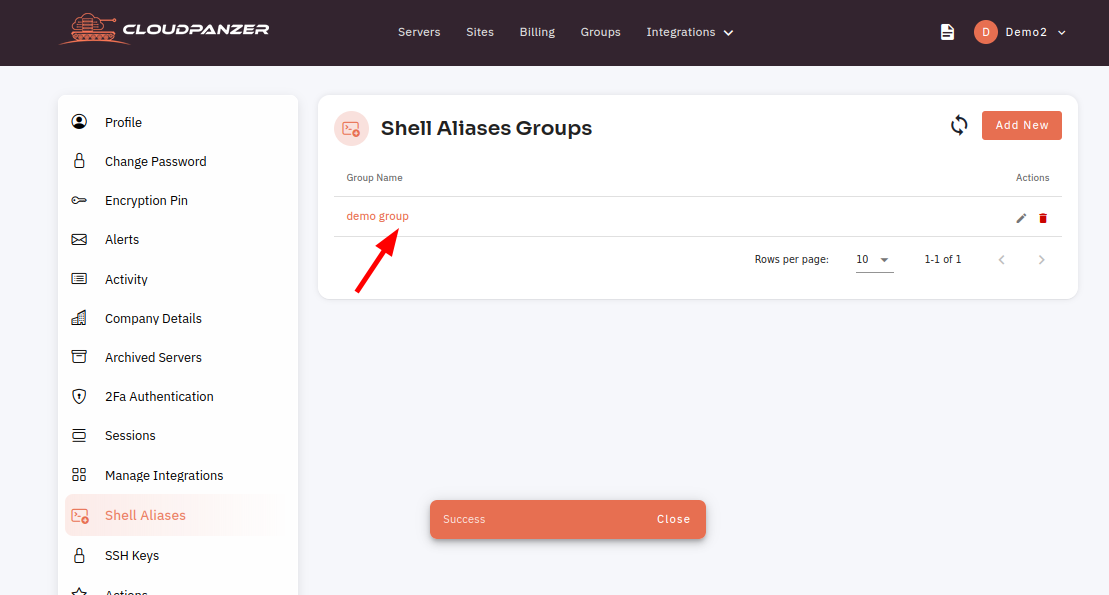
5: Enter the Group name and click on the save button.

Here, you can see the Alias group added Successfully.
How to add Source Controls in cloudpanzer through the website?
Follow the steps below to add Source Controls
- Once logged in, go to the user profile.

2. Go to Account Settings.

3. Select Source Controls Options.
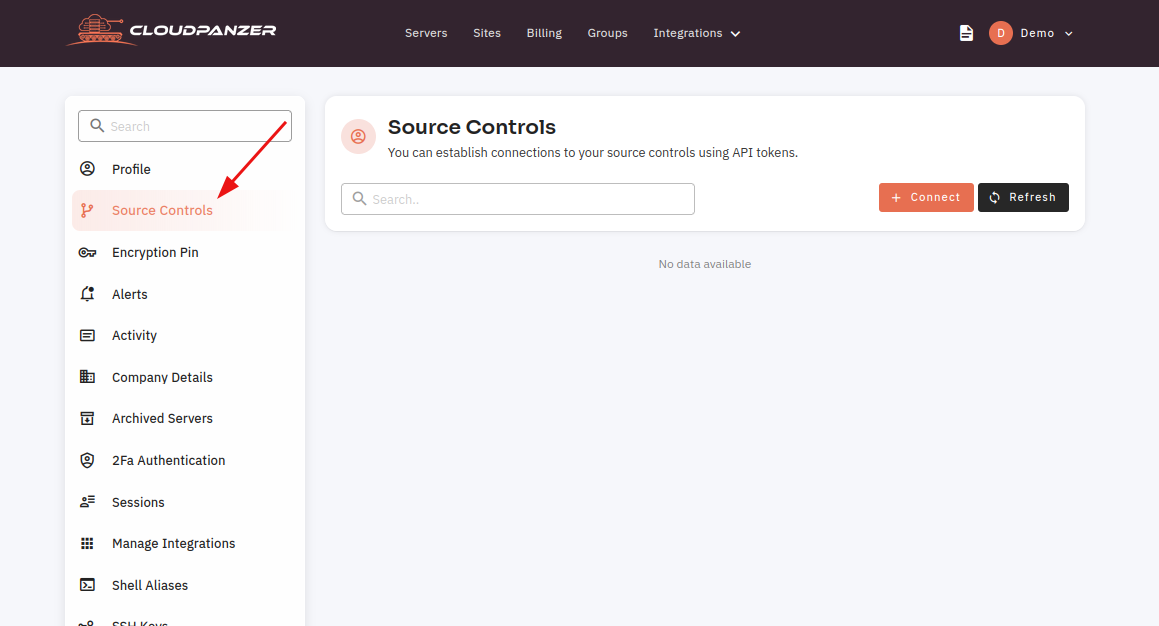
4. Click on the Connect button.
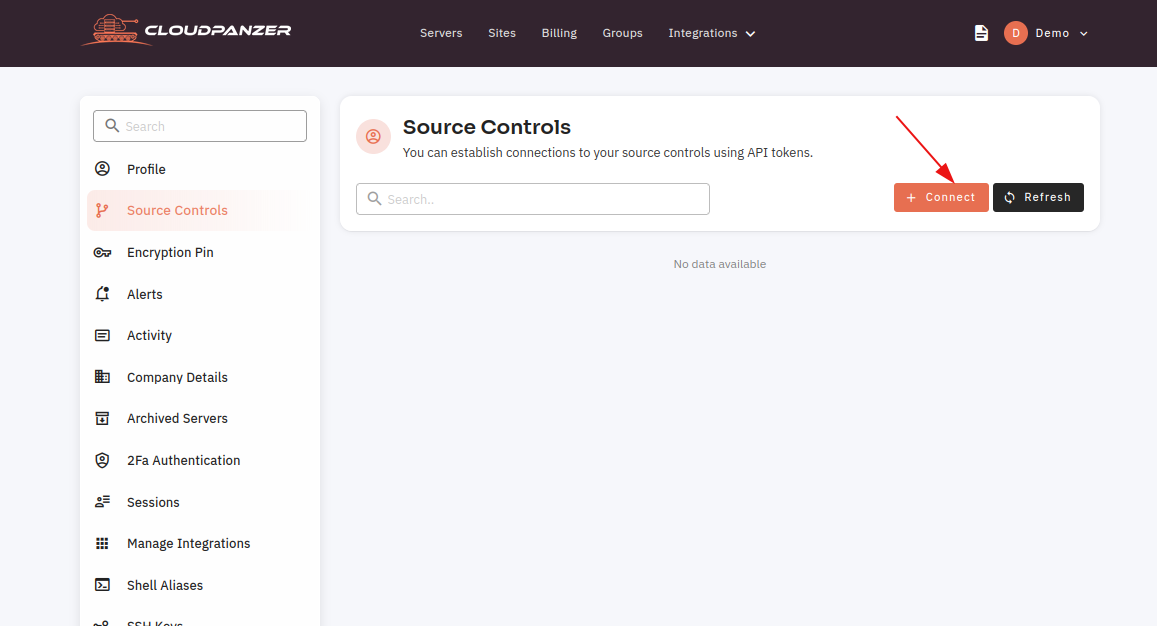
5. Fill in the field and click on the Save button.
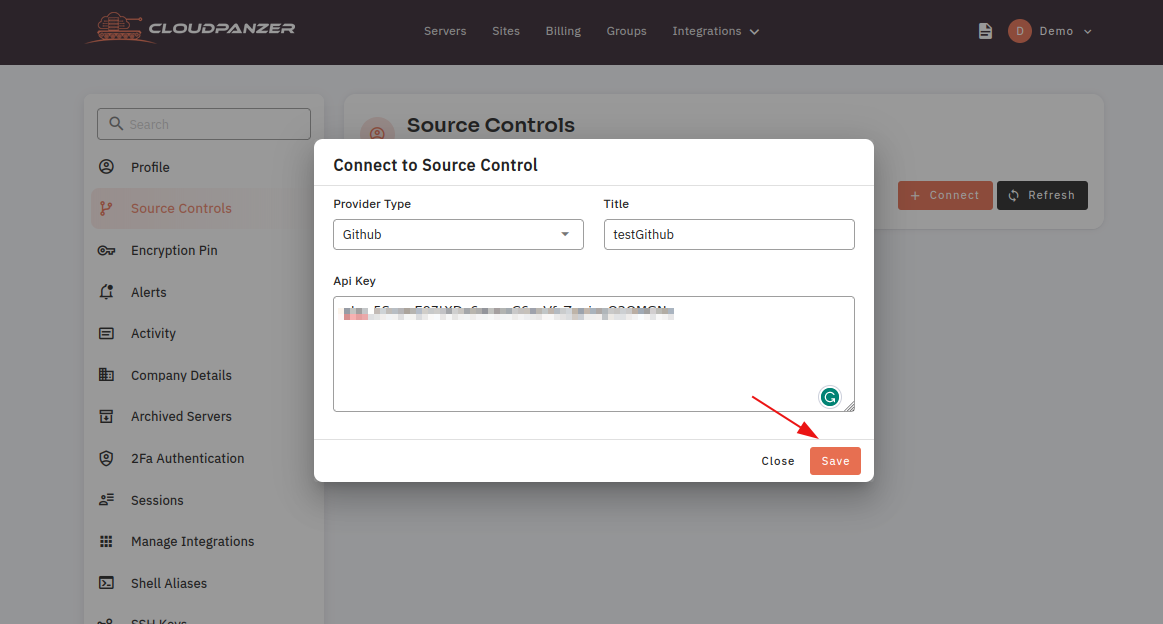
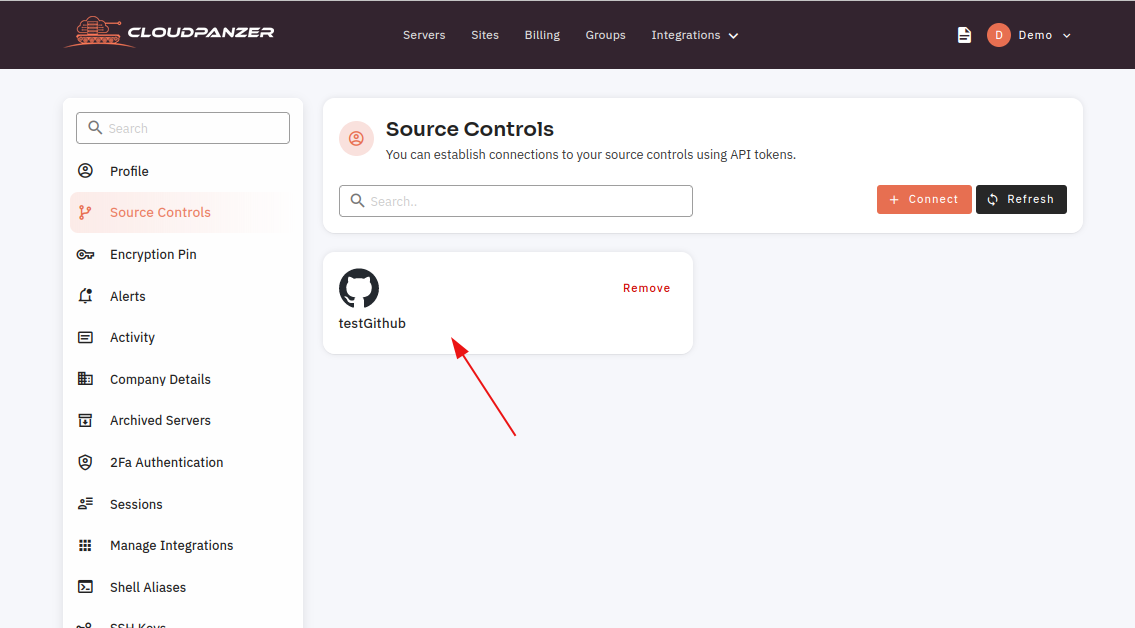
Here, you can see Source Controls added successfully.
How to add User SSH Keys in CloudPanzer?
Secure Shell (SSH) is a network protocol that allows secure remote login and other secure network services between two networked computers. One of the ways to secure an SSH connection is to use SSH keys.
Tutorial :
You can watch the Video or Continue reading the post.
Follow the steps below to add User SSH Keys
1. Click on the user profile.

2. Click on the Account Settings option.

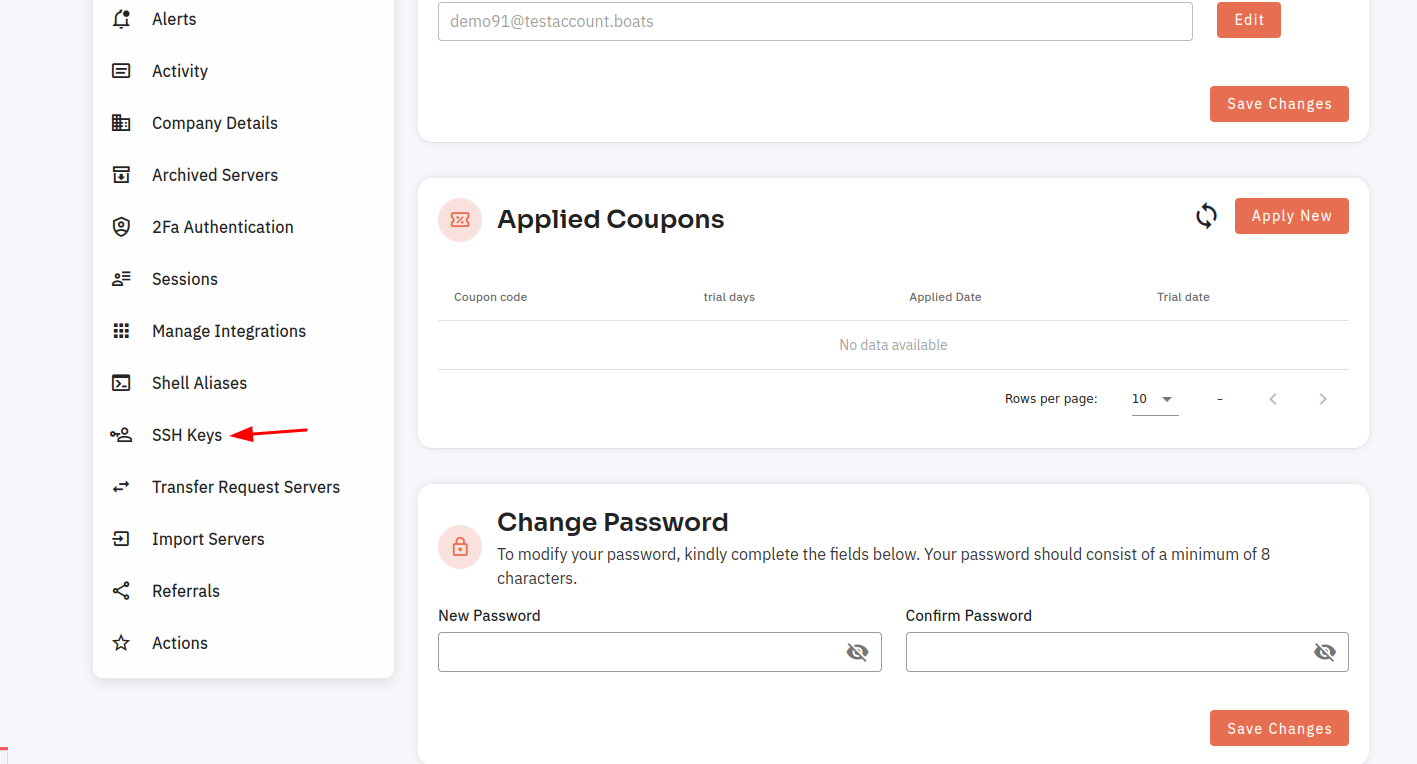
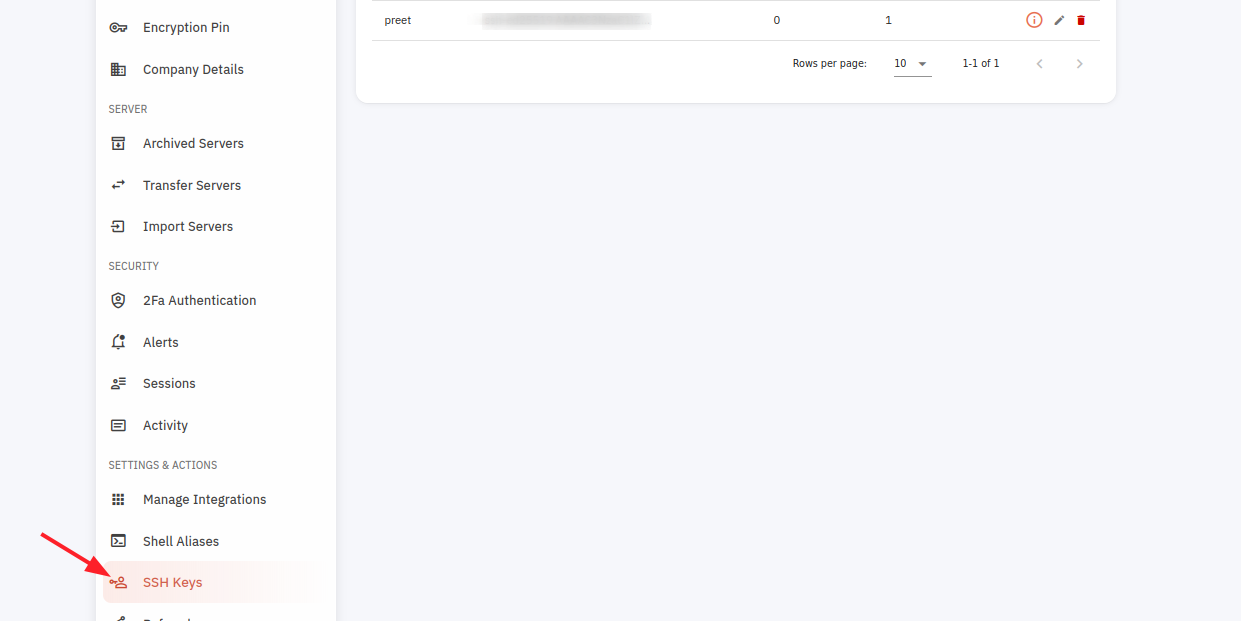
3. Click on the SSH Keys option.
4. Click on the Add new button.
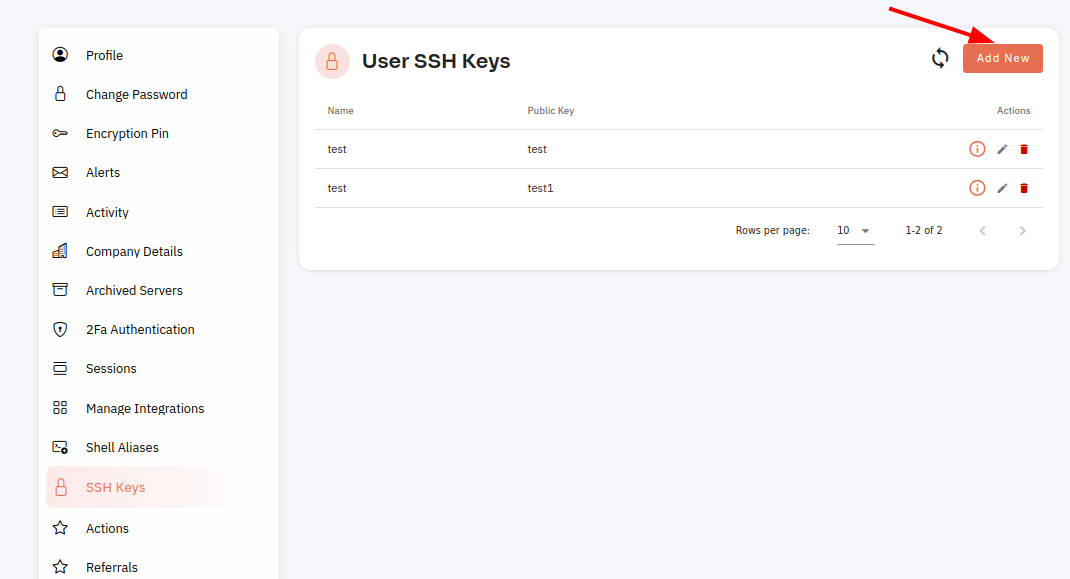
5. Fill in the public key to the server and then click on the Save button.
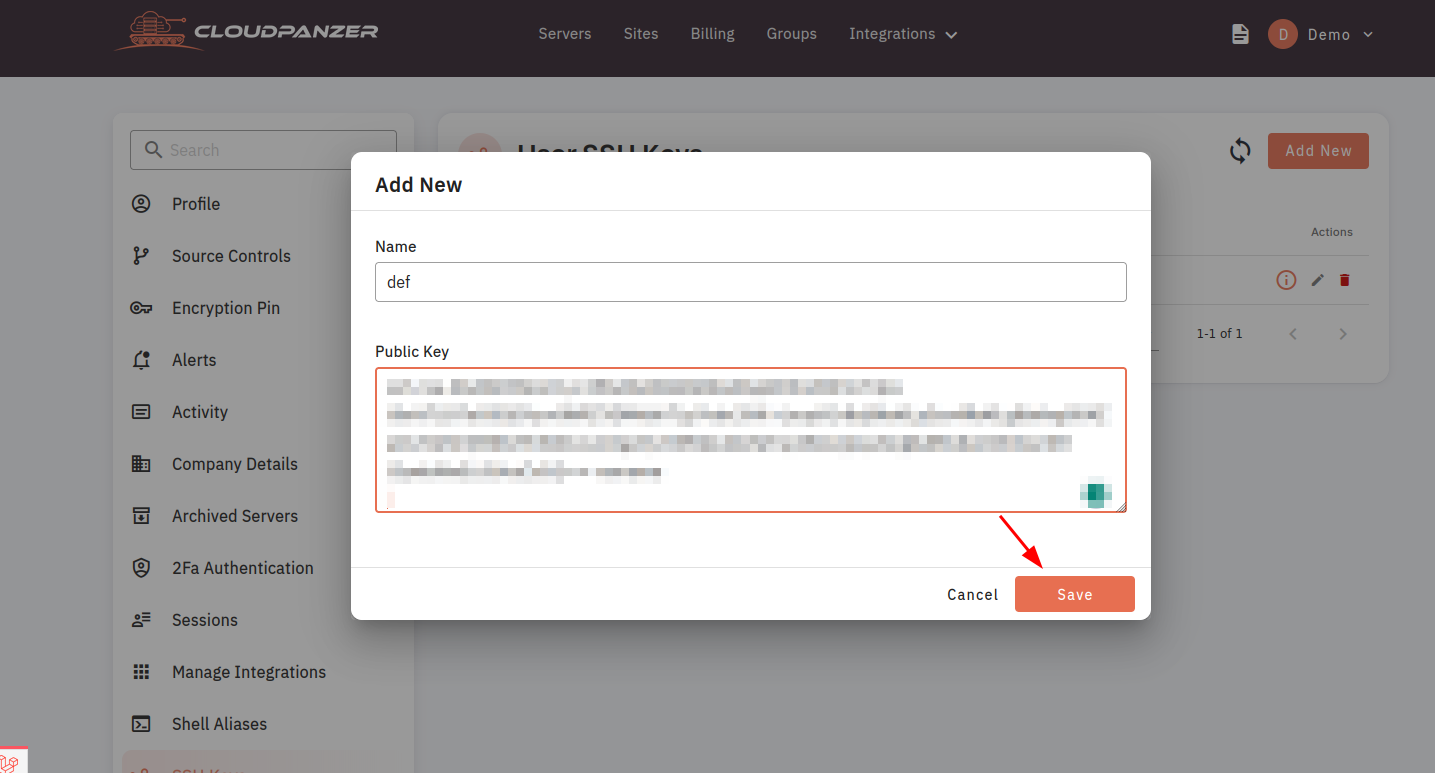
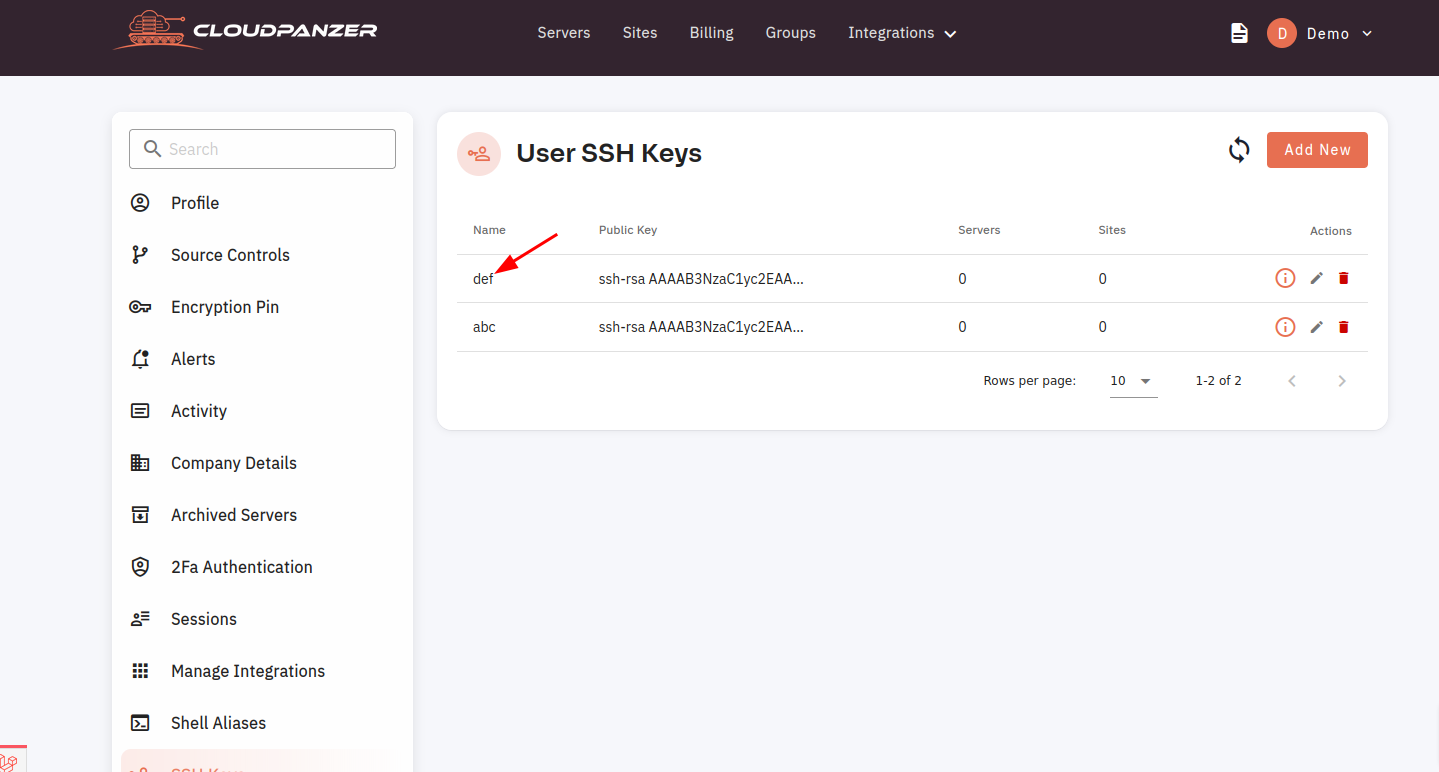
Here, you can see SSH Key Added Successfully.
How to change email address in CloudPanzer?
Updating an email address on a server is important for accurate communication. It prevents miscommunication, maintains security, and reflects changes in personal or organizational information. It ensures messages reach the right recipients, avoids security risks, and aligns with professionalism and legal requirements.
Tutorial :
You can watch the Video or Continue reading the post.
Follow the steps below to change your email address
Navigate to the Account Setting
Use this link to view How to Navigate
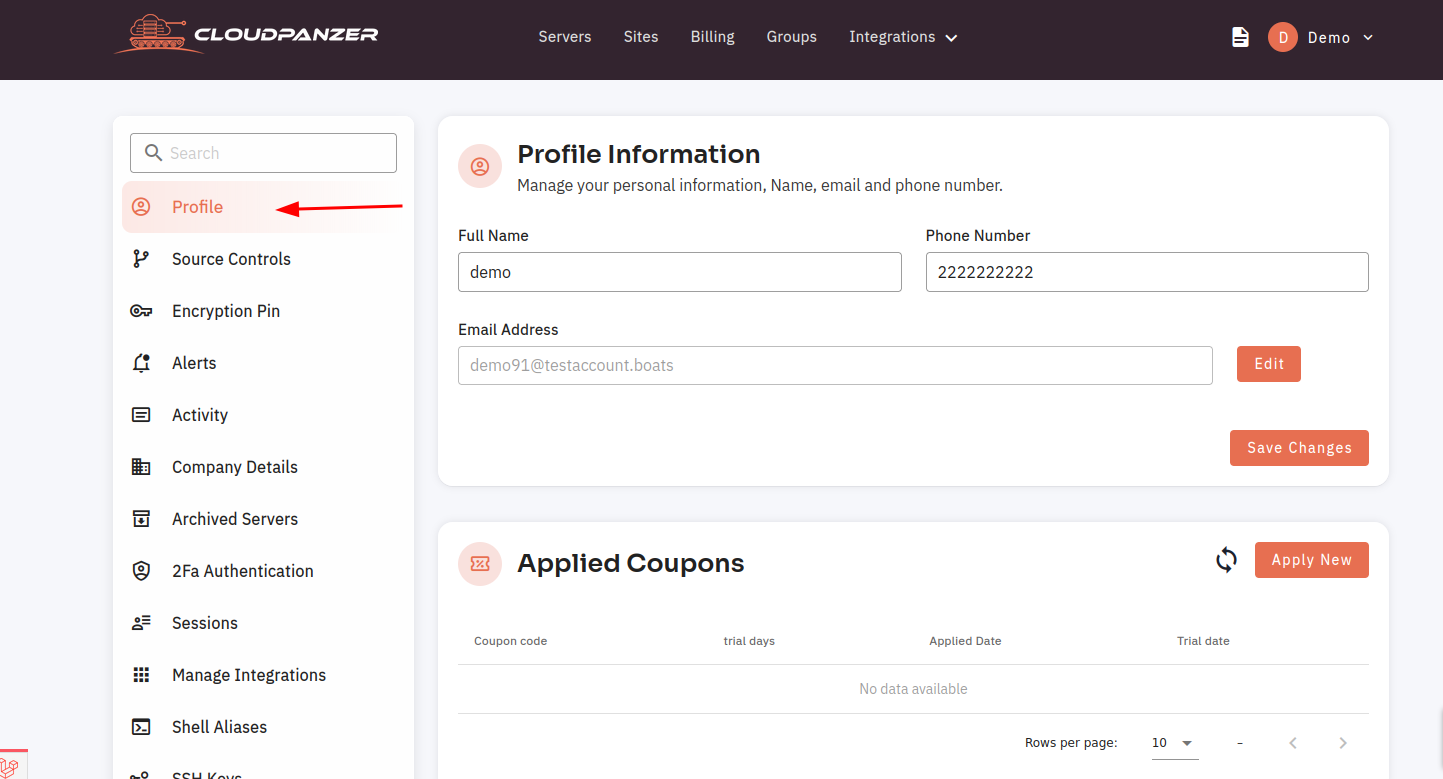
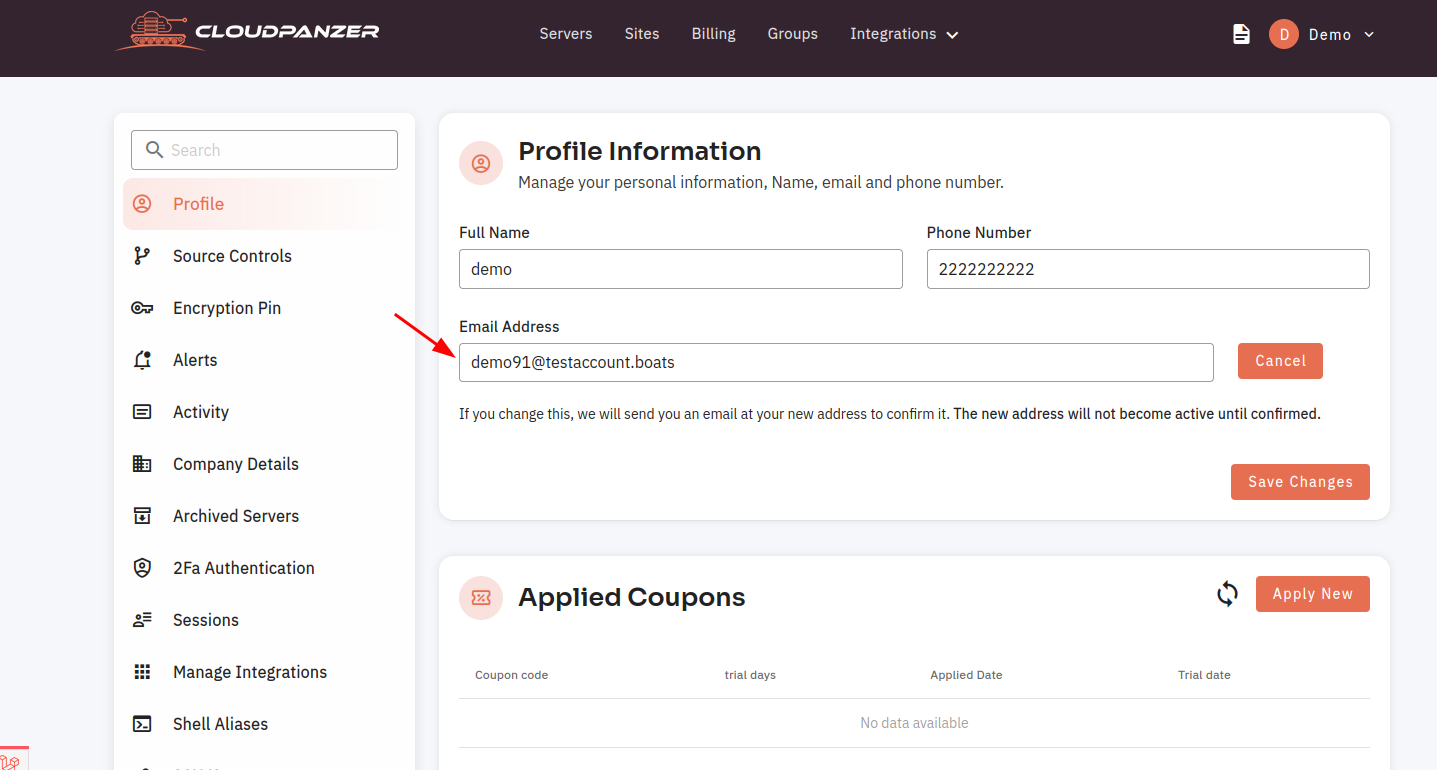
3: Select the "Profile" option to access the form where you can update your email address.
4: Click on the Edit button.
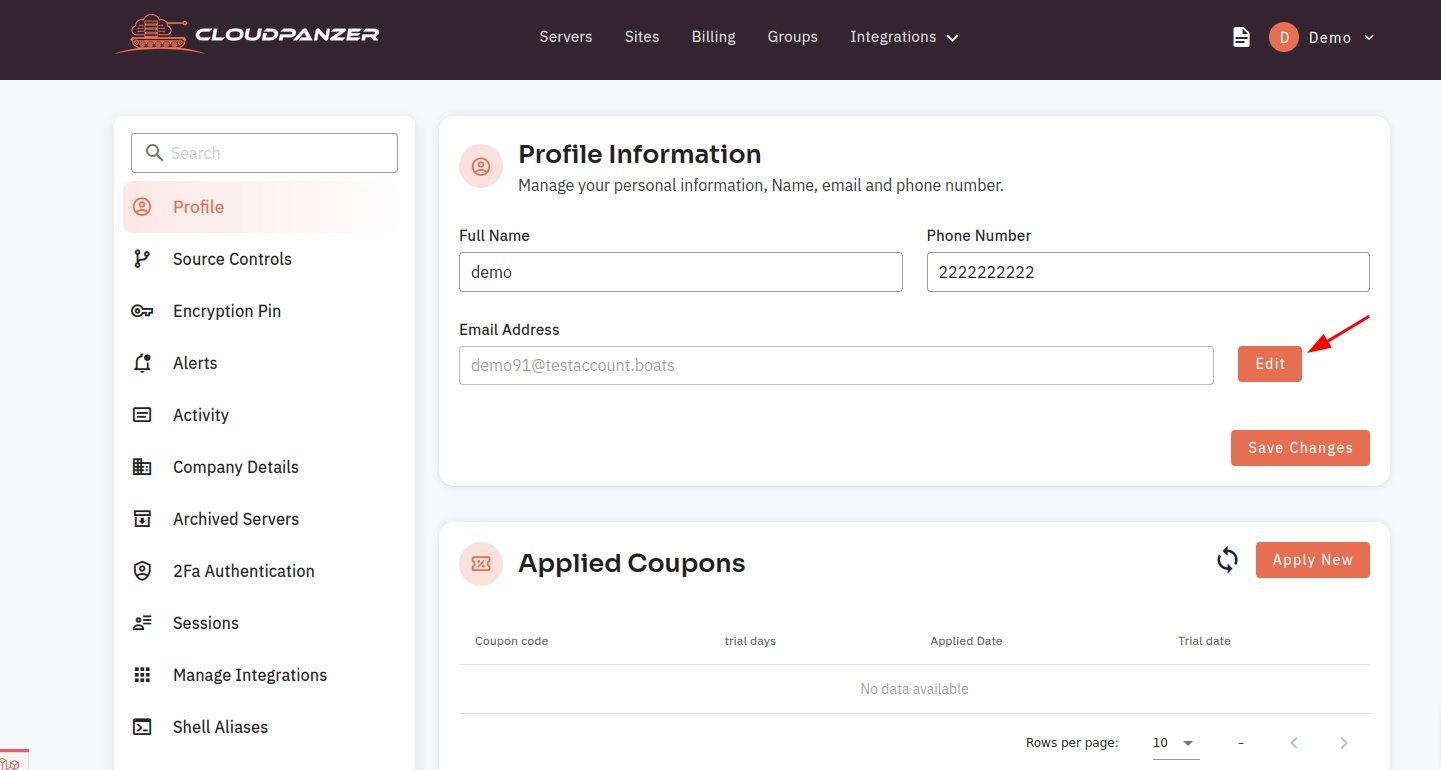
5: Please fill your updated email address in the appropriate field.
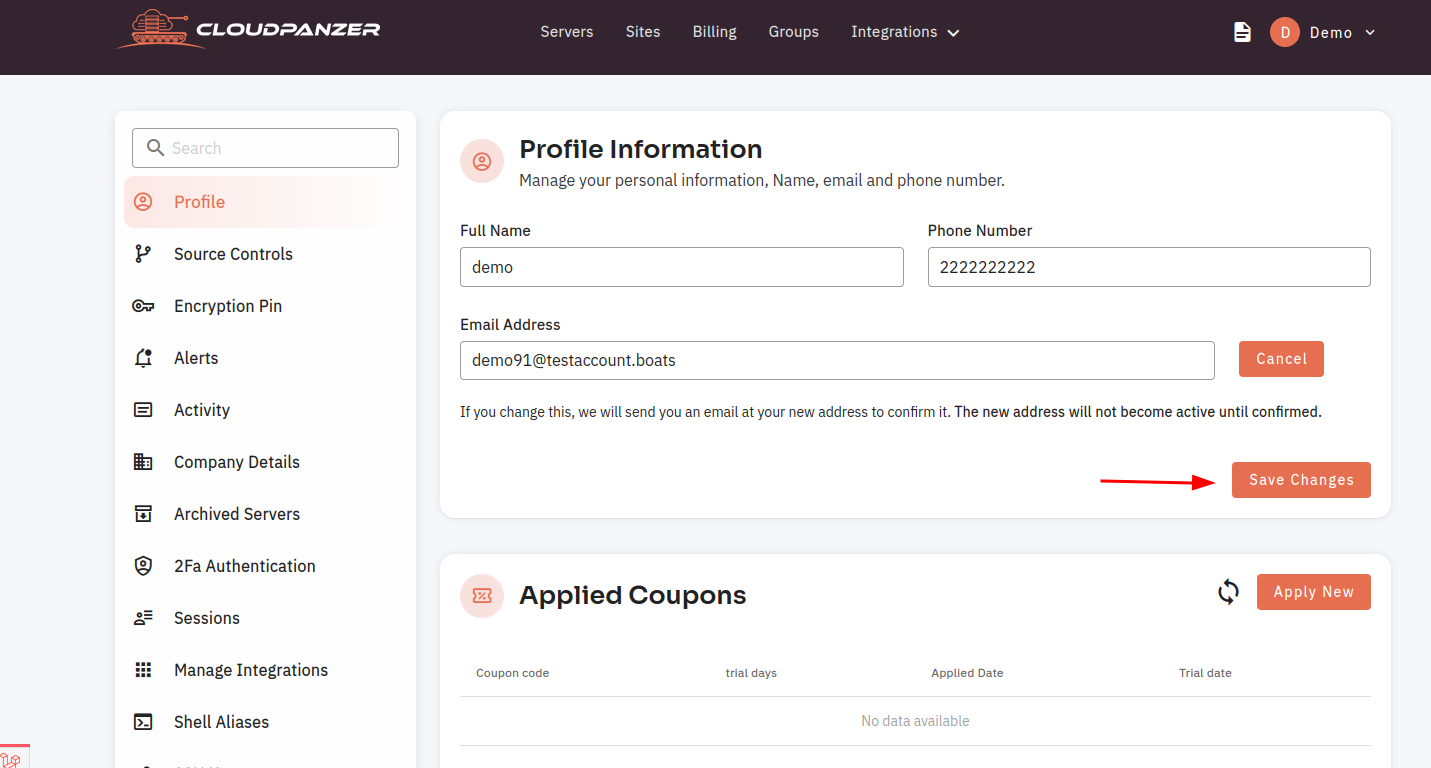
6: To update your email address, click on the "Save Changes" button.
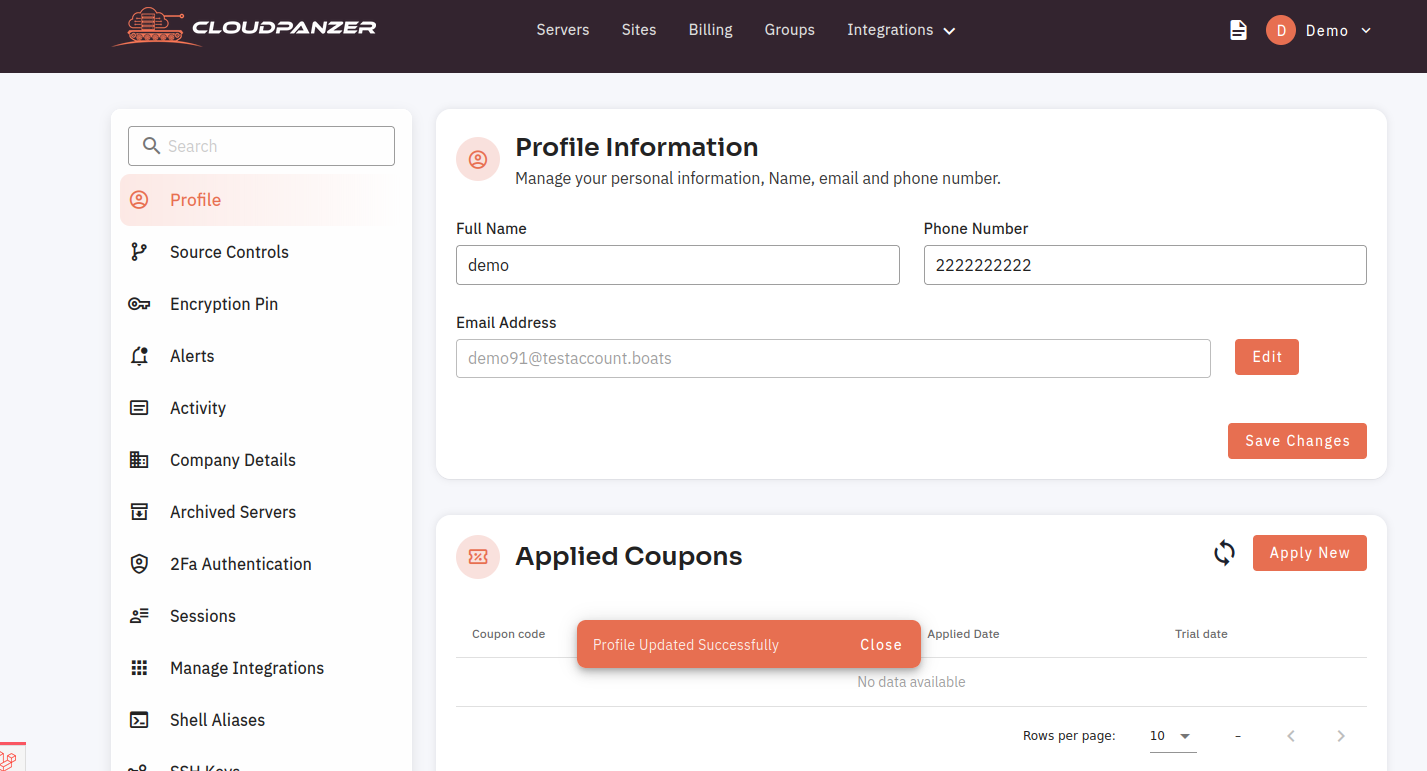
The email address has been successfully updated.
How to change Encryption Pin in CloudPanzer?
It is important to regularly verify your encryption PIN to ensure that your data remains secure. If you have forgotten your PIN, you may need to reset it or use a recovery key to access your data. It is also a good idea to use a strong and unique PIN for your encryption to prevent unauthorized access to your data. A strong PIN should be at least 8 characters long and should include a combination of numbers, letters, and special characters.
Tutorial :
You can watch the Video or Continue reading the post.
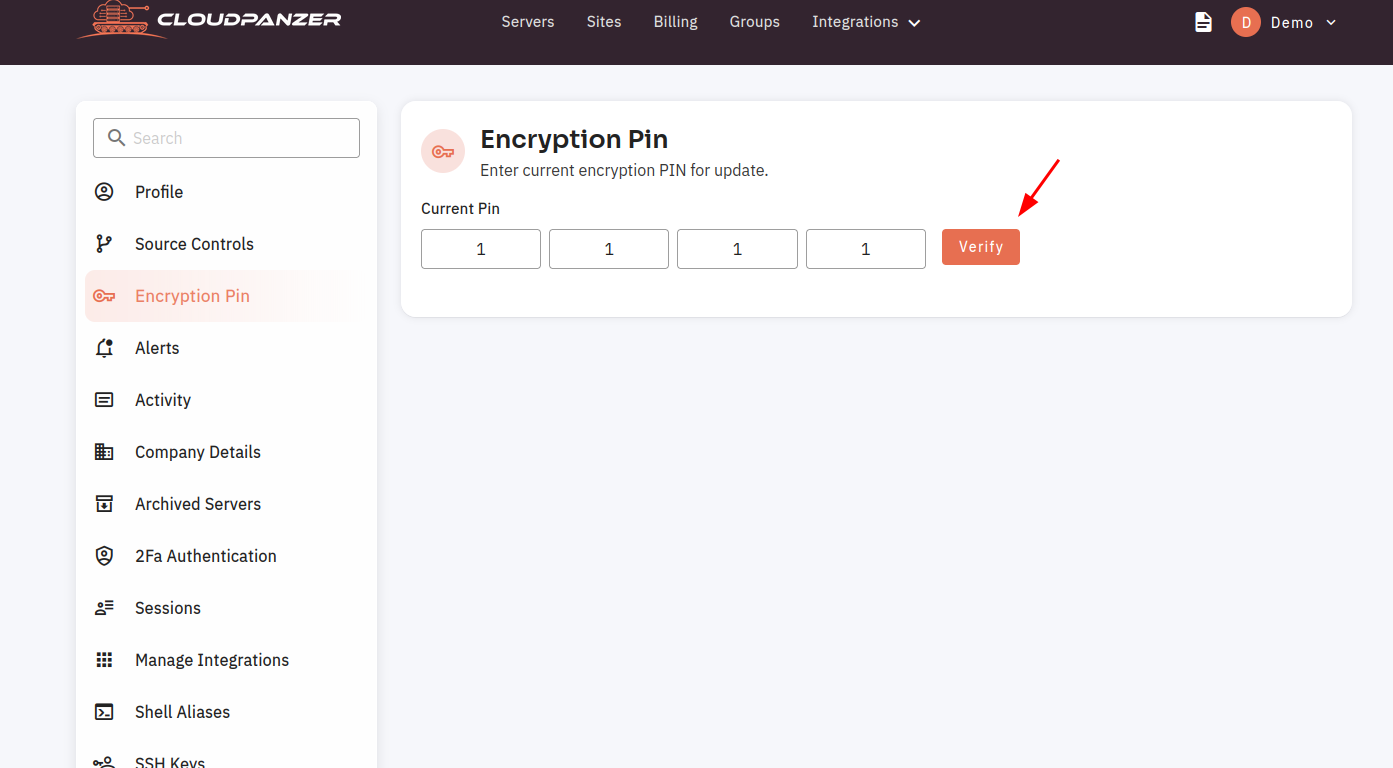
Follow the steps below to verify Encryption Pin
Navigate to the Account Setting
Use this link to view How to Navigate
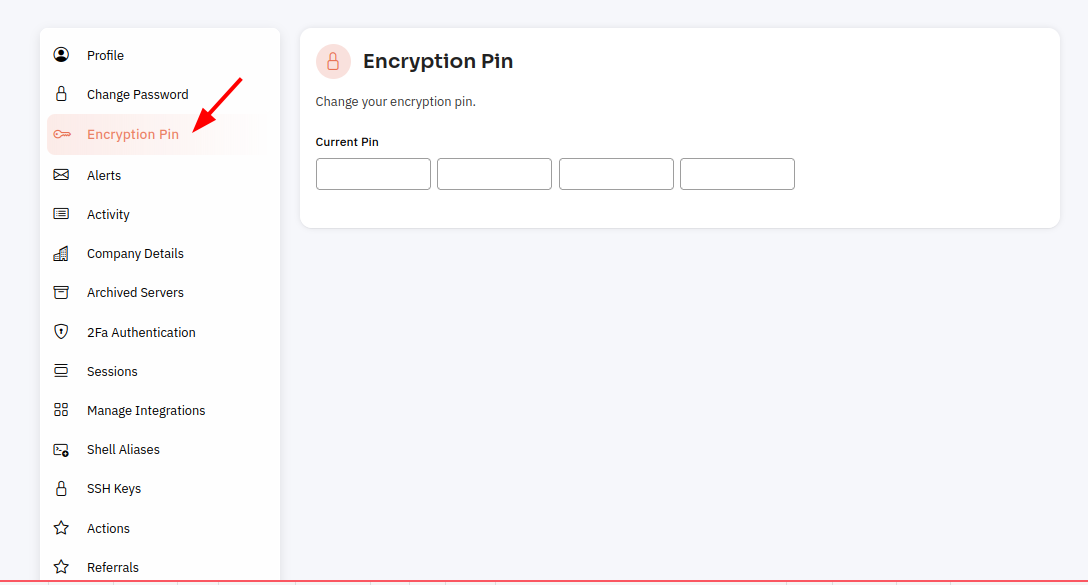 4. Fill in the PIN and click on the "Verify" button.
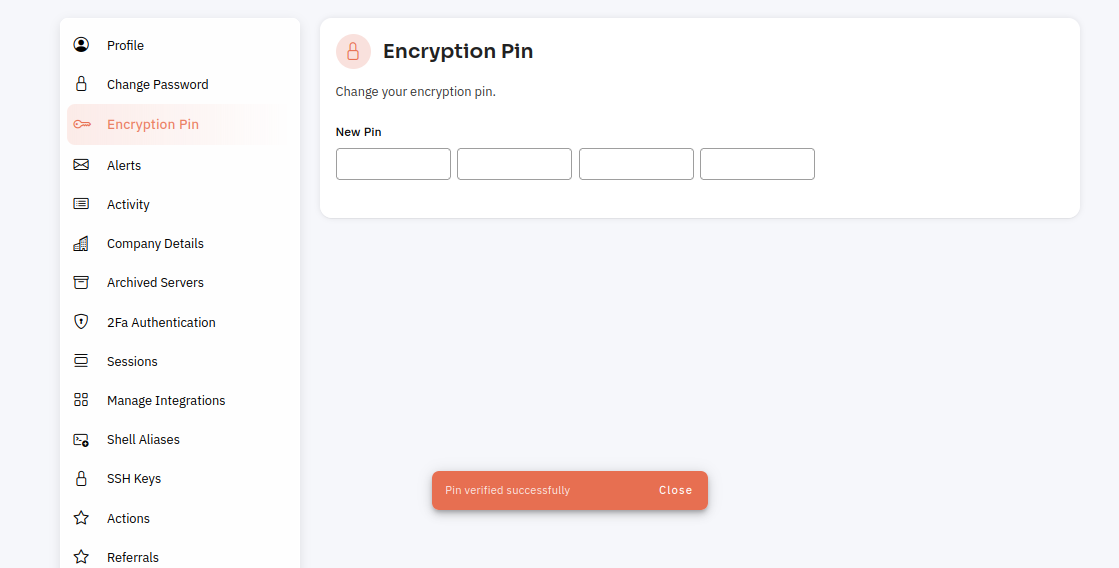
5. The PIN has been successfully verified.

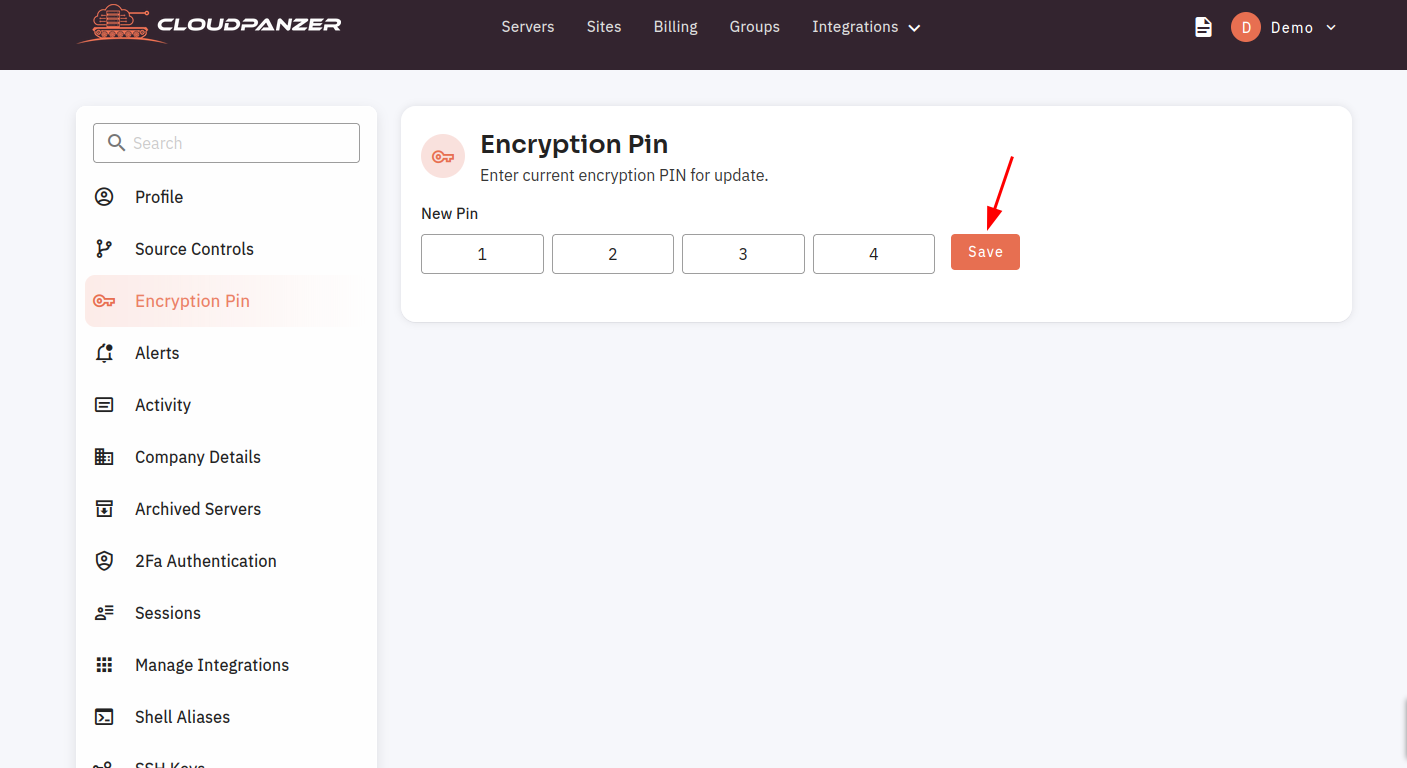
6. You can enter a new PIN from here and click on the save button.
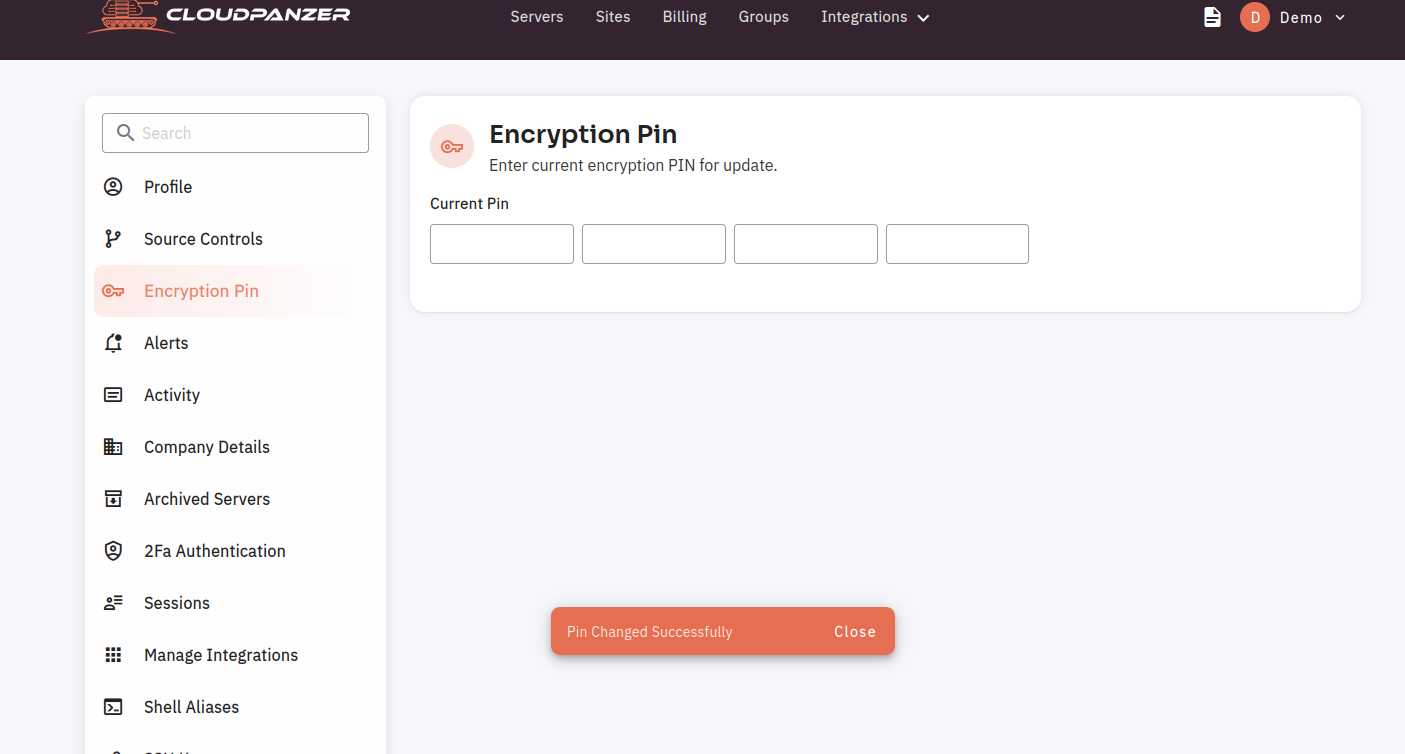
7. Here, you can see the PIN has been changed successfully.
How to change Encryption Pin in CloudPanzer?
It is important to regularly verify your encryption PIN to ensure that your data remains secure. If you have forgotten your PIN, you may need to reset it or use a recovery key to access your data. It is also a good idea to use a strong and unique PIN for your encryption to prevent unauthorized access to your data. A strong PIN should be at least 8 characters long and should include a combination of numbers, letters, and special characters.
Tutorial :
Follow the steps below to verify the Encryption Pin
Navigate to the Account Setting
Use this link to view How to Navigate

4. Fill in the PIN and click on the "Verify" button.

5. The PIN has been successfully verified.
6. Enter a PIN Code and Click on the Save button.

How to check Account Activity in CloudPanzer?
Checking your account activity is an important step in managing your finances and protecting your personal information. By regularly reviewing your account activity and taking action if you notice any suspicious activity, you can safeguard your account and avoid potential financial losses.
Tutorial :
You can watch the Video or Continue reading the post.
Follow the steps below to check Account Activity
1. Once logged in, click on the user profile.

2. Click on the Account Settings option.

3. Click on the "Activity" option.
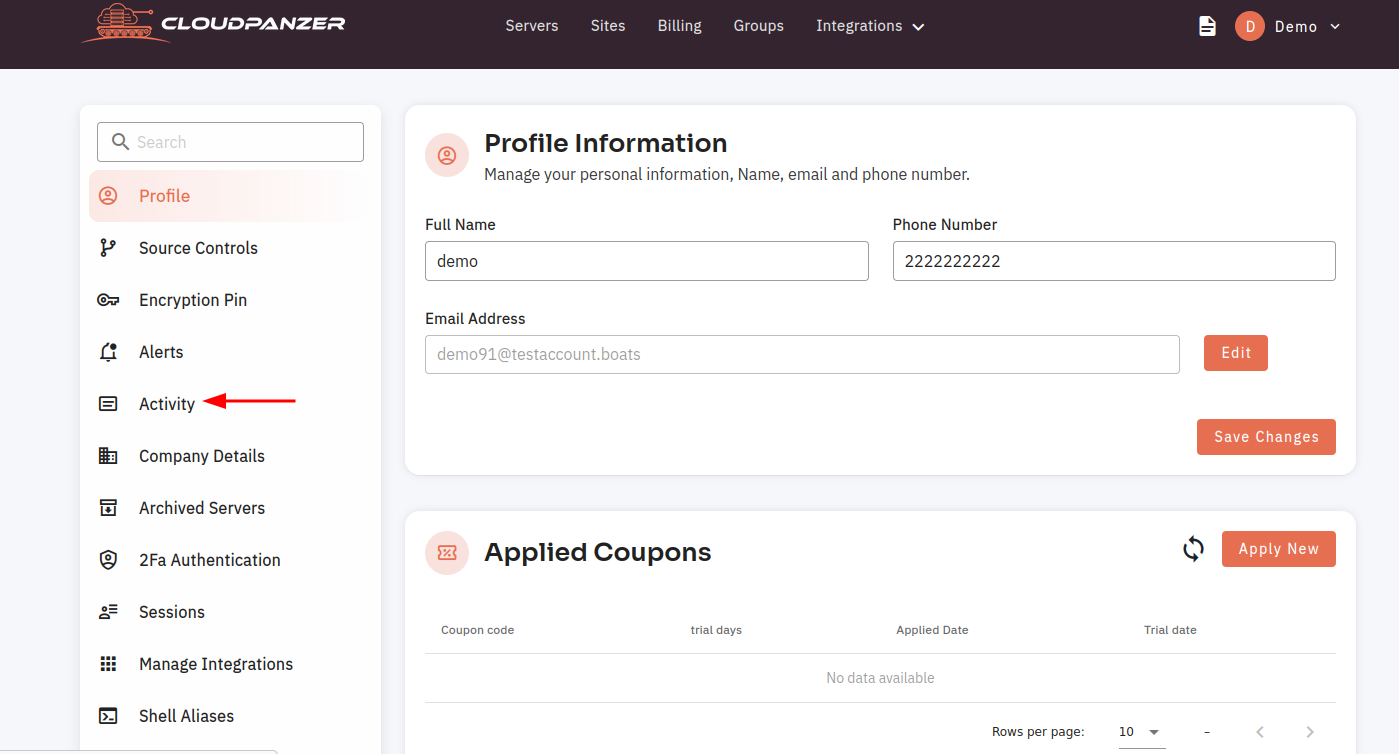
4. Here, you can see the record of your account's activity.

How to create cloudflare Integration in cloudpanzer?
Cloudflare is a popular content delivery network (CDN) that provides a variety of services including website performance optimization, security, and analytics. In this tutorial, we will show you how to integrate Cloudflare with Cloudpanzer, a cloud management platform.
Tutorial :
You can watch the Video or Continue reading the post.
Follow the steps below to create cloudflare Integration
Navigate to the Account Setting
Use this link to view How to Navigate
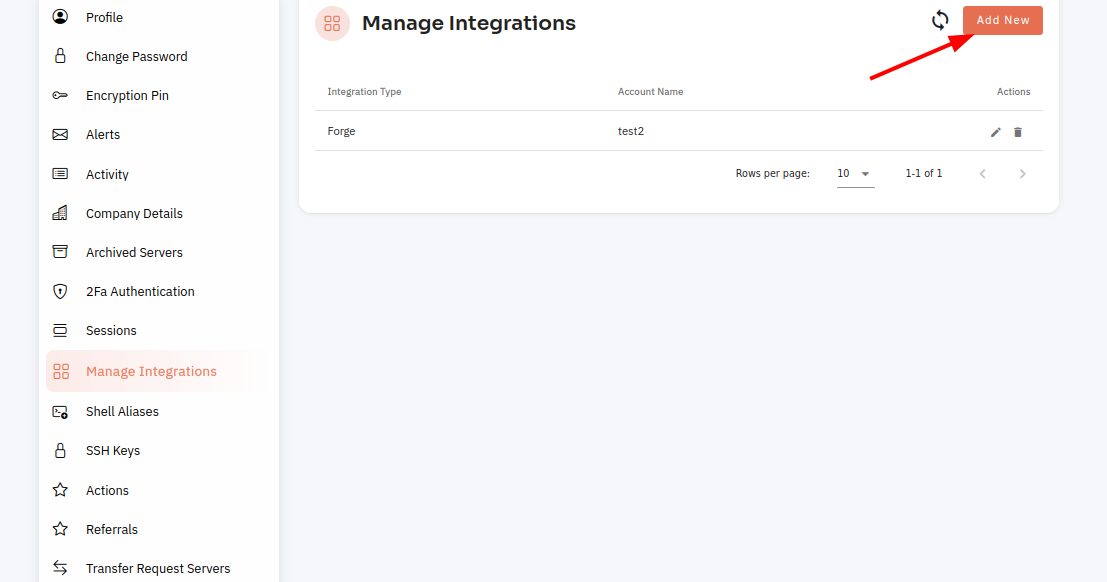
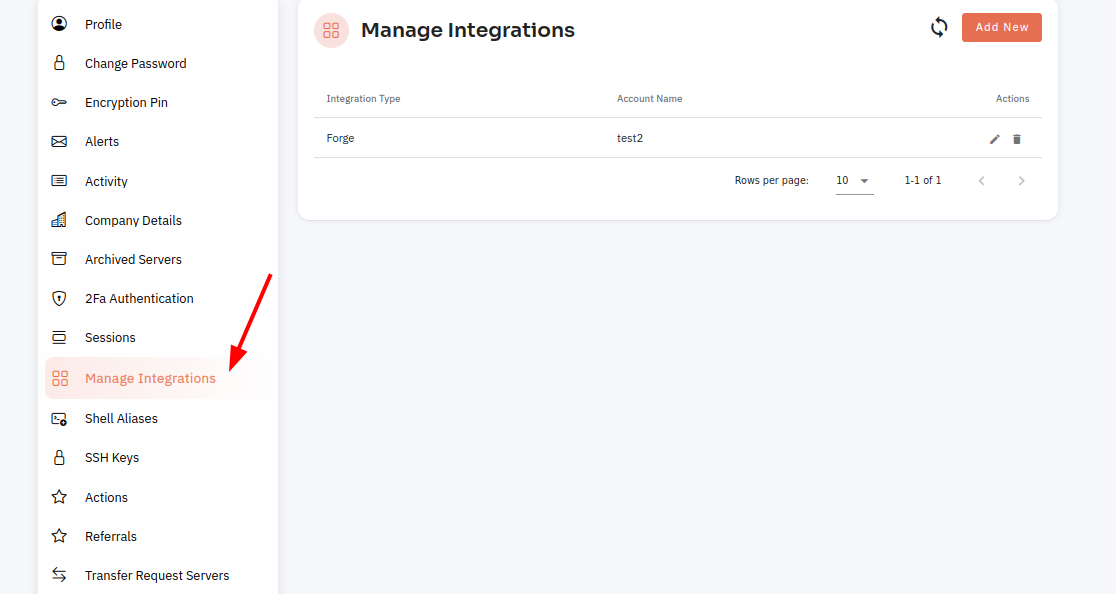
3: Choose the "Manage Integrations" option.

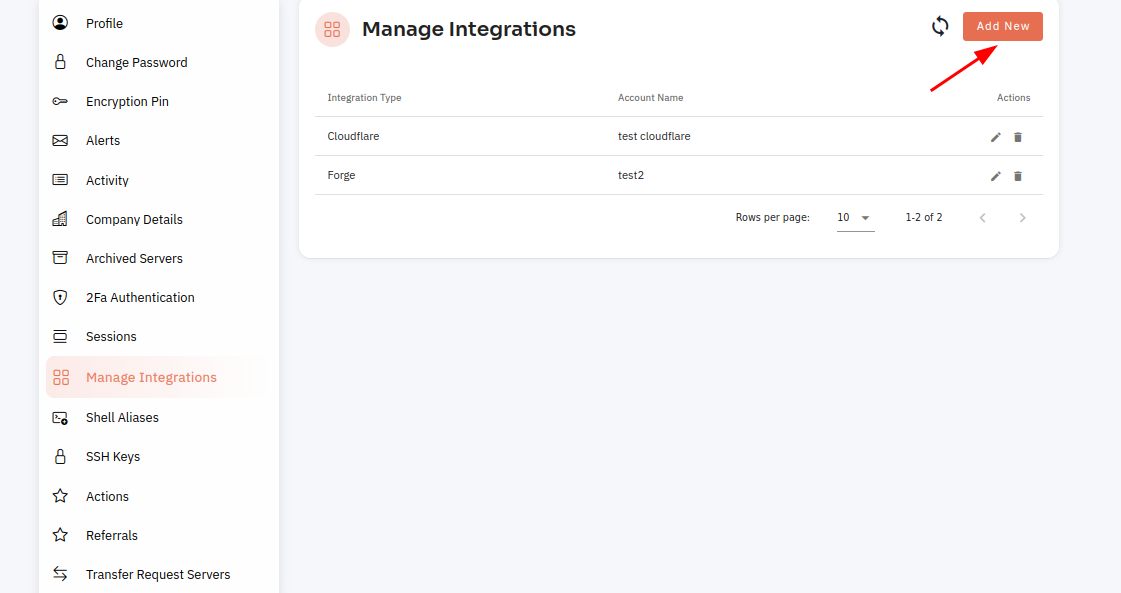
4: To create a new integration, click on the "Add New" button.
5: Select "Cloudflare" from the drop-down, fill in all fields, and save the changes.
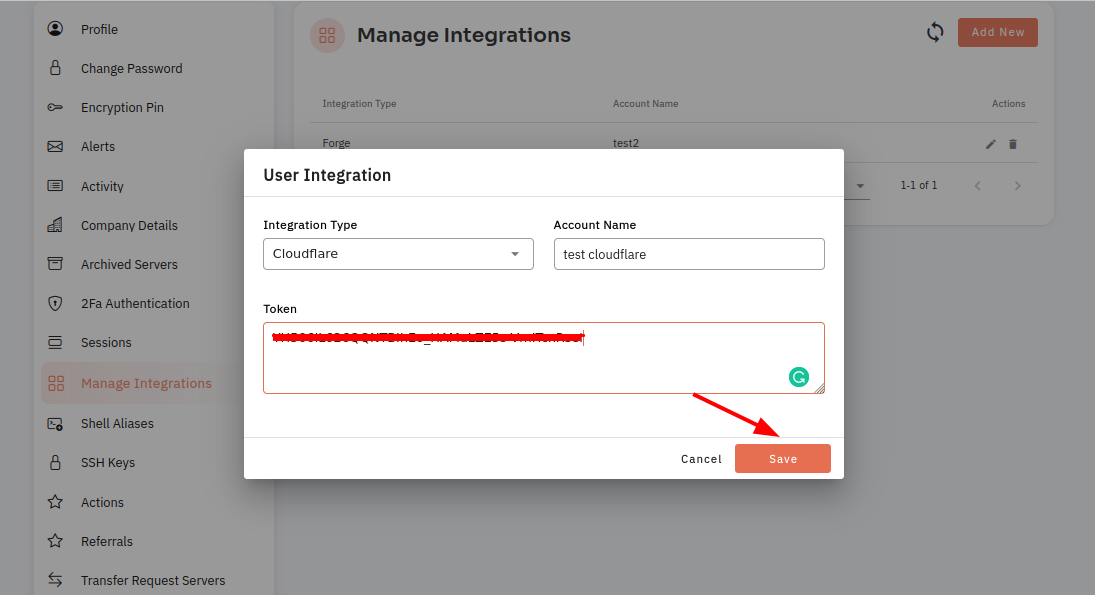
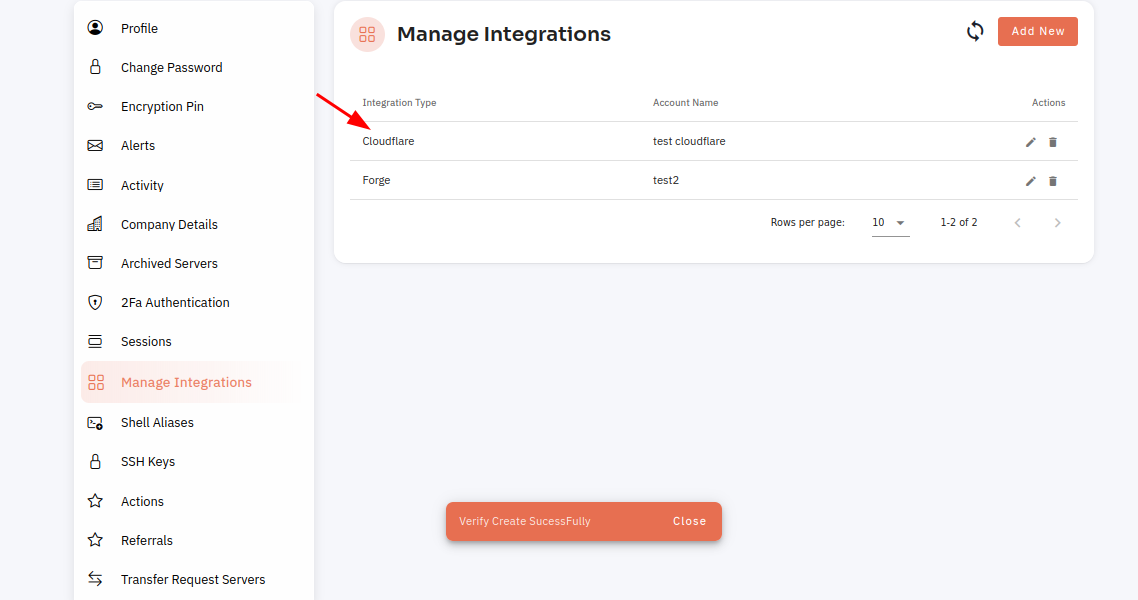
The Cloudflare integration has been successfully created.
How to create forge Integration in CloudPanzer?
Forge is a popular platform for hosting and deploying Laravel applications. In this tutorial, we will show you how to integrate Forge with Cloudpanzer, a cloud management platform.
Tutorial :
You can watch the Video or Continue reading the post.
Follow the steps below to create a forge Integration
Navigate to the Account Setting
Use this link to view How to Navigate
3. Click on the "Manage Integrations" option.
4. Click on the Add New button.
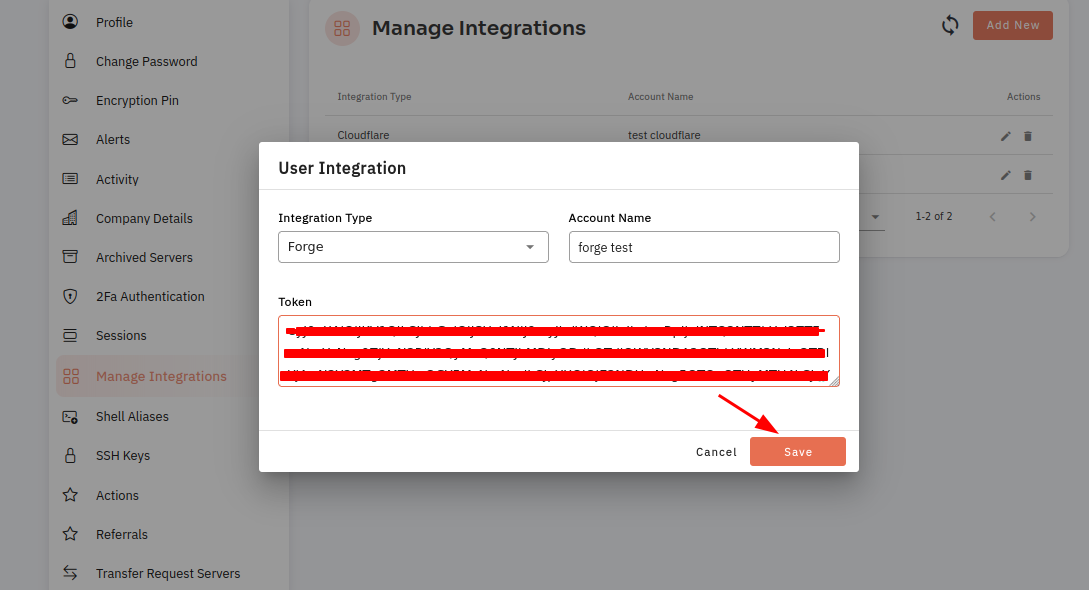
5. Fill in all the fields, then select "Forge" from the drop-down menu and finally click on the "Save" button.
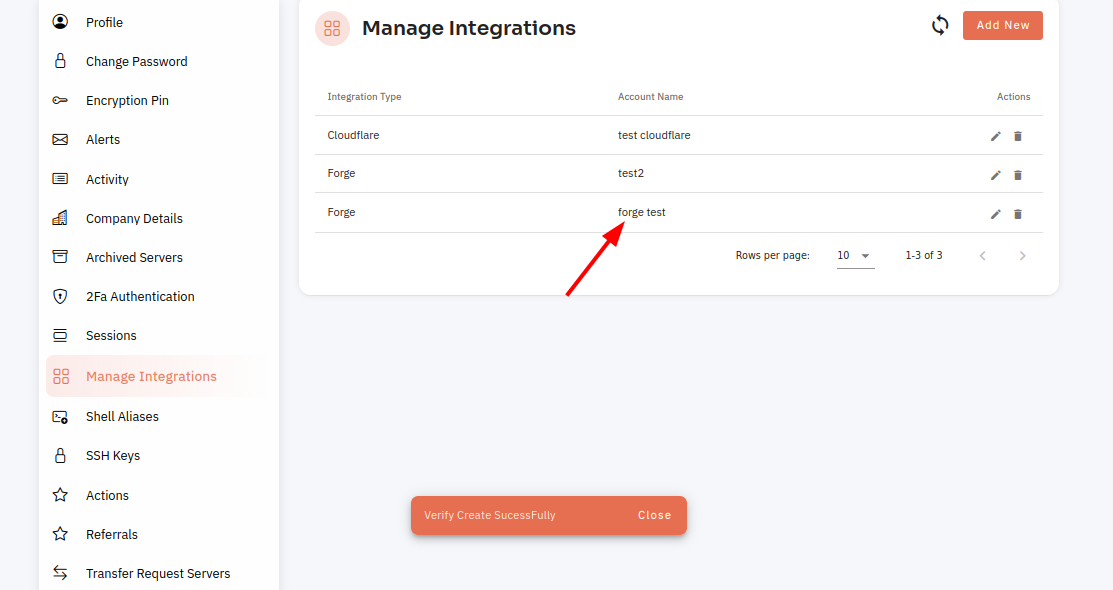
 Here, you can see the Forge integration has been successfully created.
How to delete Integration in CloudPanzer?
Deleting an integration may have unintended consequences, such as breaking certain features or functionality within your Cloudpanzer. It is important to carefully consider the consequences of deleting an integration before proceeding. If you are unsure about whether to delete an integration, you may want to consult with a technical expert or the vendor who provided the integration for further guidance.
Tutorial :
You can watch the Video or Continue reading the post.
Follow the steps below to delete the Integration
Navigate to the Account Setting
Use this link to view How to Navigate
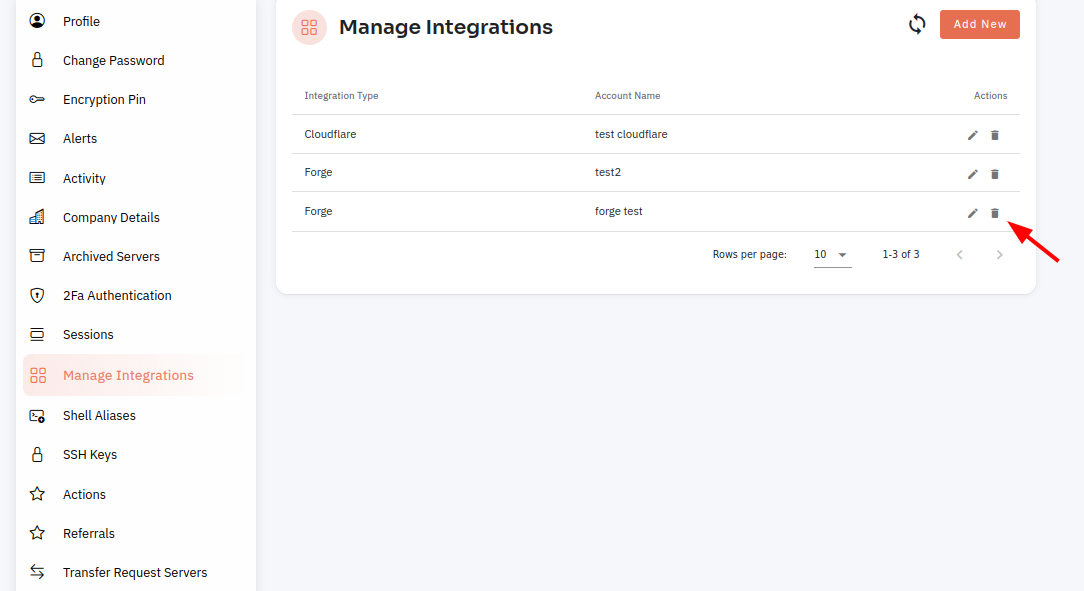
3:Choose the "Manage Integrations" option.

4: Select the Delete icon.
5: To remove a user interface, simply select the "Yes" button.
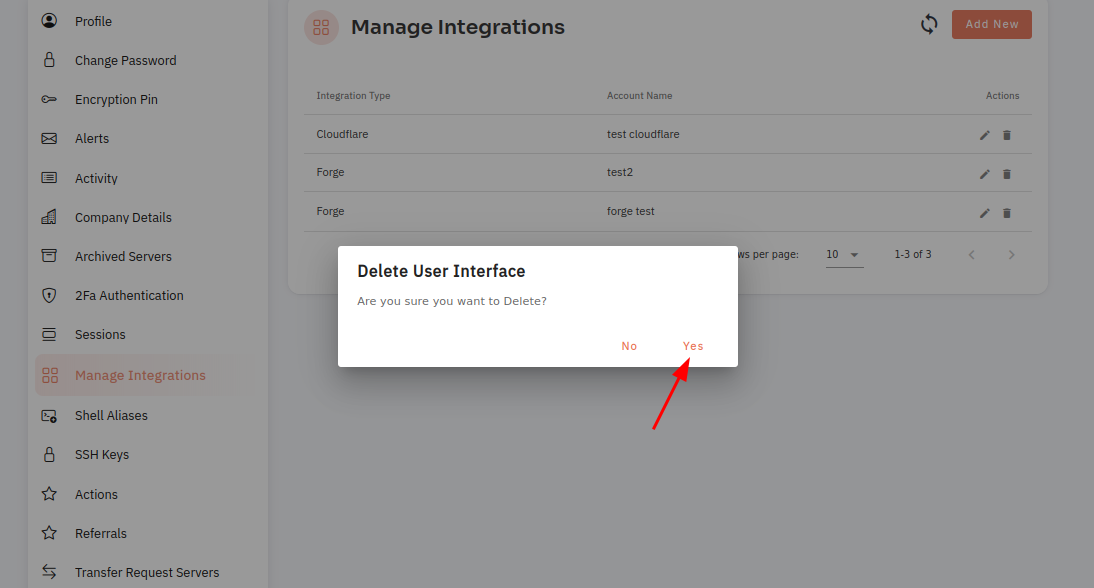
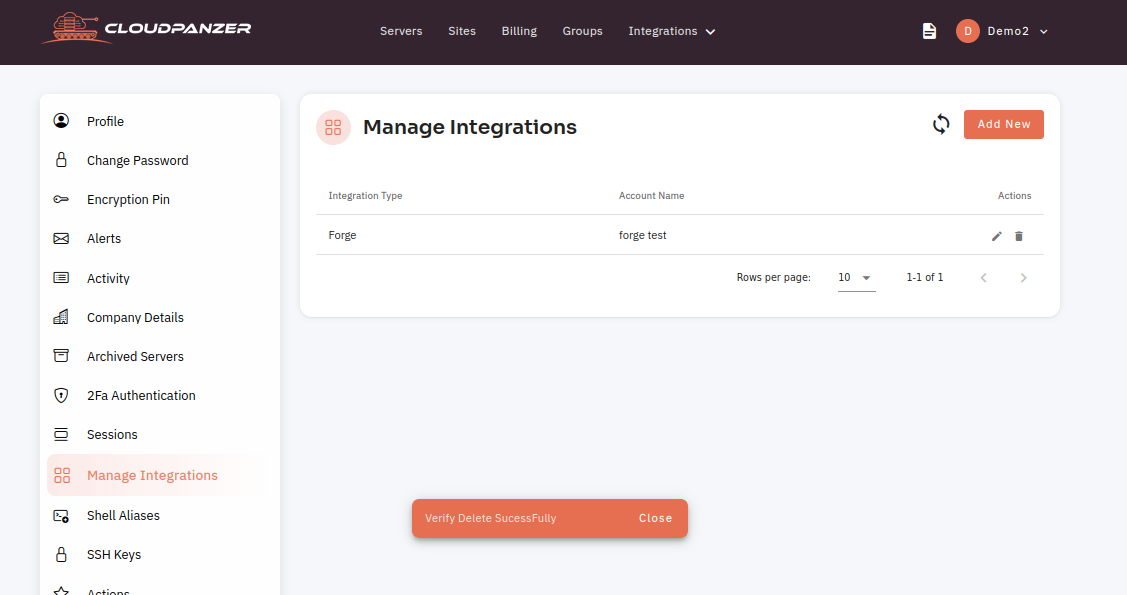
The integration was successfully deleted.
How to delete my account permanently in CloudPanzer?
Deleting your account will also delete any data or content associated with your account. This includes any messages, documents, or other information that you have uploaded or created while using the service.
Tutorial :
You can watch the Video or Continue reading the post.
Follow the steps below to delete my account permanently
Navigate to the Account Settings
Use this link to view How to Navigate
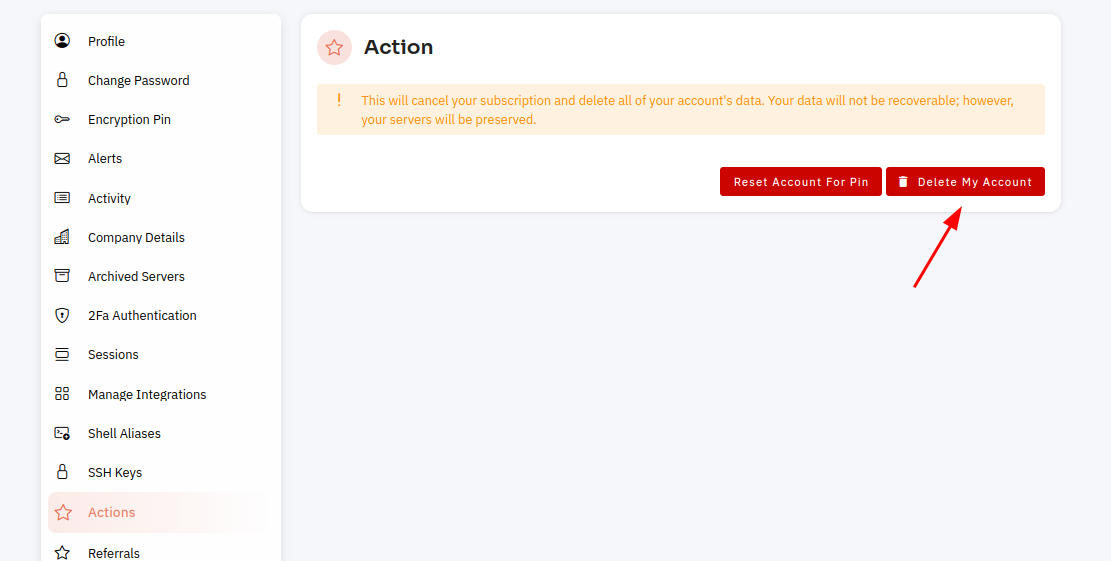
3: Select the Action option.
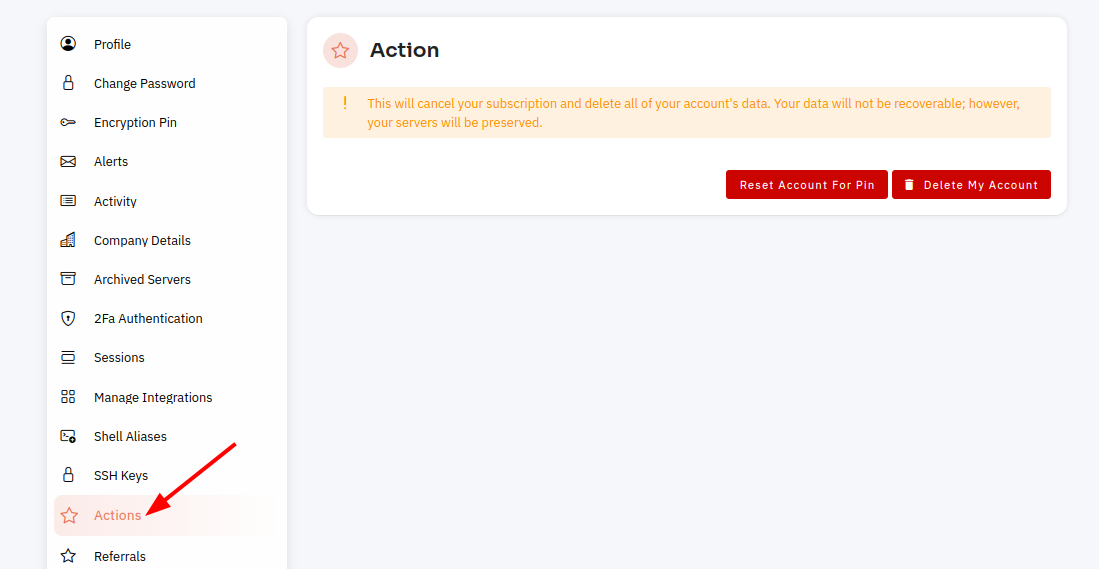
4: Here, you can click on the Delete My Account button.
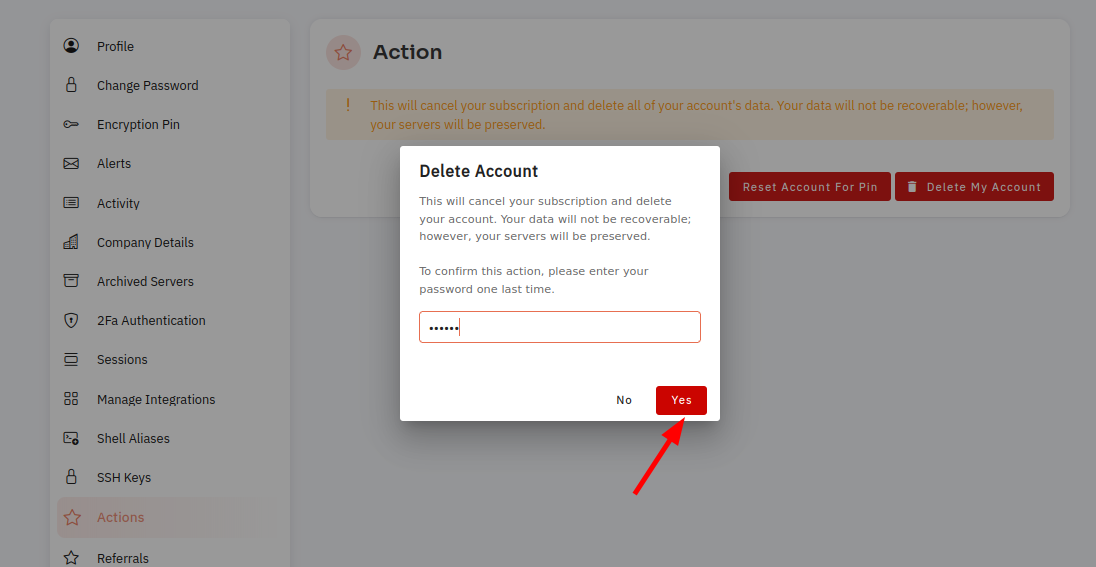
5: Enter your password and click on the yes button to delete your account. Your account will deleted successfully.
How to delete Shell Aliases Group in CloudPanzer?
Deleting shell alias groups on a server maintains order, security, and efficiency. It ensures that only relevant and secure shortcuts remain, aligning with current practices and reducing clutter in the command-line environment.
Tutorial :
You can watch the Video or Continue reading the post.
Follow the steps below to delete Shell Aliases Group
1. Click on the User Profile.

2. Go to Account Settings.

3. Click on Shell Aliases.
4. Click on Delete Icon.
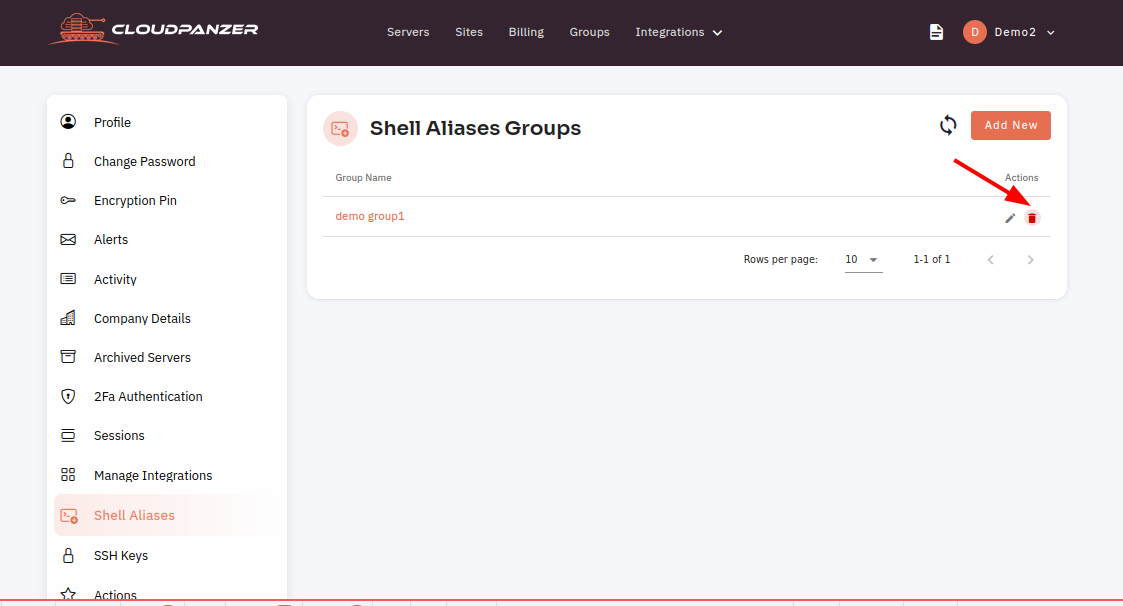
4: Click on the yes button to delete the shell alias group.
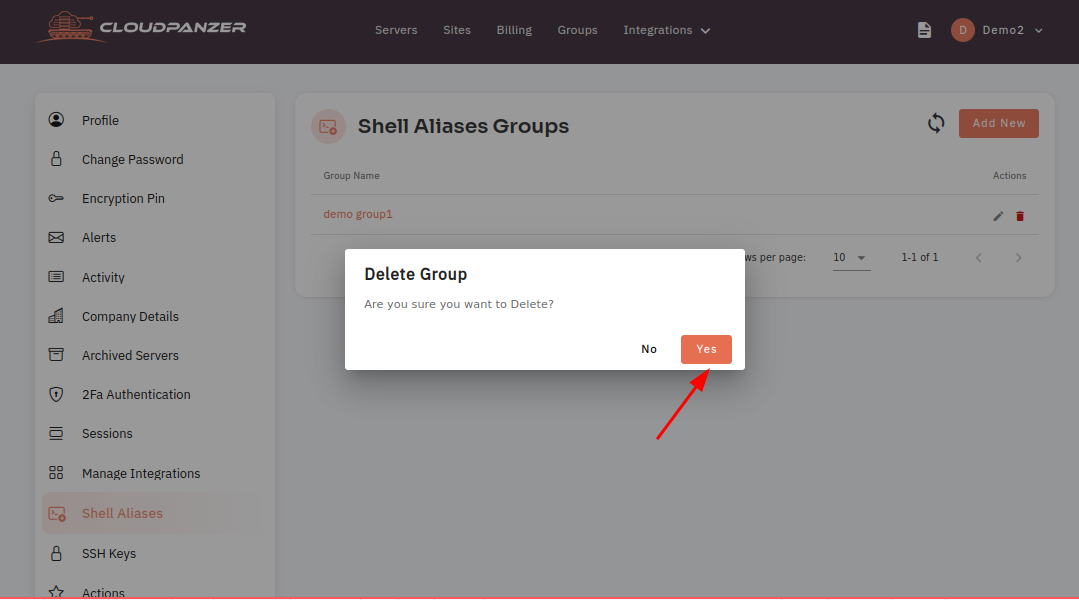
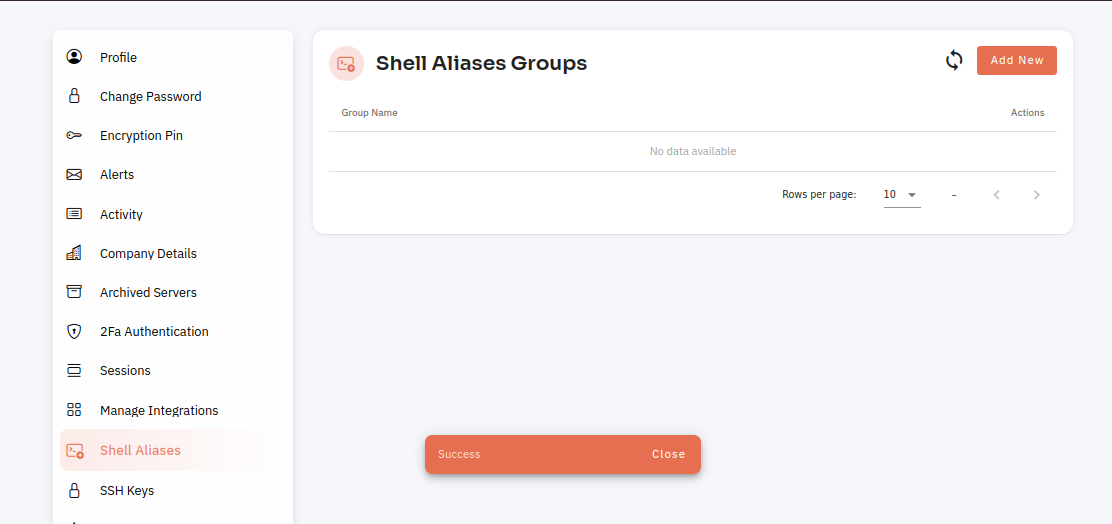
Here, you can see shell aliases deleted successfully.
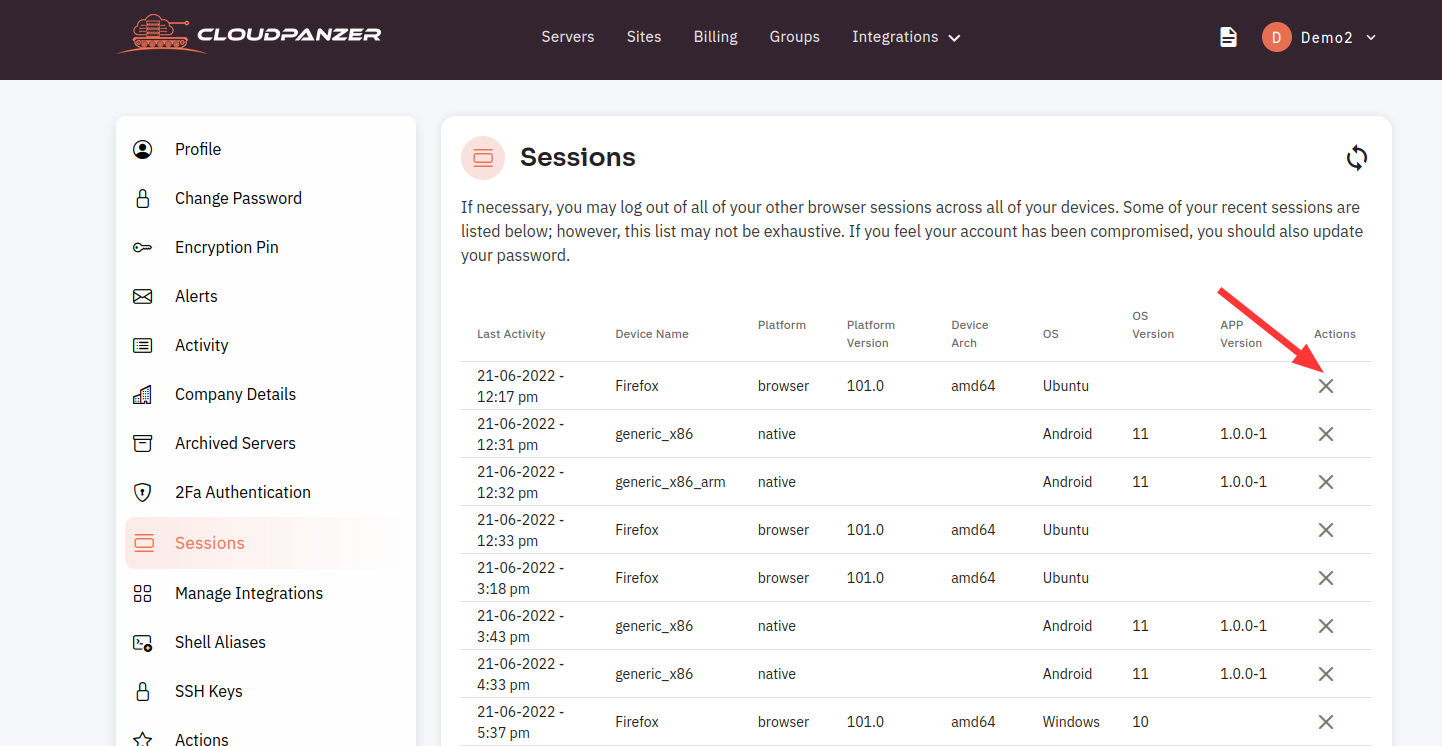
How to Delete Single Session in CloudPanzer?
Tutorial :
You can watch the Video or Continue reading the post.
Follow the steps below to Delete a Single Session
1. Once logged in, click on the user profile.
2. Click on the Account Settings option.
3. Click on the Sessions feature to view a complete list of sessions.
4. Click on the "X" icon to delete a session.
How to Delete User SSH Key in CloudPanzer?
Deleting SSH user keys is primarily done for security and access management reasons. It's essential to have clear processes in place for adding, updating, and deleting SSH keys to ensure the security and integrity of your systems.
Tutorial :
You can watch the Video or Continue reading the post.
Follow the steps below to Delete the User SSH Key
1. Click on the user profile.
2. Click on the Account Settings option.
3. Click on the SSH Keys option.

4. Click on the Delete icon.

5: Click on the yes button to delete SSH Key.
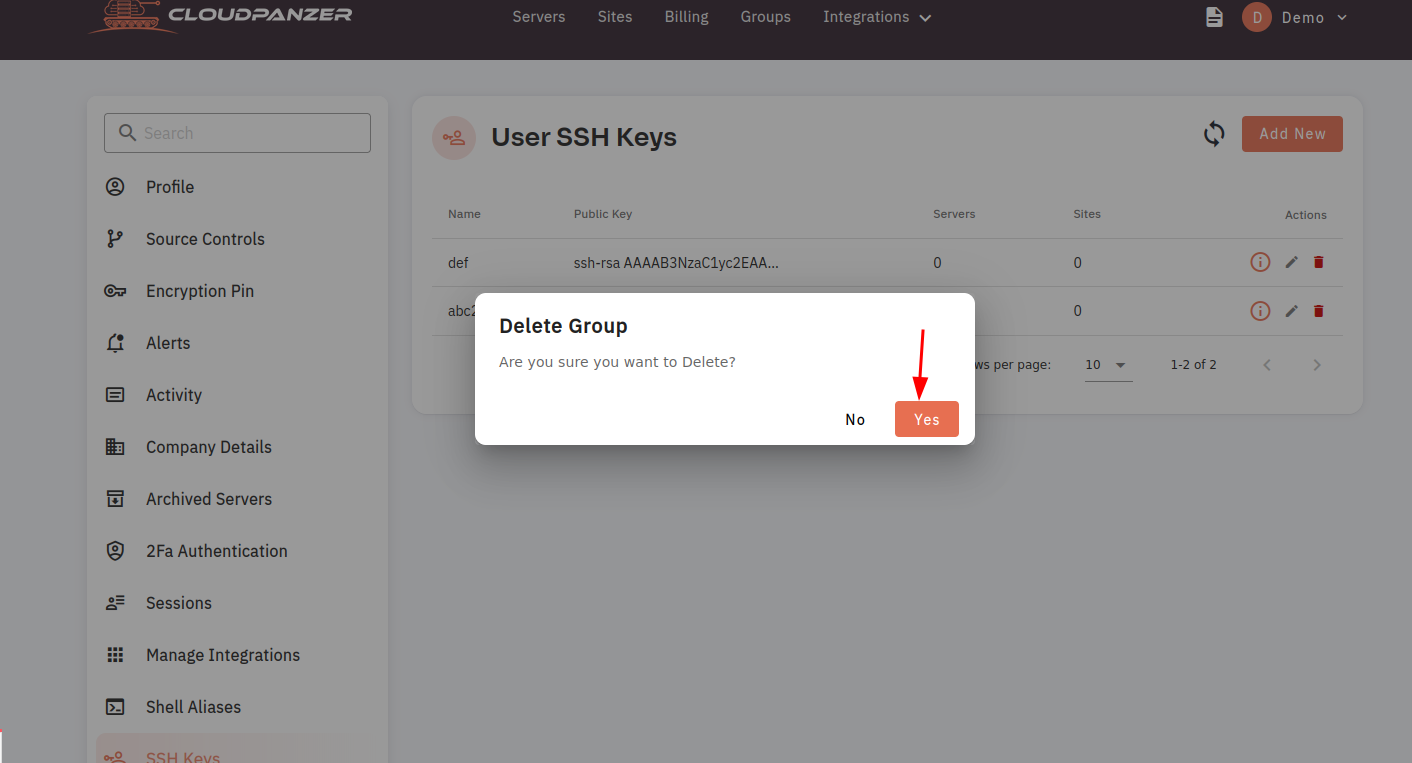
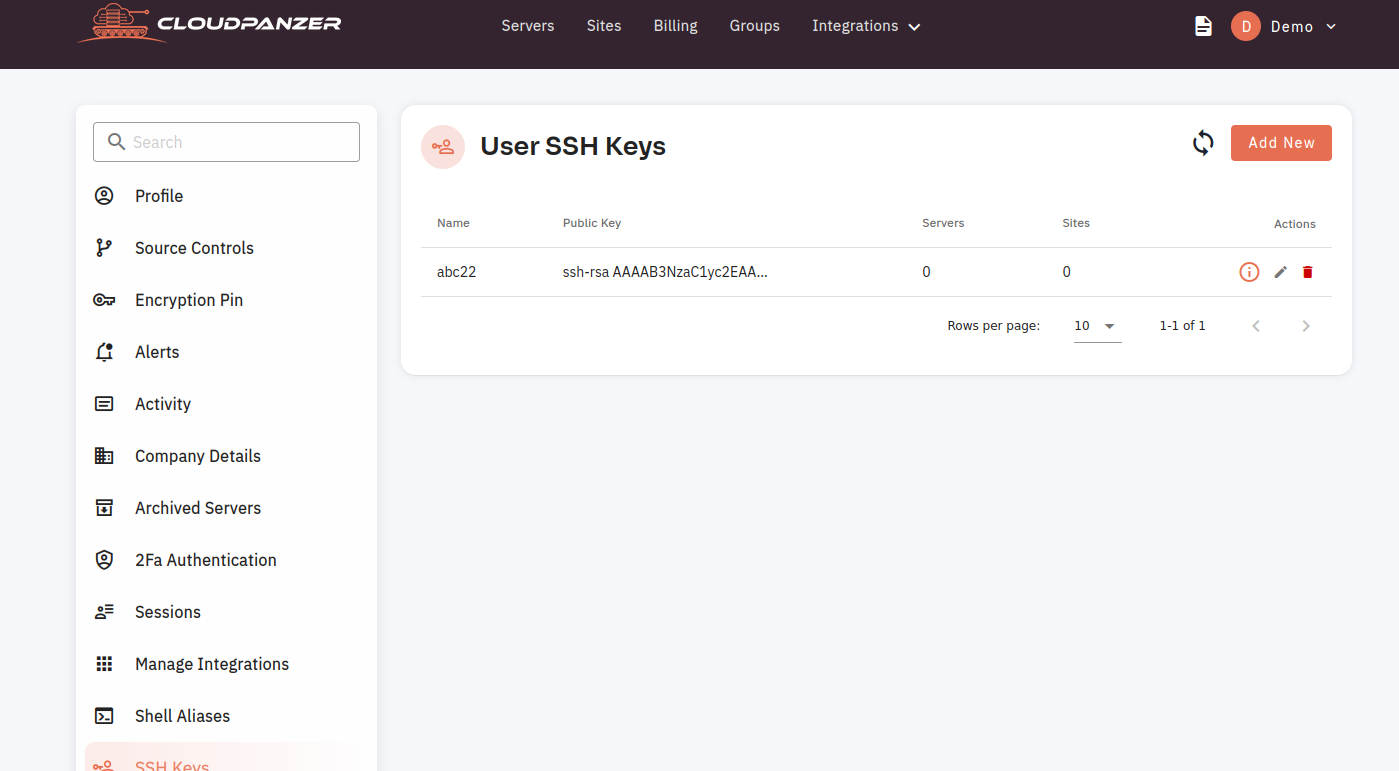
6. Here, you can see the User SSH key was deleted Successfully.
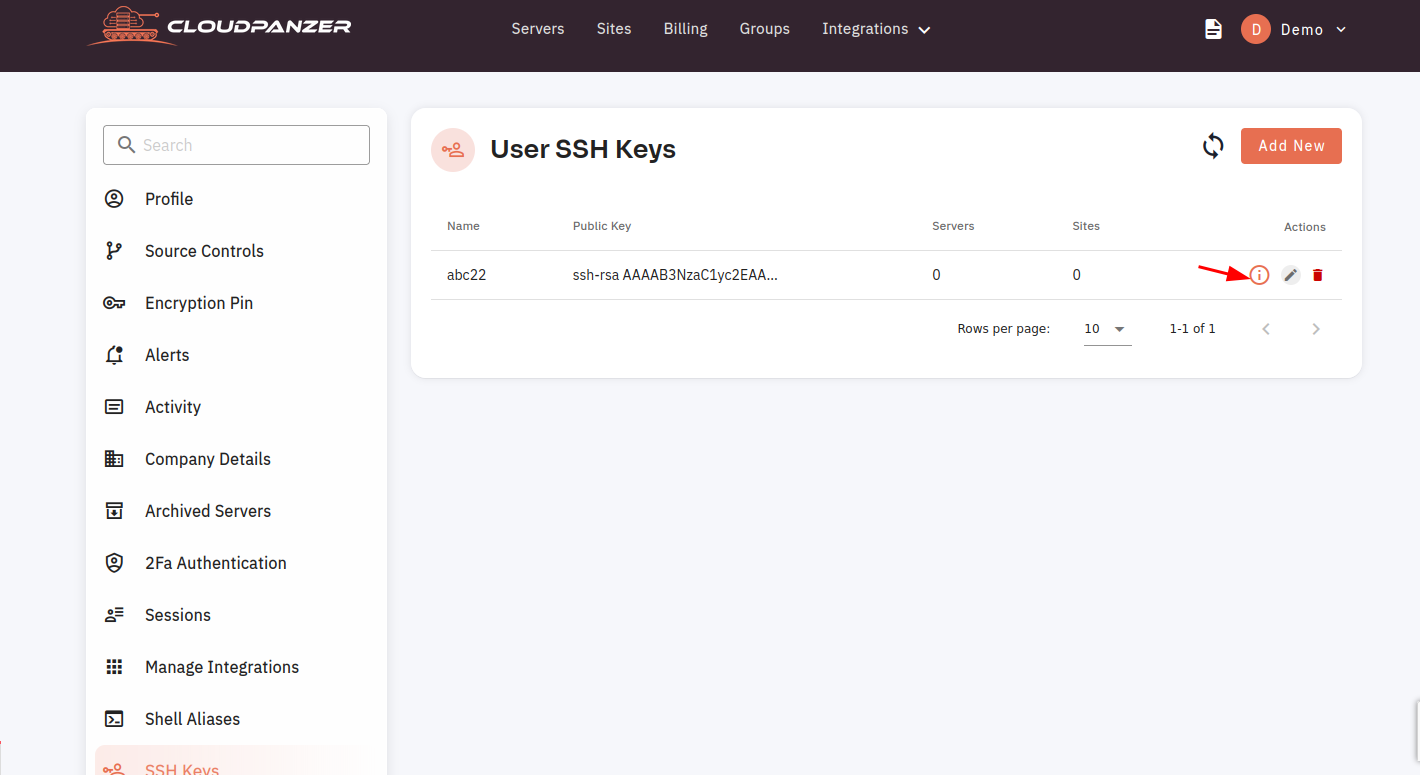
7. You can also check the public key from here.
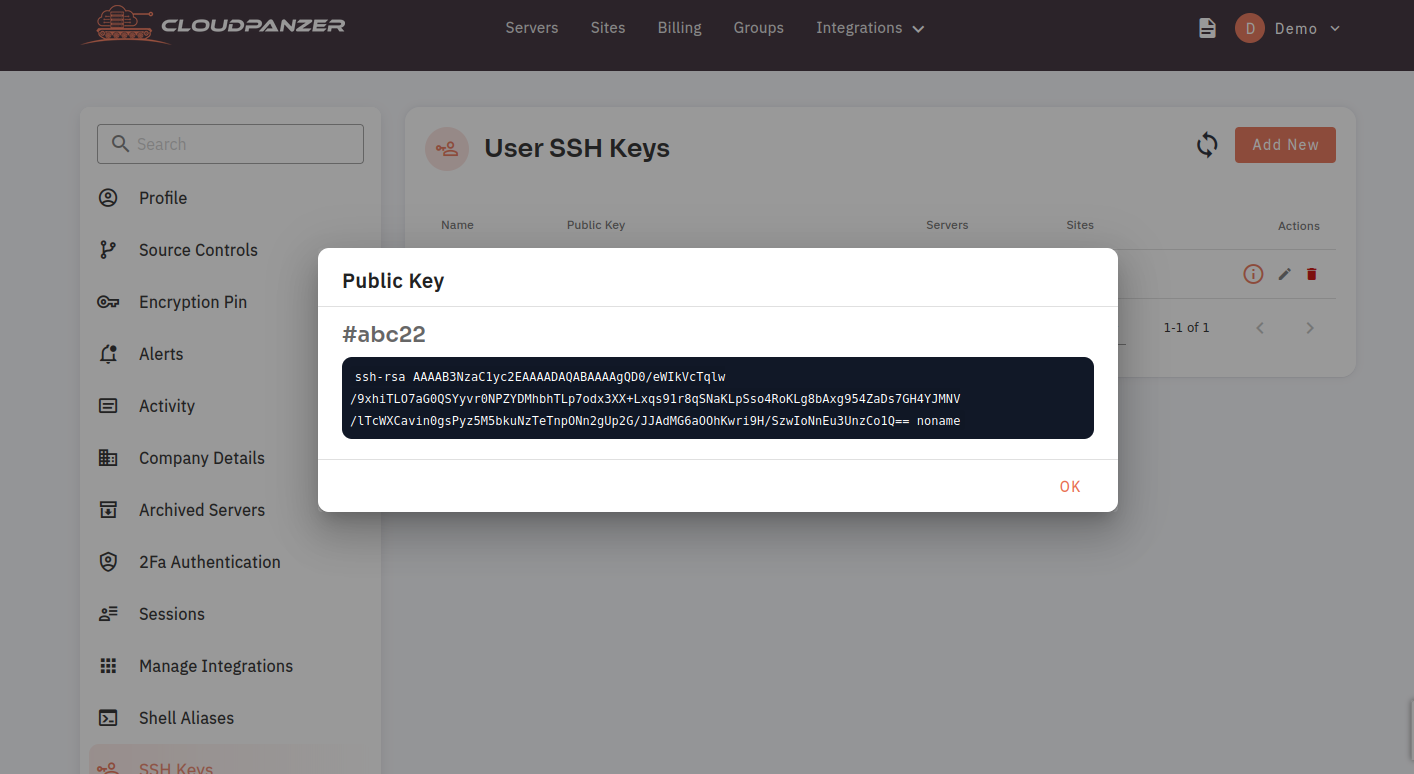
8. Here, you can see the public key.
How to Edit Integration in CloudPanzer?
Editing an integration in a Cloudpanzer can be a straightforward process, provided you have the necessary permissions and access to the relevant settings.
Tutorial :
You can watch the Video or Continue reading the post.
Follow the steps below to Edit Integration
Navigate to the Account Setting
Use this link to view How to Navigate
3: Choose the "Manage Integration" feature.
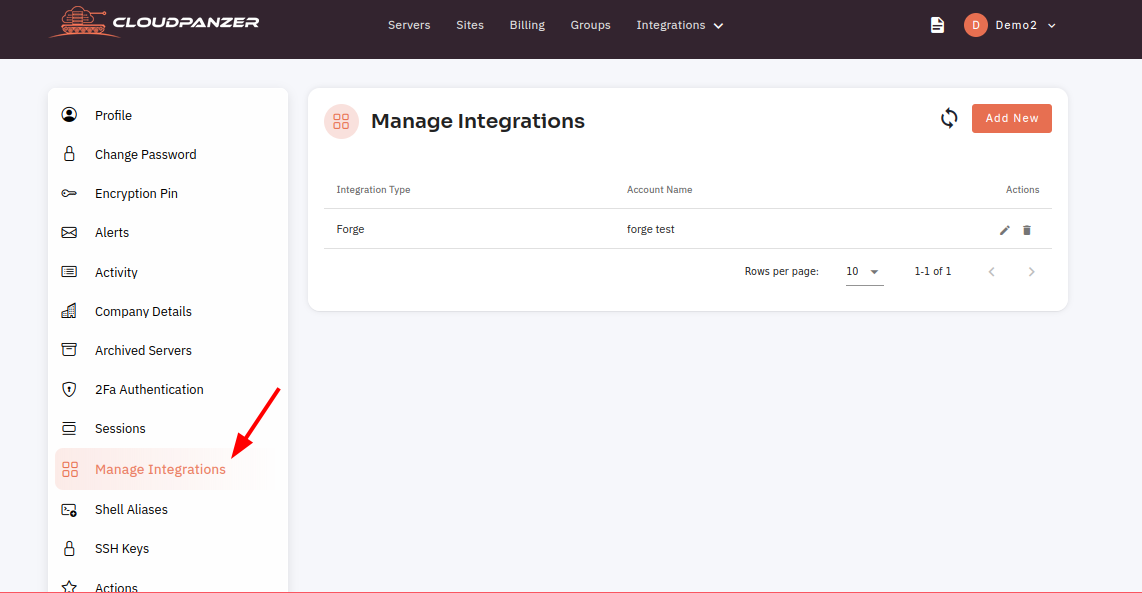
4: To make changes, select the Edit icon.

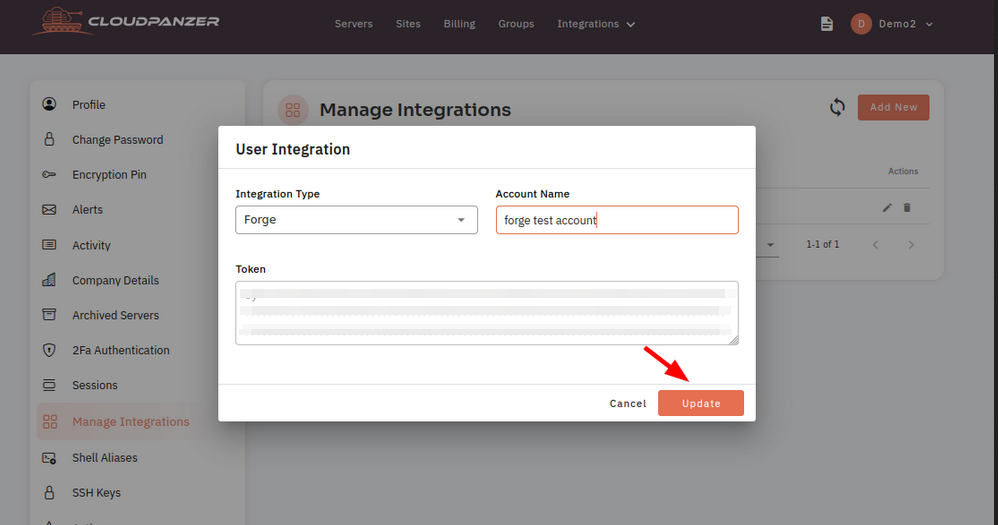
5: Fill in the details and click on the "Update" button.
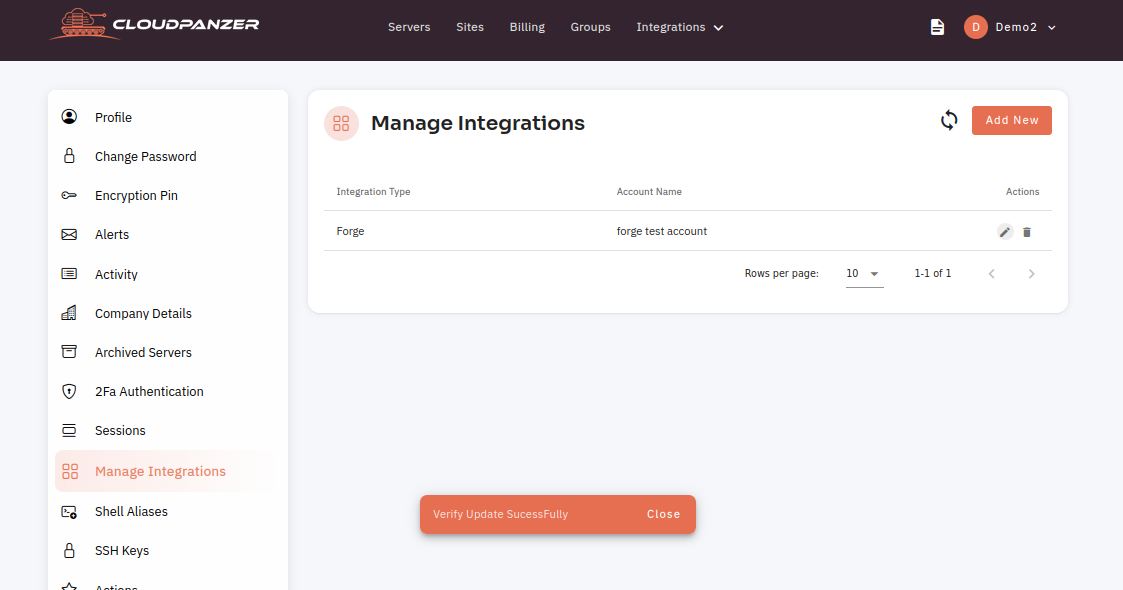
6: The Integration has been updated successfully.
How to edit Shell Ailases Group in CloudPanzer?
Editing shell aliases on a server allows users to create custom shortcuts for commands. This simplifies complex or repetitive tasks, boosts productivity, and supports customization. Administrators can standardize commands, group aliases, control access, and automate processes. Aliases are defined in user-specific configuration files and can enhance the command-line experience by making tasks faster and more efficient.
Tutorial :
You can watch the Video or Continue reading the post.
Follow the steps below to edit Shell Aliases Group
1. Click on the User Profile.

2. Go to Account Settings.

3. Click on Shell Aliases.

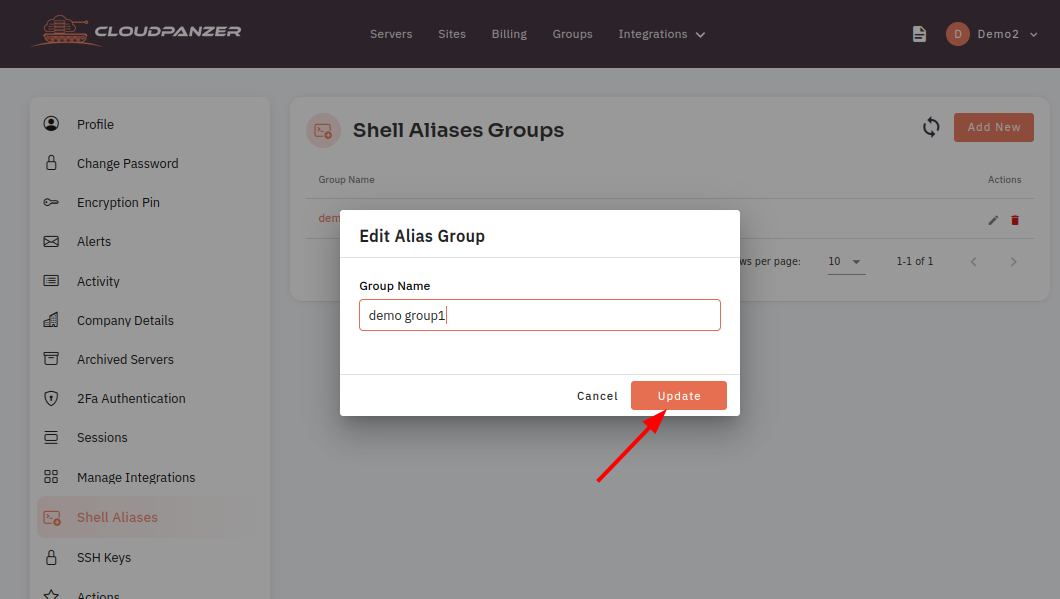
4. Click on the Edit icon.

5. Here, you can change the name and click on the update button.
Here, you can update the shell alias name successfully.
How to edit User SSH Key in CloudPanzer?
Editing a user's SSH key can be a useful task in maintaining the security of your system. It's important to regularly review and update your SSH keys to maintain the security of your system and protect against unauthorized access.
Tutorial :
You can watch the Video or Continue reading the post.
Follow the steps below to edit the User SSH Key
1. Click on the user profile.
2. Click on the Account Settings option.
3. Click on the SSH Keys option.
4. Click on the Edit icon.
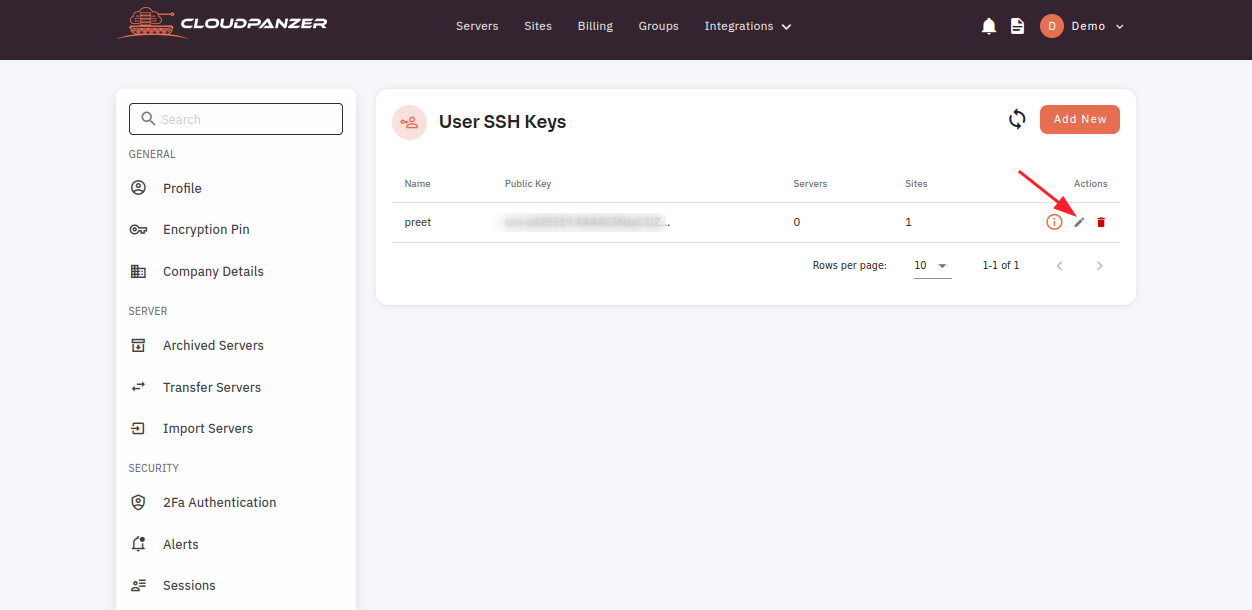
5. Make the required changes and then click on the "Update" button.
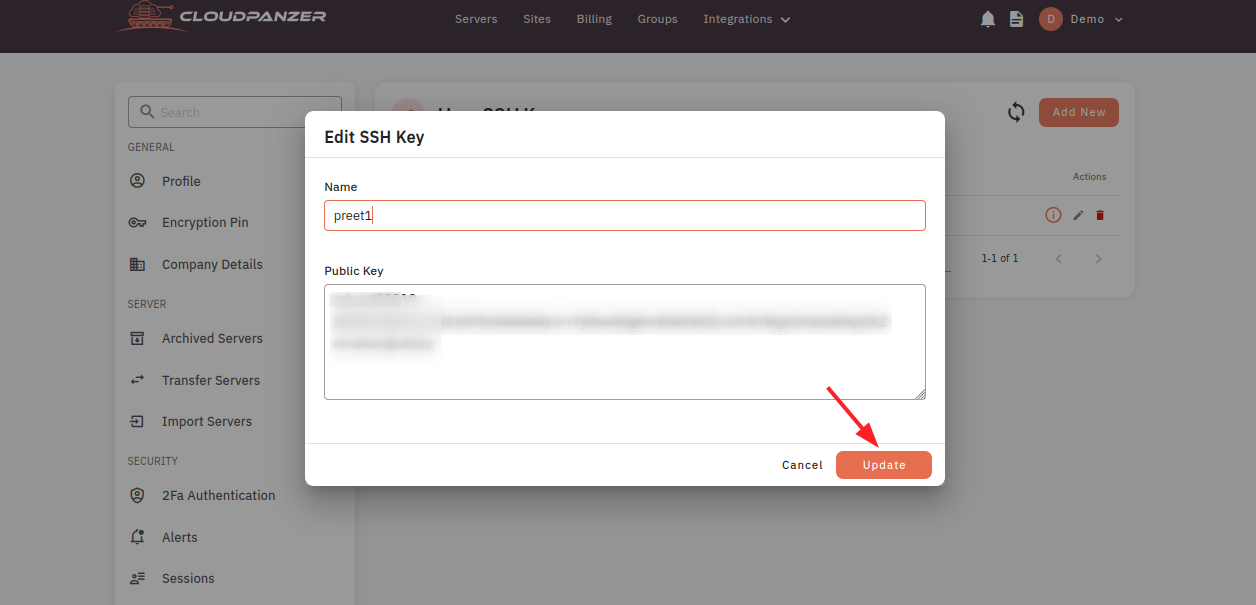
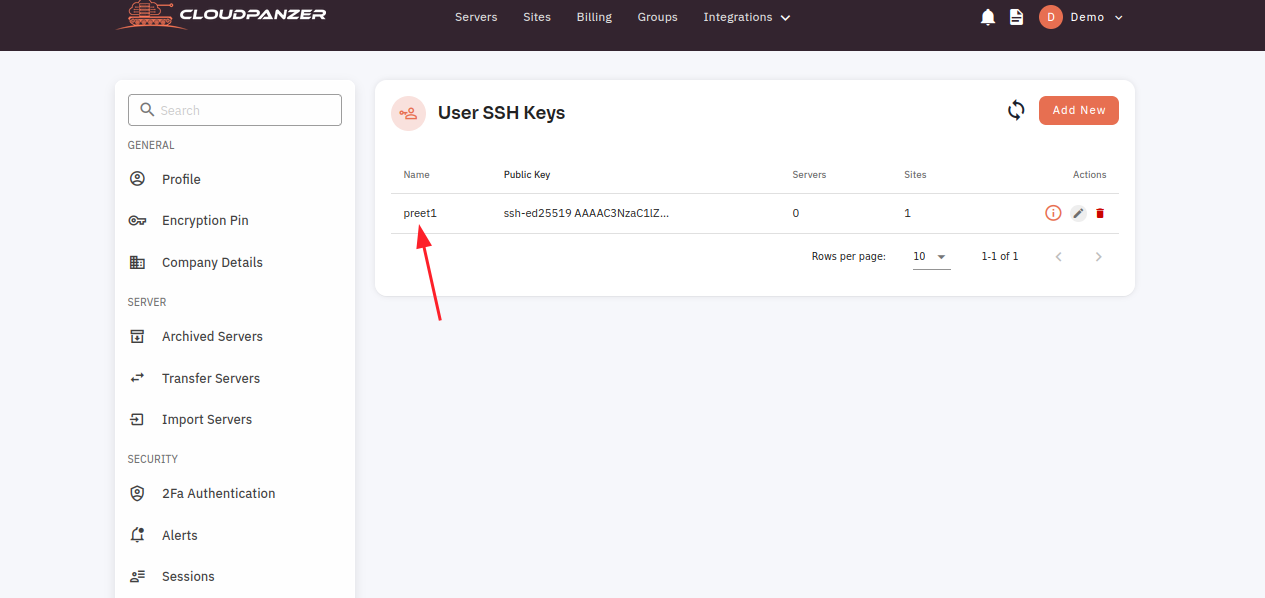
Here, you can see the SSH Key Updated Successfully.
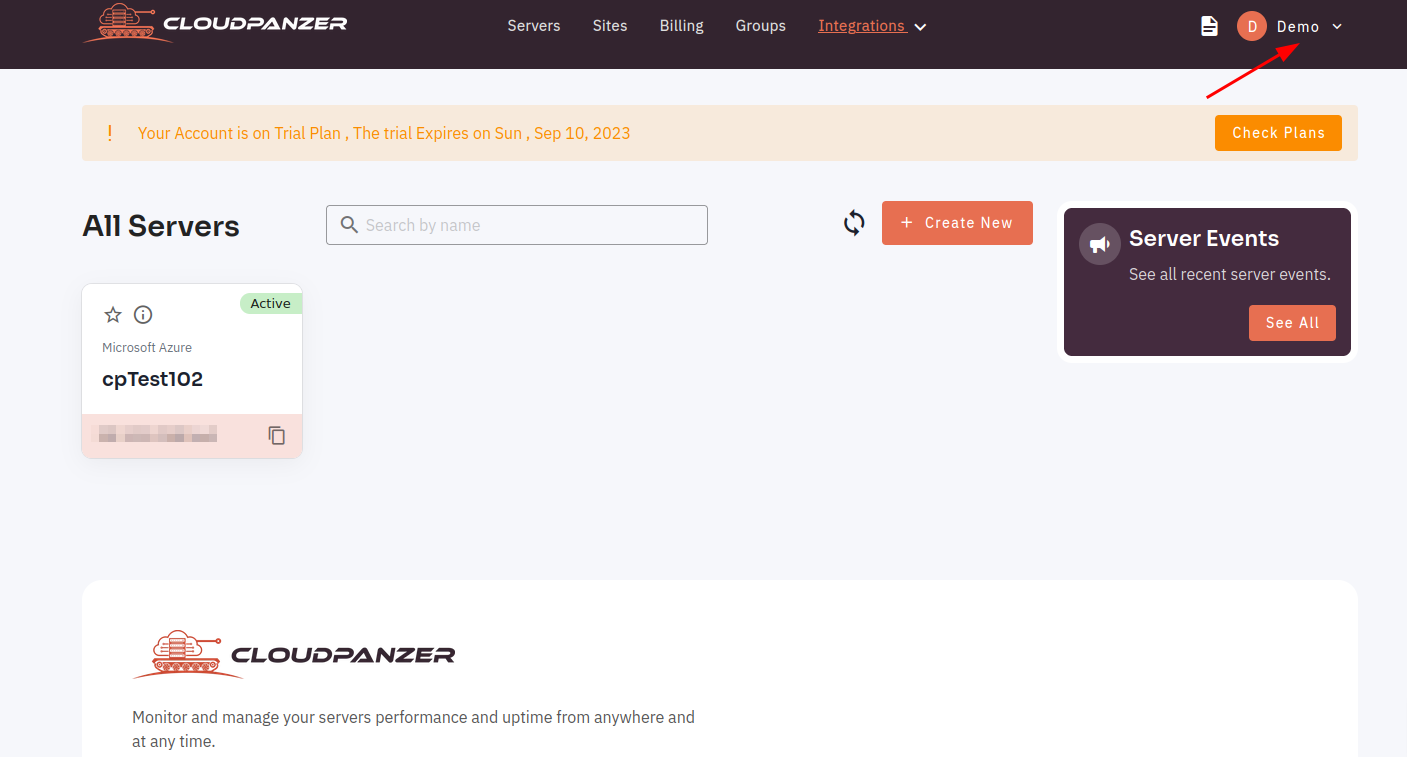
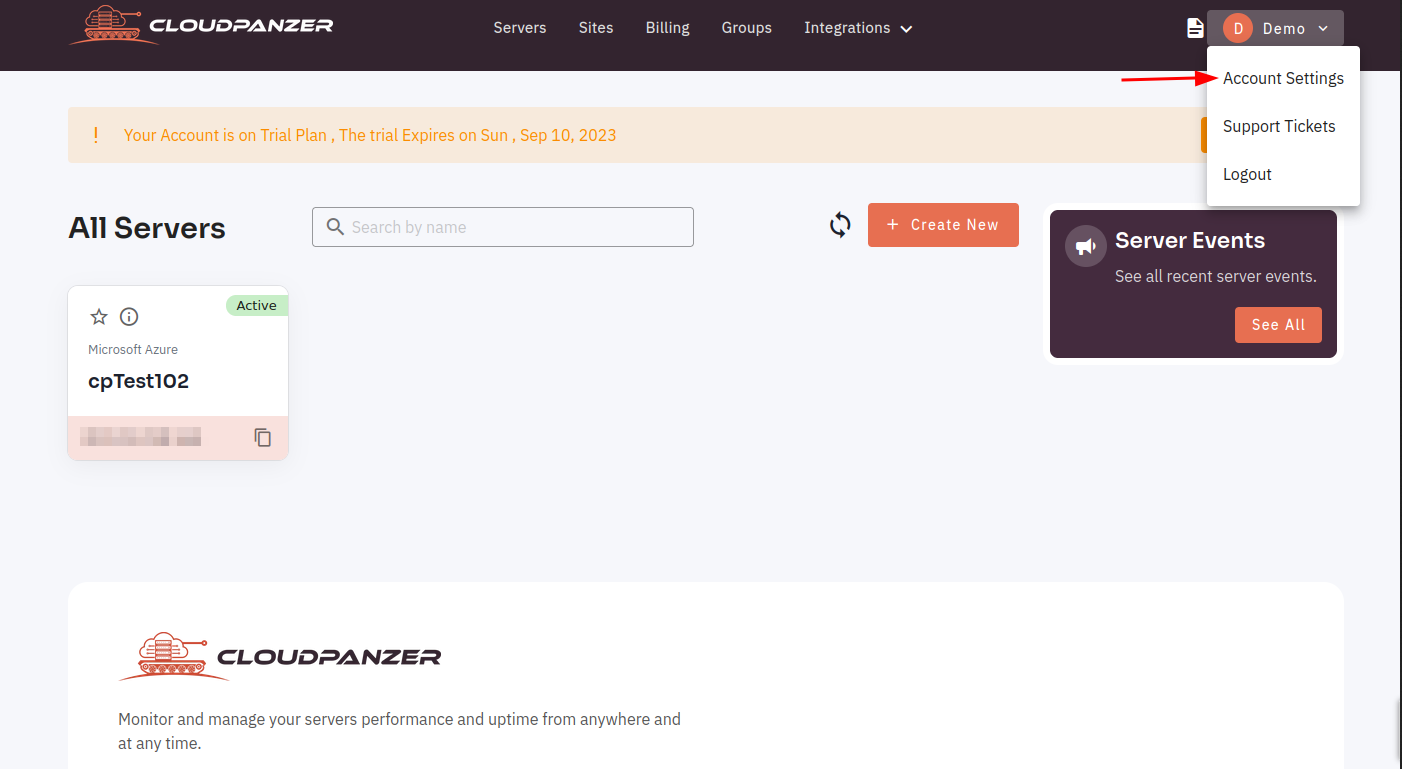
How to Navigate Account Settings in CloudPanzer?
Follow the steps below to Navigate Account Settings
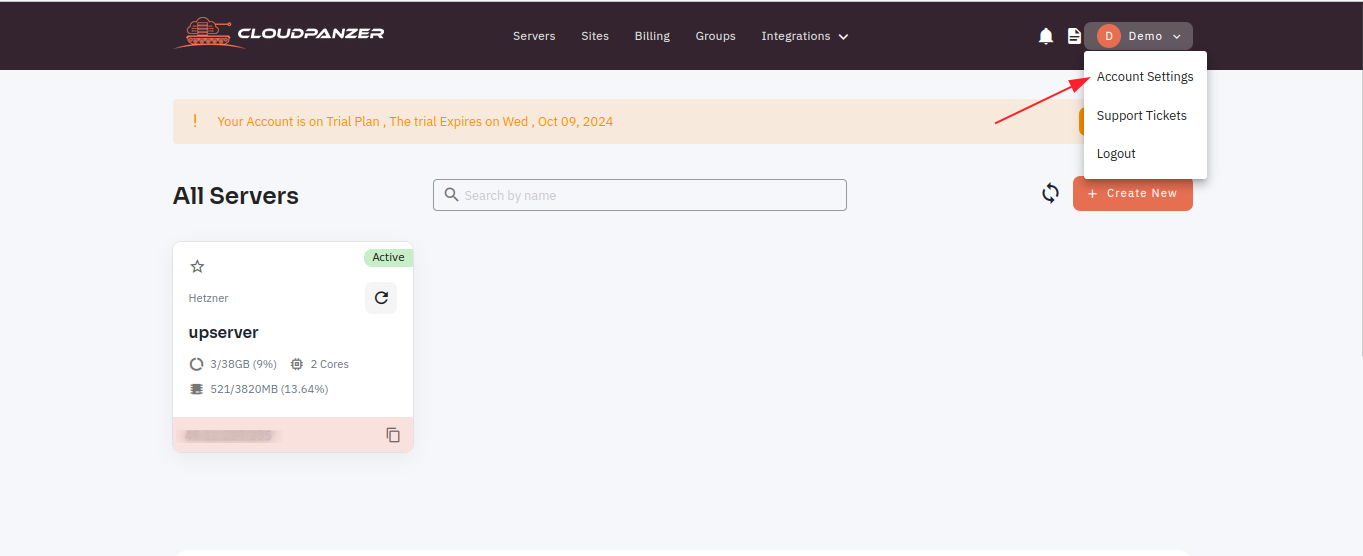
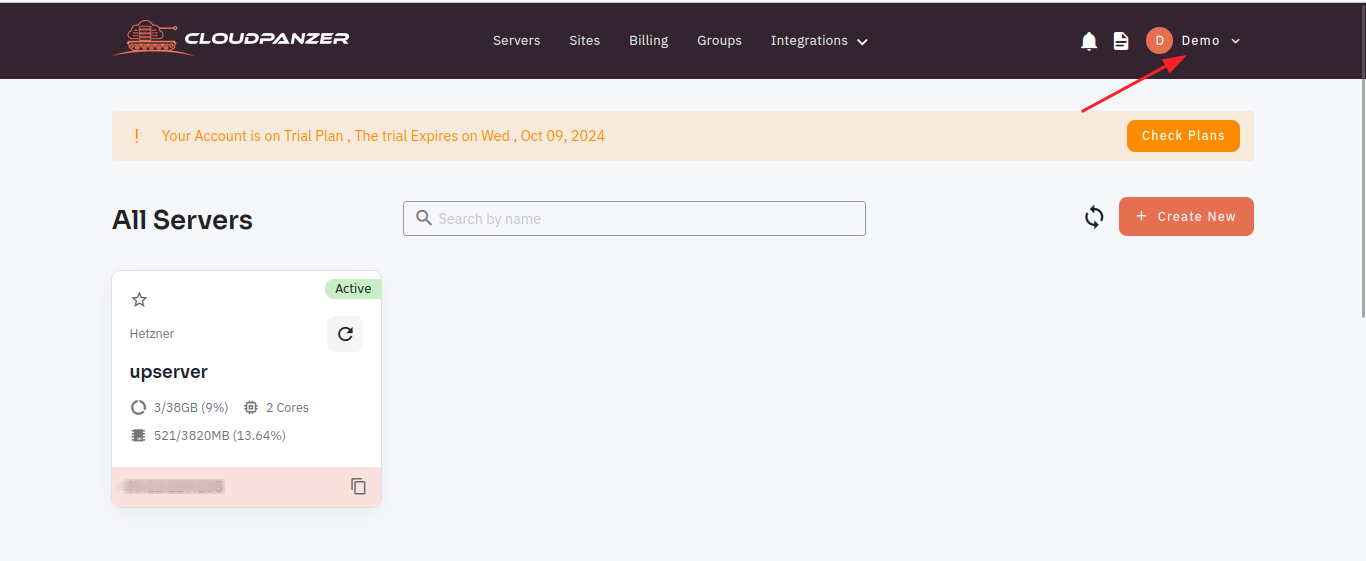
1: Once logged in, click on the user profile.

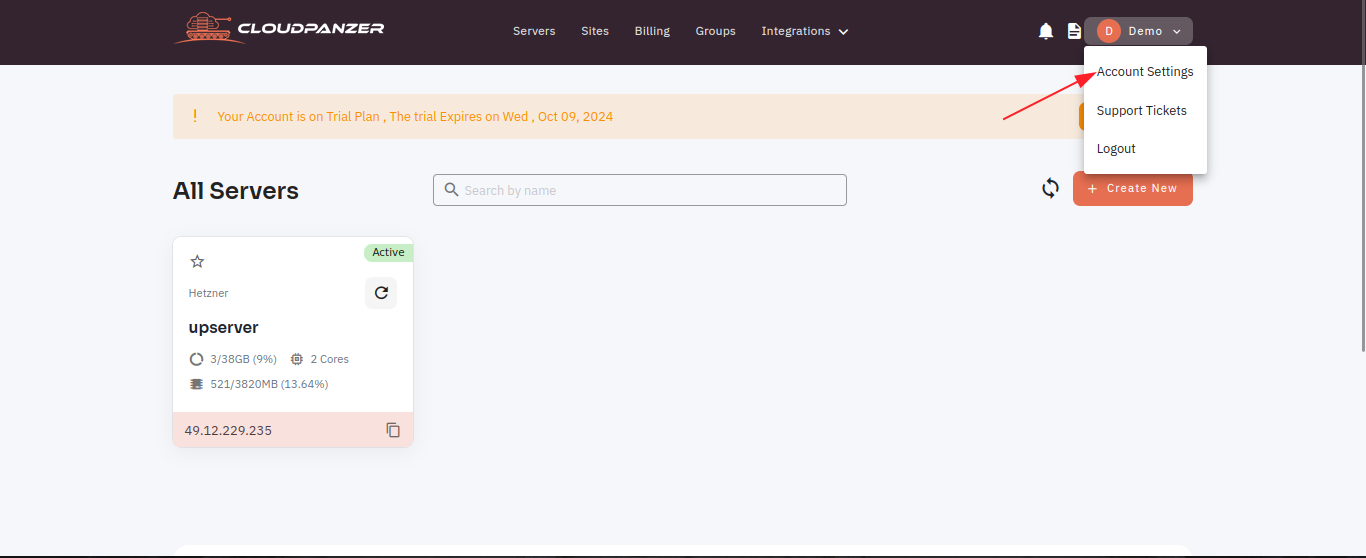
2. Click on the Account Settings option.

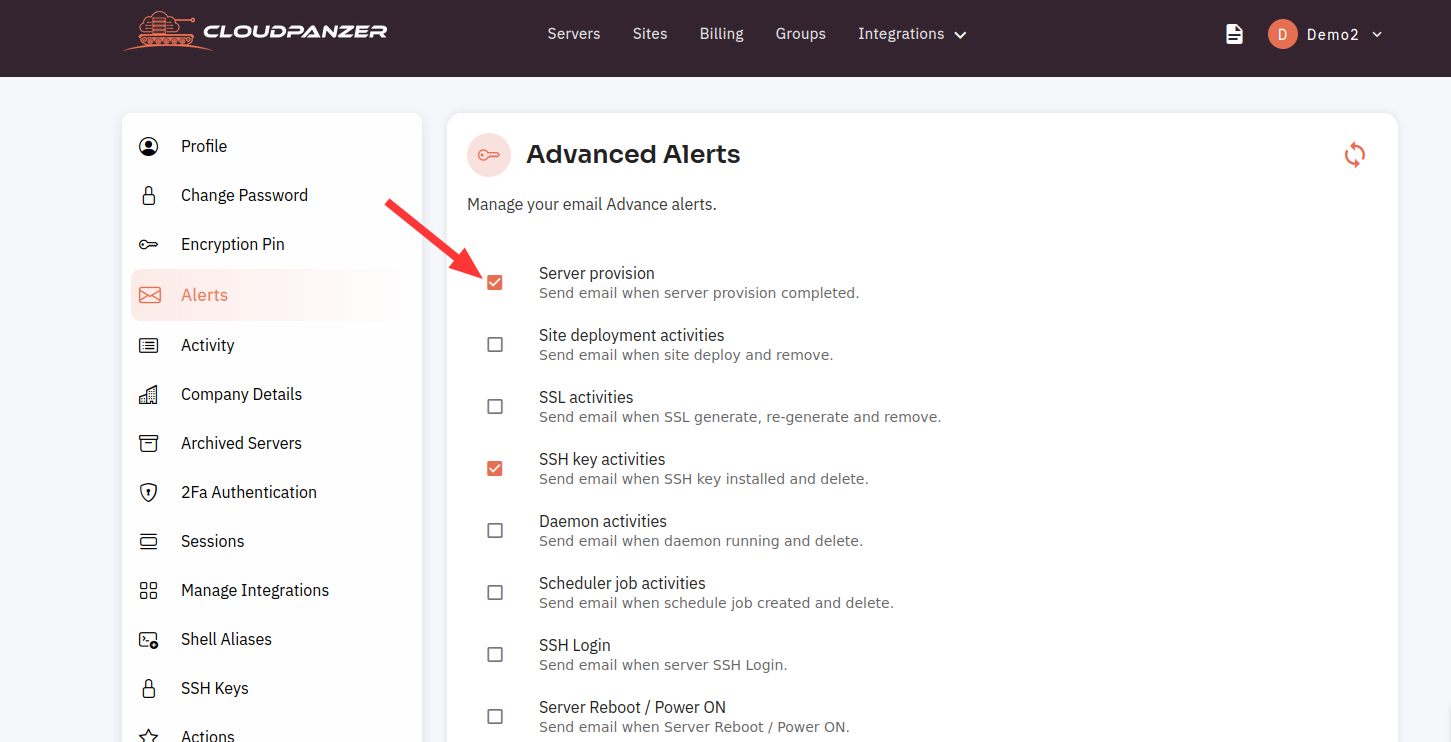
How to set Advance Alerts in CloudPanzer?
Advanced alerts can be a useful feature in a Cloudpanzer, allowing users to receive notifications about important events or updates.
Tutorial :
You can watch the Video or Continue reading the post.
Follow the steps below to set Advance Alerts
Navigate to the Account Setting
Use this link to view How to Navigate
3. Please select the "Alerts" option.
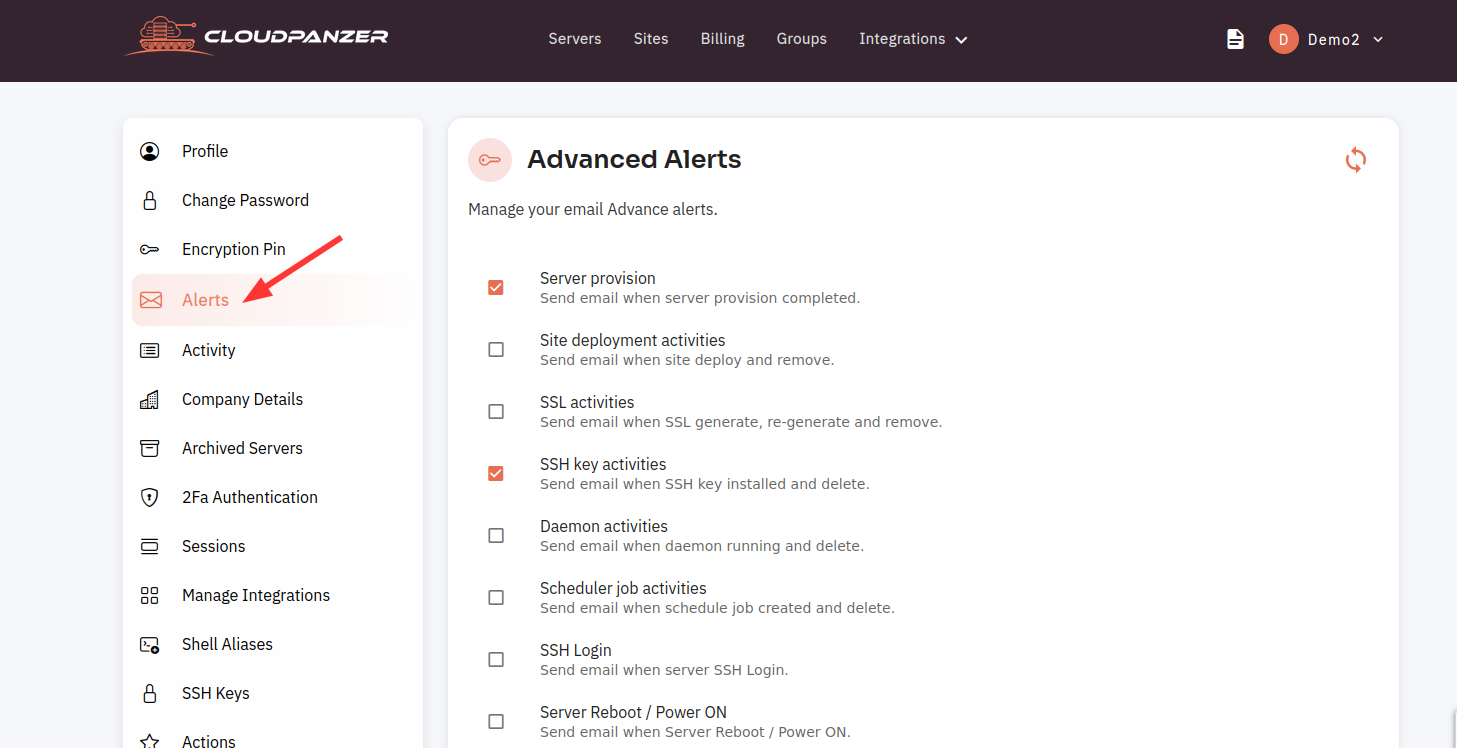
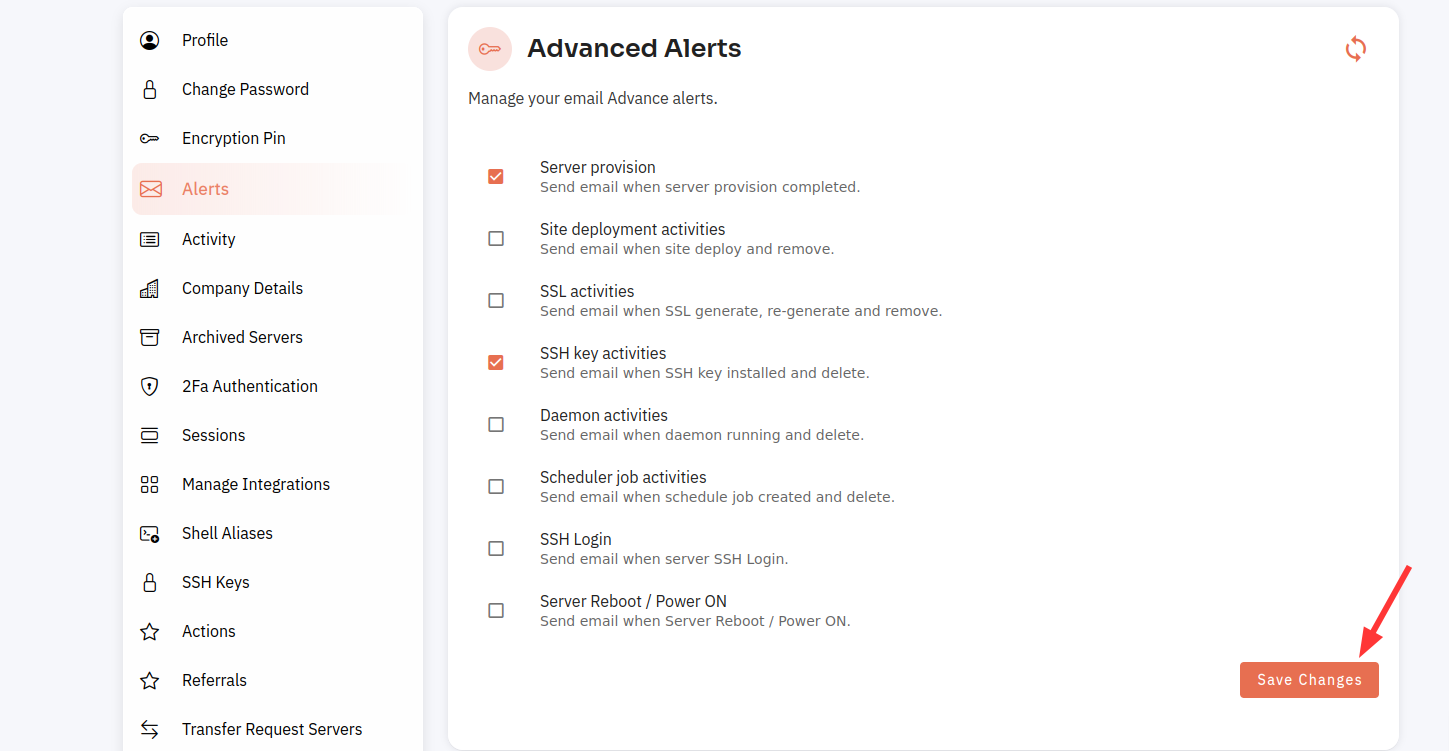
4. Specify the location for configuring the Advance Alert.
5. Click on the "Save Changes" button.
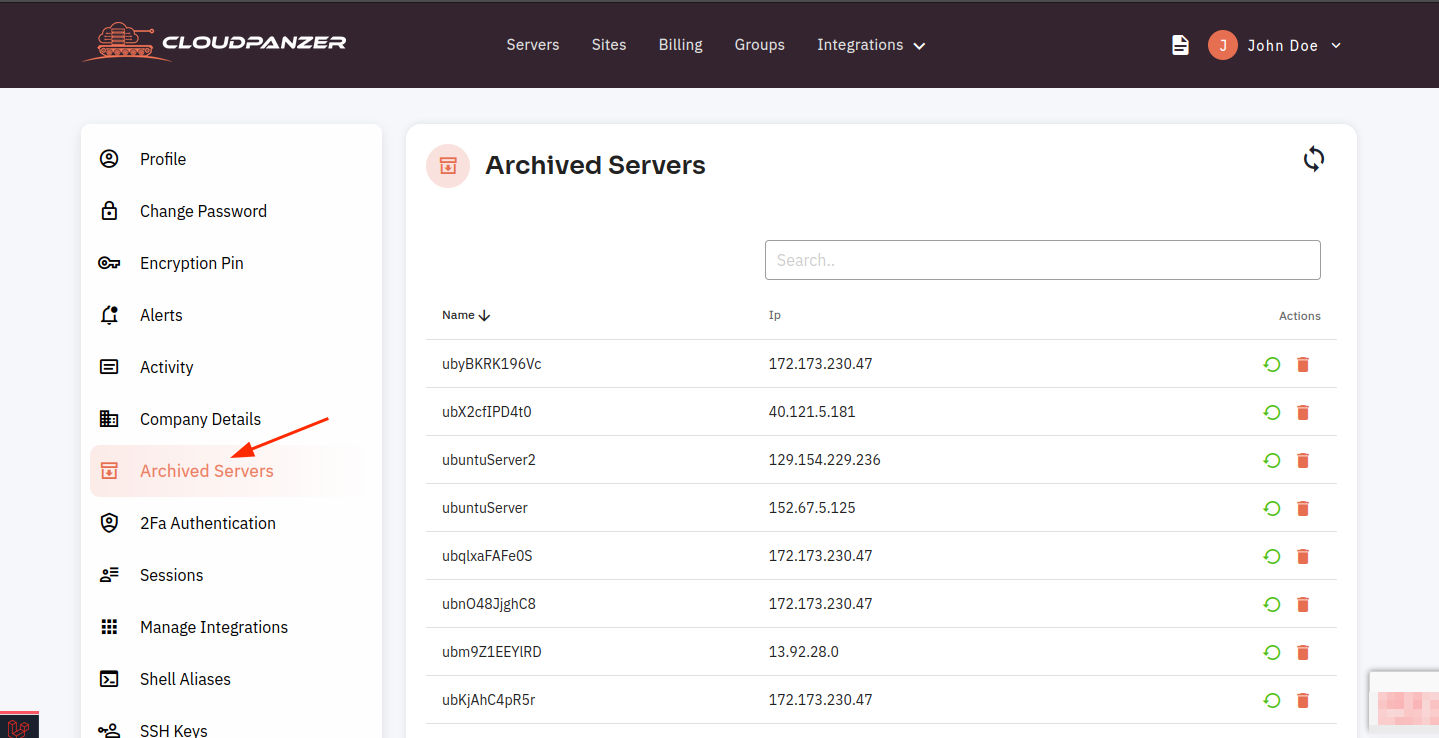
How to View Archived Servers in CloudPanzer?
Tutorial :
You can watch the Video or Continue reading the post.
Follow the steps below to View Archived Servers
1: Once logged in, click on the user profile.

2. Click on the Account Settings option.

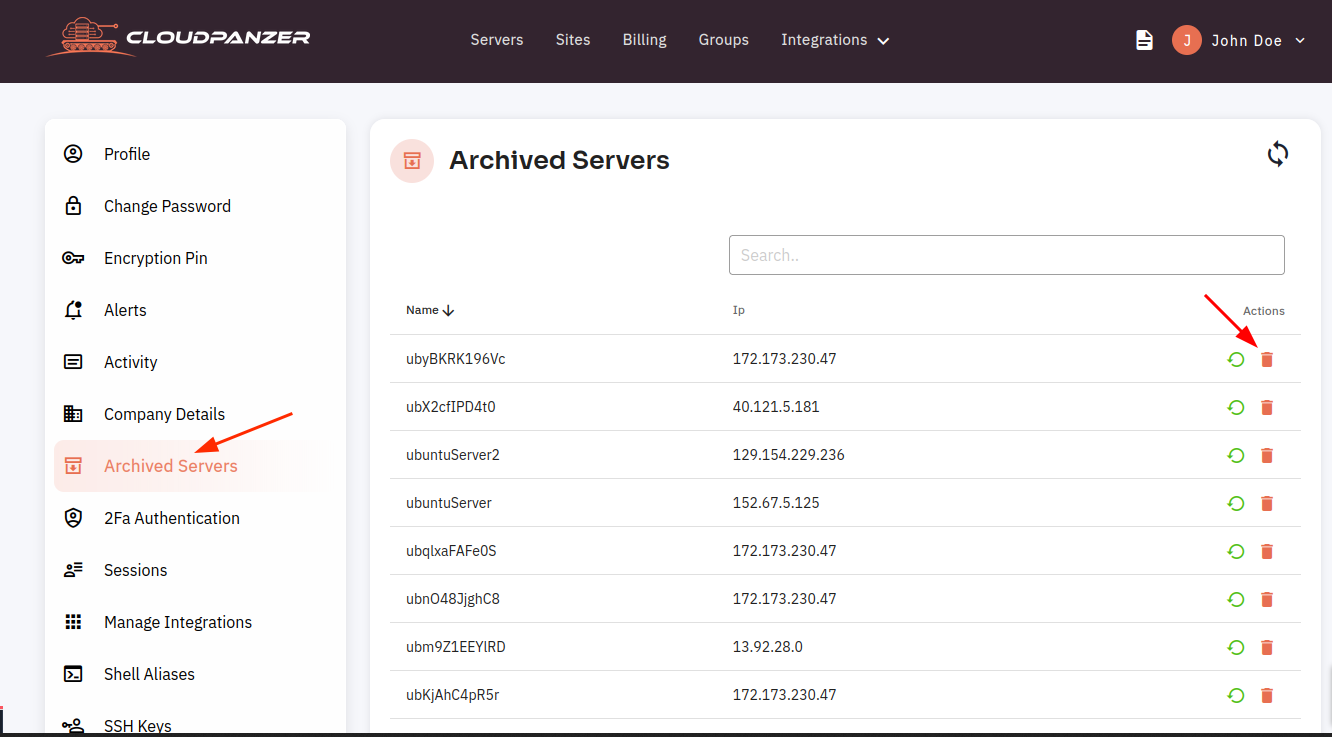
3. Click on the Archived server option and here, you can see the Archived servers list.
4. You can also delete the archived server by clicking on the delete icon.
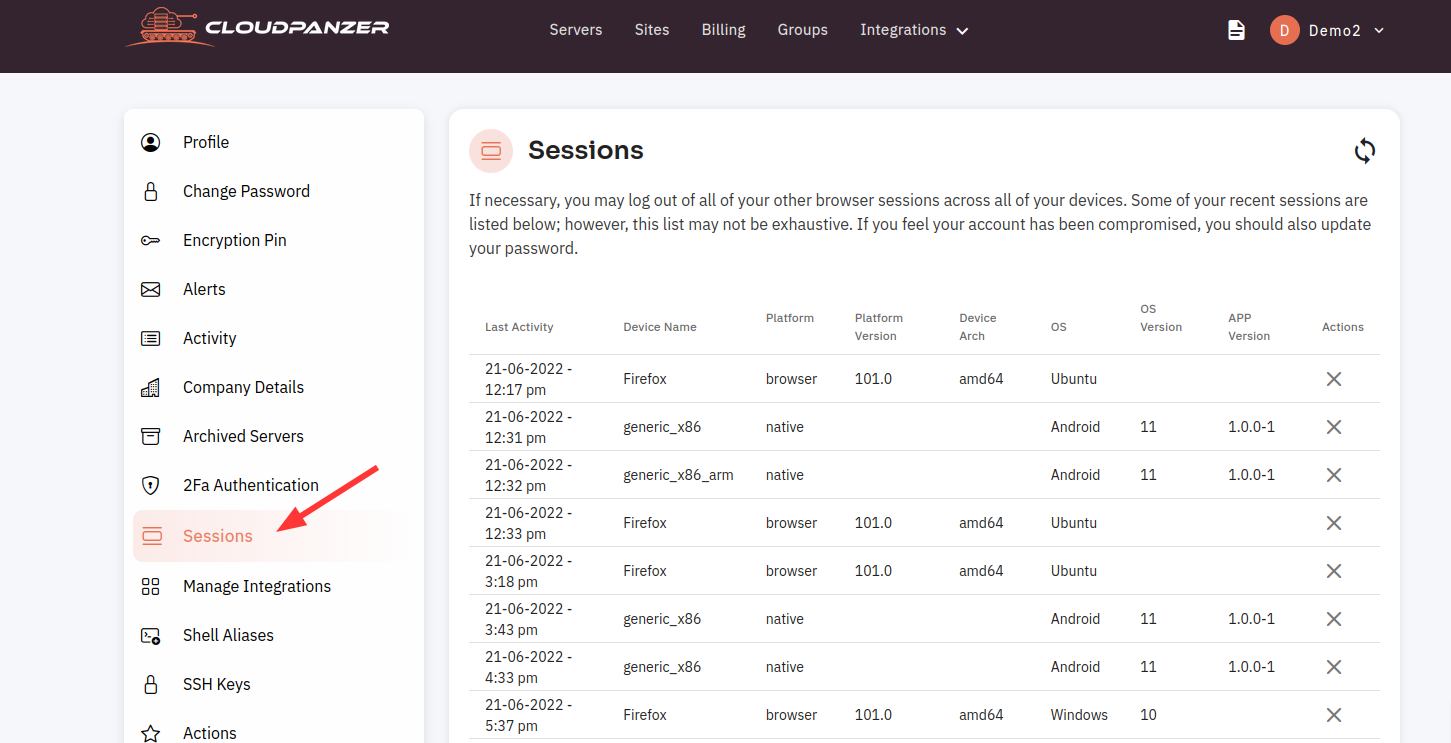
How to view Sessions in CloudPanzer?
As a Cloudpanzer user, it may be necessary to view your active sessions in order to manage your account and ensure the security of your login information. This can be especially important if you are accessing the portal from multiple devices or locations.
Tutorial :
You can watch the Video or Continue reading the post.
Follow the steps below to view Sessions
1: Once logged in, click on the user profile.

2. Click on the Account Settings option.

3. Click on the Sessions to view a comprehensive list of all available sessions.
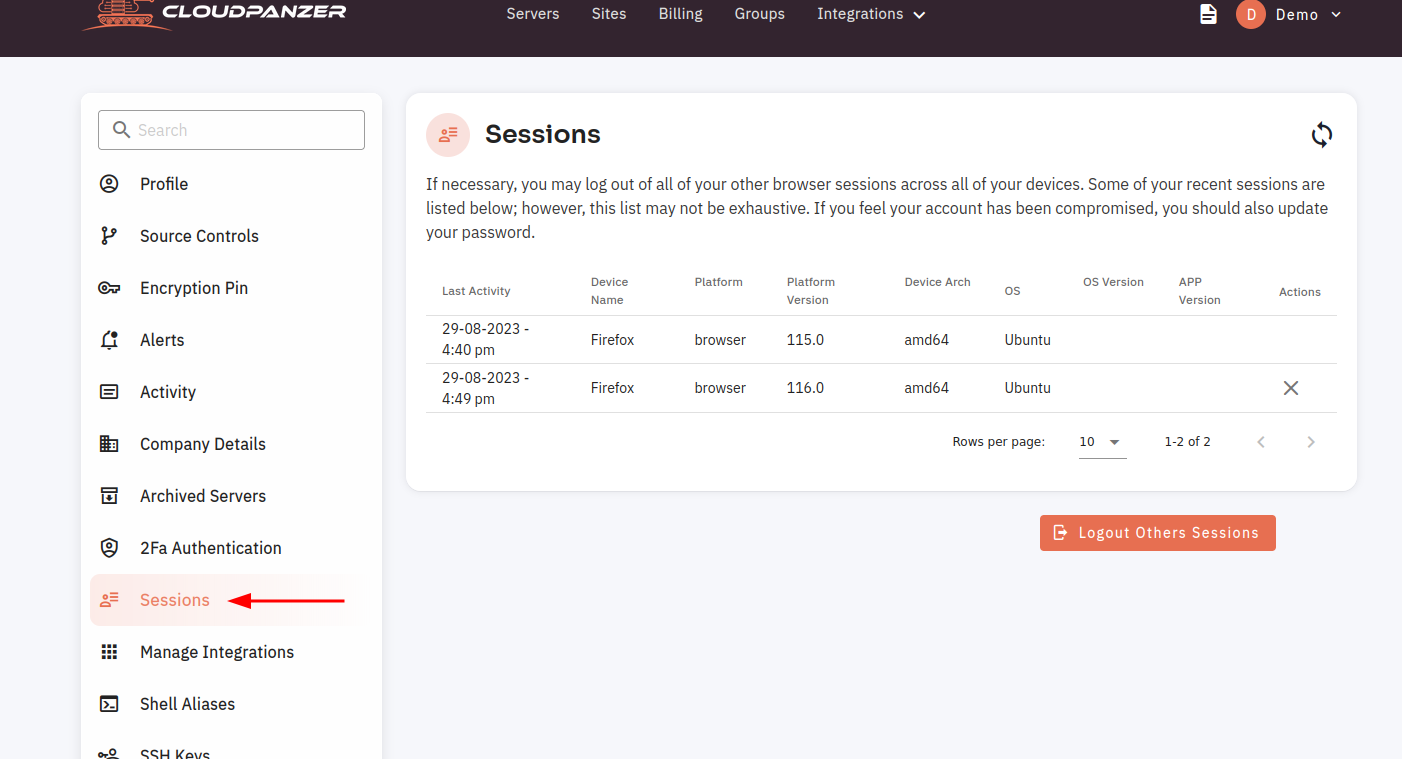
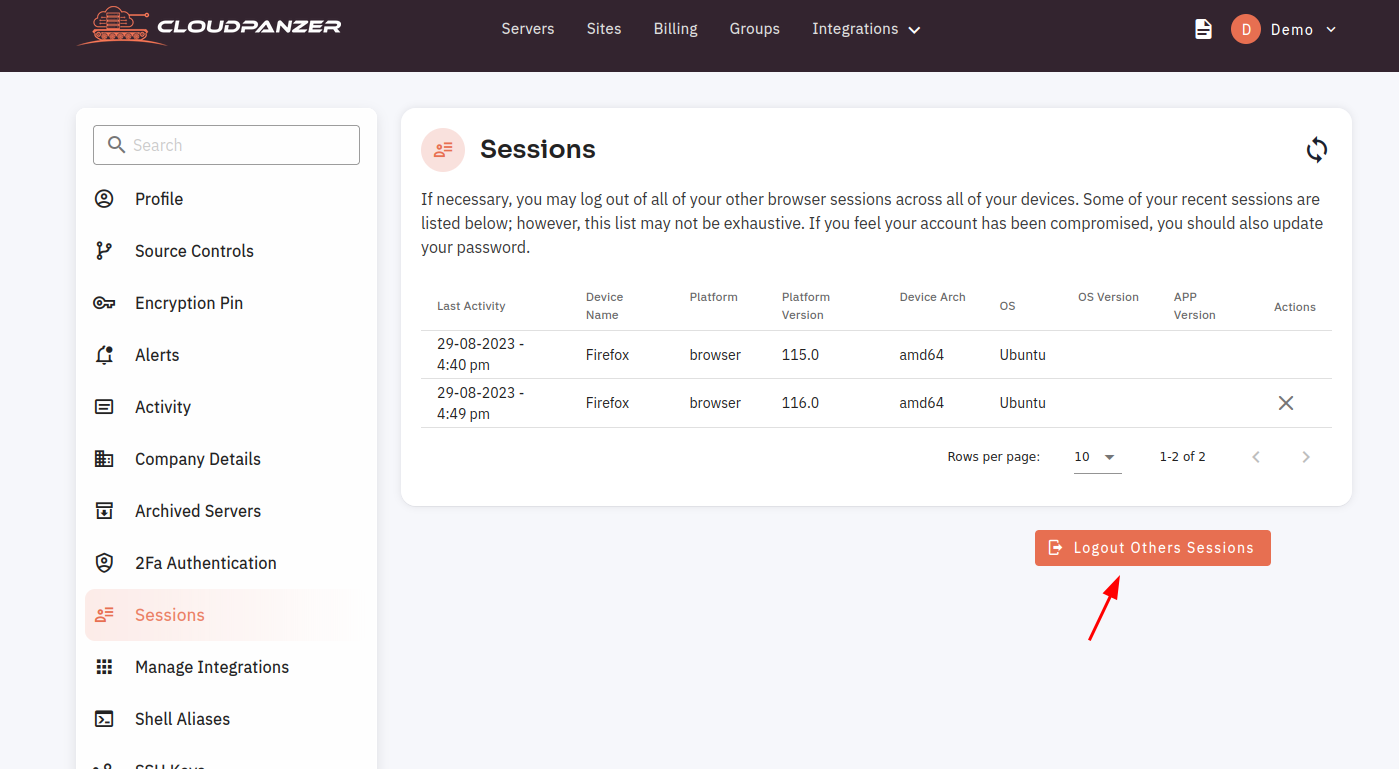
4. You can also logout from others sessions by clicking on the logout others session button.
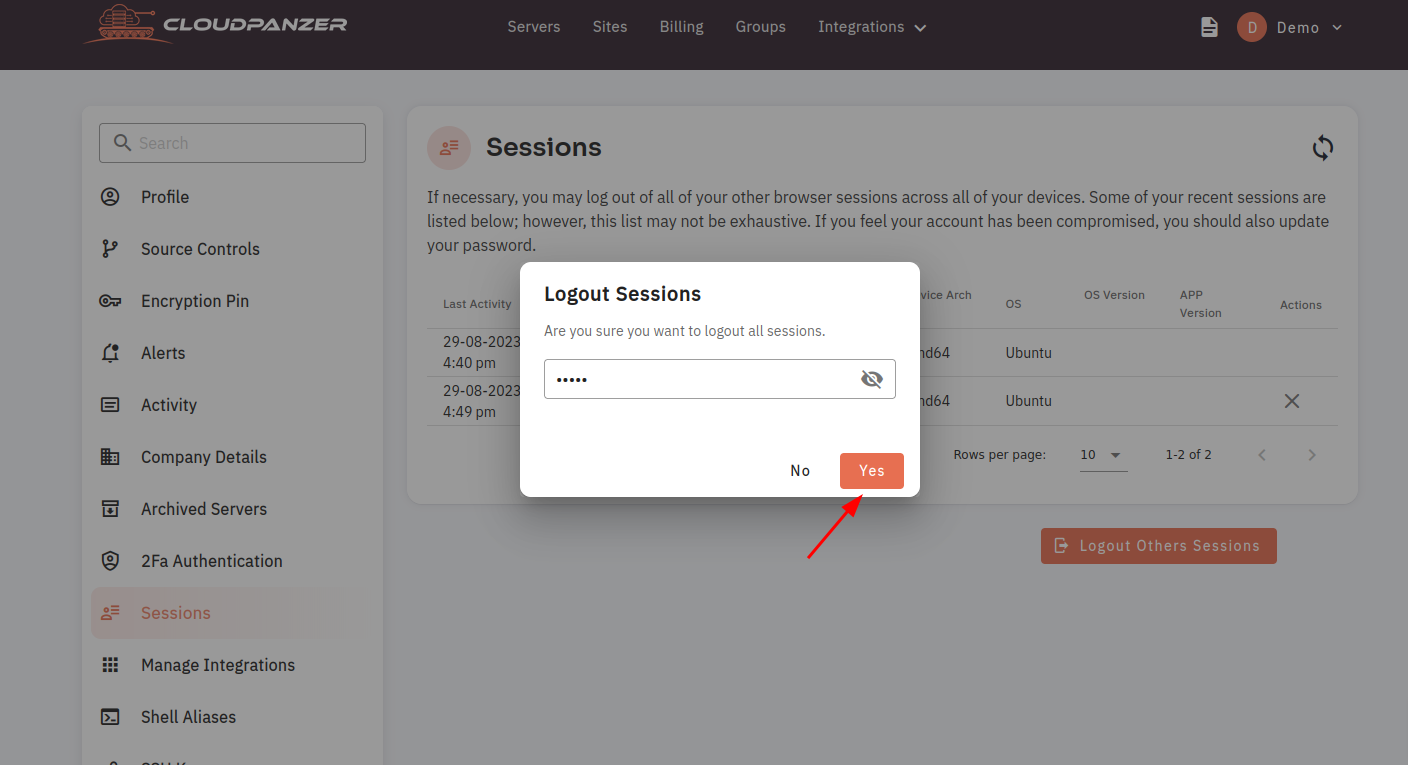
5. Here, you can logout by clicking on the yes button.
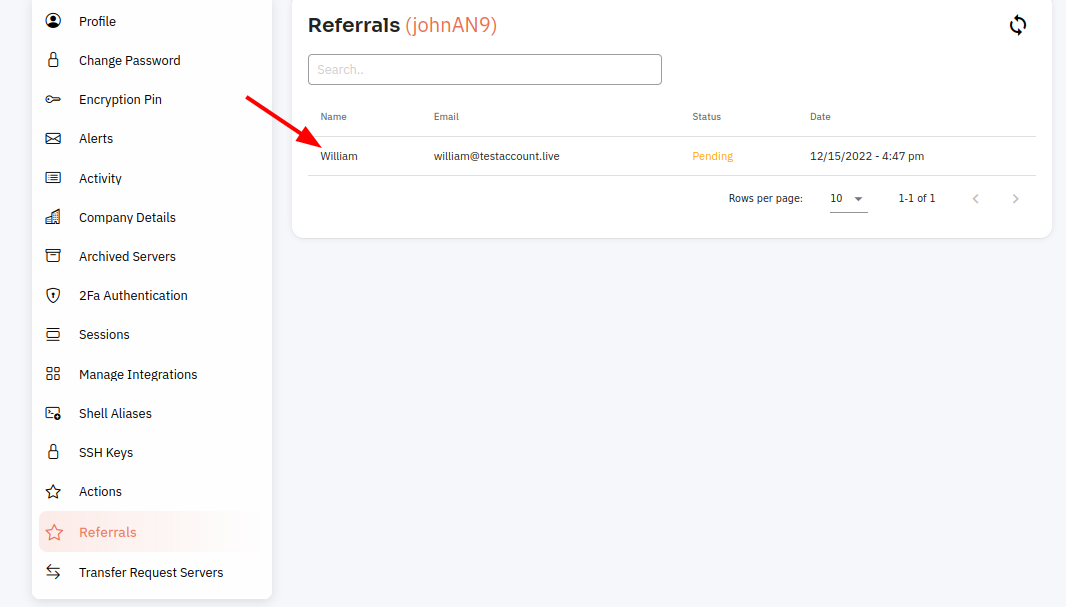
Where you can see Referrals users list in CloudPanzer?
Referrals on a server are used to enhance performance, availability, and security. They distribute network traffic, balance loads across servers, and guide users to appropriate resources. Referrals also optimize data retrieval, support centralized authentication, and improve the overall user experience in distributed and complex server environments.
Follow the steps below to the Referrals users list
Navigate to the Account Setting
Use this link to view How to Navigate