Cloudeflare
- How to Add New DNS Record?
- How to Add Pseudo IPv4 header?
- How to Change Browser Cache TTL?
- How to Change Caching level?
- How to Change Encryption Mode ?
- How to Change SSL/TLS Recommender ?
- How to change the maximum upload size?
- How to Change TLS Latest Version ?
- How to Change TLS Minimum Version?
- How to Check DNS Record ?
- How to Check SSL/TSL Edge Certificates?
- How to create Website on CloudFlare?(pending)
- How to Delete DNS Record?
- How to Disable Universal SSL ?
- How to Edit DNS Record?
- How to Enable And Disable Always Online Mode?
- How to Enable and Disable Automatic HTTPS Rewrites ?
- How to Enable And Disable Development Mode?
- How to Enable and Disable Opportunistic Encryption ?
- How to Enable and Disable Under Attack Mode ?
- How to Enable HSTS?
- How to Enable Or Disable 0-RTT Connection Resumption?
- How to Enable Or Disable HTTP/3 (with QUIC)?
- How to Enable Or Disable IP Geolocation?
- How to Enable Or Disable IPv6 Compatibility?
- How to Enable Or Disable Onion Routing?
- How to Enable Or Disable WebSockets?
- How to Navigate Cloudflare Home ?
- How to Navigate Network Settings?
- How to Navigate on Setting in Cloudflare?
- How to Navigate SSL/TLS on a Dashboard ?
- How to purge Cache?
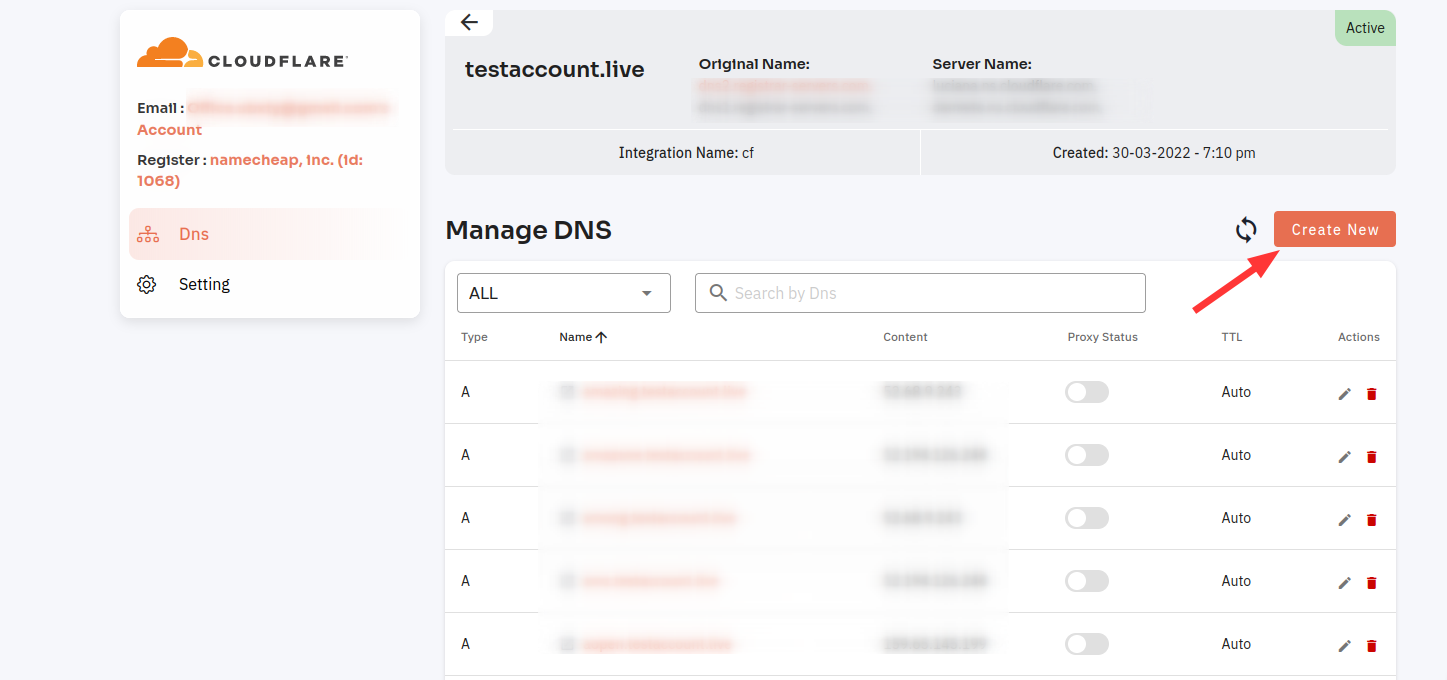
How to Add New DNS Record?
A DNS (Domain Name System) record is a type of data that is stored in a DNS server and used to map domain names to IP addresses. It is important to carefully enter the required information for your DNS record and to consult your hosting provider or domain registrar for specific instructions if needed.
Tutorial :
You can watch the Video or Continue reading the post.
Follow the steps below to Add New DNS records.
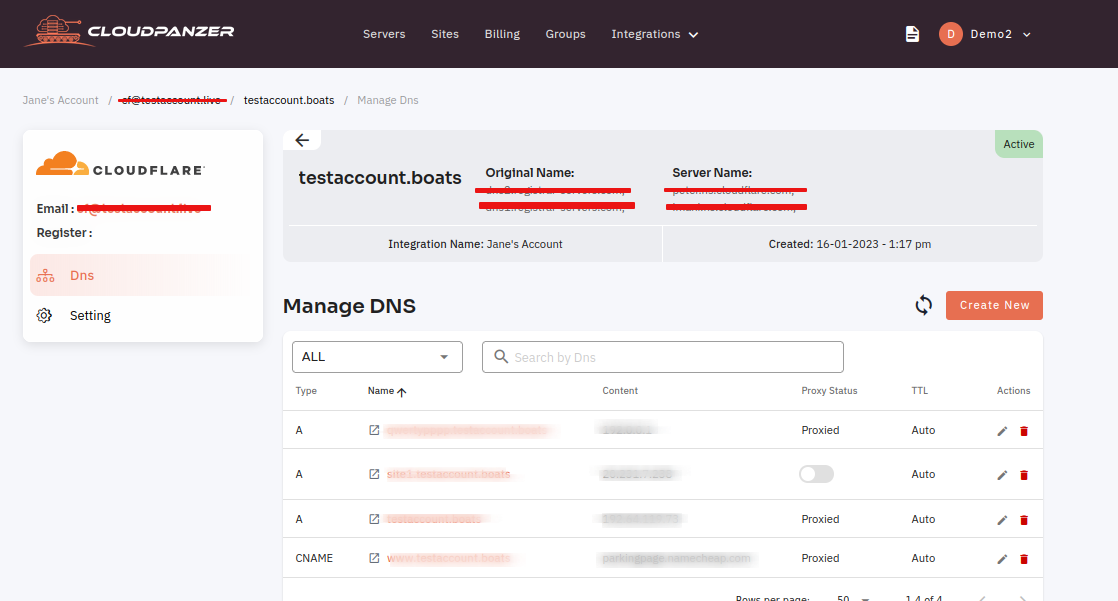
Navigate to the DNS Dashboard (Use this link to view How to Navigate)
1. Click on the "Add Record" button.
2. Fill in All required fields and Click on the "Save" button.
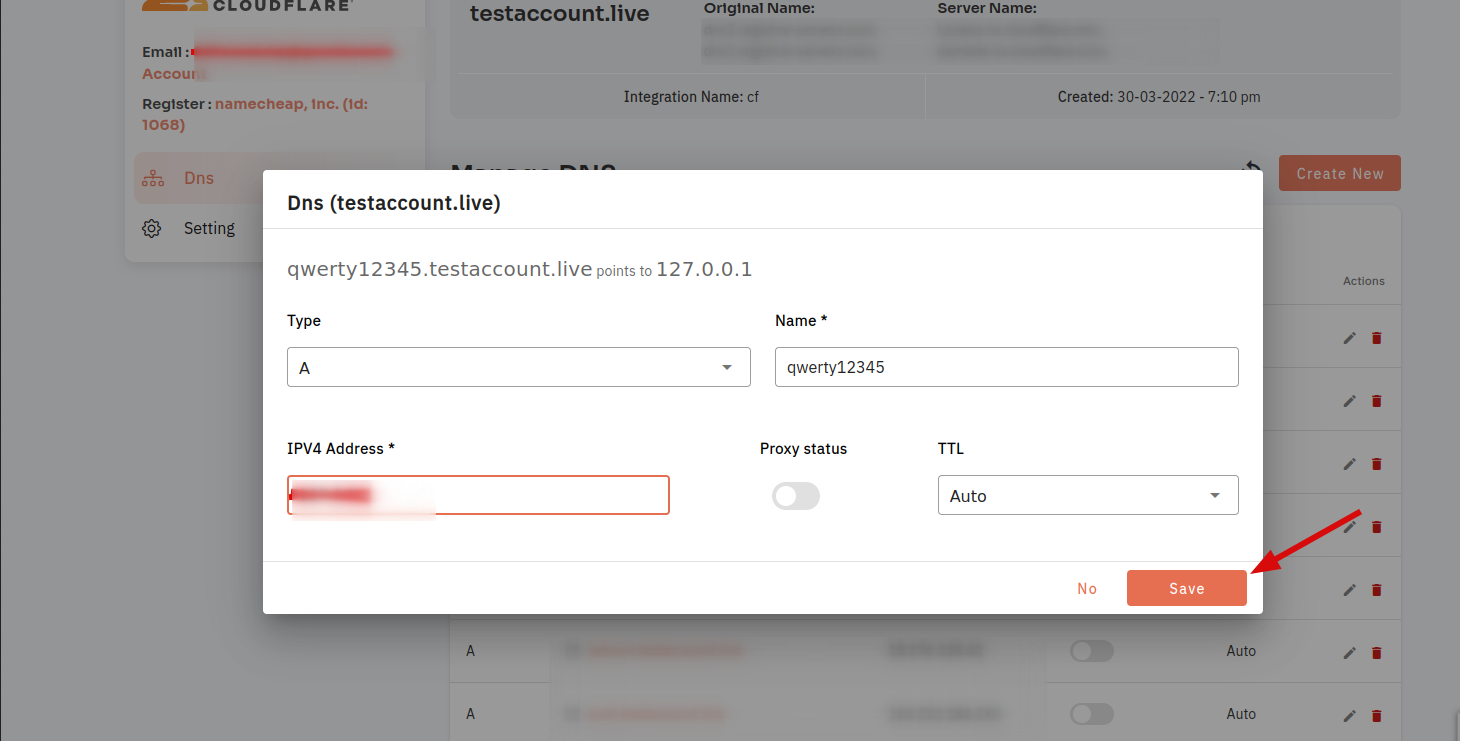
You can see Record Added Successfully.
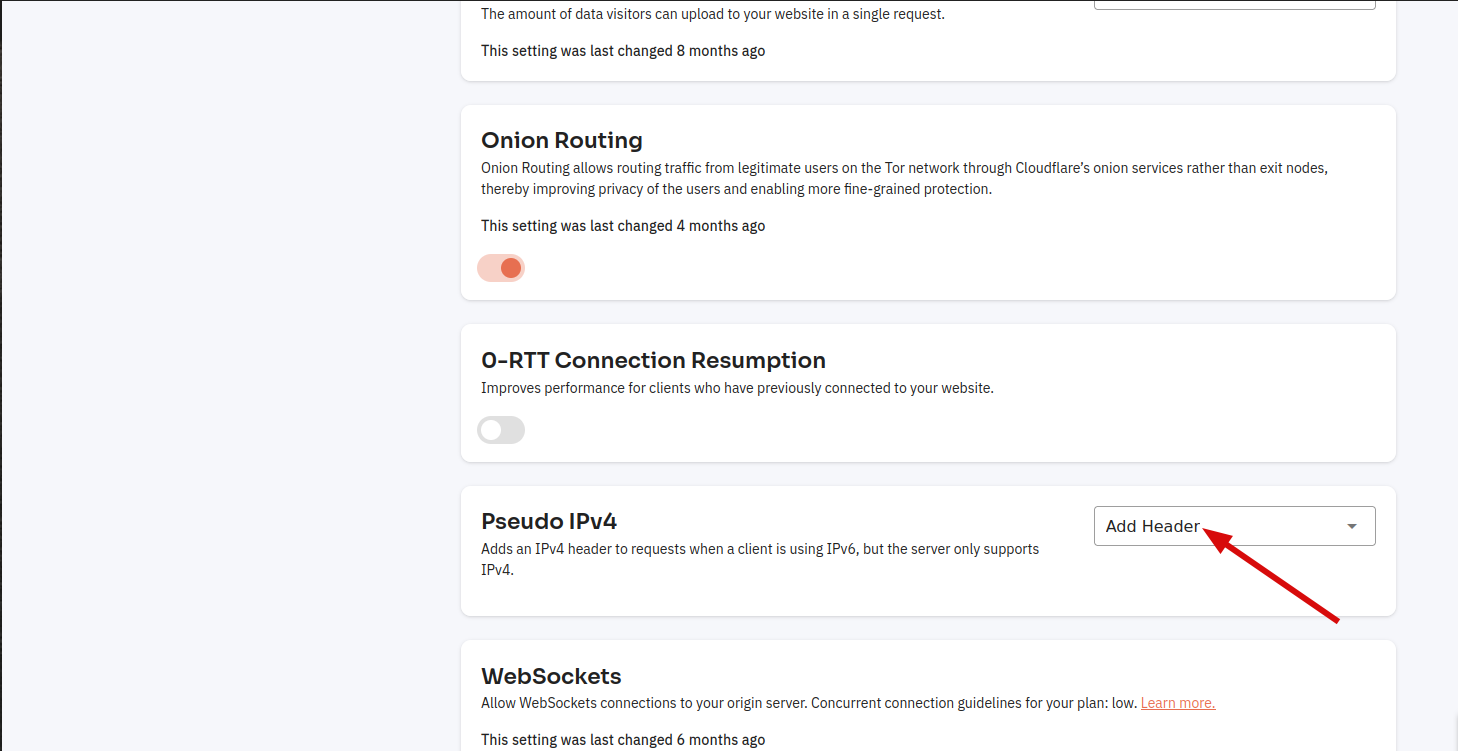
How to Add Pseudo IPv4 header?
Pseudo-IPv4 headers are used in some networks to allow IPv6 devices to communicate with IPv4 devices. They are only intended to be used as a temporary workaround until a more permanent solution can be implemented.
Follow the steps below to Add a Pseudo IPv4 header.
Navigate to the Network Settings of Cloudflare (Use this link to view How to Navigate).
Tutorial :
You can watch the Video or Continue reading the post.
Here you can Add a Header.
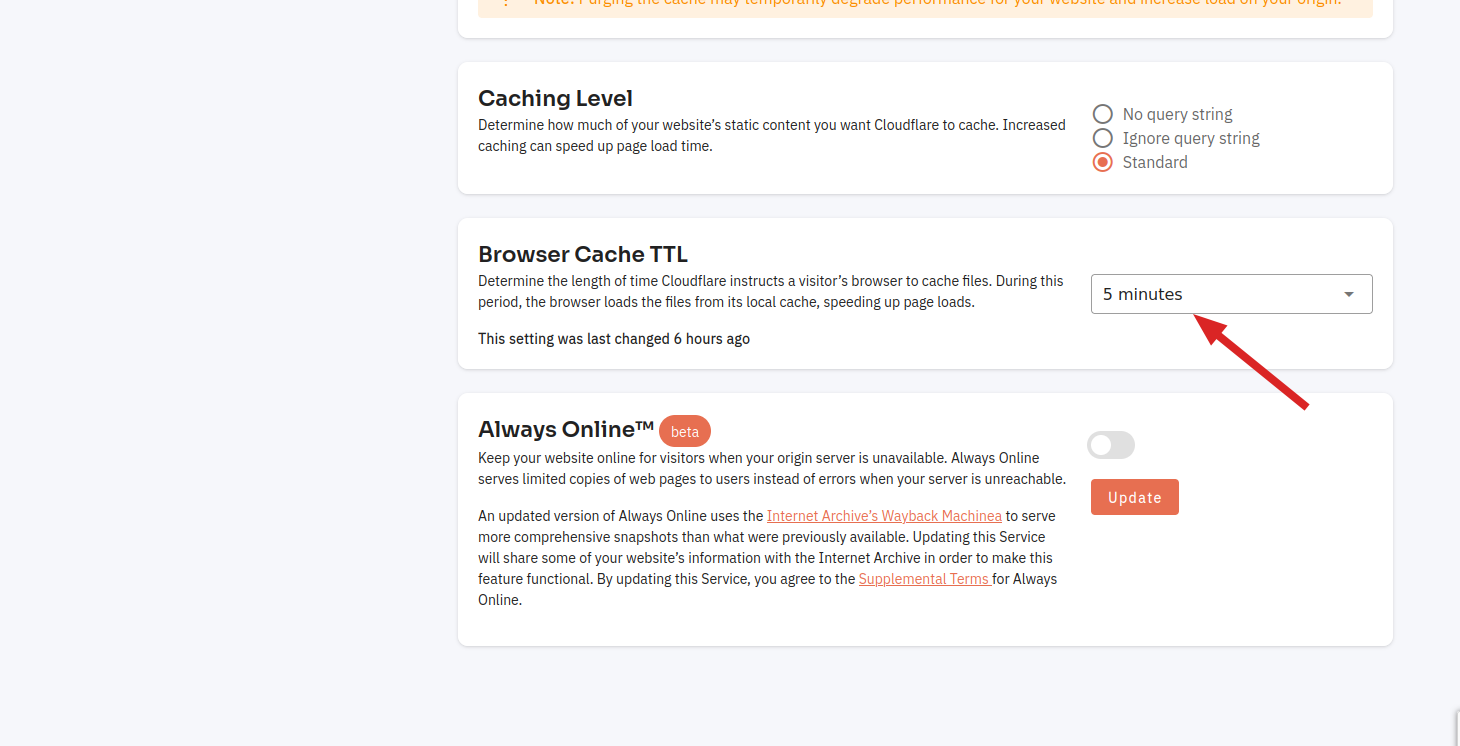
How to Change Browser Cache TTL?
Browser cache Time To Live (TTL) is the length of time that a web browser should store and use a cache of a webpage before checking for updates or refreshing the cache. This helps to speed up the loading of webpages, as the browser can retrieve resources from the cache rather than fetching them from the server again.
Tutorial :
You can watch the Video or Continue reading the post.
Follow the steps below to Change Browser Cache TTL.
Navigate to the Setting (Use this link to view How to Navigate).
Here You can change the Browser Cache TTL.
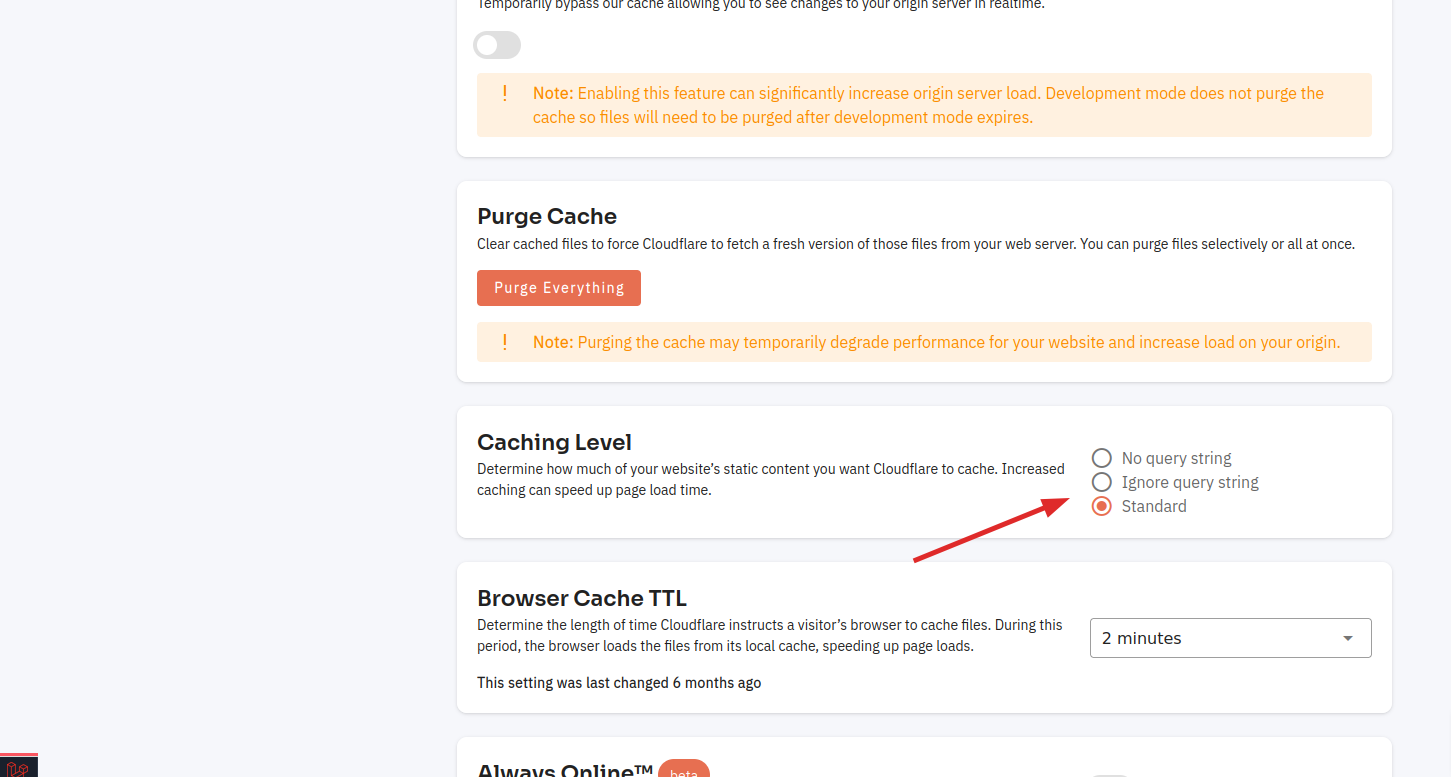
How to Change Caching level?
Caching level refers to the different levels at which caching can be implemented in a system or application. Caching is a technique used to store frequently accessed data in a temporary storage location (such as memory or a disk) so that it can be quickly retrieved later. There are various levels at which caching can be implemented, including client-side caching, server-side caching, and network caching.
Tutorial :
You can watch the Video or Continue reading the post.
Follow the steps below to Change Caching level.
Navigate to the Setting (Use this link to view How to Navigate).
You can change caching level here.
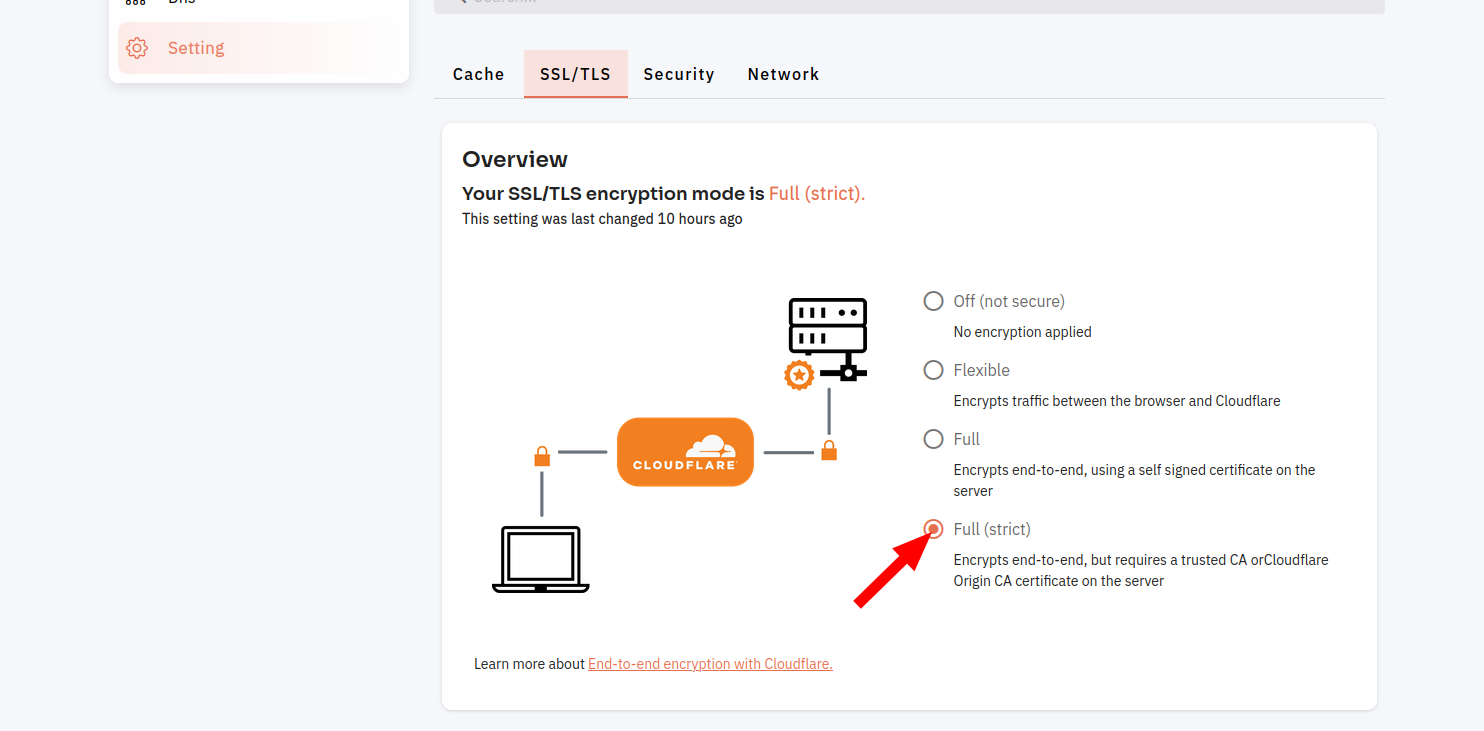
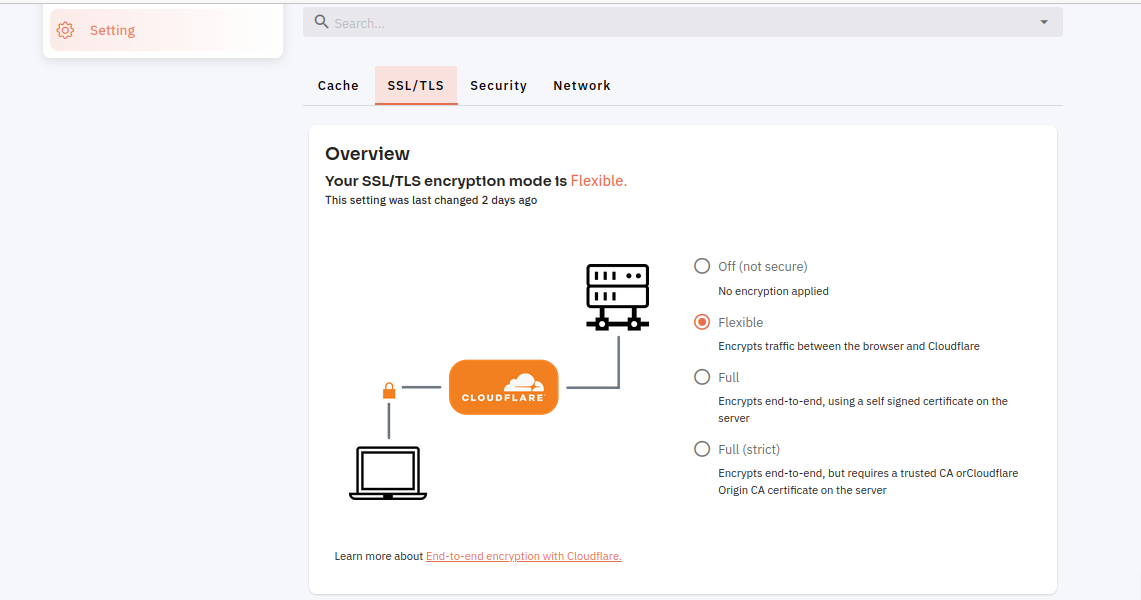
How to Change Encryption Mode ?
Encryption is a security measure that helps protect data from unauthorized access. It converts plaintext data into a coded form that can only be accessed by someone with the correct decryption key. There are various encryption modes that can be used to secure data, each with its own set of advantages and disadvantages.
Tutorial :
You can watch the Video or Continue reading the post.
Follow the steps to Change the Encryption Mode.
Navigate to the SSL/TLS of Cloudflare (Use this link to view How to Navigate).
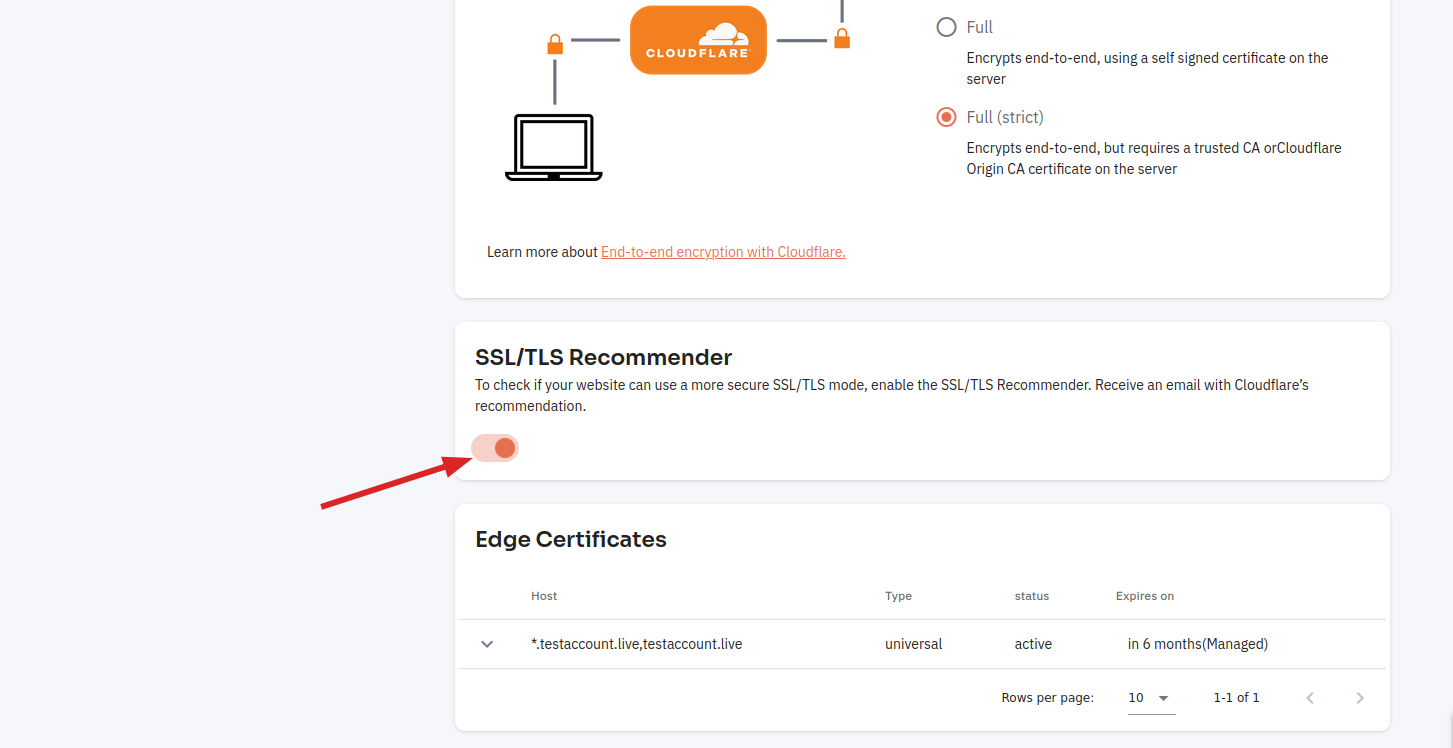
You can change your "Encryption Mode" Here.
How to Change SSL/TLS Recommender ?
You can change the SSL/TLS recommendations for your Cloudpanzer and ensure that your website is secure and properly configured for secure communication.
Tutorial :
You can watch the Video or Continue reading the post.
Follow the steps to Change the Recommender.
Navigate to the SSL/TLS of Cloudflare (Use this link to view How to Navigate).
Enable Recommender :
Click on the Switch button.
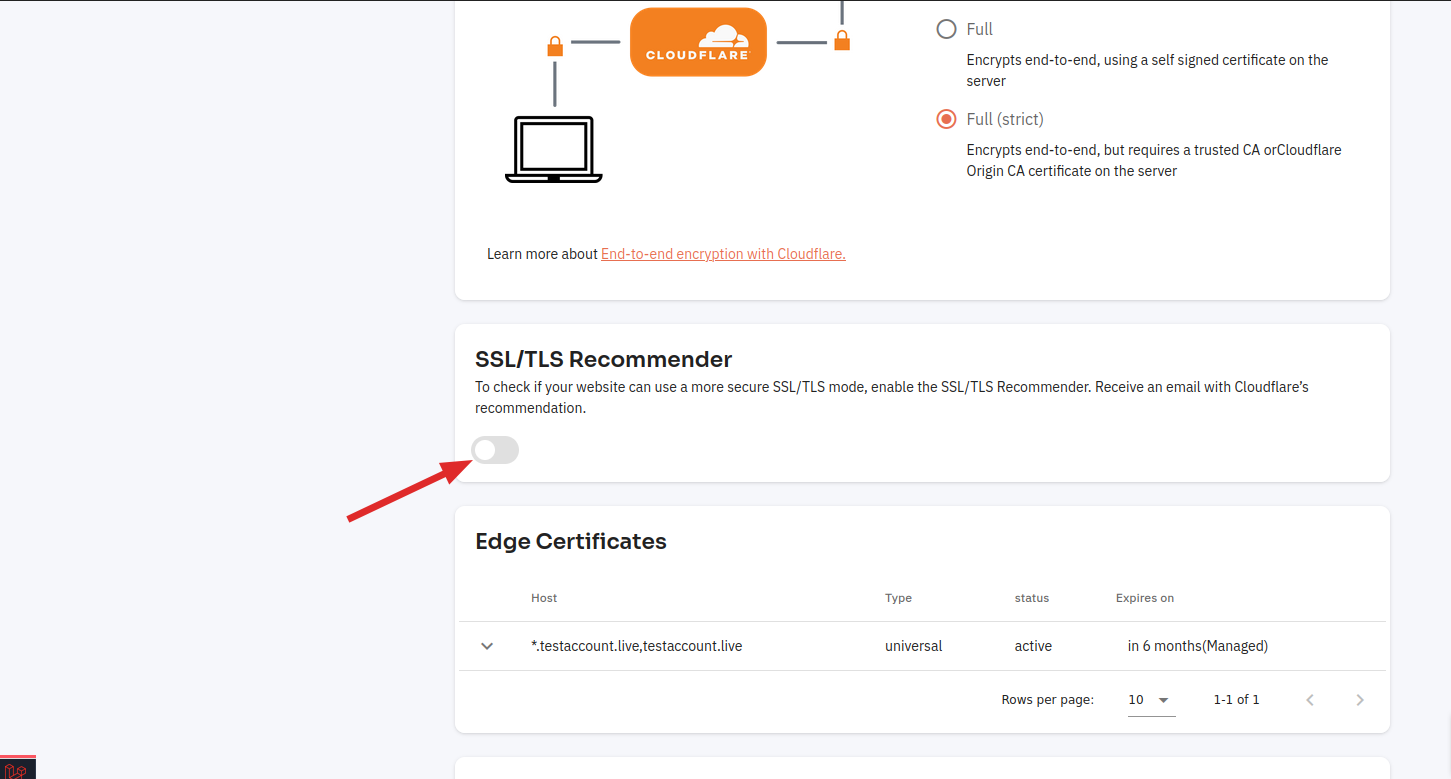
Here, you can see the recommender changed successfully.
Disable Recommender :
Click on the Switch button.
Here, you can see the recommender changed successfully.
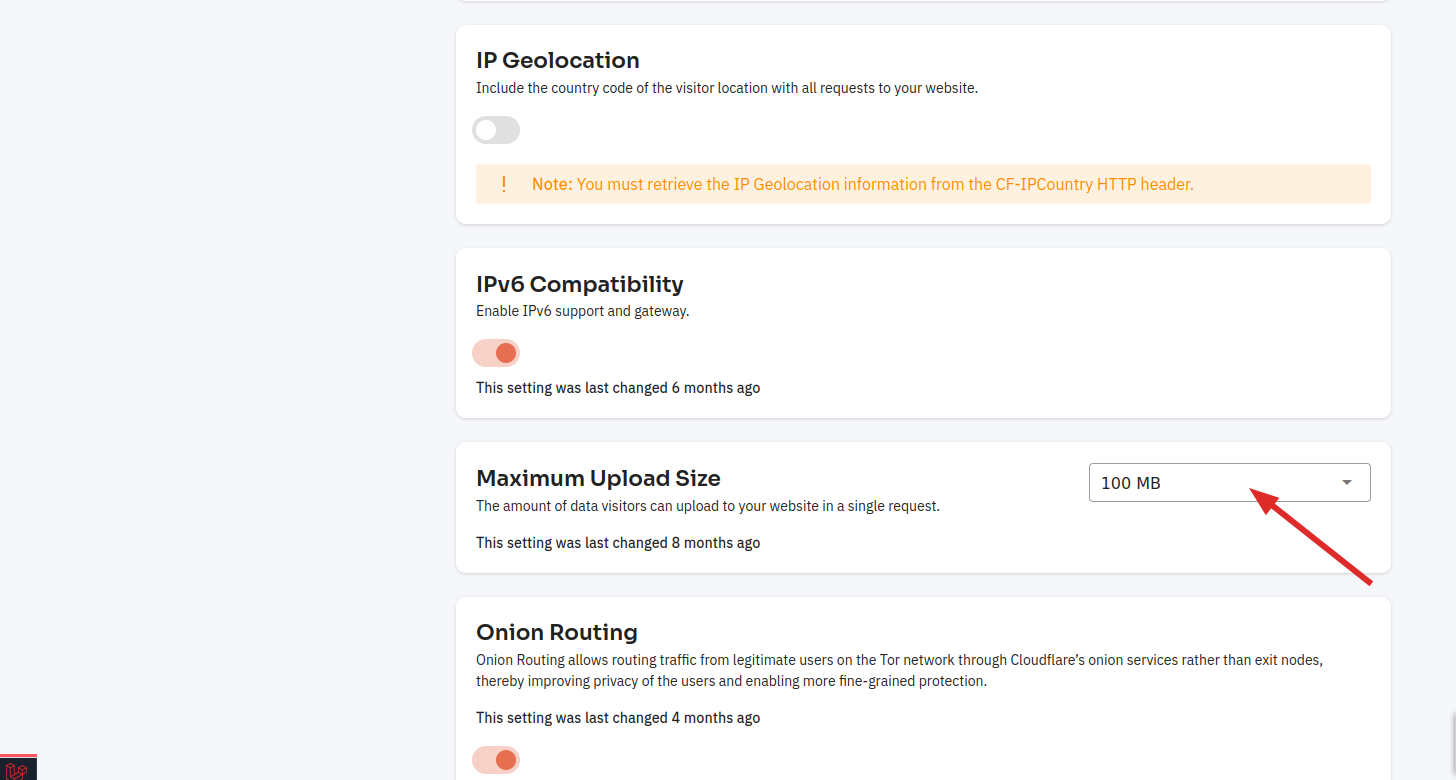
How to change the maximum upload size?
If you are trying to upload a file to a Cloudpanzer and are encountering an error message stating that the file exceeds the maximum upload size, it is likely that the Cloudpanzer has a set limit on the size of files that can be uploaded. This limit is often imposed to prevent users from uploading excessively large files, which can consume a lot of server resources and potentially cause performance issues.
Follow the steps below to change the Maximum upload size.
Tutorial :
You can watch the Video or Continue reading the post.
Here you can change the Maximum Upload Size.
Navigate to the Network Settings of Cloudflare (Use this link to view How to Navigate).
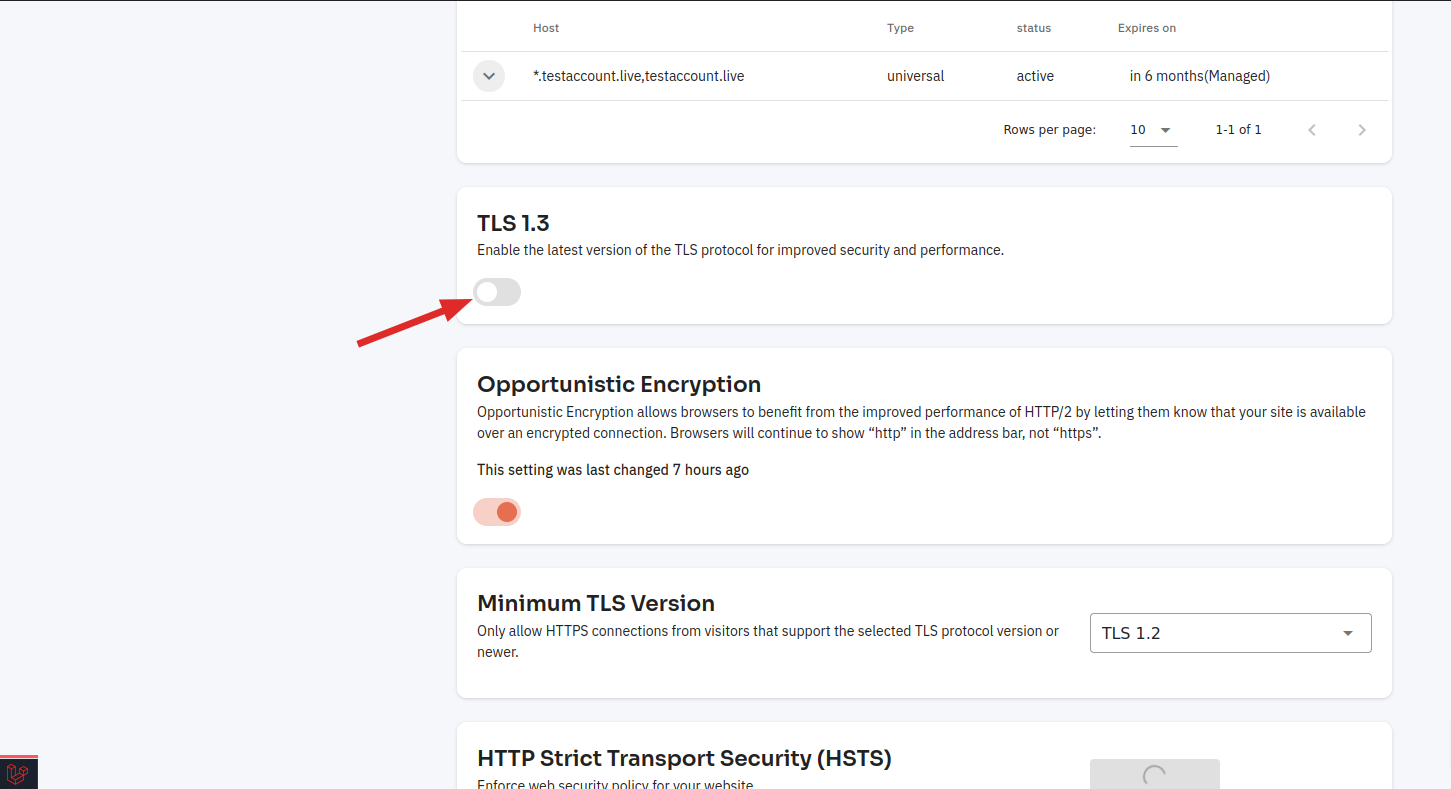
How to Change TLS Latest Version ?
Transport Layer Security (TLS) is a widely used protocol for securing communication over the internet. It is designed to prevent eavesdropping, tampering, and message forgery, and is used in a variety of applications, including email, web browsing, and online transactions.
Tutorial :
You can watch the Video or Continue reading the post.
Follow the steps to Change to the TLS Latest Version.
Navigate to the SSL/TLS of Cloudflare (Use this link to view How to Navigate).
Here, you can "Enable or Disable" the Latest Version of TLS.
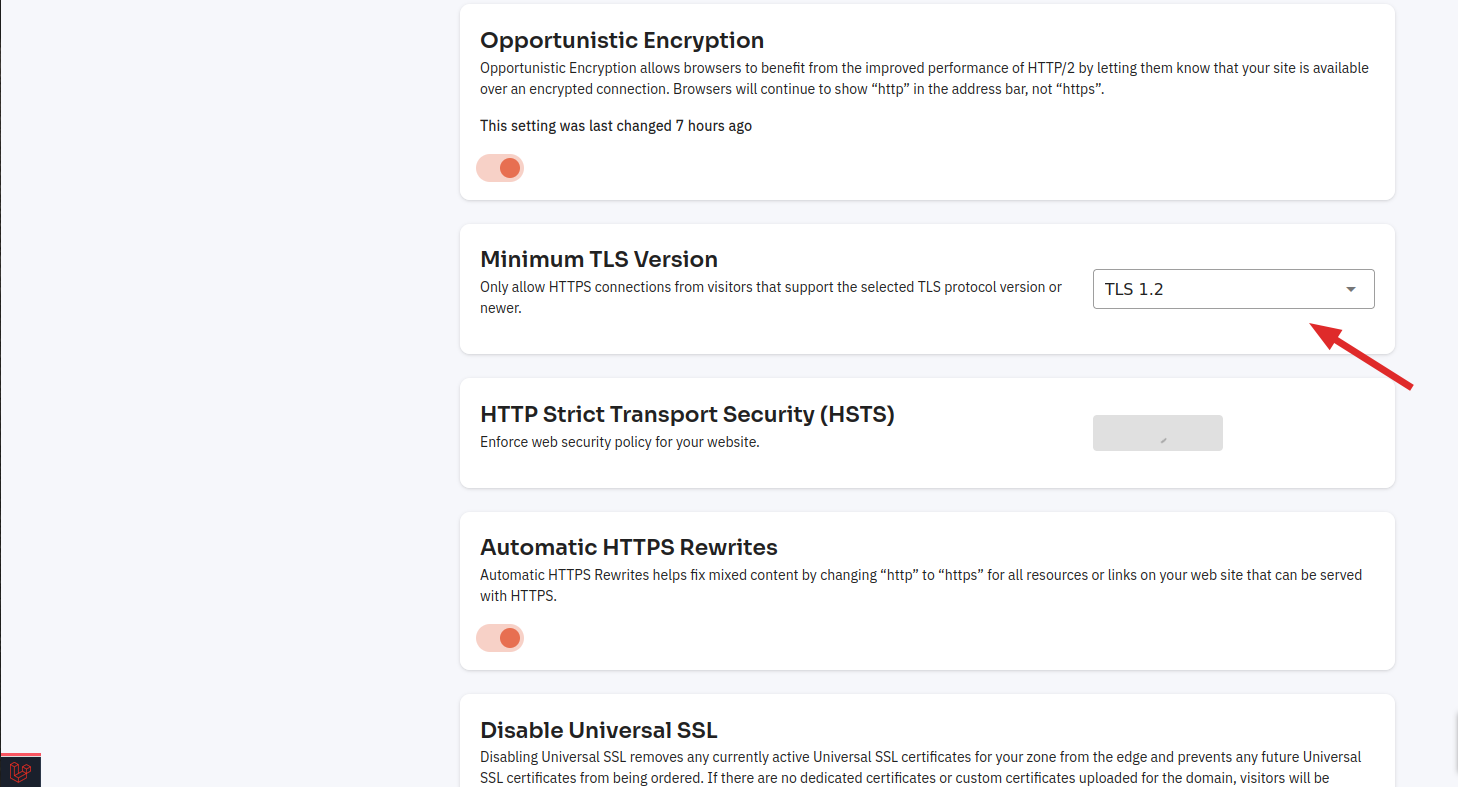
How to Change TLS Minimum Version?
Transport Layer Security (TLS) is a cryptographic protocol that provides secure communication over networks, including the internet. It is used to encrypt data transmission and authenticate the identity of the server and client. The minimum TLS version is the lowest version of the protocol that a server or client will accept for secure communication.
Tutorial :
You can watch the Video or Continue reading the post.
Follow the steps to Change to the TLS Minimum Version.
Navigate to the SSL/TLS of Cloudflare (Use this link to view How to Navigate).
Here you can select the Minimum TLS Version
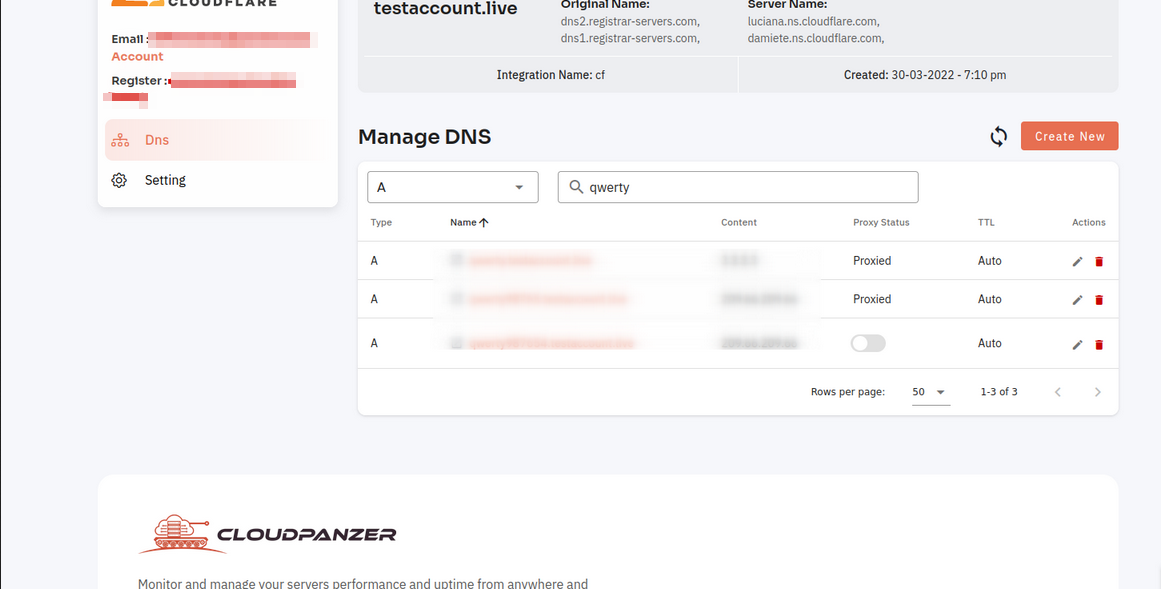
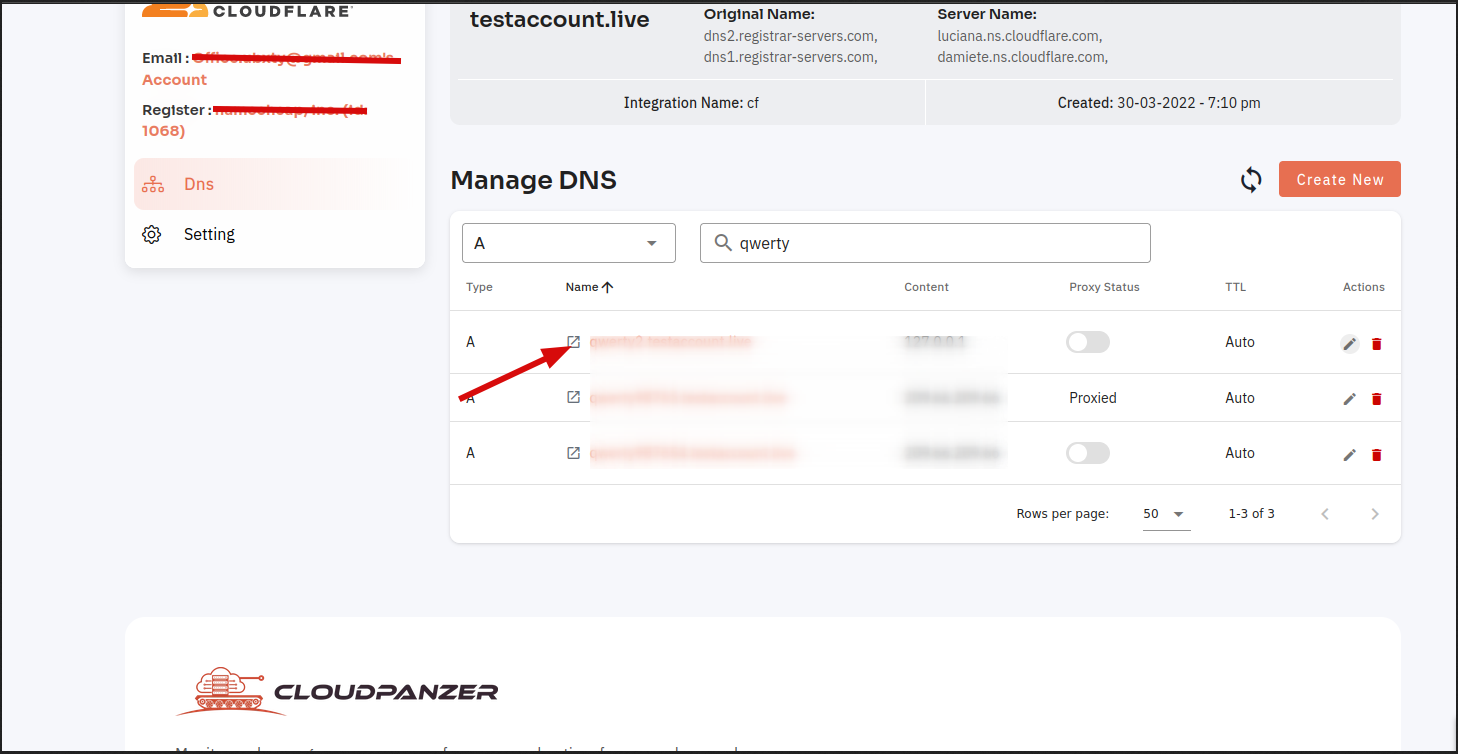
How to Check DNS Record ?
DNS, or Domain Name System, is an essential part of the internet that translates domain names into IP addresses. When you type a website's address into your web browser, the DNS server converts the domain name into the corresponding IP address, allowing your device to connect to the correct website.
Tutorial :
You can watch the Video or Continue reading the post.
Follow the steps below to Check DNS records.
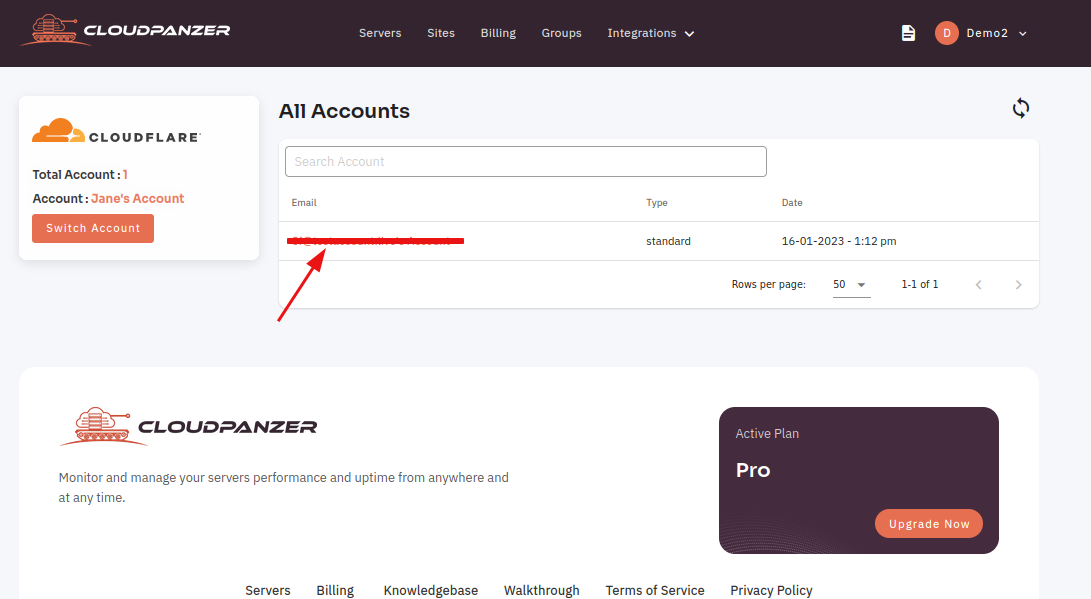
Navigate to the Home Page of CloudFlare(Use this link to view How to Navigate).
1. Click on your Account.
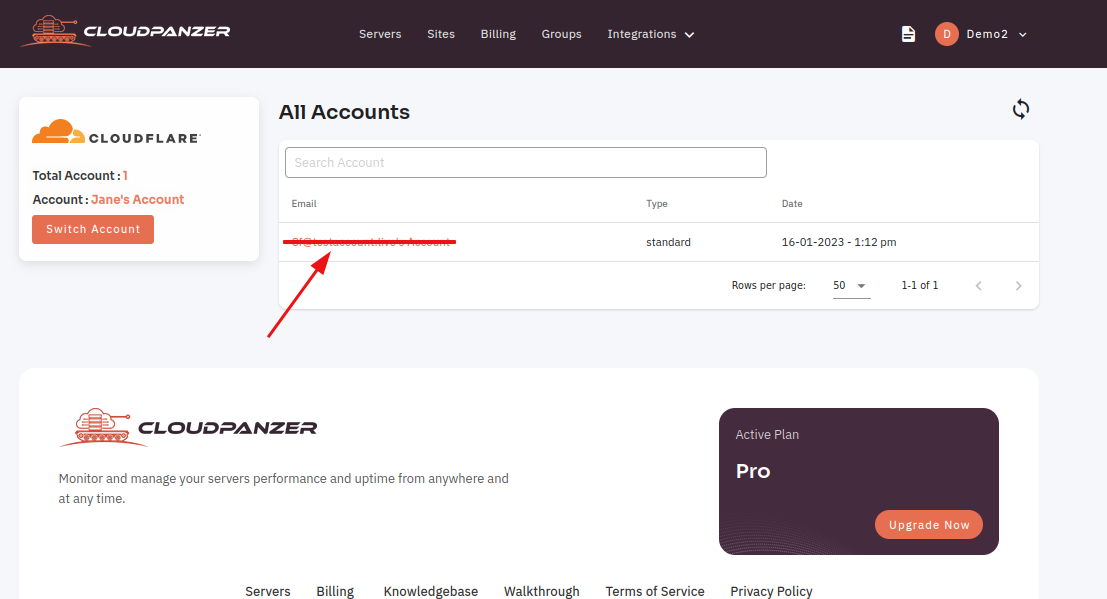
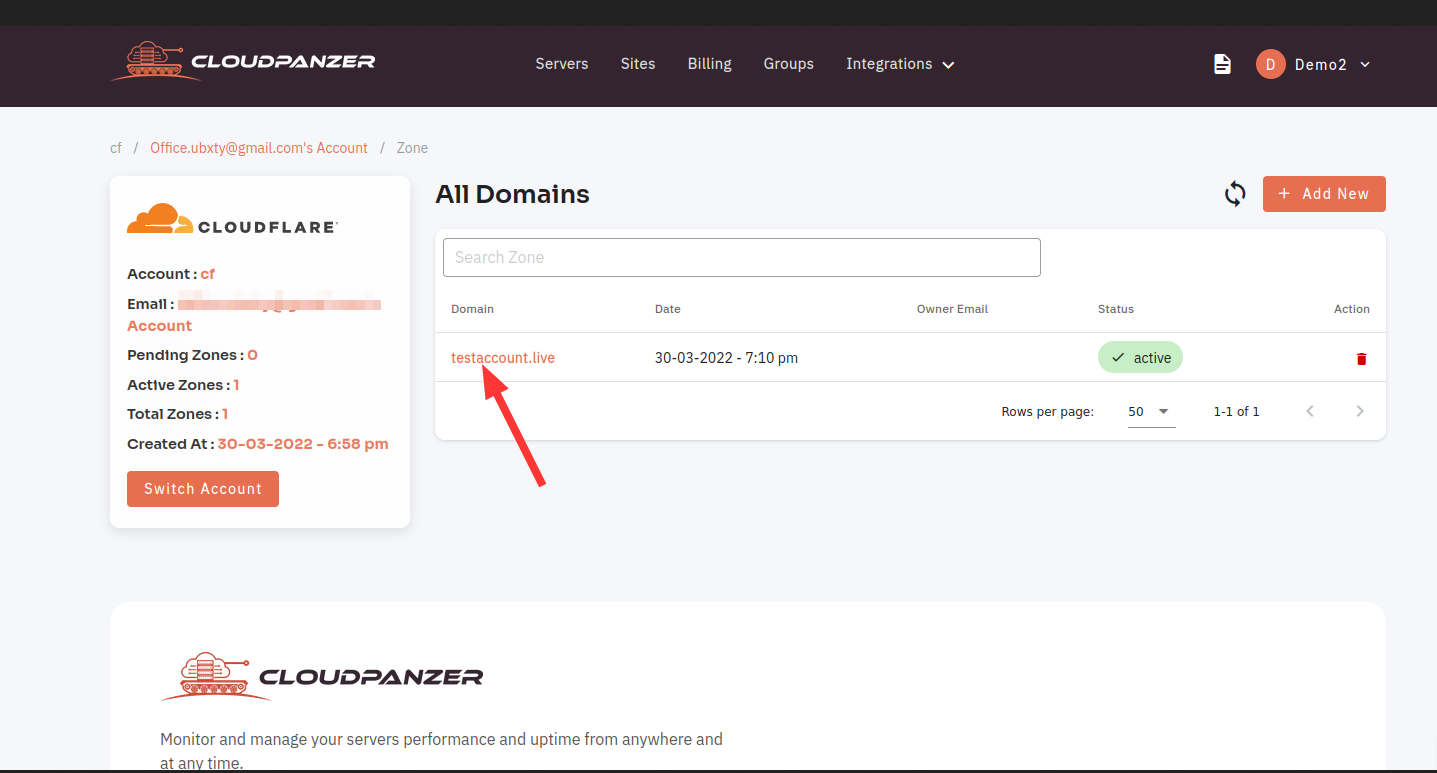
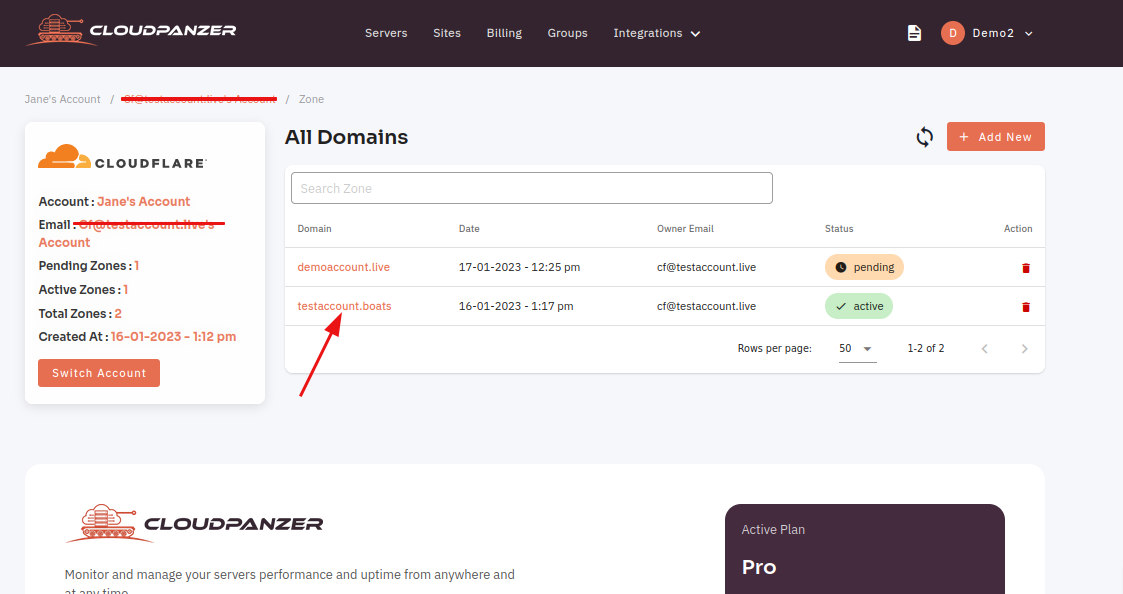
2. Click on the Domain.

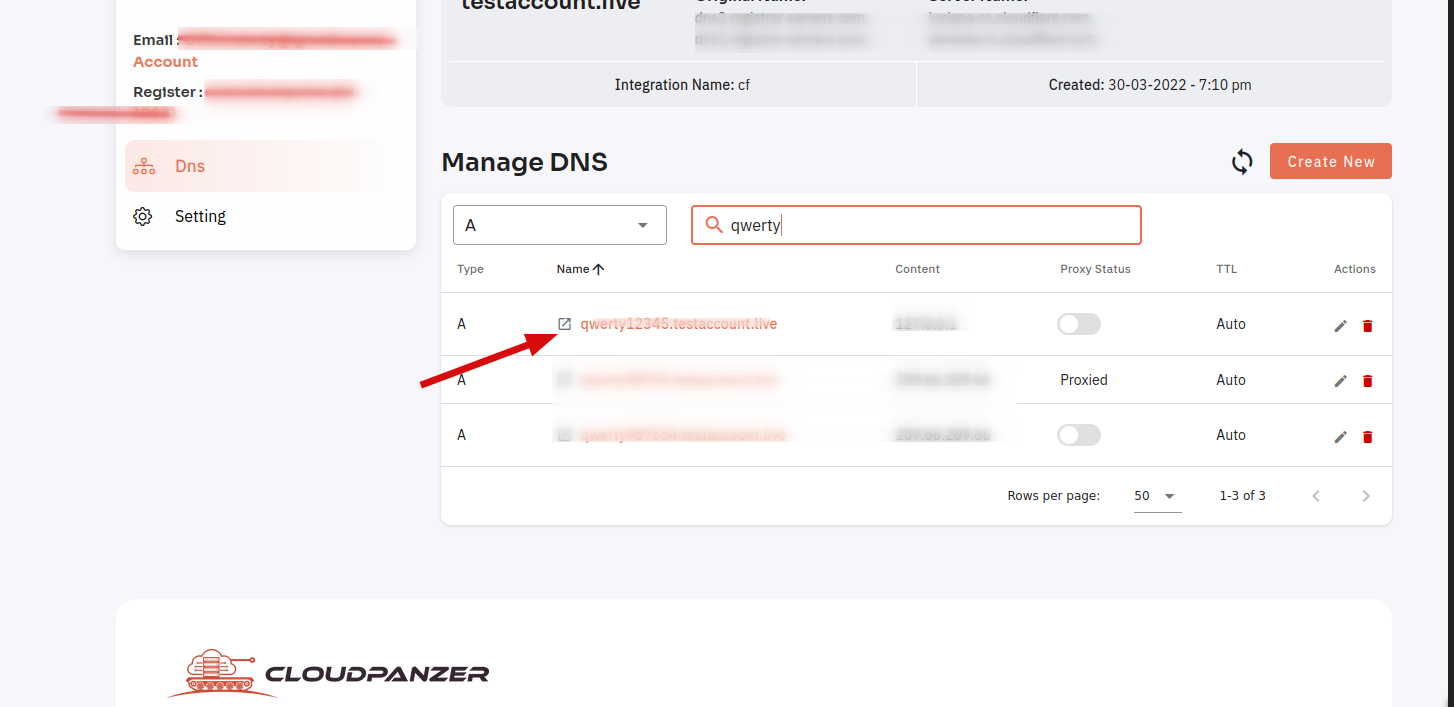
Here, you can see the Records.
How to Check SSL/TSL Edge Certificates?
An SSL/TLS certificate is a digital certificate that is used to establish a secure connection between a server and a client. The certificate contains information about the identity of the server and the organization that operates it, as well as a public key that is used to encrypt the communication between the server and the client.
Tutorial :
You can watch the Video or Continue reading the post.
Follow the steps to Check SSL/TSL Edge Certificates.
Navigate to the SSL/TLS of Cloudflare (Use this link to view How to Navigate).
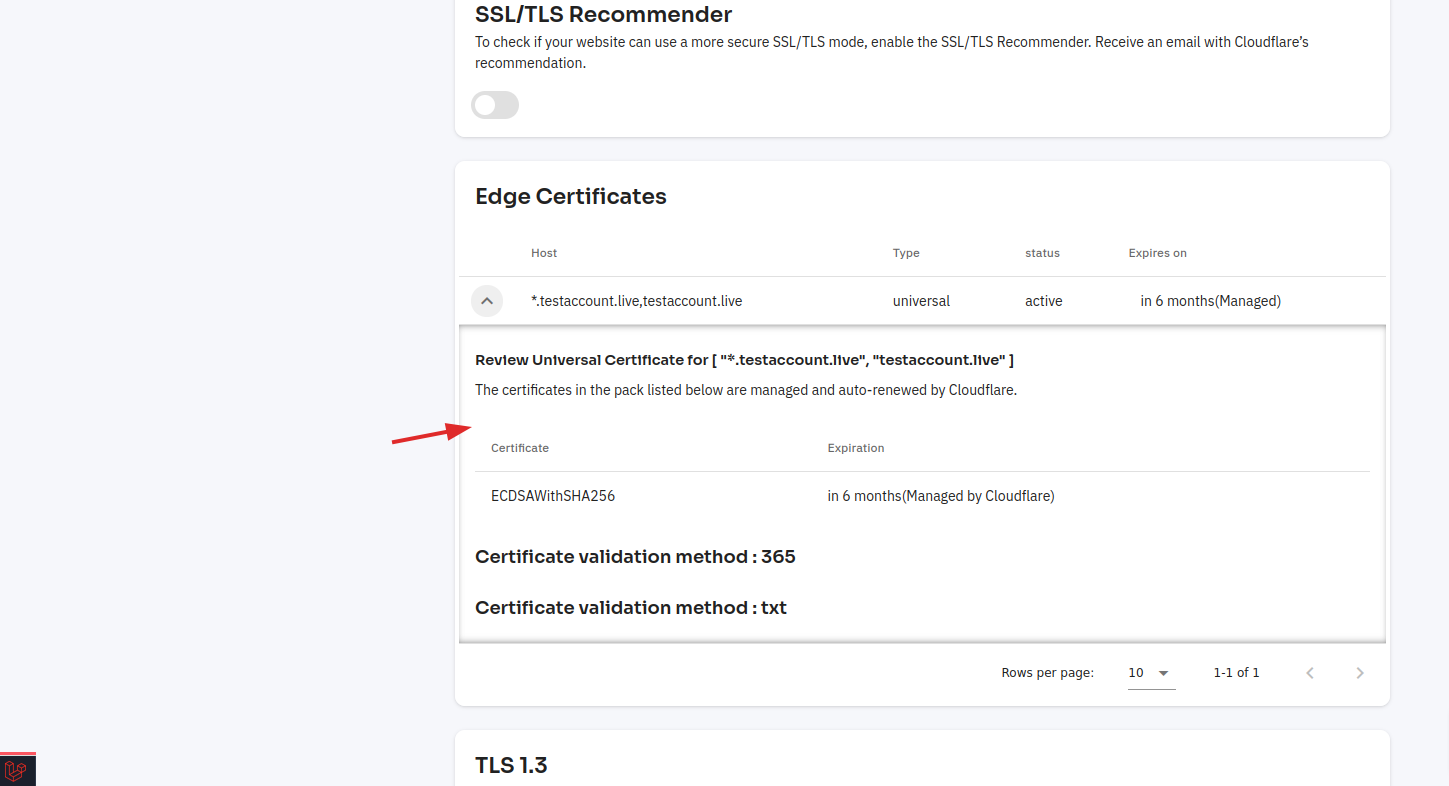
Click on the certificate.
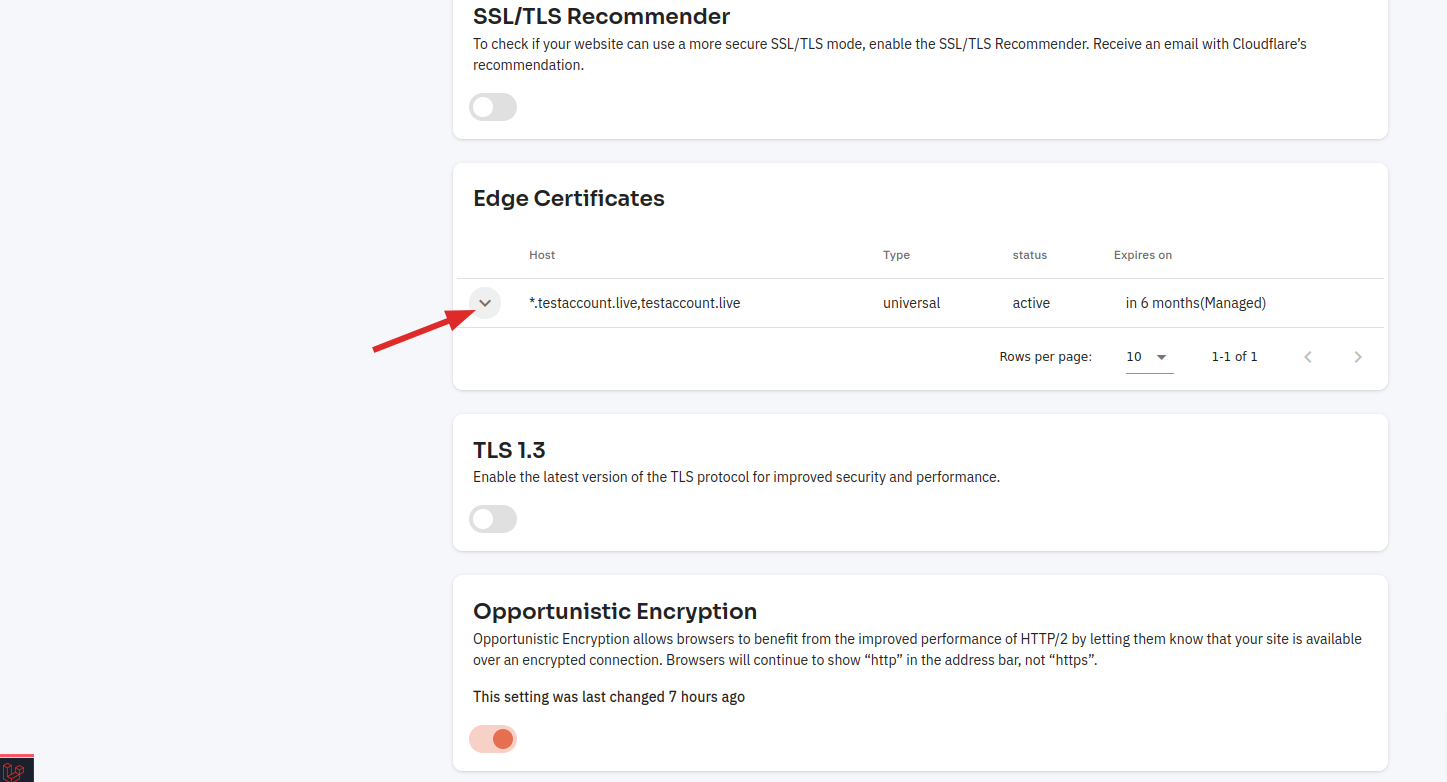
Here, you can see view SSL/TLS Edge certificates.
How to create Website on CloudFlare?(pending)
Cloudflare is a cloud-based service that helps improve the security and performance of your website. It offers a range of features including DDoS protection, content delivery network (CDN) services, and website optimization tools.
Follow the steps below to check Cloudflare Websites.
Navigate to the Home Page of CloudFlare(Use this link to view How to Navigate).
1. Click on your Account.
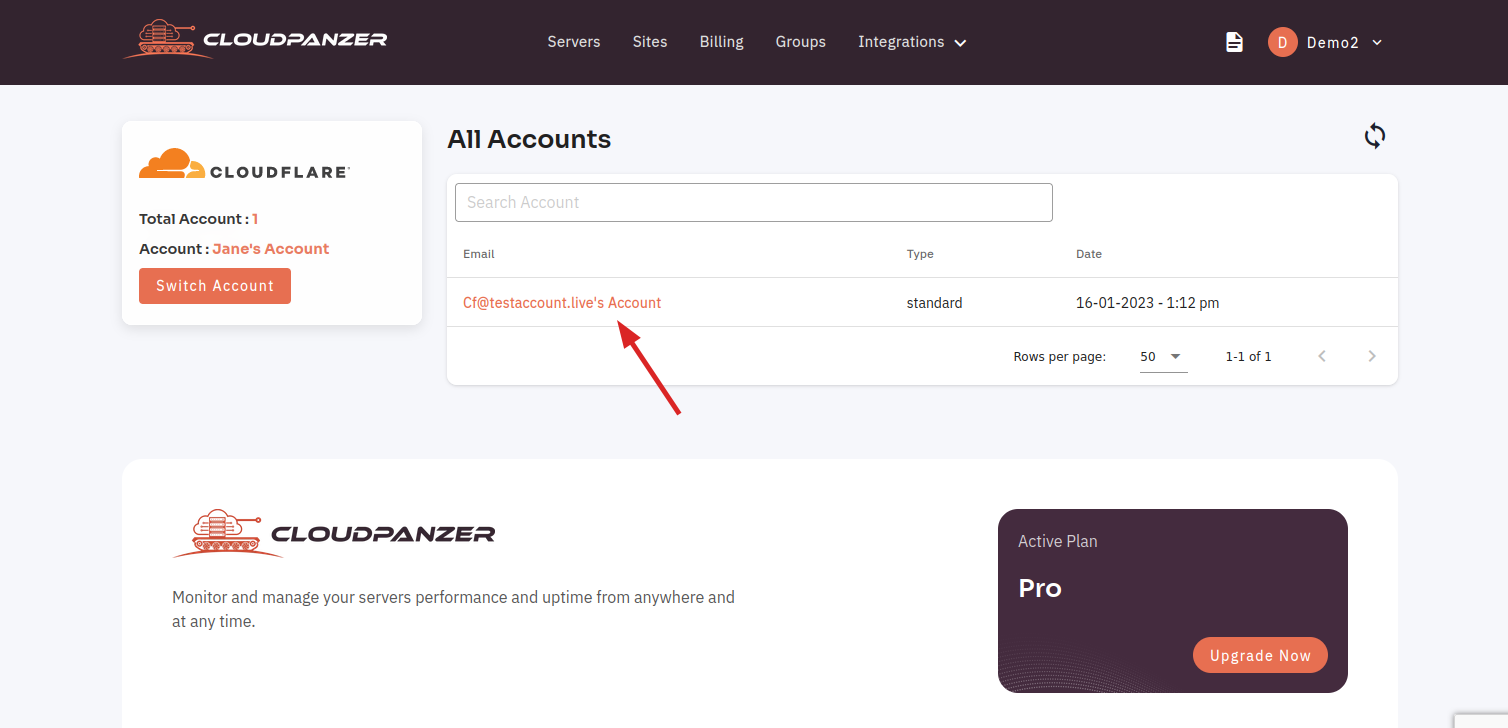
2. Click on the "add new" button.
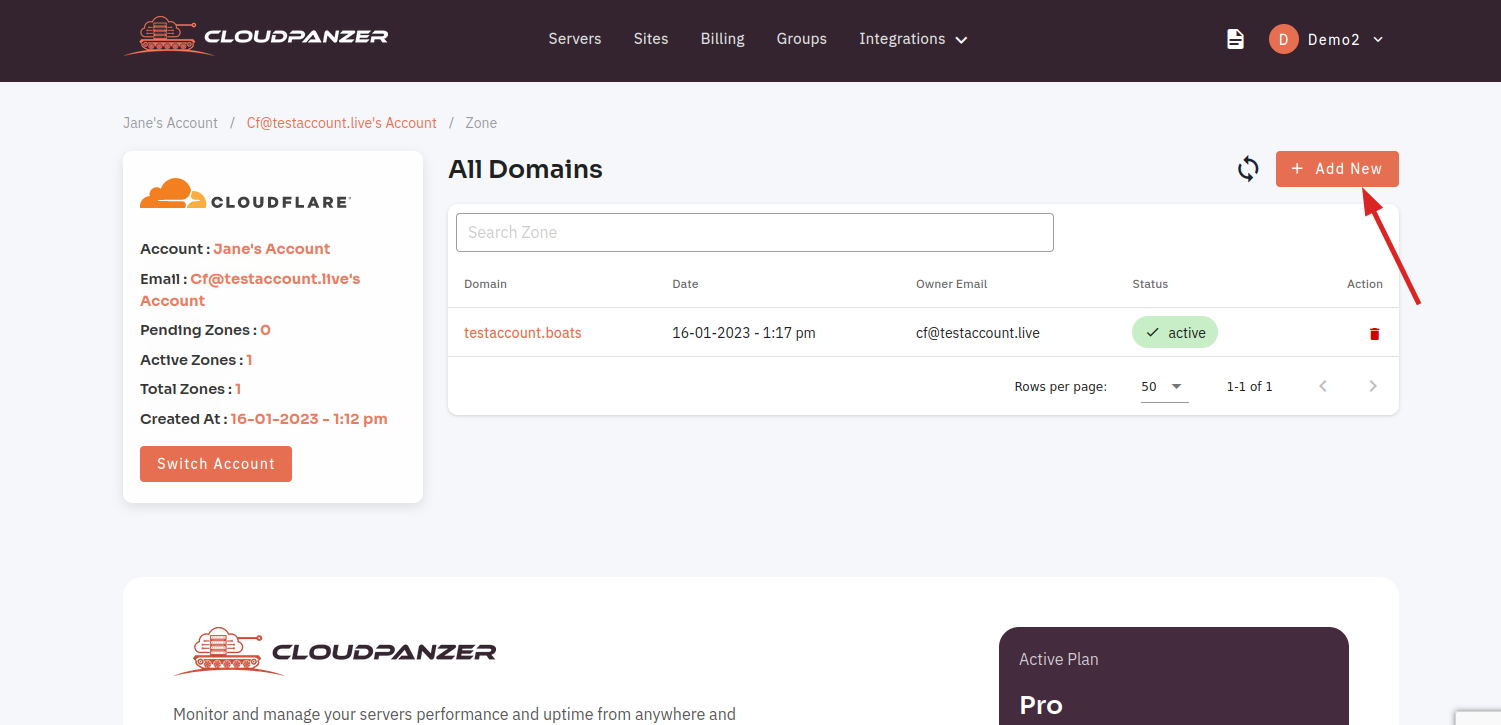
3. fill all required fields and Click on the add site button.
How to Delete DNS Record?
Deleting a DNS record is a simple process that can be accomplished by logging in to the account where you manage your DNS records, locating the DNS record you want to delete, and clicking the delete or remove button. Just be sure to save your changes and allow for sufficient time for the DNS changes to propagate.
Tutorial :
You can watch the Video or Continue reading the post.
Follow the steps below to delete DNS records.
Navigate to the DNS Dashboard (Use this link to view How to Navigate)
- Click on the delete icon.
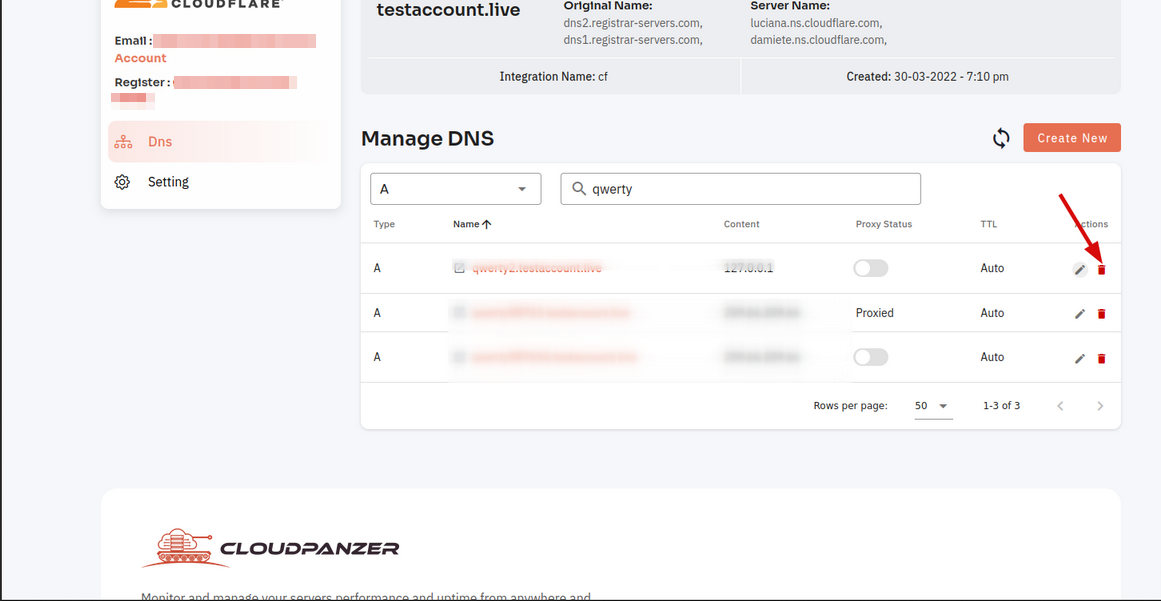
2. Click on the "Delete" button,
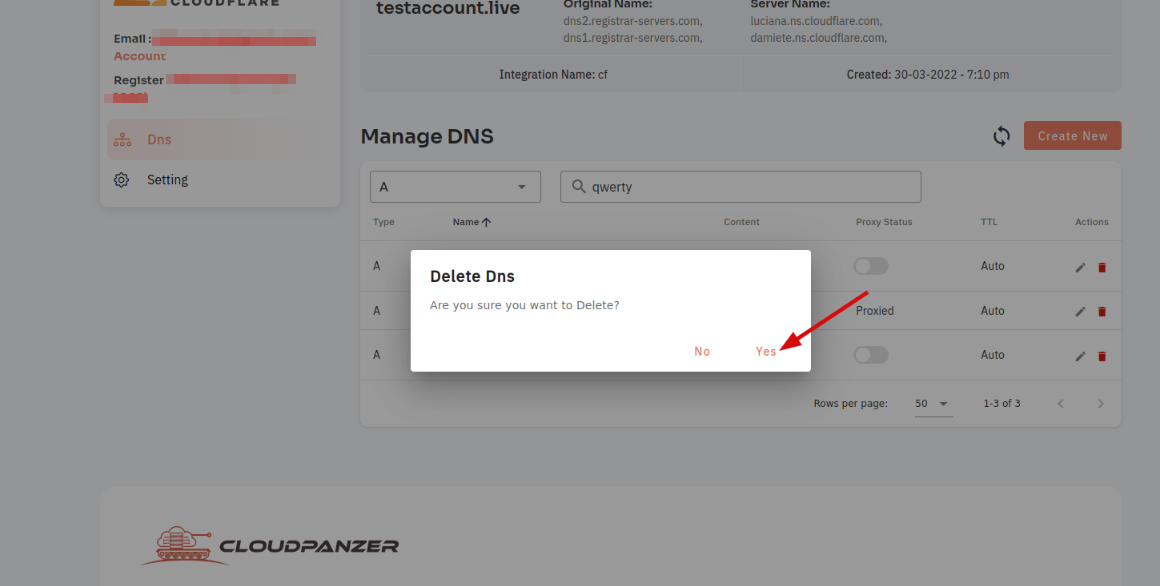
You can see the record is deleted Successfully.
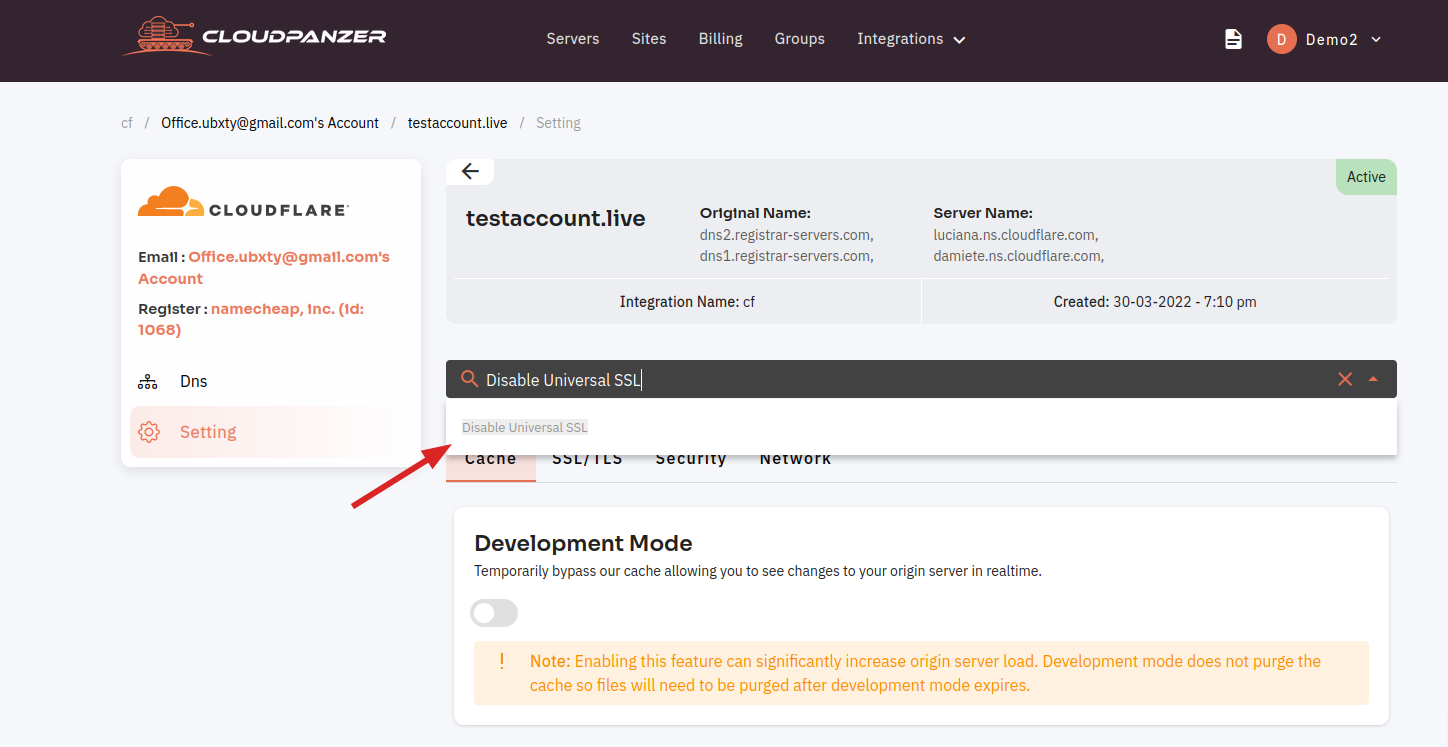
How to Disable Universal SSL ?
If you are using CloudPanzer and have enabled Universal SSL, you may occasionally encounter a "Universal SSL Pending" message when accessing your website. This message indicates that the SSL certificate for your website is in the process of being issued or renewed.
Tutorial :
You can watch the Video or Continue reading the post.
Follow the steps to Disable Universal SSL.
Navigate to the SSL/TLS of Cloudflare (Use this link to view How to Navigate).
Search "Disable Universal SSL" and Click on the "Disable Universal SSL" Option.
Disable Universal SSL:
Click on the "Disable Universal SSL" button.
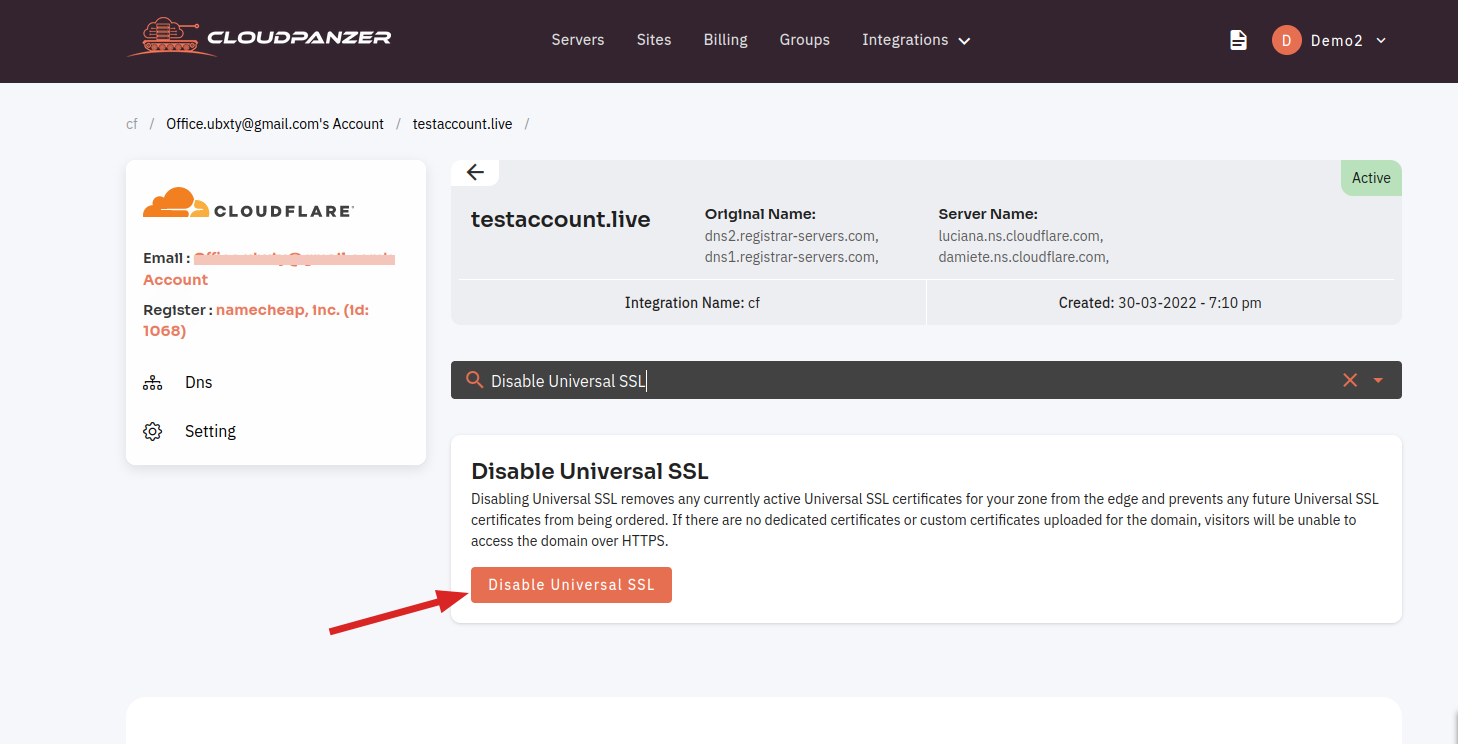
Confirm and Click the "Confirm" button.

Here, you can see universal SSL was disabled successfully.
How to Edit DNS Record?
Editing a DNS record can be a useful way to manage your domain name and website.
Tutorial :
You can watch the Video or Continue reading the post.
Follow the steps below to Edit DNS records.
Navigate to the DNS Dashboard (Use this link to view How to Navigate)
- Click on the Edit icon.

2. After Changes Click on the "Update" button.
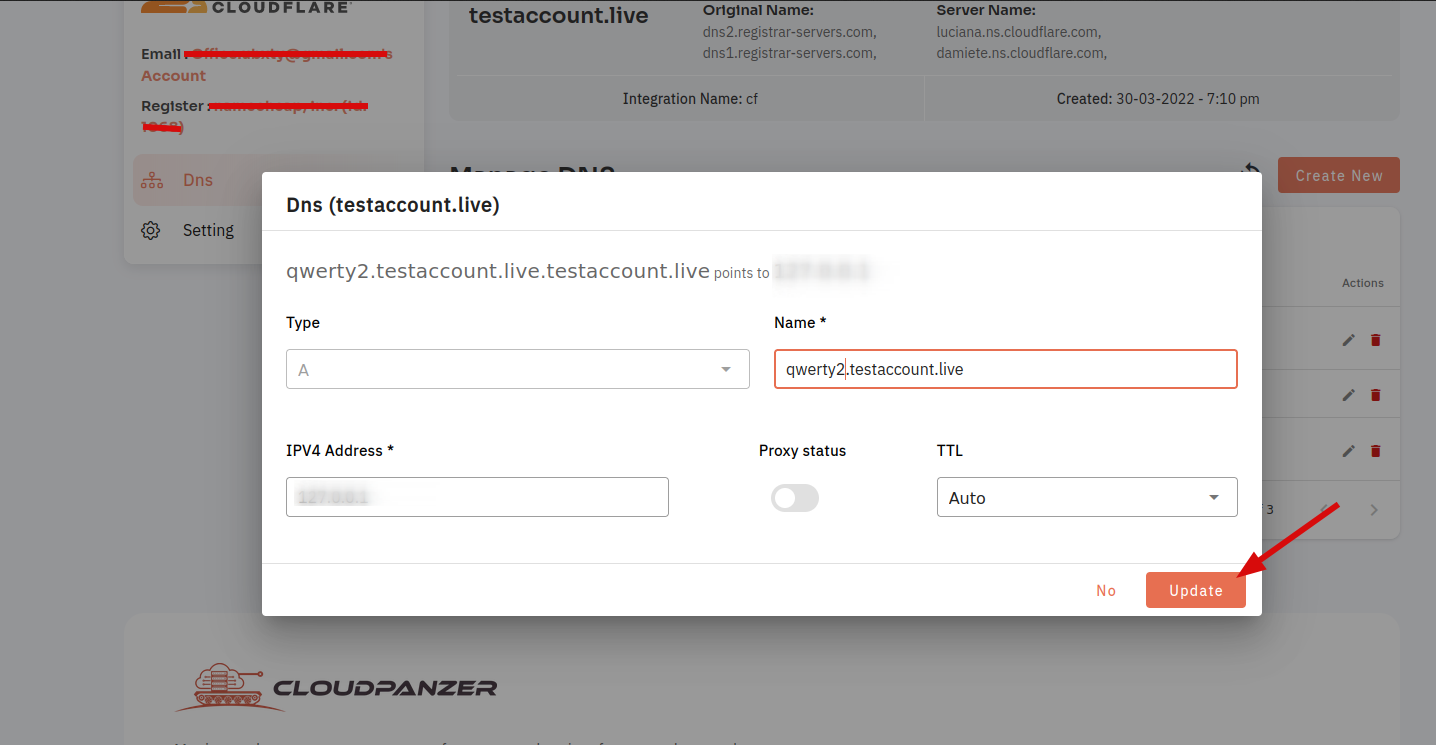
You can see information is updated Successfully.
How to Enable And Disable Always Online Mode?
Online mode refers to a state in which a device or system is connected to the internet and able to communicate with other devices or systems over the internet. This is in contrast to offline mode, in which a device or system is not connected to the internet and is unable to communicate with other devices or systems over the internet.
Tutorial :
You can watch the Video or Continue reading the post.
Follow the steps below to Enable And Disable Always Online Mode.
Navigate to the Setting (Use this link to view How to Navigate).
Enable Always Online Mode :
For "Always Online", on the switch button. OR Click on the update button.
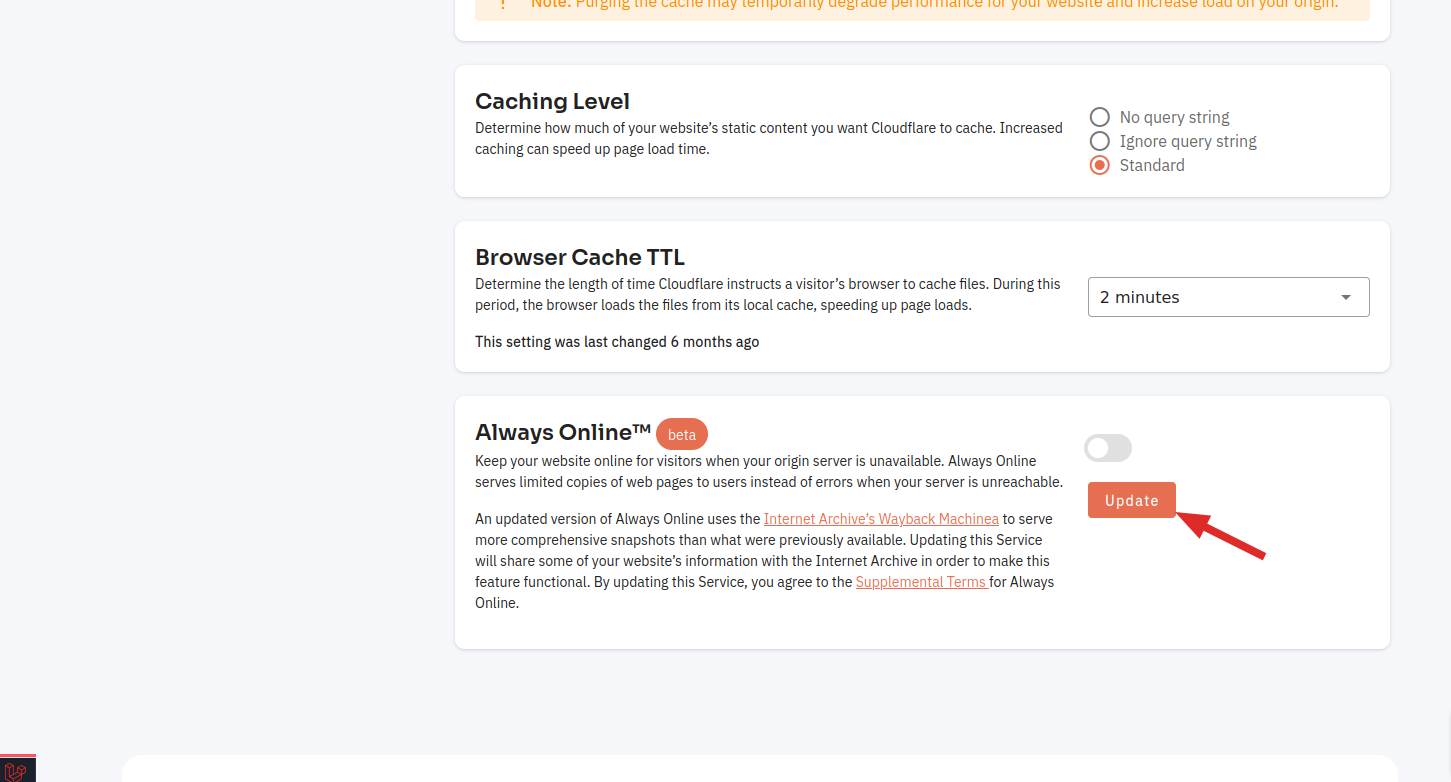
Here, you can see Always Online Mode Enabled successfully.

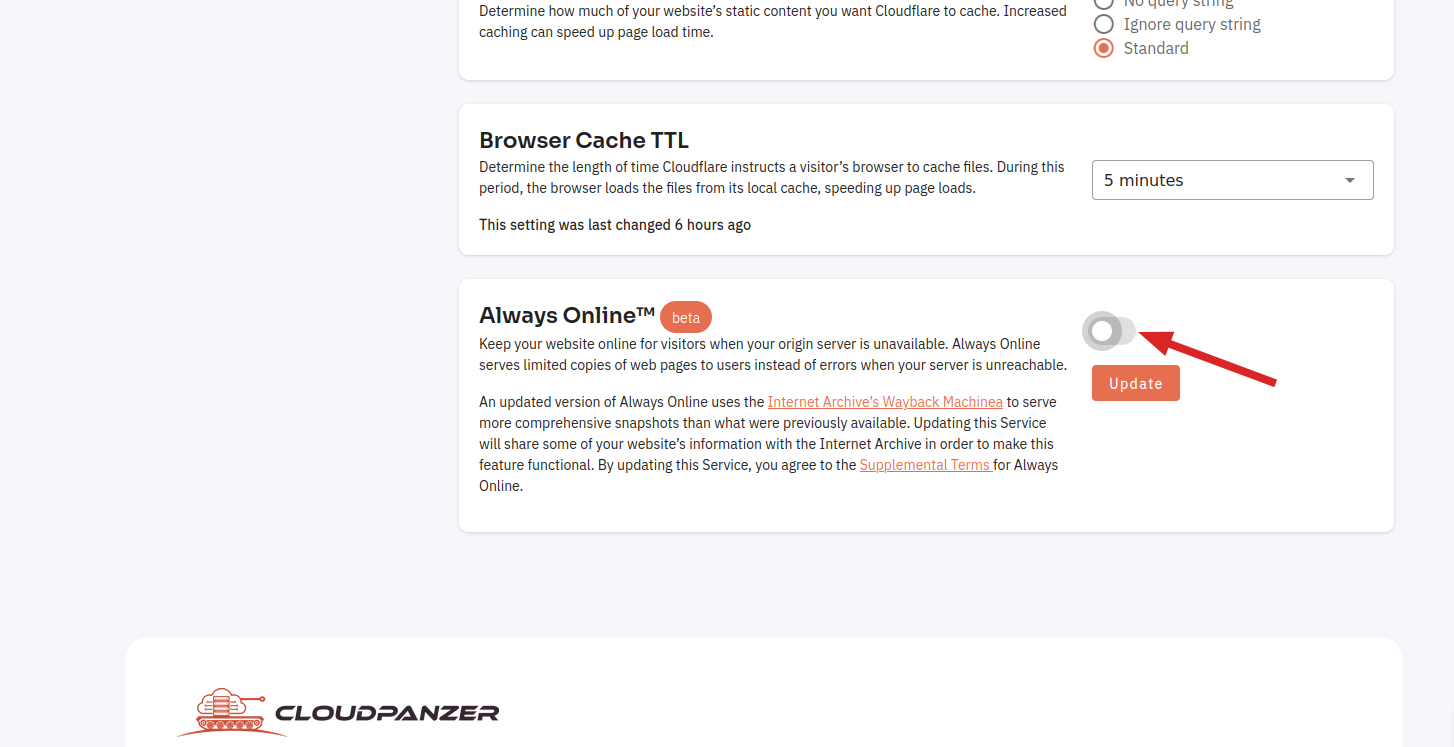
Disable Always Online Mode :
Click on the switch button.
Here, you can see Always Online Mode Disable successfully.
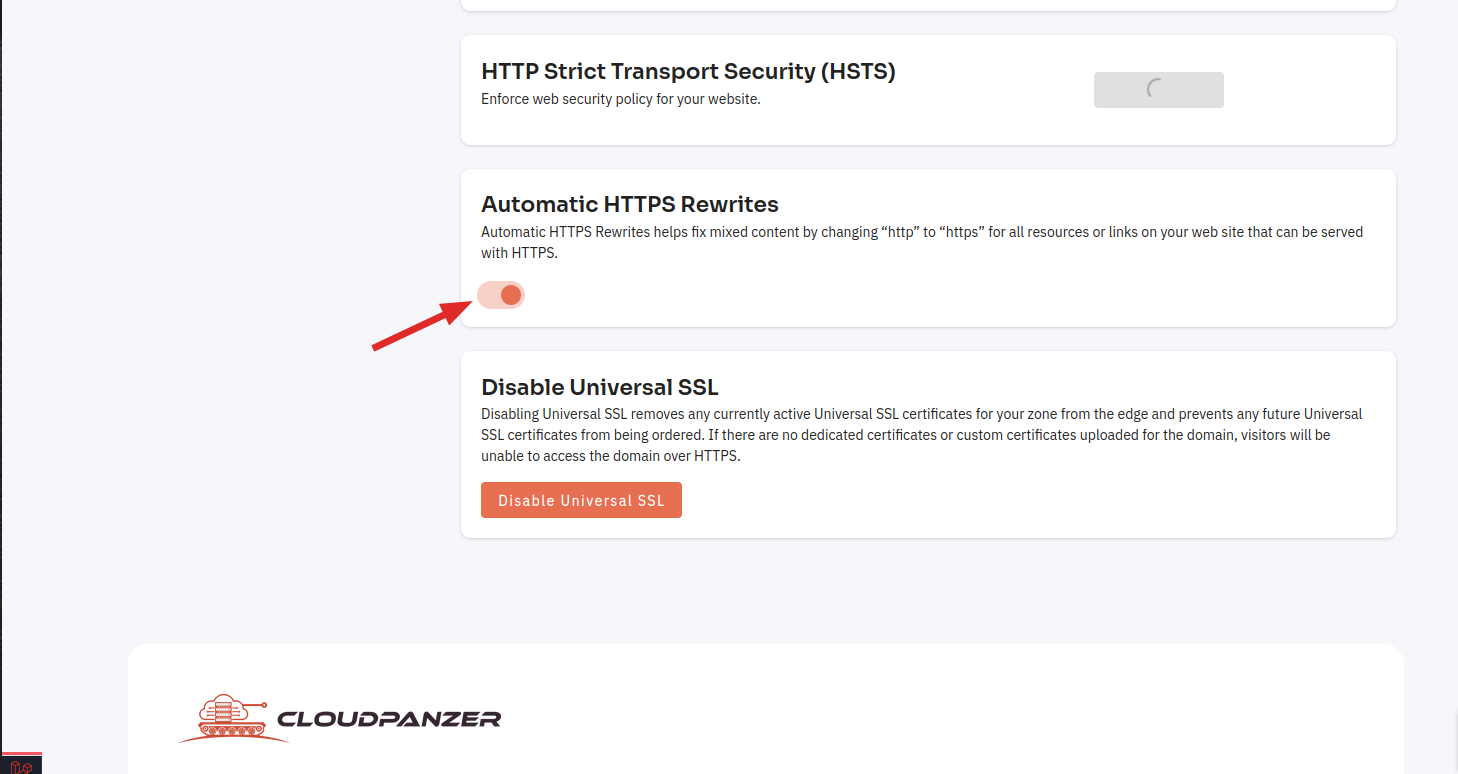
How to Enable and Disable Automatic HTTPS Rewrites ?
Automatic HTTPS Rewrites is a feature that allows a web server to automatically redirect HTTP traffic to HTTPS, the secure version of the HTTP protocol. This is important because HTTPS provides an encrypted connection between a client (such as a web browser) and a server, which helps to protect sensitive data such as passwords, credit card numbers, and other personal information from being intercepted by third parties.
Tutorial :
You can watch the Video or Continue reading the post.
Follow the steps to Enable and Disable Automatic HTTPS Rewrites.
Navigate to the SSL/TLS of Cloudflare (Use this link to view How to Navigate).
Here you can "Enable or Disable" the Automatic HTTPS Rewrites
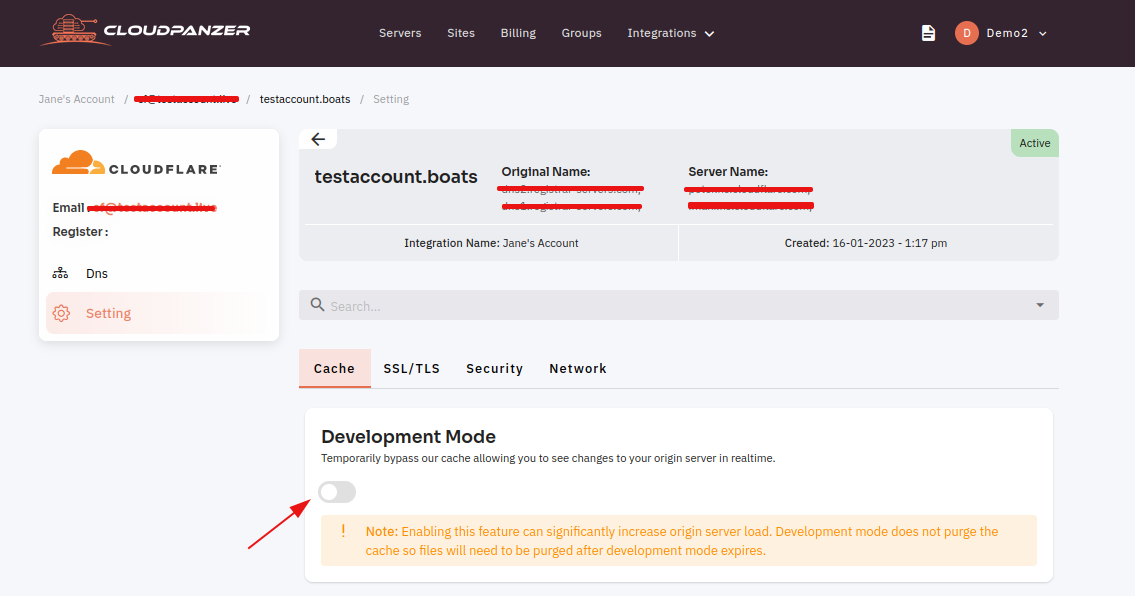
How to Enable And Disable Development Mode?
Development mode is a term that can refer to a variety of different things depending on the context in which it is used. In general, development mode refers to a state or configuration in which a system, device, or application is being developed, tested, or debugged.
Follow the steps below to Enable And Disable Development Mode.
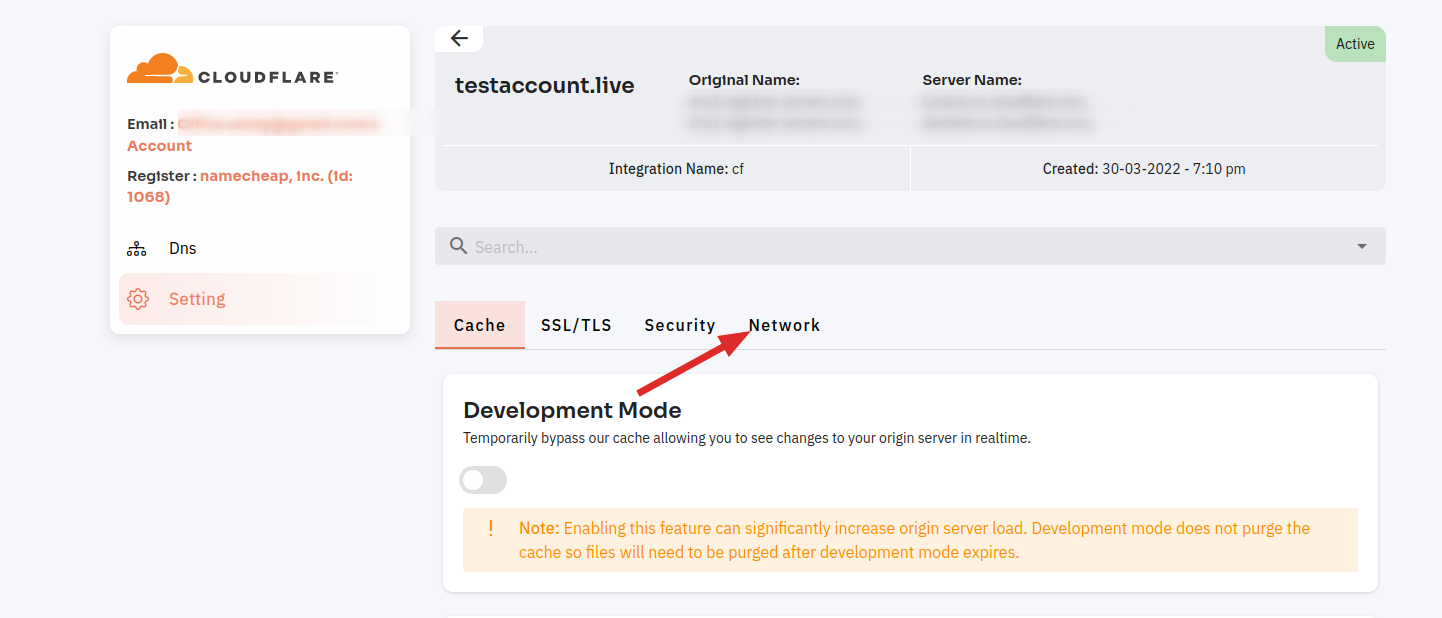
Navigate to the Setting (Use this link to view How to Navigate).
Enable Development Mode :
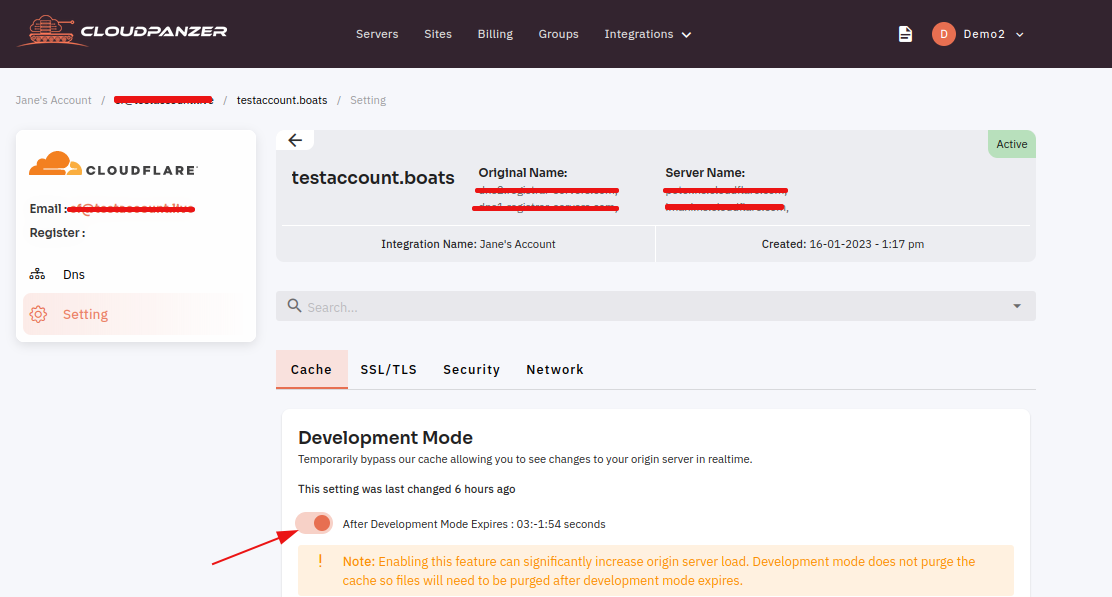
Click on the switch button.
Here, you can see Development Mode Enabled successfully.
Disable Development Mode :
Click on the switch button.
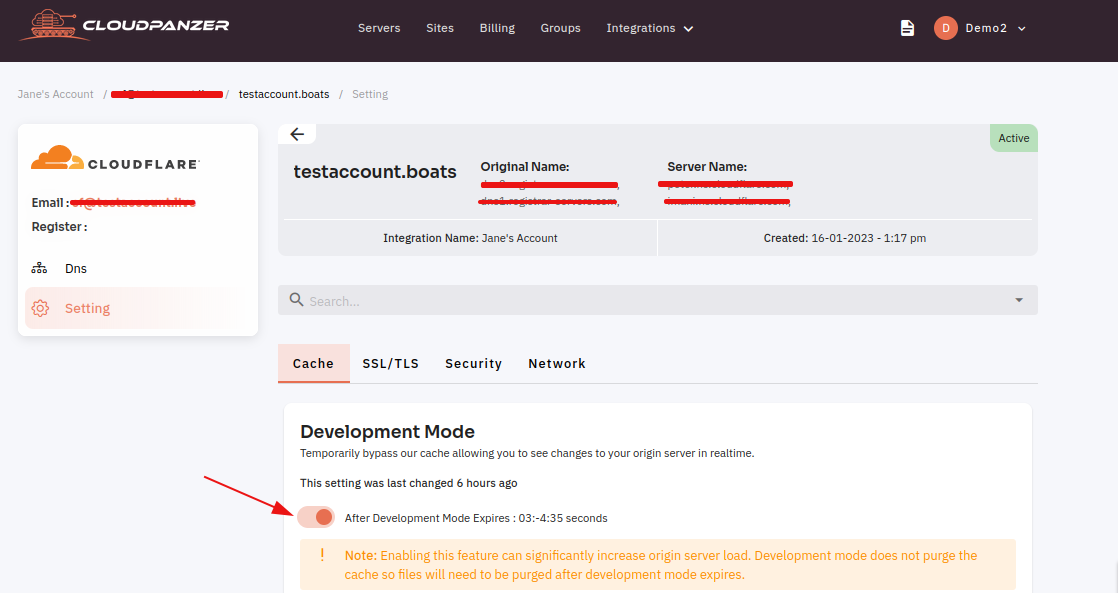
Here, you can see Development Mode Disable successfully.

How to Enable and Disable Opportunistic Encryption ?
Opportunistic encryption is a method of encrypting data transmission that occurs automatically whenever two systems communicate with each other over a network. It is used to secure data transmitted between systems without requiring any additional configuration or setup by the user.
Tutorial :
You can watch the Video or Continue reading the post.
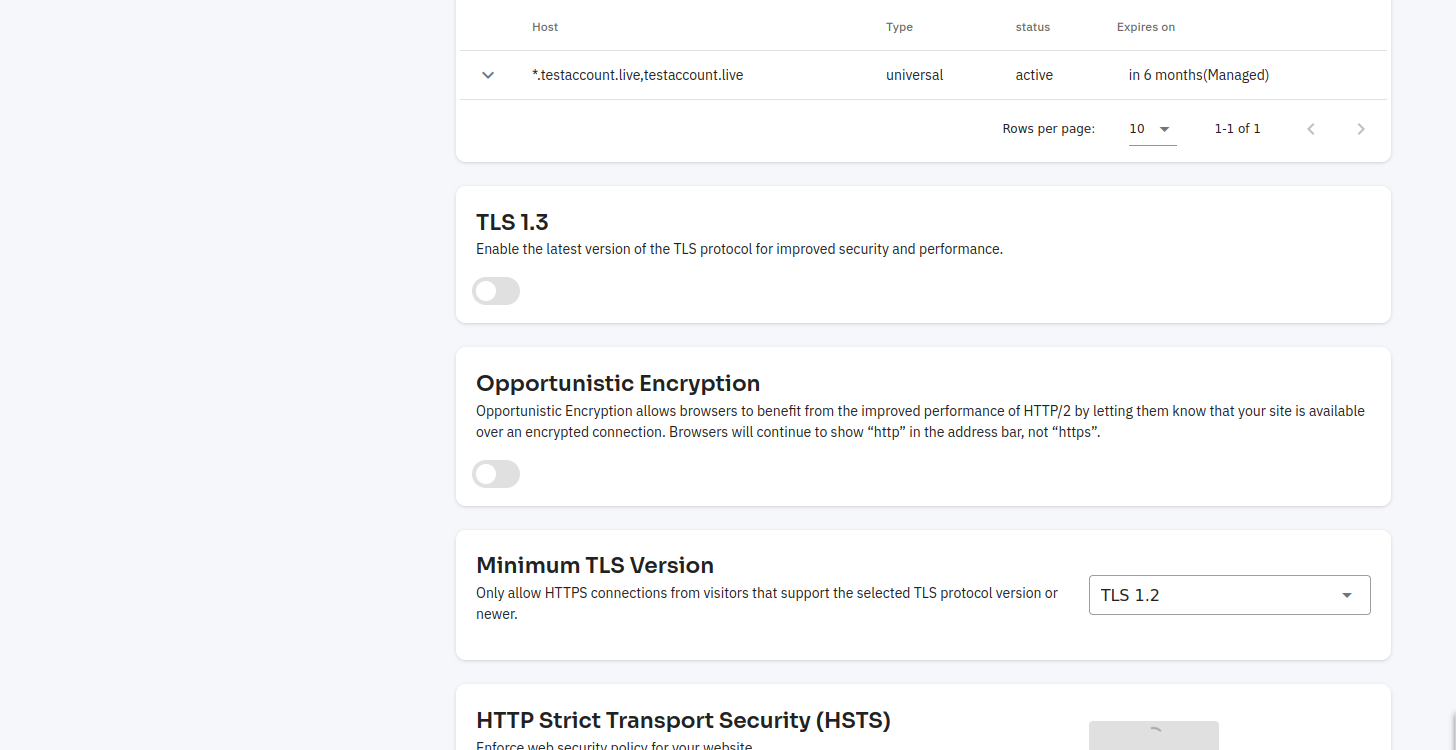
Follow the steps to Enable and Disable Opportunistic Encryption.
Navigate to the SSL/TLS of Cloudflare (Use this link to view How to Navigate).
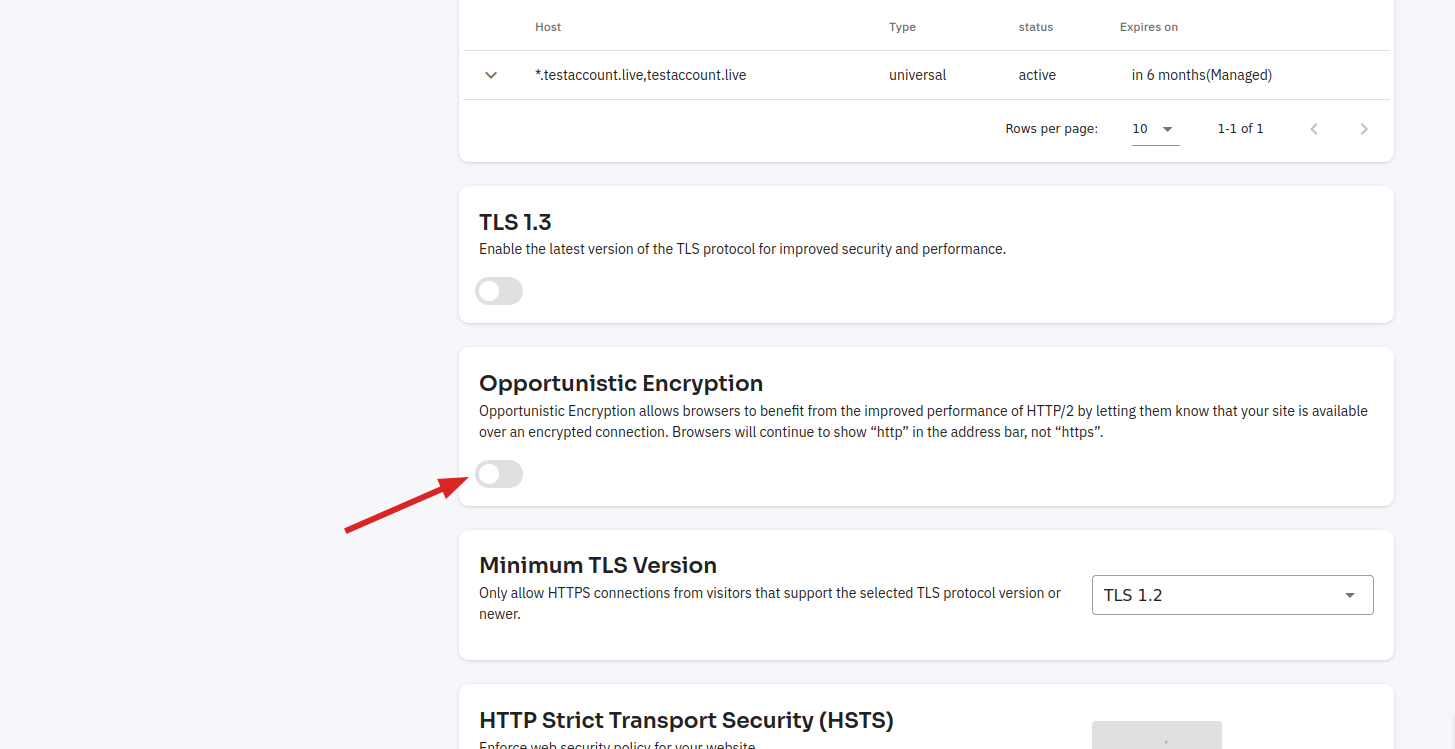
Disable Opportunistic Encryption :
Click on the Switch button.
Here, you can see Opportunistic Encryption is disabled successfully.
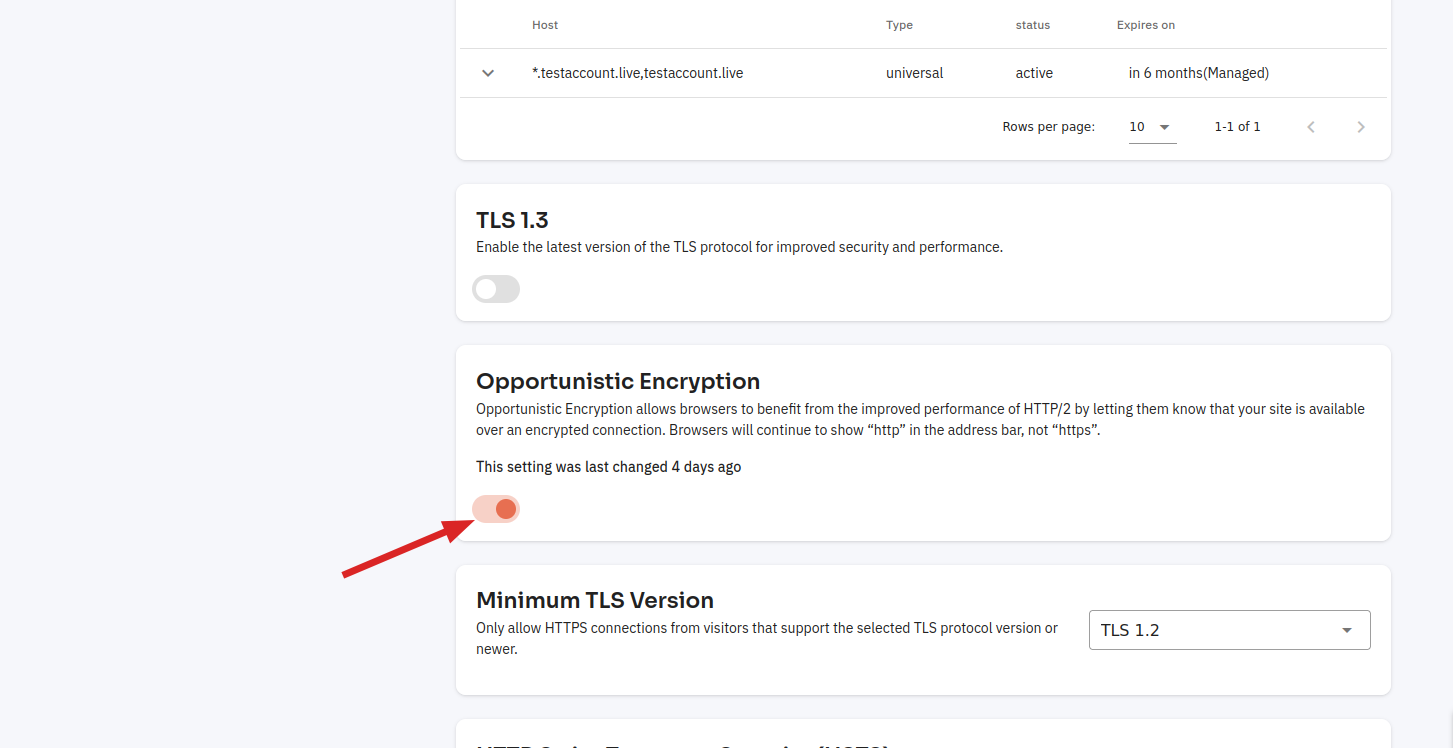
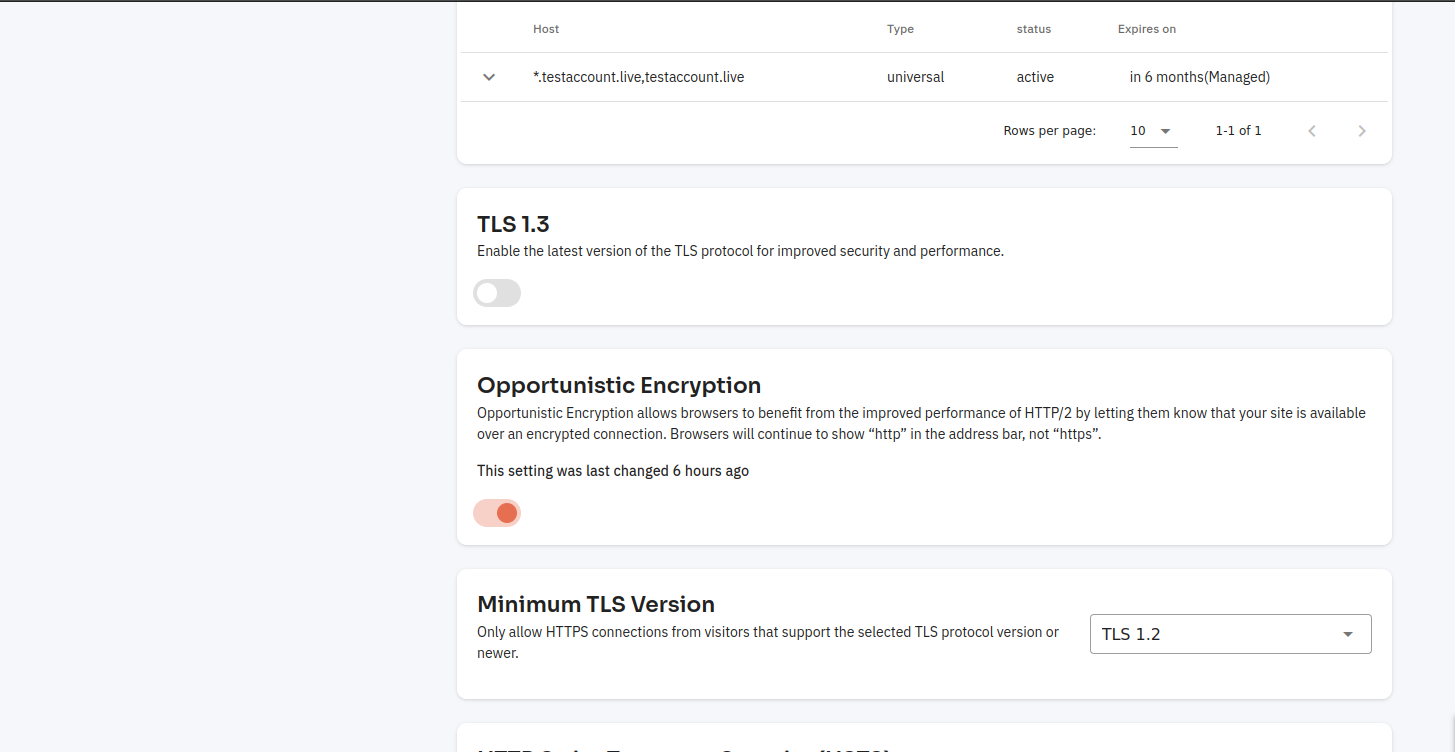
Enable Opportunistic Encryption :
Click on the Switch button.
Here, you can see Opportunistic Encryption is enabled successfully.
How to Enable and Disable Under Attack Mode ?
Under Attack, the mode is a feature provided by Cloudflare that helps protect your website from various types of cyber threats, such as DDoS attacks, brute force attempts, and others. In this mode, Cloudflare will present a JavaScript challenge to visitors of your website, which will help filter out malicious traffic and ensure that only legitimate users can access your site.
Tutorial :
You can watch the Video or Continue reading the post.
Follow the steps below to Enable and Disable Under Attack Mode.
Navigate to the Home Page of CloudFlare(Use this link to view How to Navigate).
- Select your account.
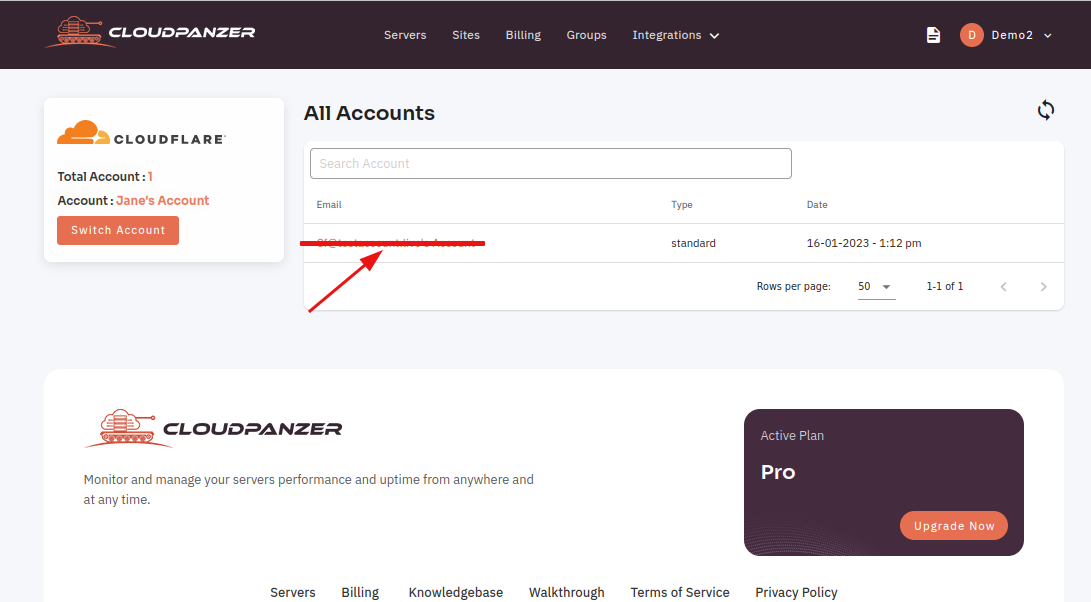
2. Click on the Domain.

3. Click on the "Setting" button.
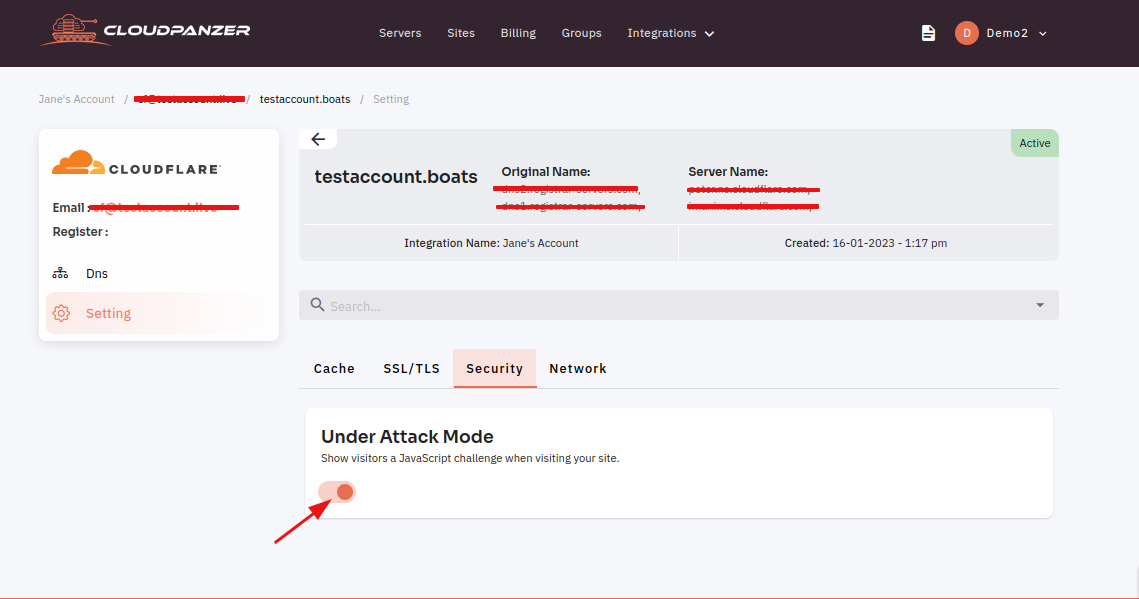
4. Click on the "Security" button.

5. Click on the switch button for "Enable Or Disable" Under Attack Mode.
How to Enable HSTS?
HTTP Strict Transport Security (HSTS) is a security mechanism that helps protect against attacks such as man-in-the-middle attacks by enforcing the use of secure connections (HTTPS) for a website or web portal. Enabling HSTS can help improve the security of your website and enhance the privacy of your users.
Tutorial :
You can watch the Video or Continue reading the post.
Follow the steps to Enable HSTS.
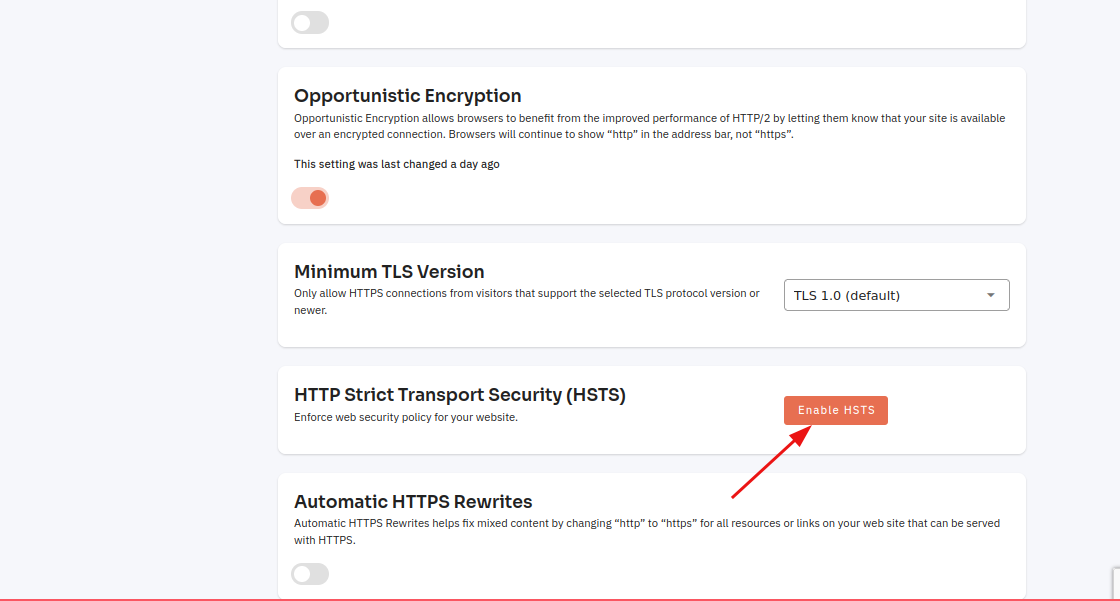
Navigate to the SSL/TLS of Cloudflare (Use this link to view How to Navigate).
Click on the "Enable HSTS" button.
Click on the "understand" button and click on the "Next" button.
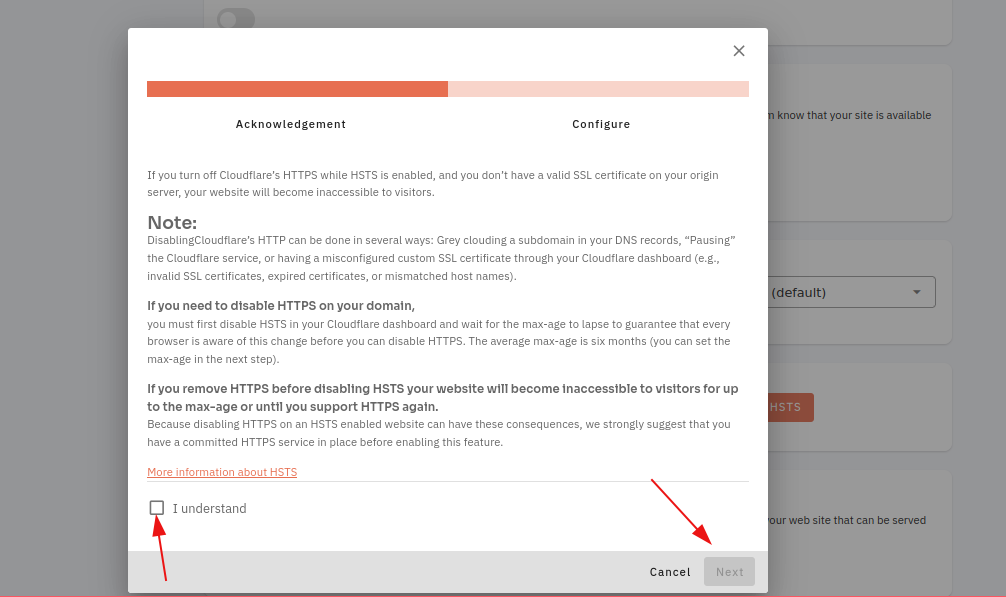
Here, you can change your configuration and Click on the "Save" button.
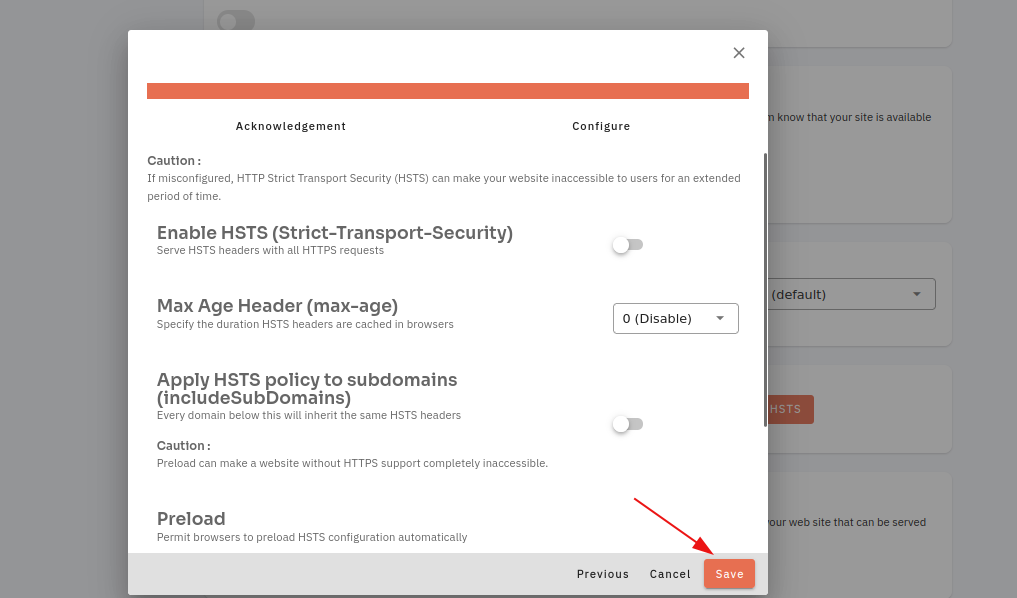
Here, you can see HSTS is enabled successfully.
How to Enable Or Disable 0-RTT Connection Resumption?
0-RTT connection resumption is a feature of the Transport Layer Security (TLS) protocol that allows a client to resume an interrupted TLS connection with a server without having to perform a full handshake. This can significantly reduce the time it takes to establish a secure connection, which can improve the performance and user experience of applications that rely on TLS.
Follow the steps below to Enable Or Disable 0-RTT Connection Resumption.
Navigate to the Network Settings of Cloudflare (Use this link to view How to Navigate).
Tutorial :
You can watch the Video or Continue reading the post.
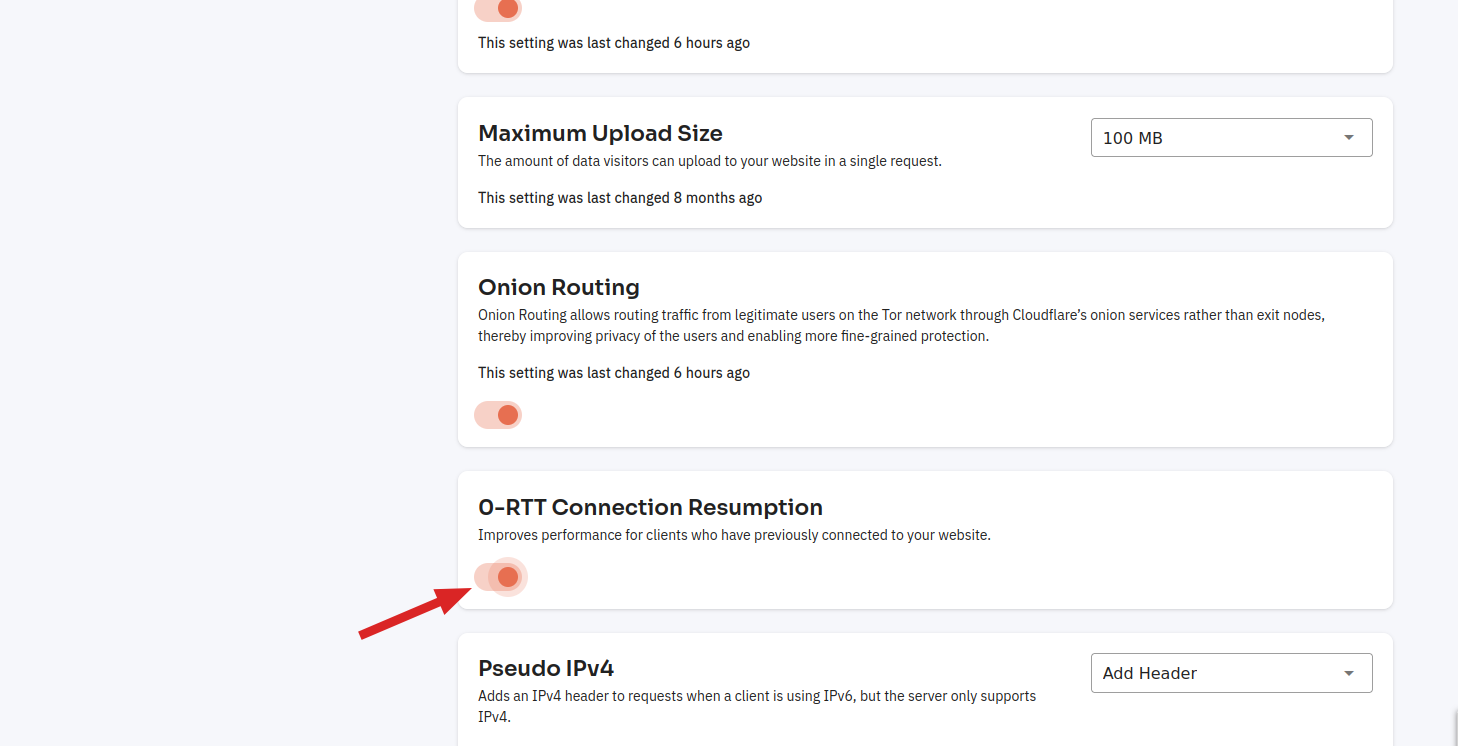
Enable 0-RTT Connection Resumption:
Click on the switch button.

Here, you can see 0-RTT Connection Resumption Enabled successfully.

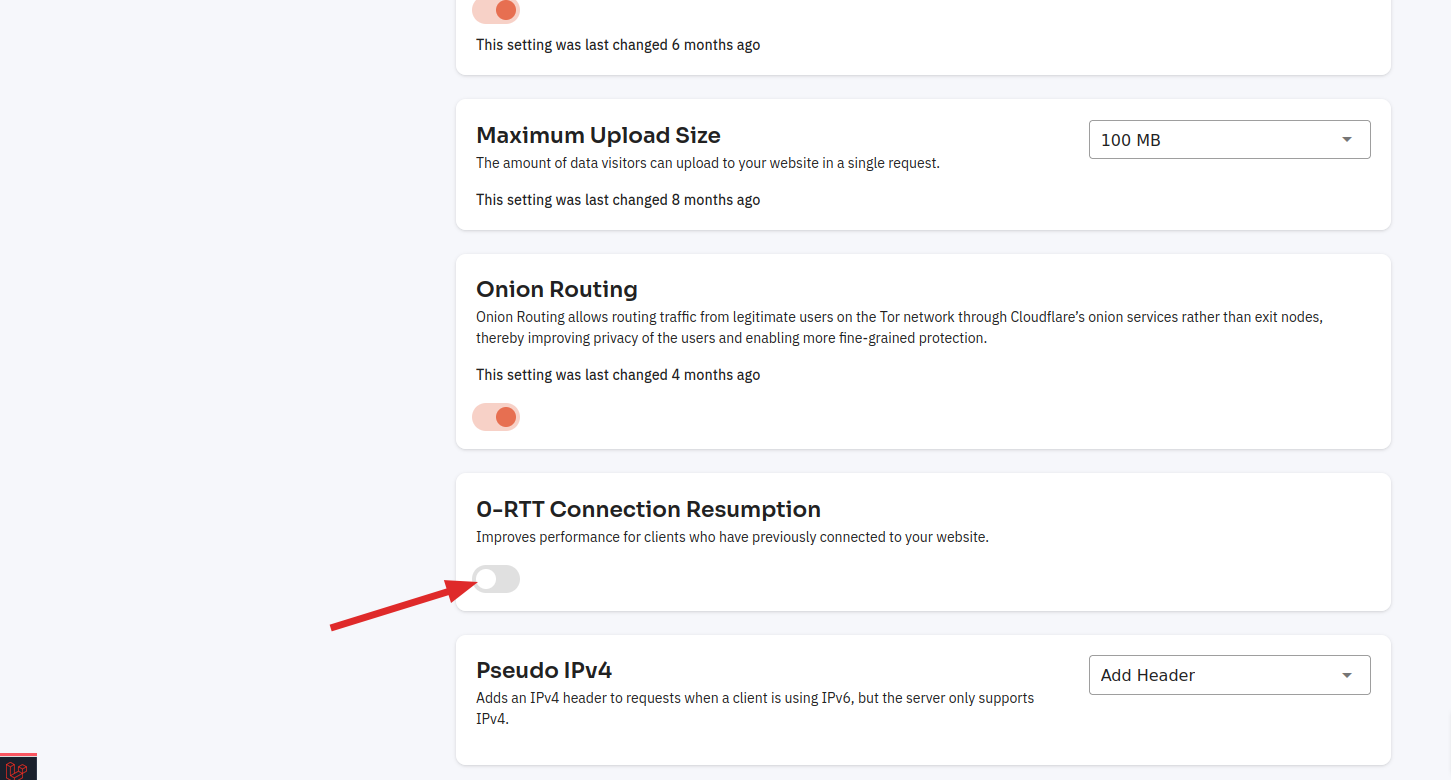
Disable 0-RTT Connection Resumption:
Click on the switch button.
Here, you can see that 0-RTT Connection Resumption was disabled successfully.
How to Enable Or Disable HTTP/3 (with QUIC)?
HTTP/3 (also known as HTTP-over-QUIC) is a new version of the HTTP protocol that is designed to improve the speed and security of the Internet. It is based on the QUIC (Quick UDP Internet Connections) protocol, which allows multiplexed connections over UDP and provides improved security, congestion control, and error handling compared to TCP.
Tutorial :
You can watch the Video or Continue reading the post.
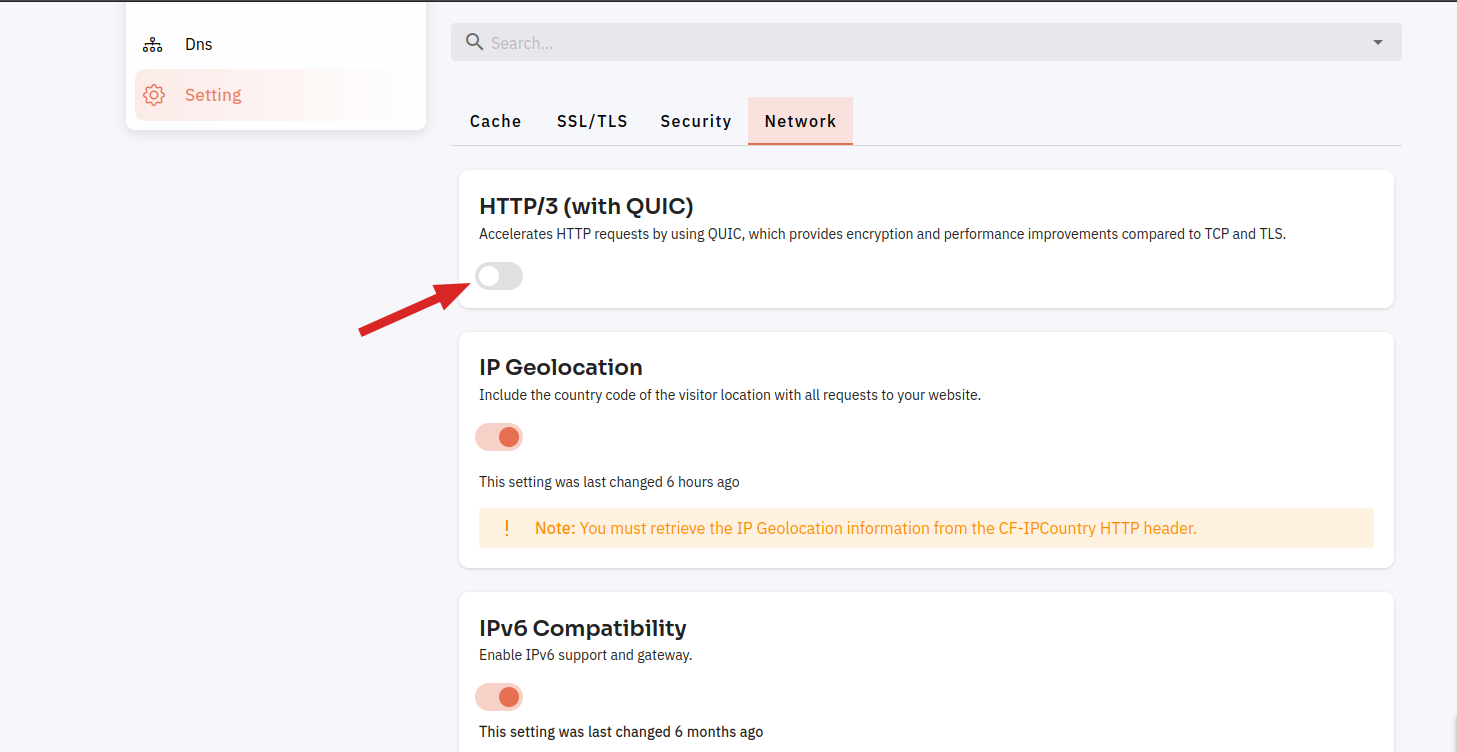
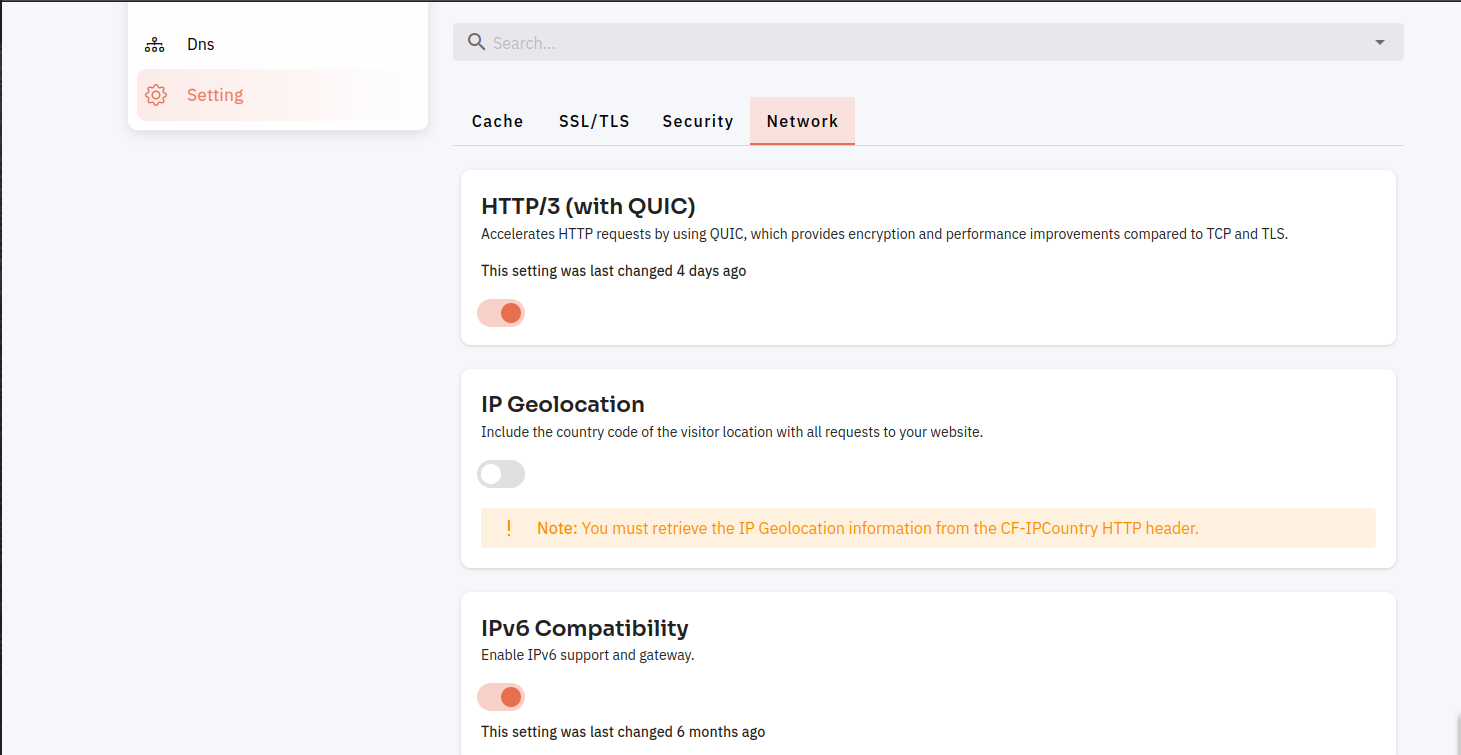
Follow the steps below to Enable Or Disable HTTP/3 (with QUIC).
Navigate to the Network Settings of Cloudflare (Use this link to view How to Navigate).
Enable HTTP/3 (with QUIC):
Click on the switch button.
Here, you can see HTTP/3 (with QUIC) Enabled successfully.
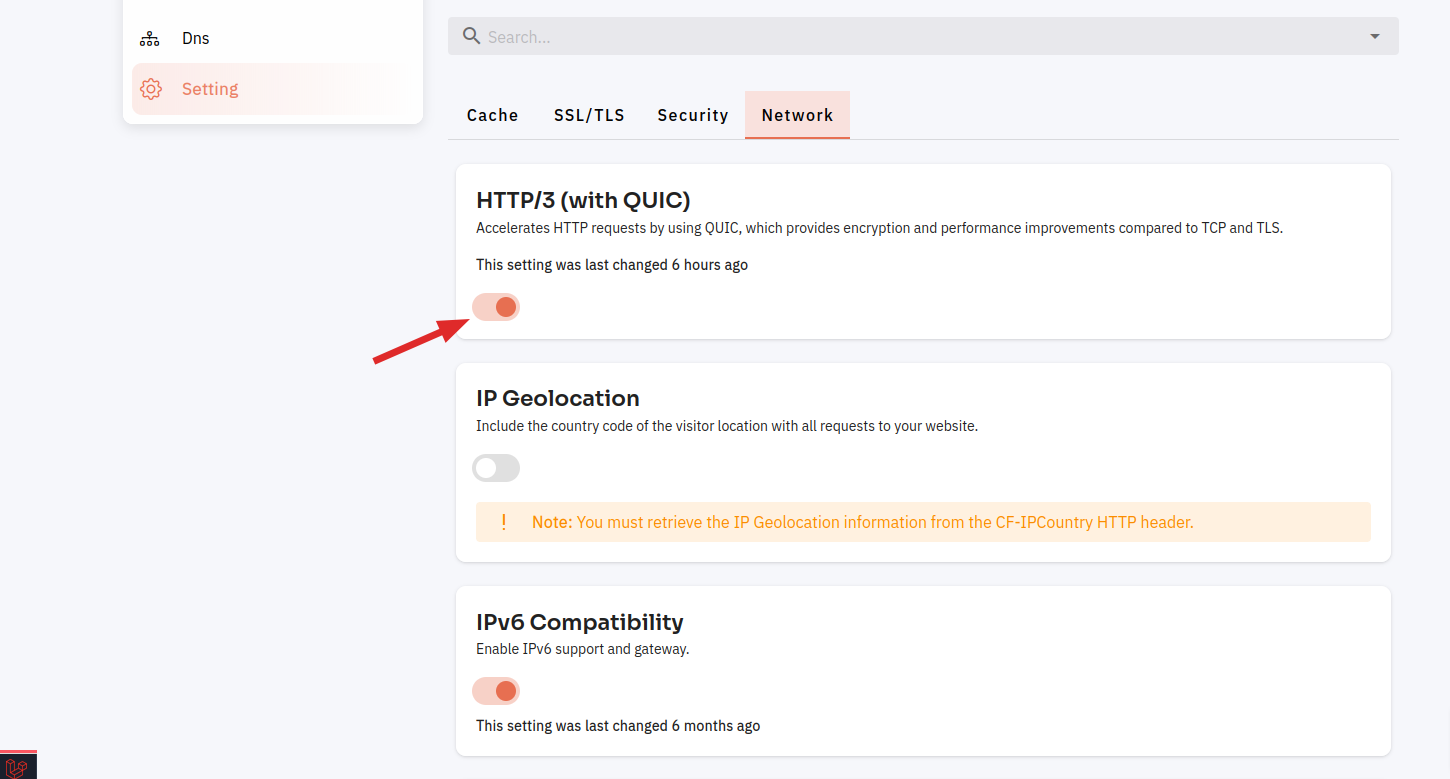
Disable HTTP/3 (with QUIC):
Click on the switch button.
Here, you can see HTTP/3 (with QUIC) was disabled successfully.

How to Enable Or Disable IP Geolocation?
In summary, IP geolocation is a process that involves determining the physical location of a device using its IP address, which can be done using databases and APIs provided by specialized companies. This information can be used for a variety of purposes, but the accuracy of the results can vary.
Follow the steps below to Enable Or Disable IP Geolocation.
Navigate to the Network Settings of Cloudflare (Use this link to view How to Navigate).
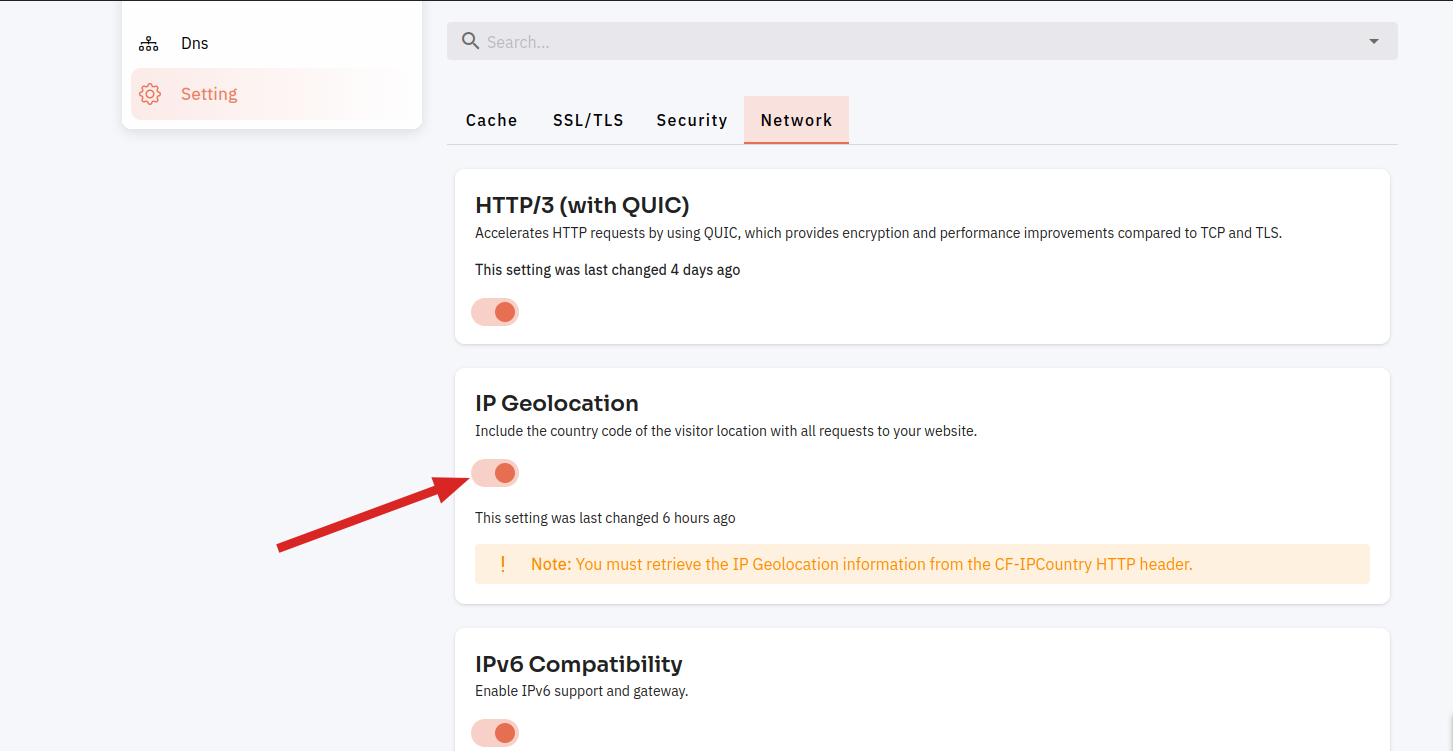
Enable IP Geolocation:
Click on the switch button.
Here, you can see IP Geolocation Enabled successfully.
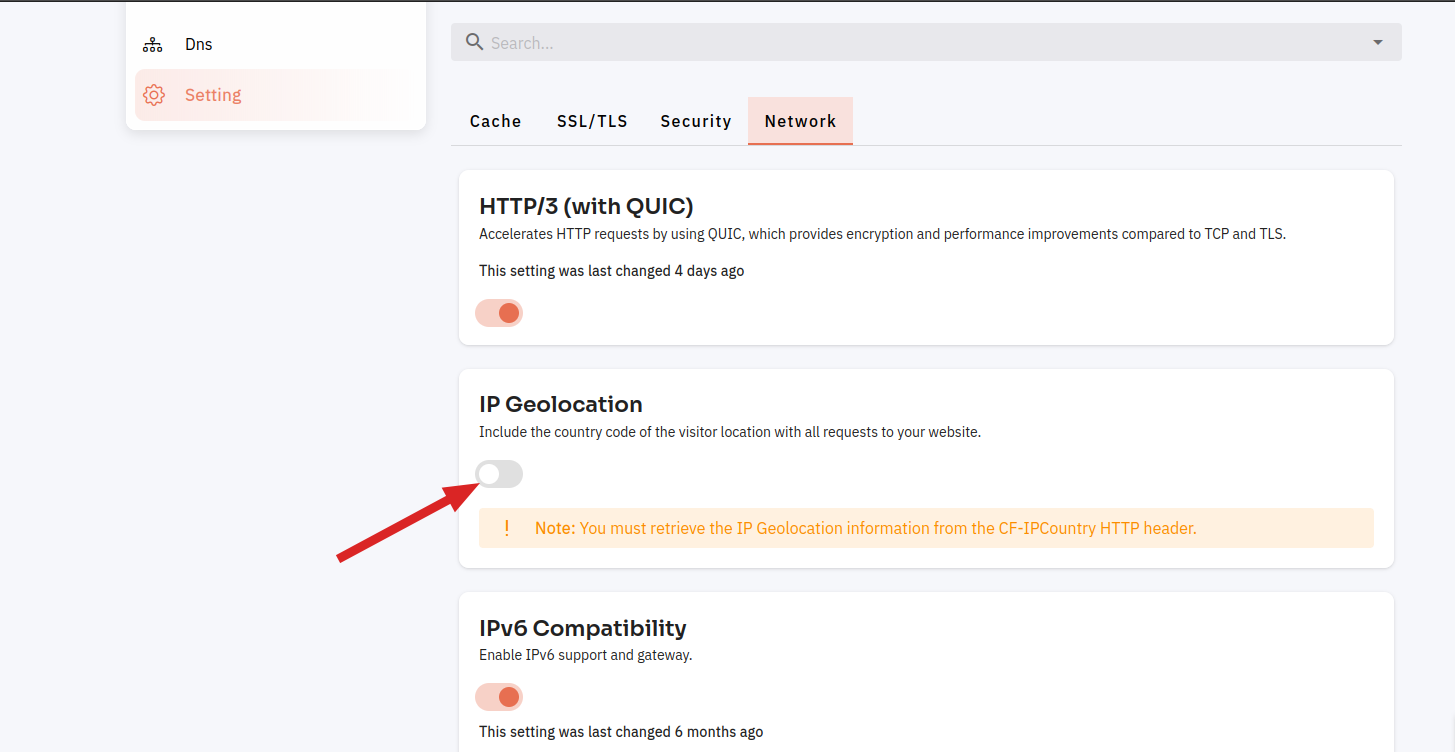
Disable IP Geolocation:
Click on the switch button.
Here, you can see IP Geolocation was disabled successfully.
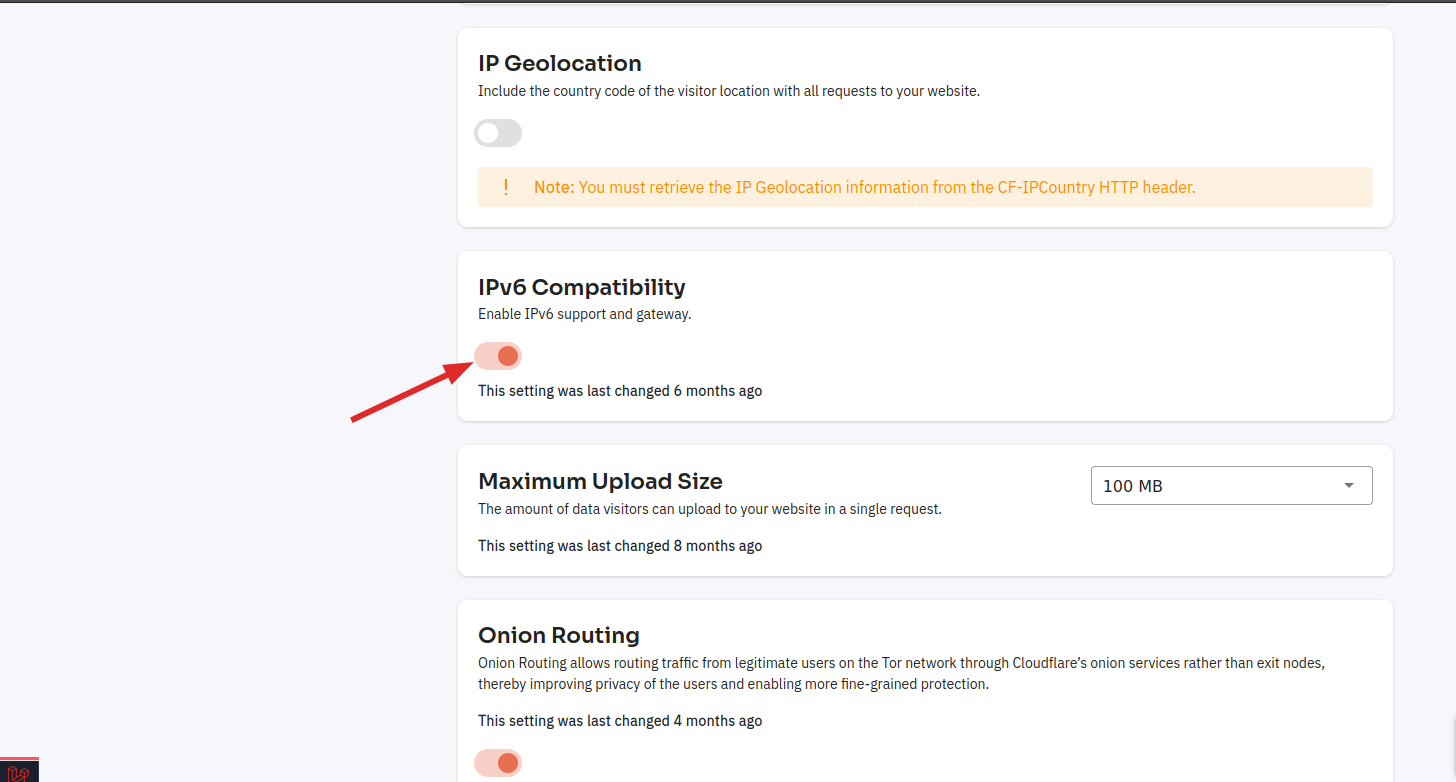
How to Enable Or Disable IPv6 Compatibility?
IPv6 compatibility refers to the ability of a device or system to support and use the Internet Protocol version 6 (IPv6) standard. IPv6 is the successor to IPv4, which is the current standard used for routing internet traffic. IPv6 was developed to address the shortage of available IPv4 addresses, which has been exhausted due to the rapid growth of the internet.
Follow the steps below to Enable Or Disable IPv6 Compatibility.
Navigate to the Network Settings of Cloudflare (Use this link to view How to Navigate).
Tutorial :
You can watch the Video or Continue reading the post.
Enable IPv6 Compatibility:
Click on the switch button.
Here, you can see IPv6 Compatibility Enabled successfully.
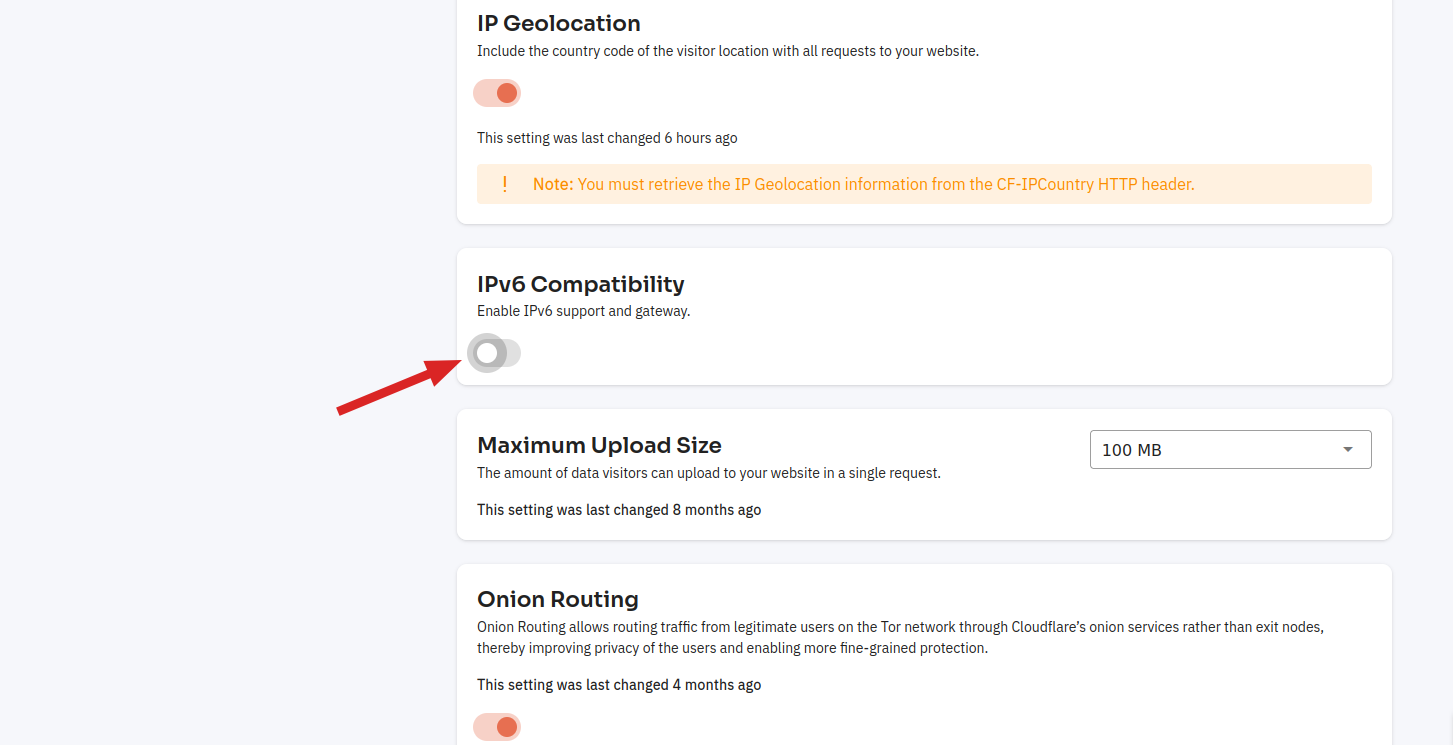
Disable IPv6 Compatibility:
Click on the switch button.

Here, you can see IPv6 Compatibility was disabled successfully.

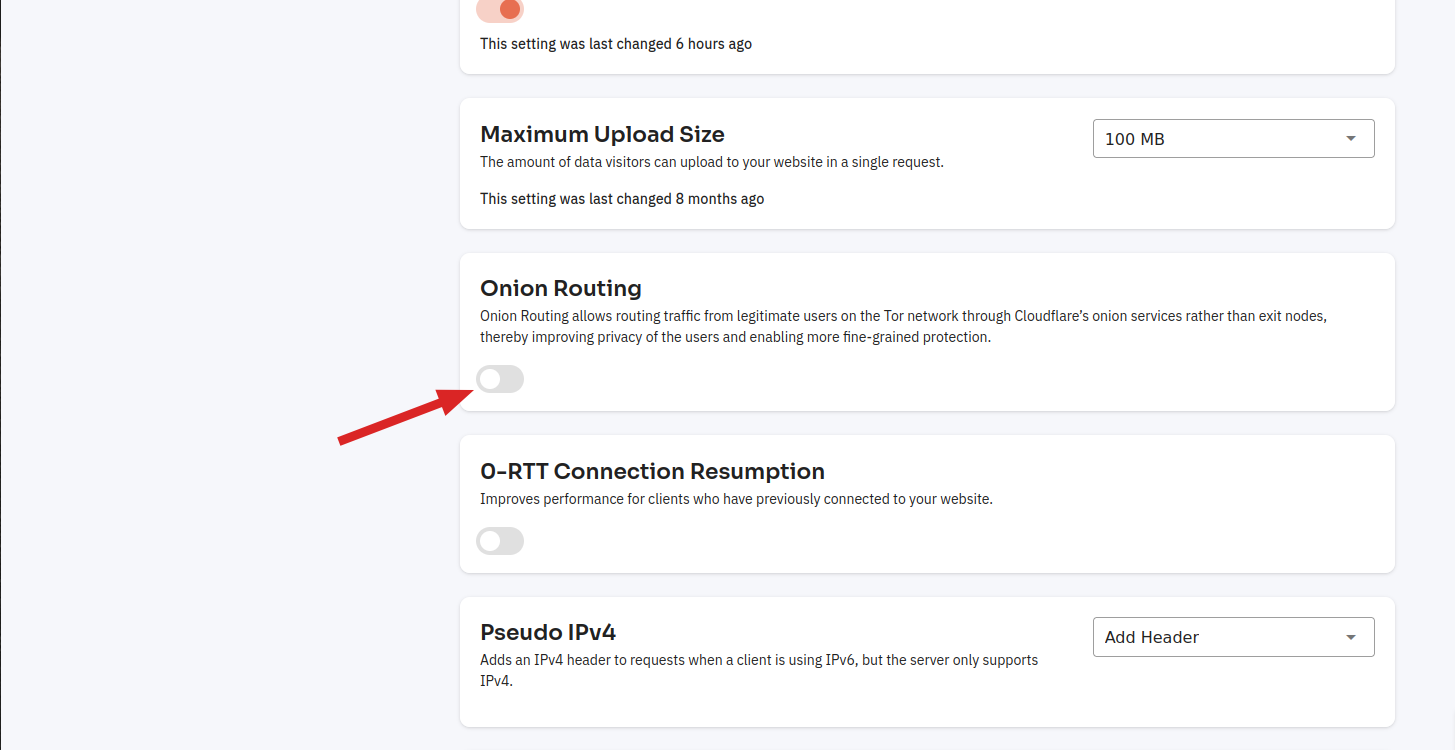
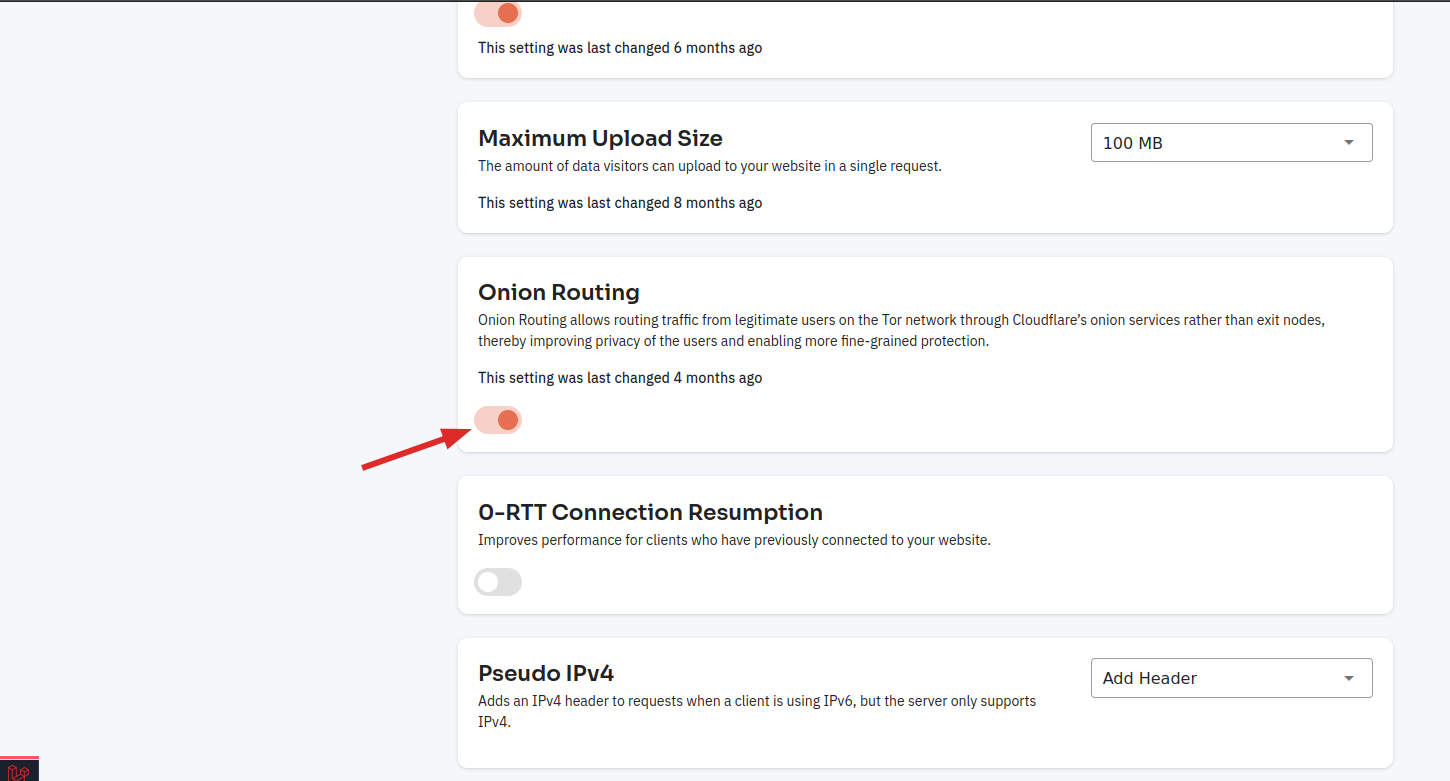
How to Enable Or Disable Onion Routing?
Onion routing is a technique for anonymous communication over a computer network. It involves the use of layers of encryption and multiple intermediaries, or "onion routers," to hide the identity of the sender and recipient of a message.
Follow the steps below to Enable Or Disable Onion Routing.
Navigate to the Network Settings of Cloudflare (Use this link to view How to Navigate).
Tutorial :
You can watch the Video or Continue reading the post.
Enable Onion Routing:
Click on the switch button.
Here, you can see Onion Routing Enabled successfully.
Disable Onion Routing:
Click on the switch button.

Here, you can see Onion Routing was disabled successfully.

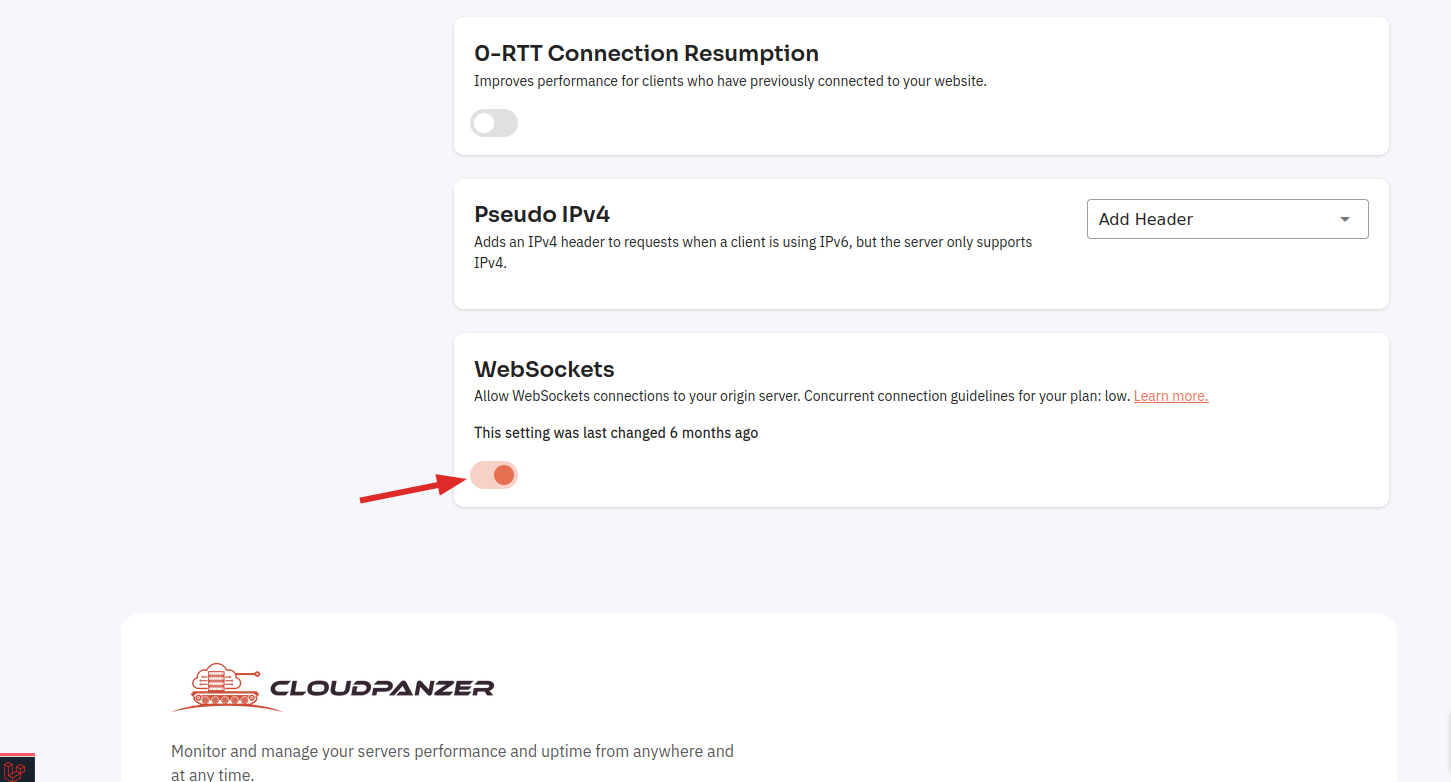
How to Enable Or Disable WebSockets?
WebSockets is a protocol that enables two-way communication between a client and a server over a single, persistent connection. It allows full-duplex communication over a single TCP connection, meaning that both the client and the server can send and receive data at the same time.
Follow the steps below to Enable Or Disable WebSockets.
Navigate to the Network Settings of Cloudflare (Use this link to view How to Navigate).
Here you can "Enable Or Disable " the WebSockets.
How to Navigate Cloudflare Home ?
Follow the steps below to Navigate Cloudflare Homer.
1: Click on "Integration".
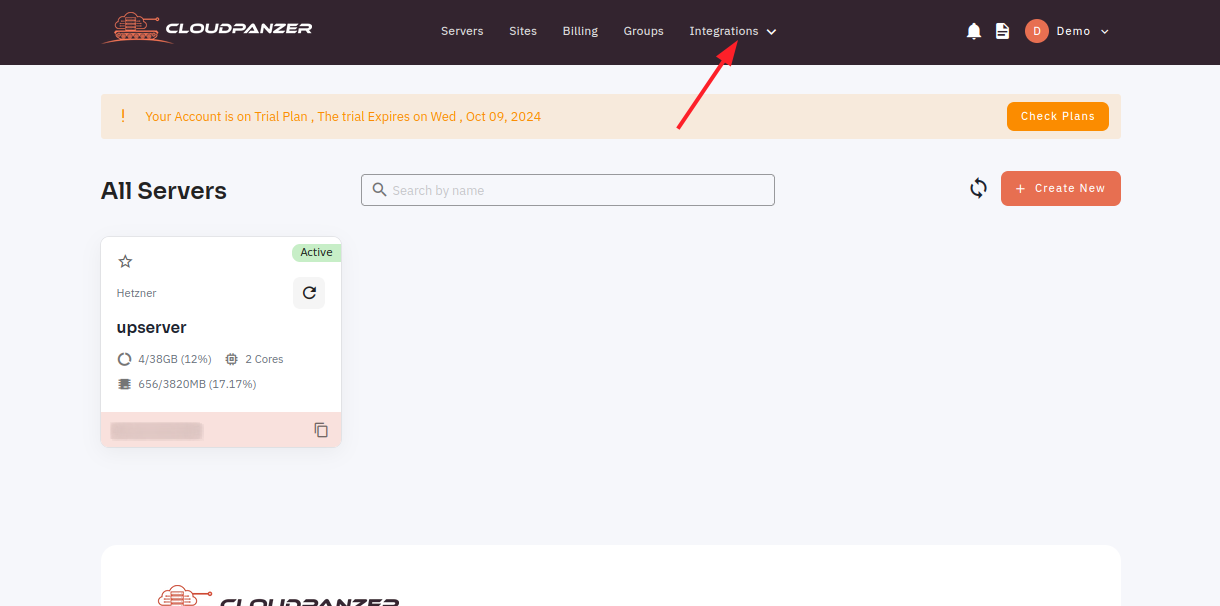
2: Click on the "Cloudflare Option".
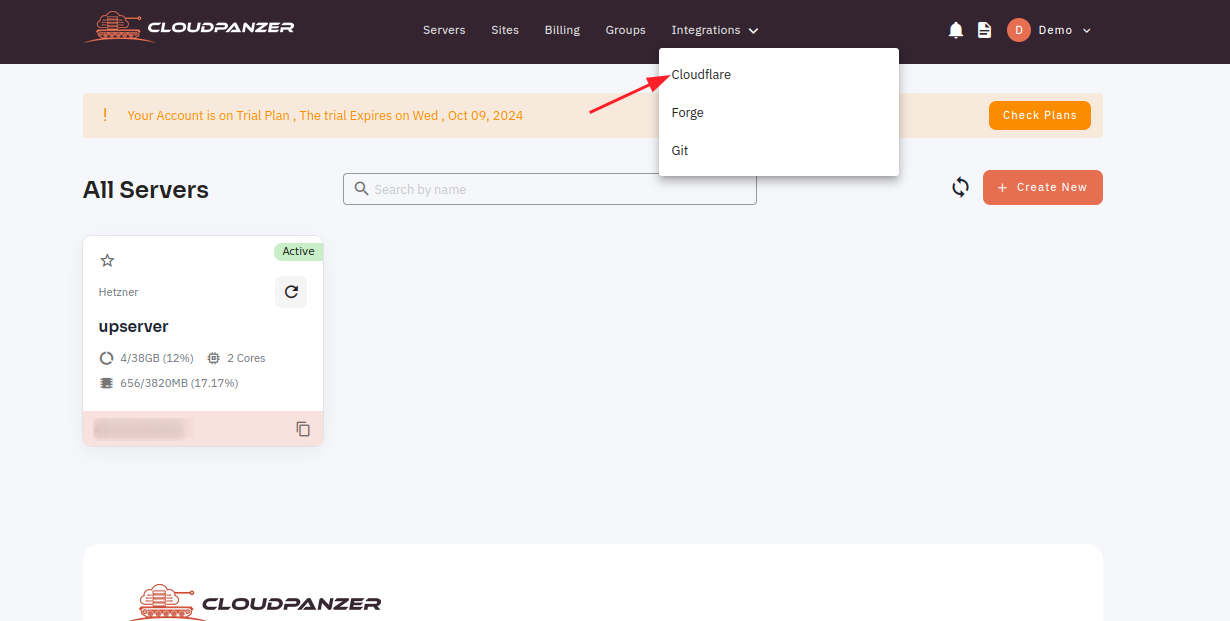
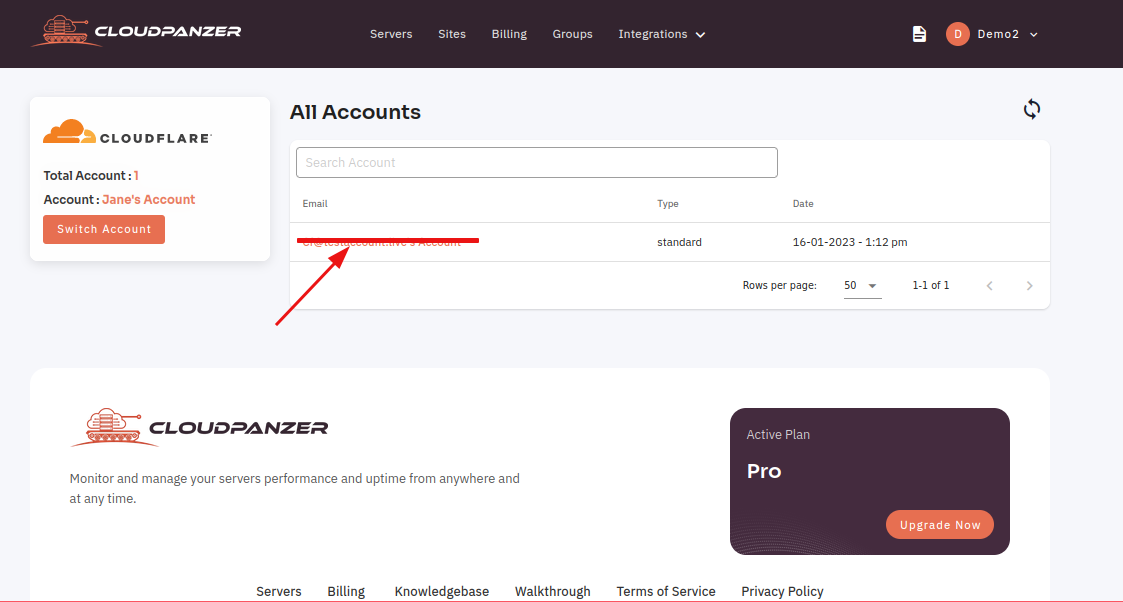
3. Select integration account.
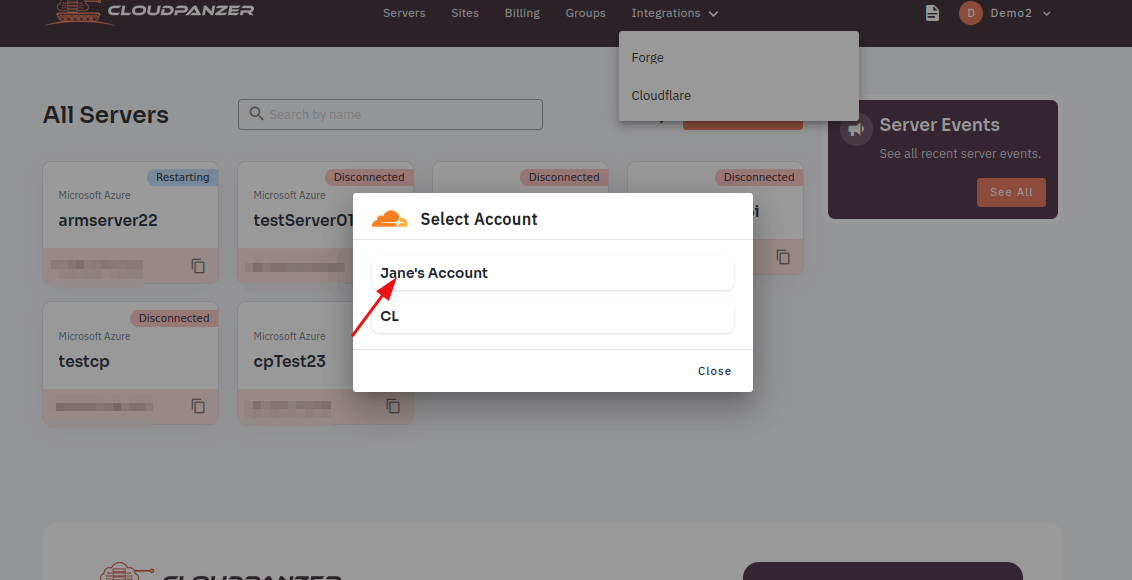
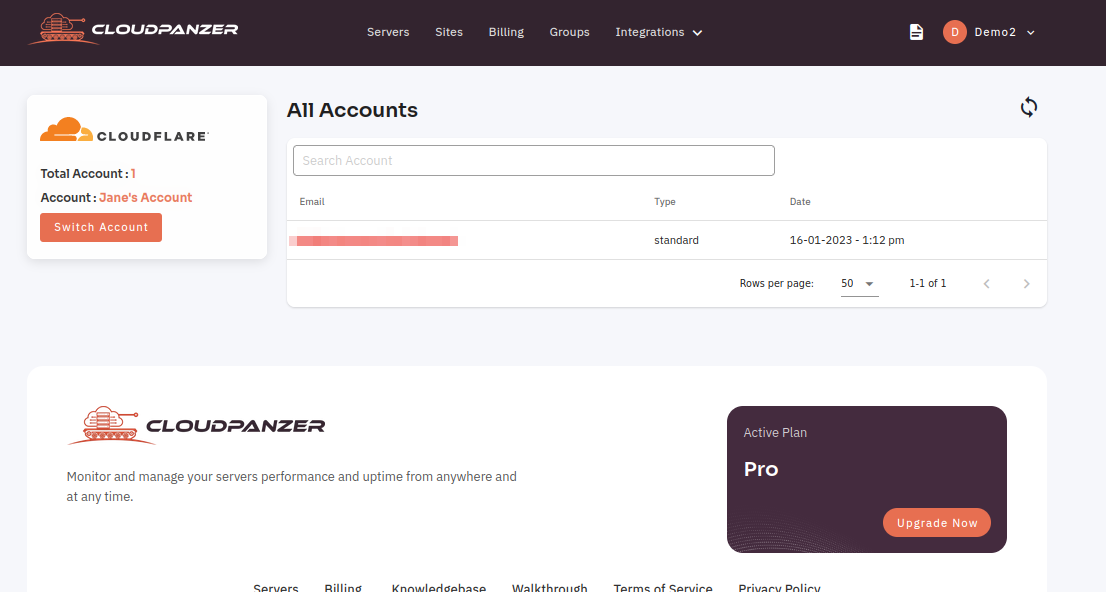
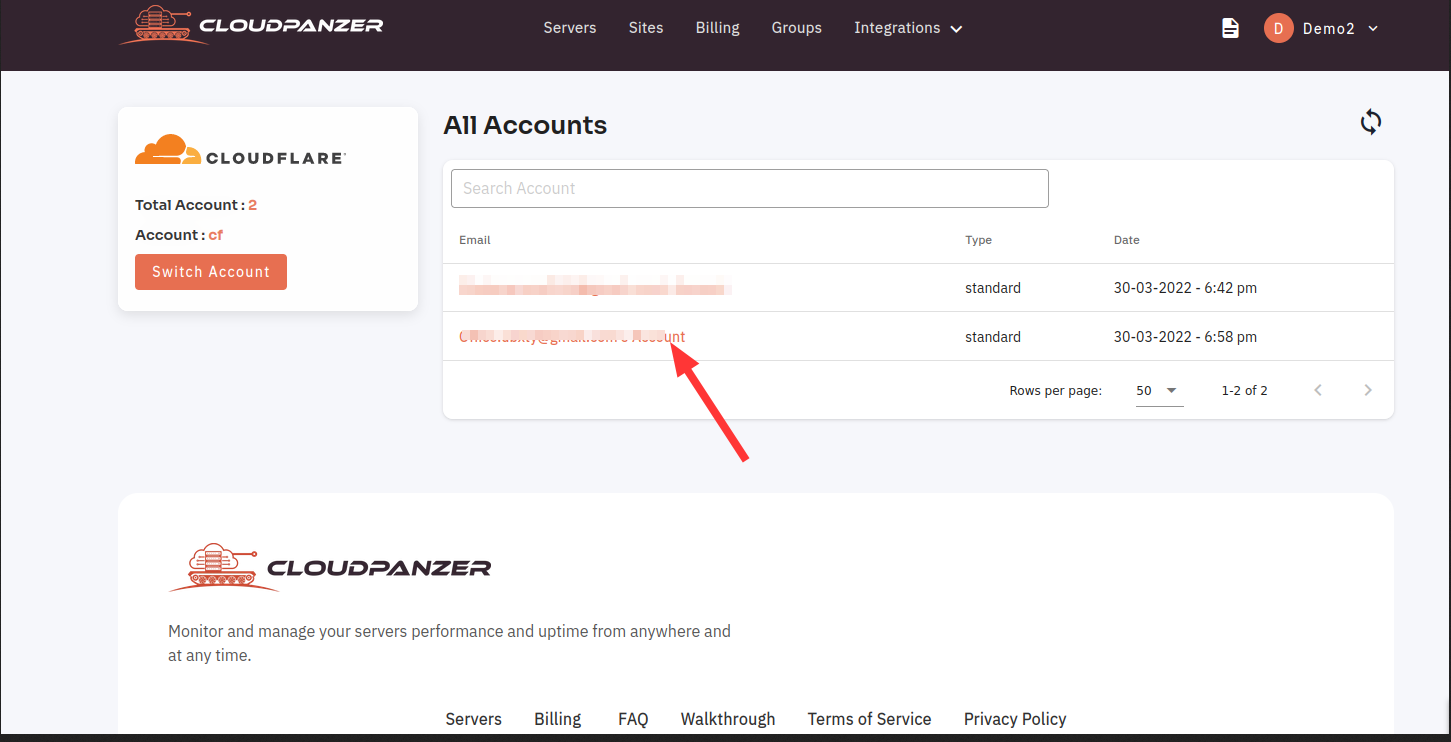
Here, you can see Cloudflare's home.
How to Navigate Network Settings?
In today's increasingly connected world, having a solid understanding of your network settings is crucial for both personal and professional use. Whether you're setting up a home network or managing a corporate network, understanding how to navigate and configure these settings can help ensure smooth and reliable network performance.
Follow the steps below to Use DNS records.
Navigate to the Home Page of CloudFlare(Use this link to view How to Navigate).
- Select your account.
2. Click on the Domain.
3. Click on the "Setting" button.
4. Click on the "Network" Tab.
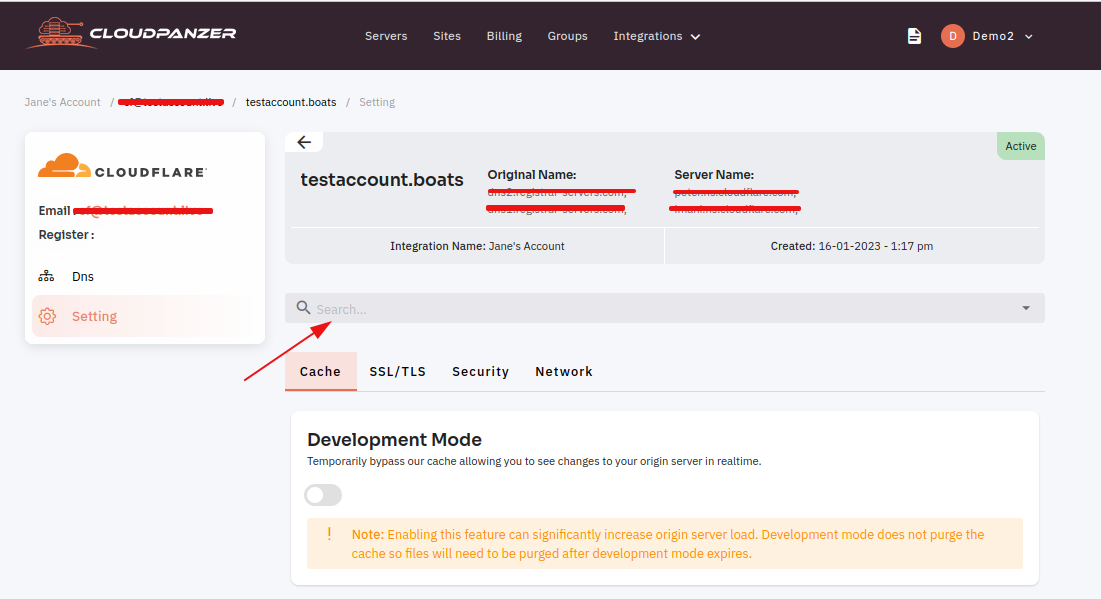
You can search the all settings here.
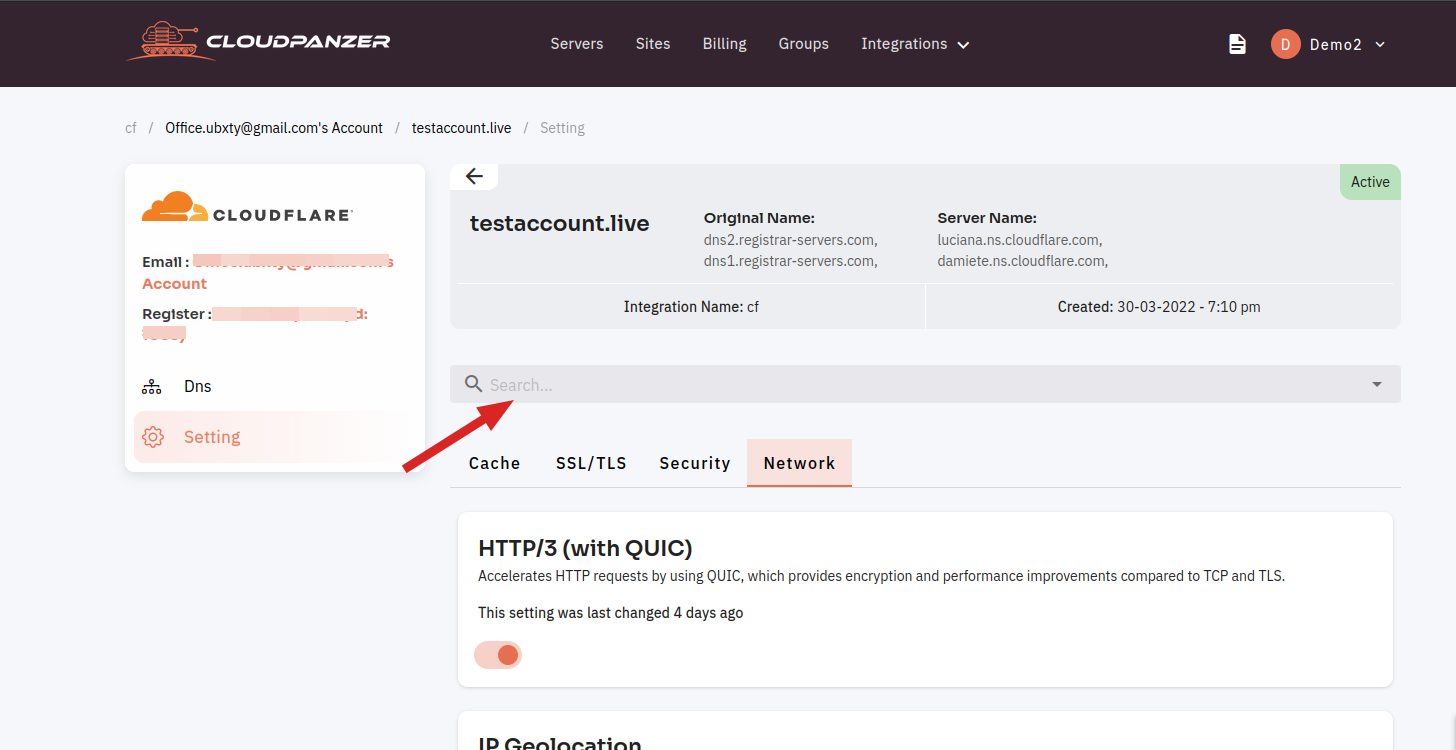
Here You can see Network settings.
How to Navigate on Setting in Cloudflare?
Cloudflare is a web performance and security company that offers a range of services for websites and mobile apps. One of the key features of Cloudflare is the ability to customize and configure settings to improve performance and security.
Follow the steps below to Navigate settings.
Navigate to the Home Page of CloudFlare(Use this link to view How to Navigate).
- Select your account.
2. Click on the Domain.
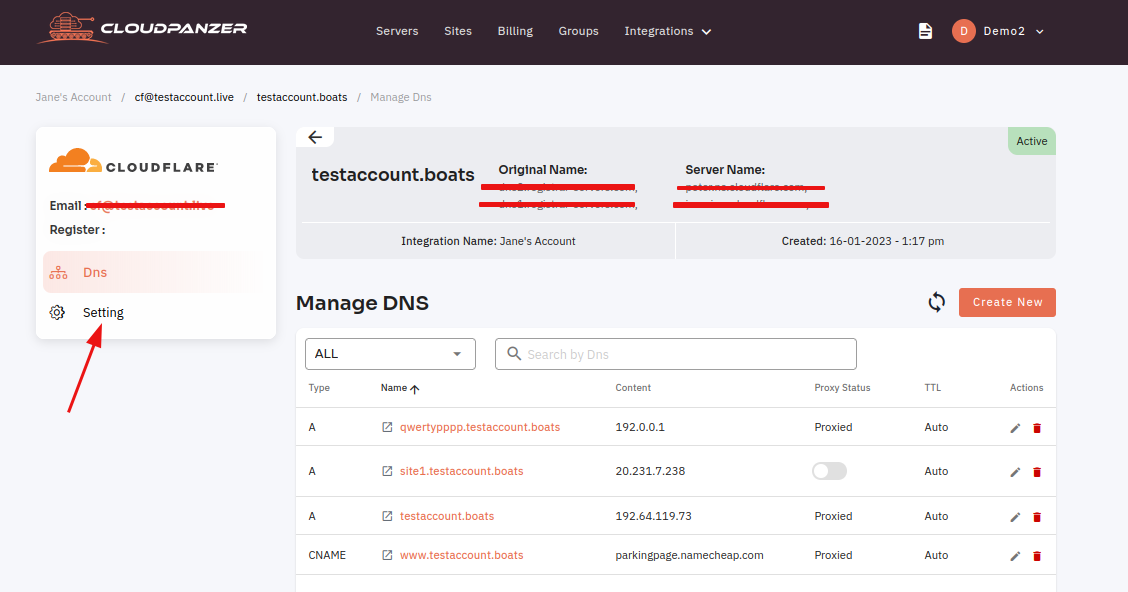
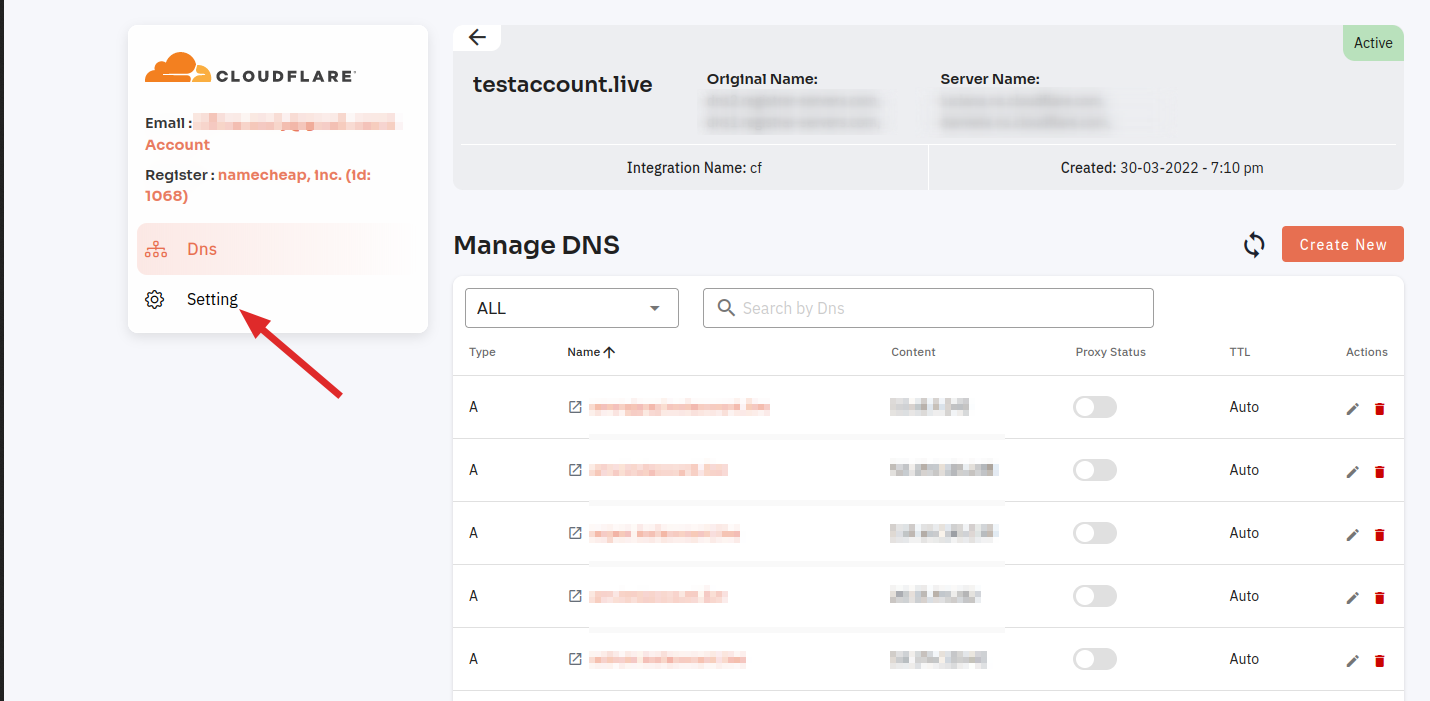
3. Click on "Setting".
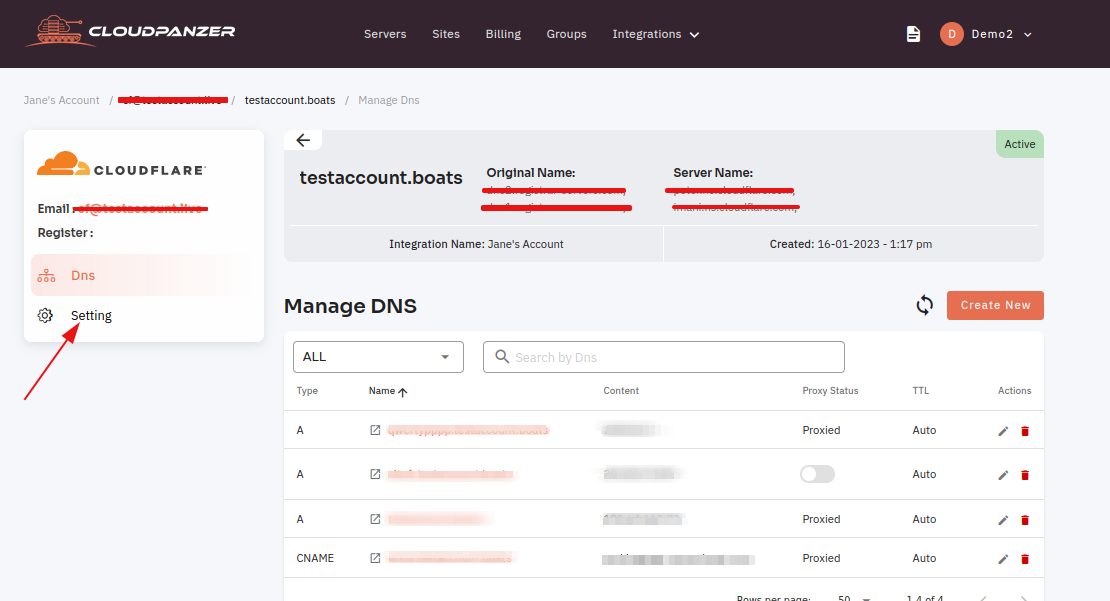
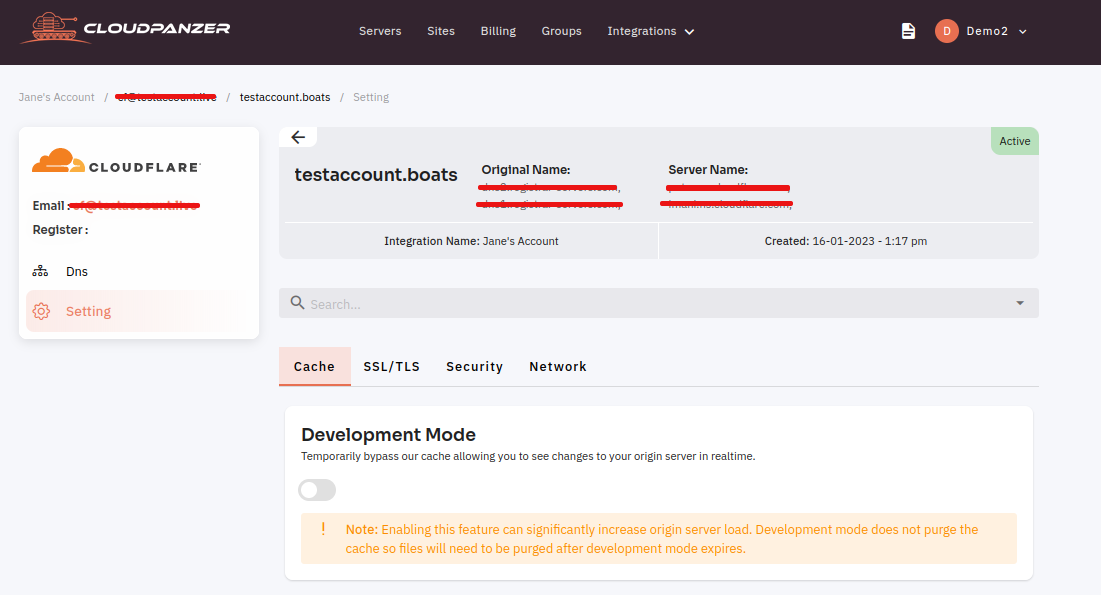
Here, you can see the setting page.
Here you can search Settings.
How to Navigate SSL/TLS on a Dashboard ?
SSL/TLS (Secure Sockets Layer/Transport Layer Security) is a widely-used security protocol that ensures the confidentiality and integrity of data transmitted over the internet. It is essential for protecting sensitive information, such as login credentials and financial transactions, from being intercepted by malicious actors.
Follow the steps Navigate SSL/TLS on a Dashboard.
Navigate to the Home Page of CloudFlare(Use this link to view How to Navigate).
1. Click on your Account.
2. Click on the Domain.
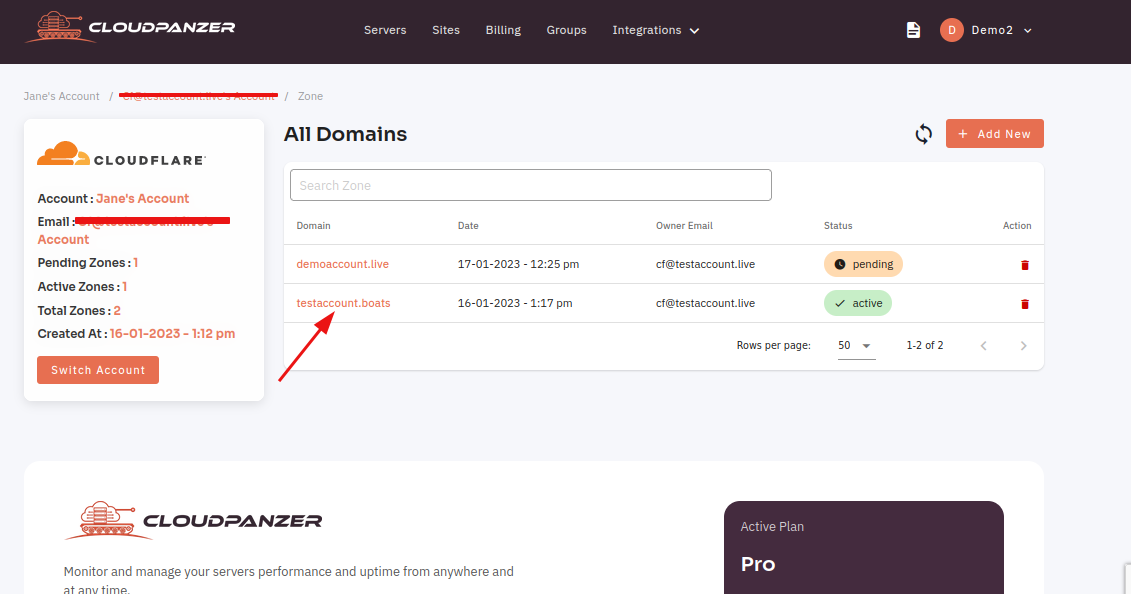
Click on the "Setting" button.
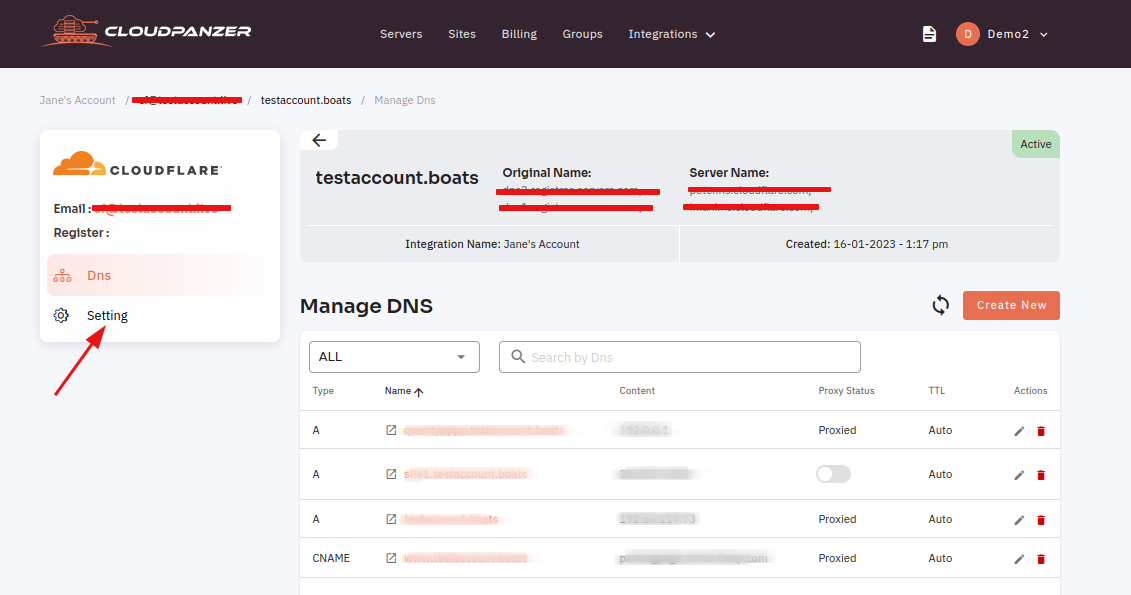
Here you can search the settings.
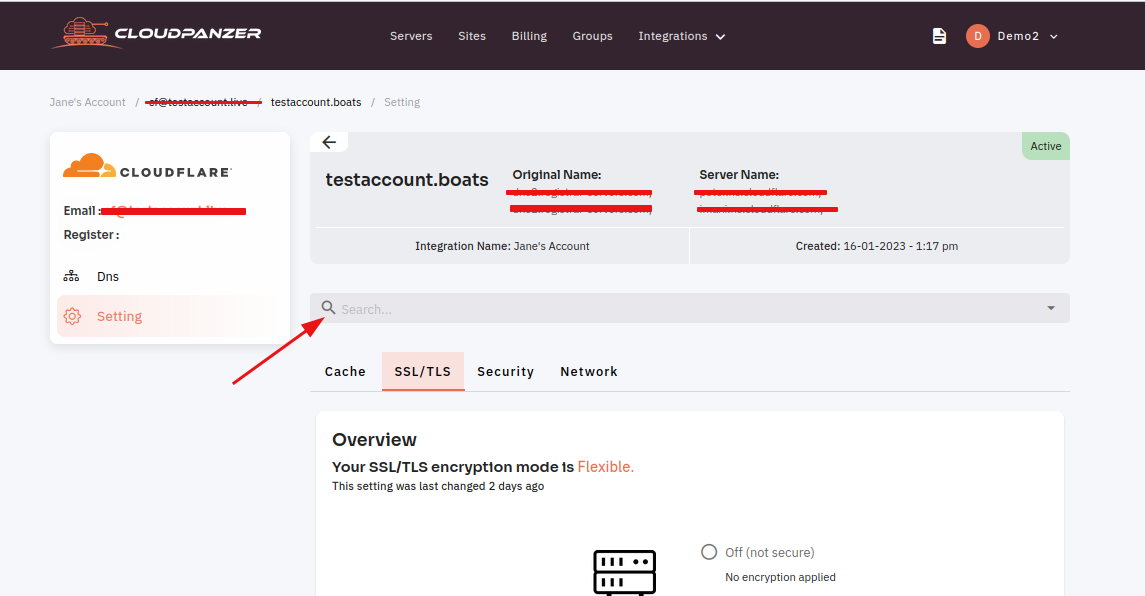
Click on the "SSL/TSL" Tab.
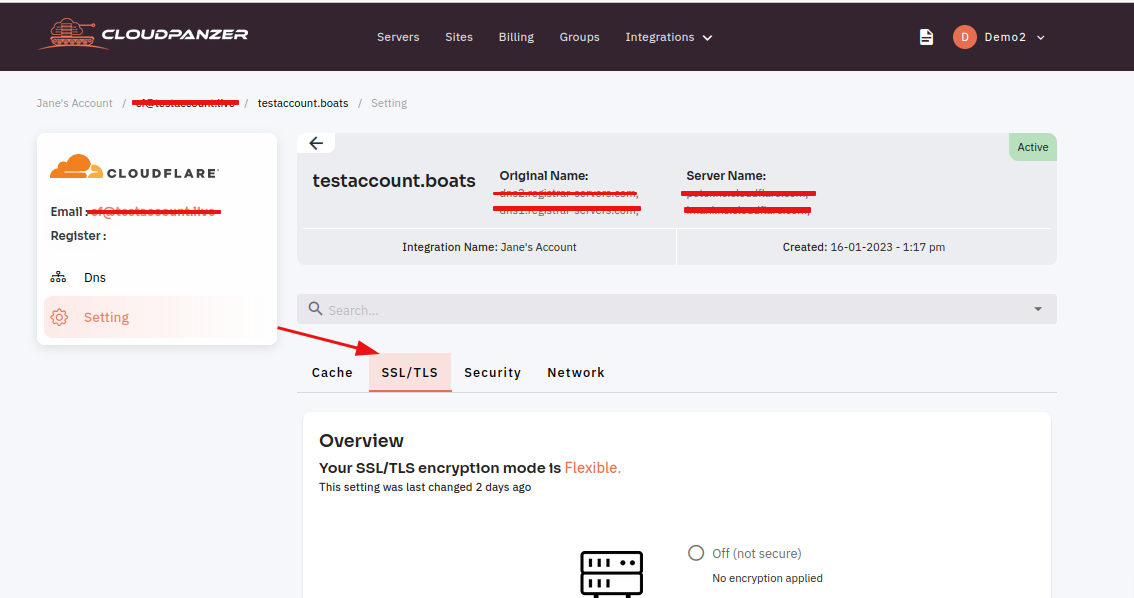
Here, you can see SSL/TLS dashboard.
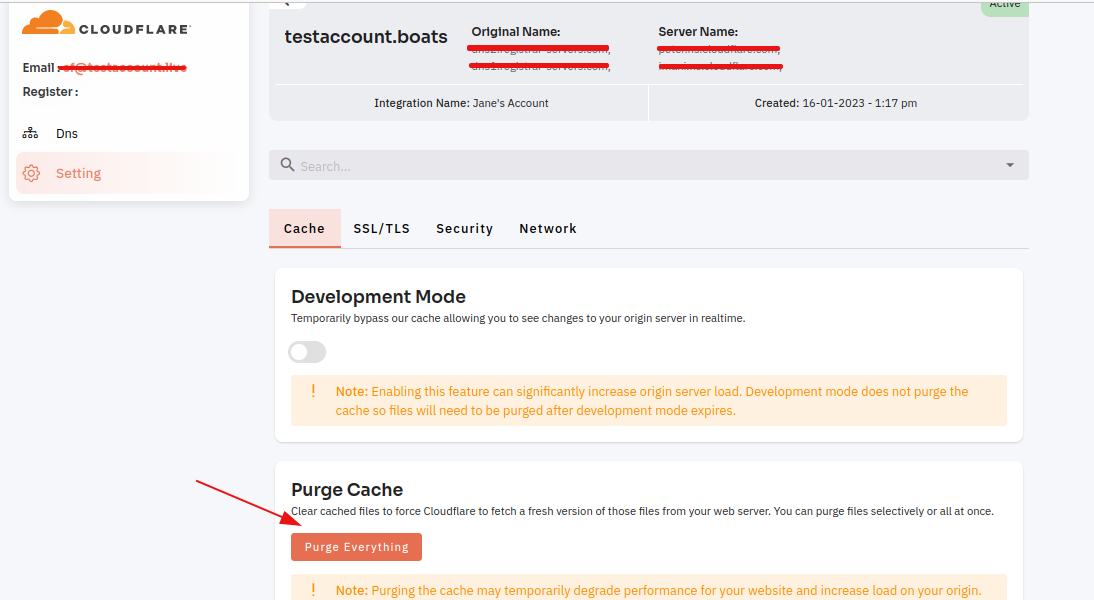
How to purge Cache?
Follow the steps below to purge Cache.
Navigate to the Setting (Use this link to view How to Navigate).
Click on the "Purge Everything" button.
Click on the "Purge Everything".
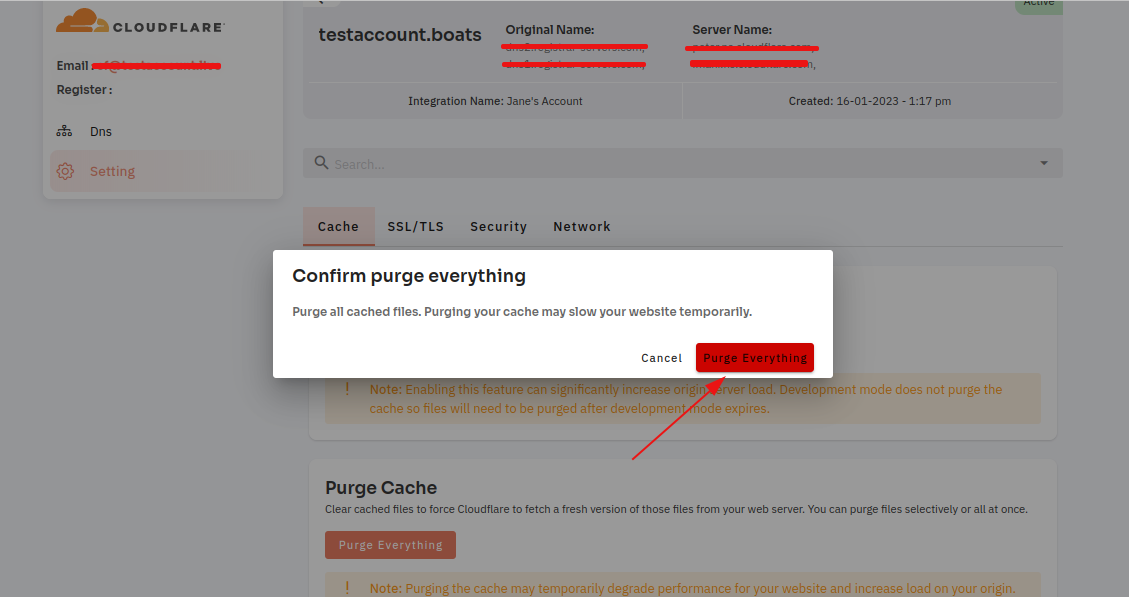
Your cache purging successfully.