PHP
- How to change PHP version on a site in CloudPanzer?
- How to check Site php logs through the cloudpanzer website?
- How to install a PHP version on a site in CloudPanzer?
- How to install and configure PHP on server in CloudPanzer?
- How to Manage PHP on CloudPanzer?
- How to remove already installed PHP version?
- How to restart the current PHP version in CloudPanzer?
- How to Set Default PHP version ?
- How to use PHP Built In Extensions ?
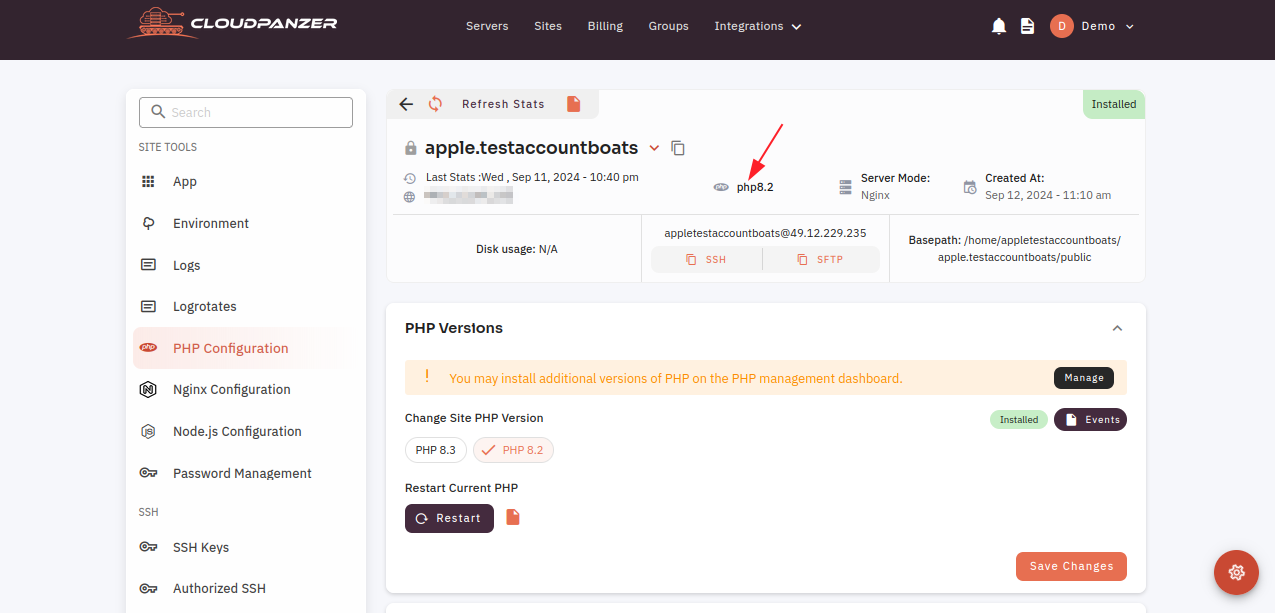
How to change PHP version on a site in CloudPanzer?
You can ensure that your site is using the most appropriate and compatible PHP version for its needs. However, it is important to carefully consider the compatibility of your site before making any changes, as switching to an incompatible PHP version can result in issues or errors.
Tutorial :
You can watch the Video or Continue reading the post.
Follow the steps below to change the PHP version on the site
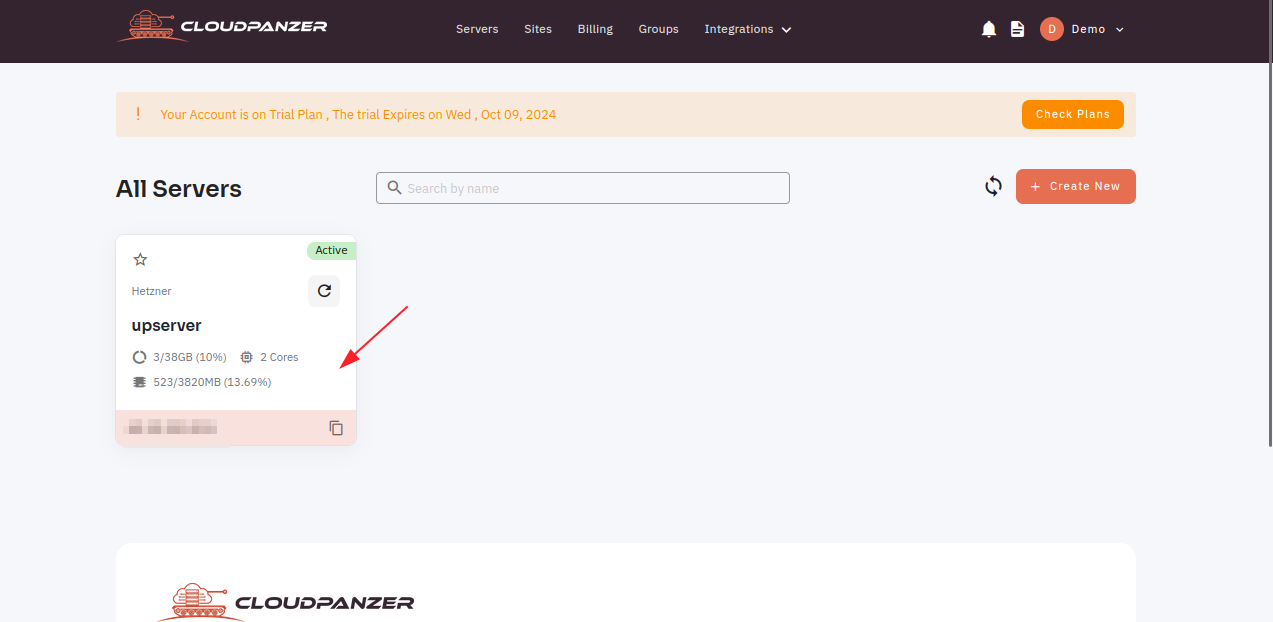
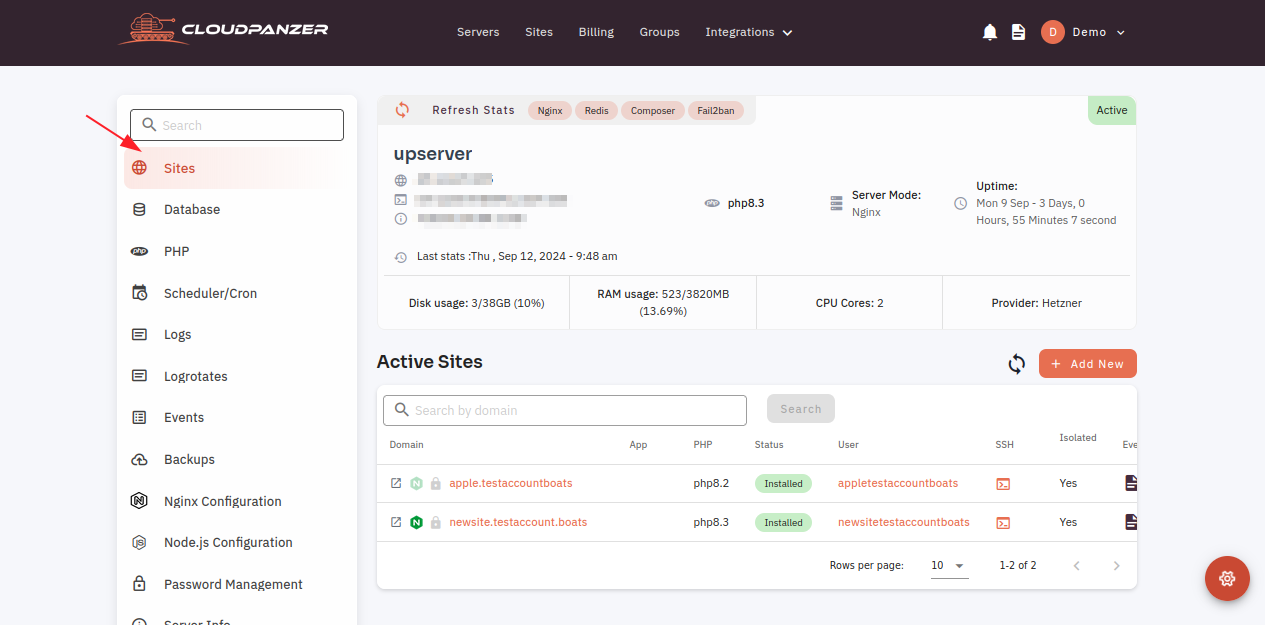
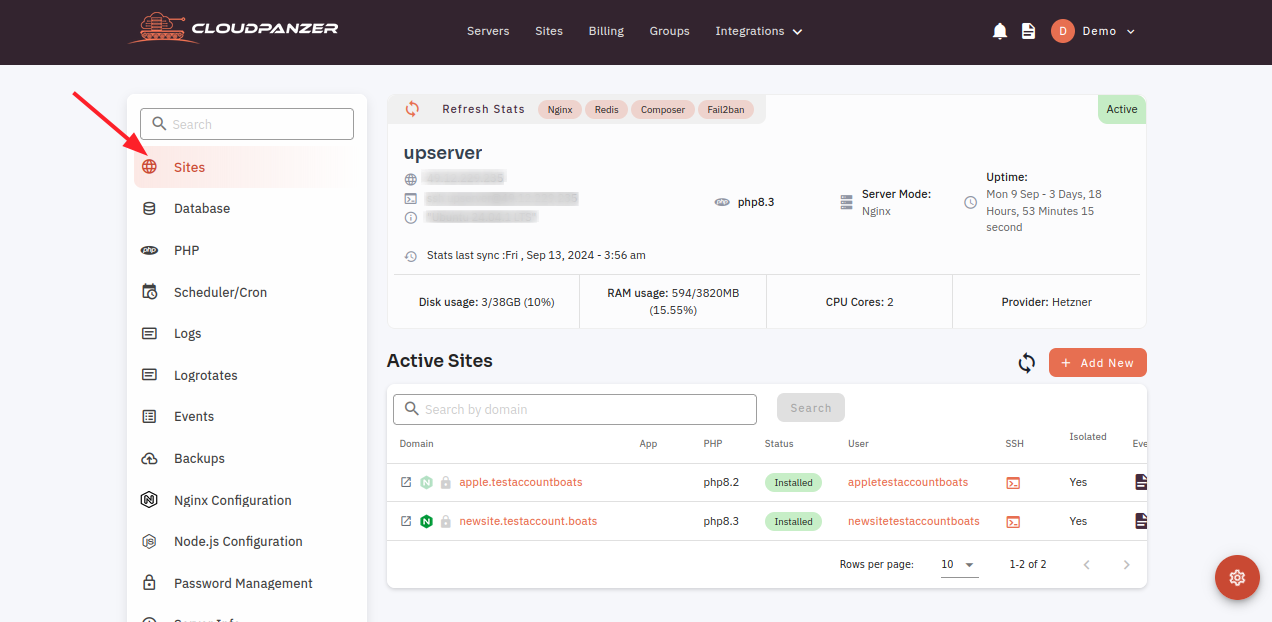
1: Once you are logged in, look for a "Server" and click on it.
2. Select the Sites option.

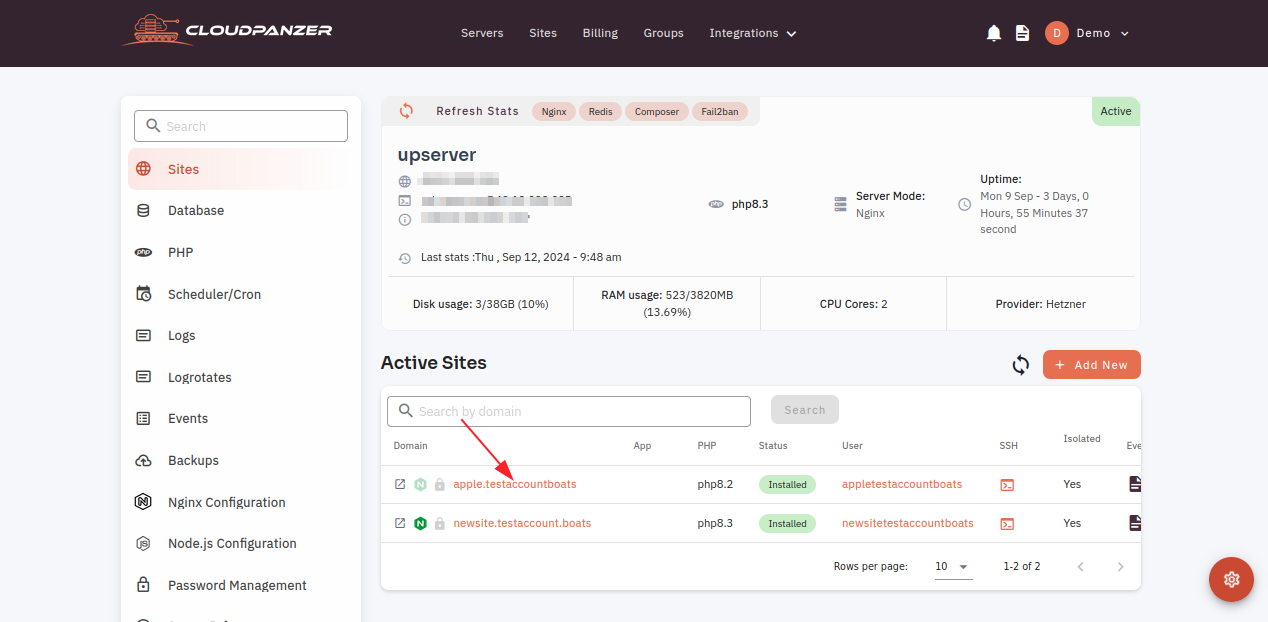
3. Select the Active site.

4. Select the PHP Config option.

5. Select the PHP version.
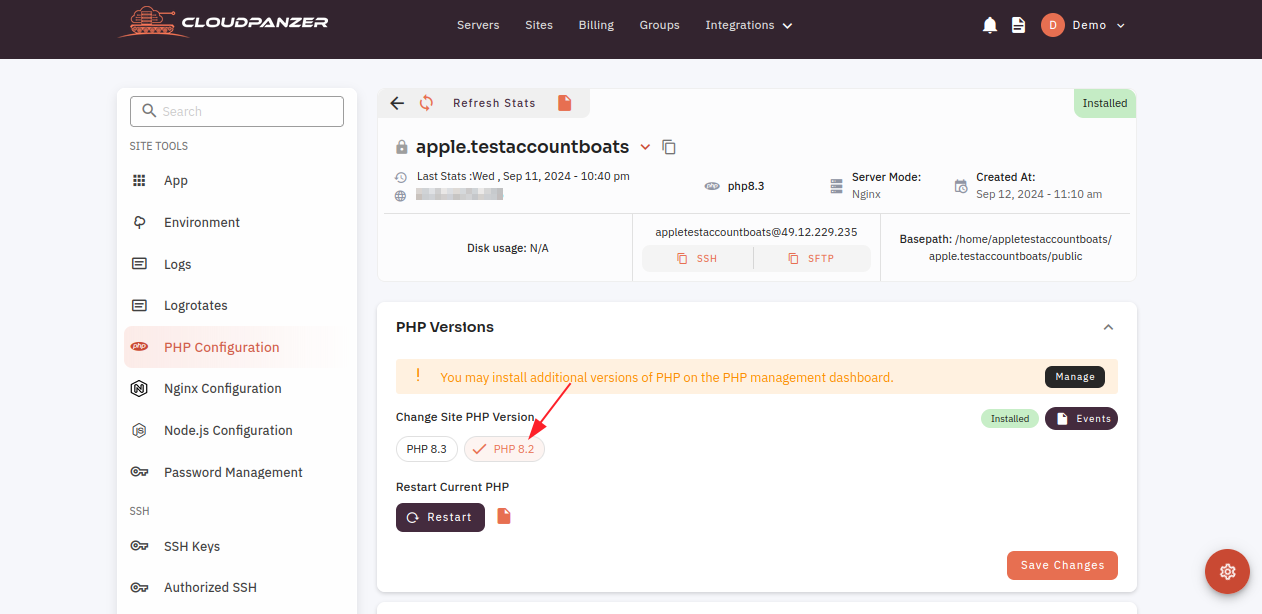
6. Click on the save Change Button and the PHP version changed successfully.
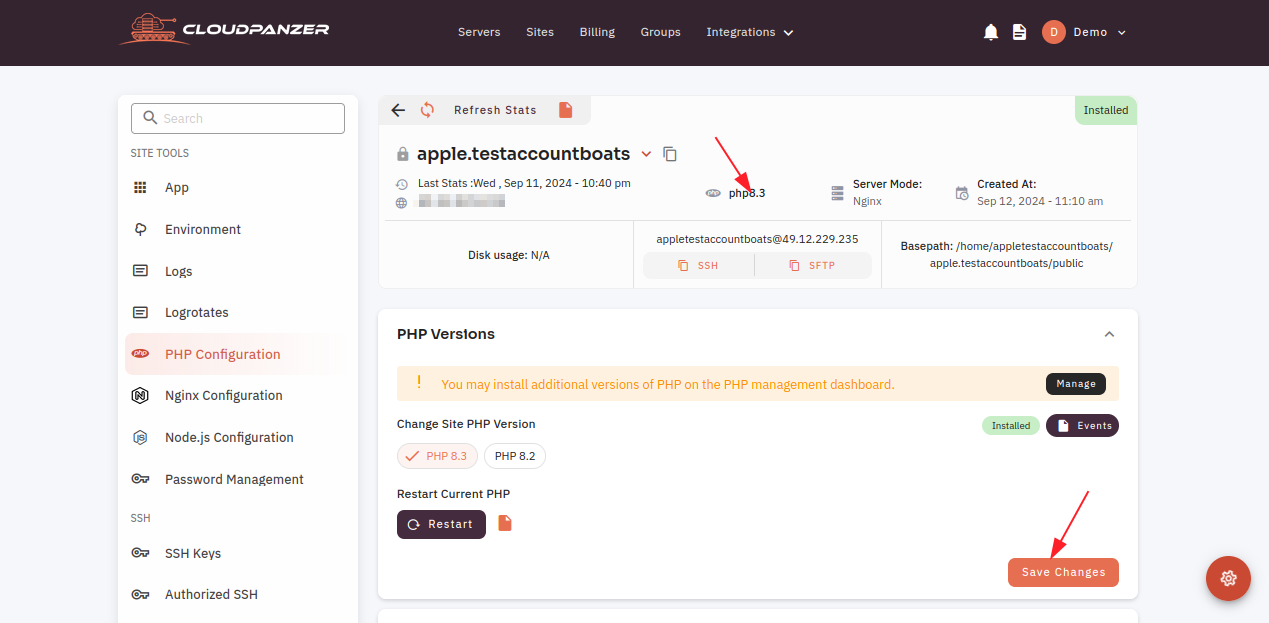
Here, you can see the PHP version changed successfully.
How to check Site php logs through the cloudpanzer website?
If you're having issues with your PHP-based website, one of the first places you should look for clues is the PHP logs. These logs can provide valuable information about any errors or issues that are occurring on your site, as well as help you troubleshoot and fix any problems.
Tutorial :
You can watch the Video or Continue reading the post.
Follow the steps below to check php logs site
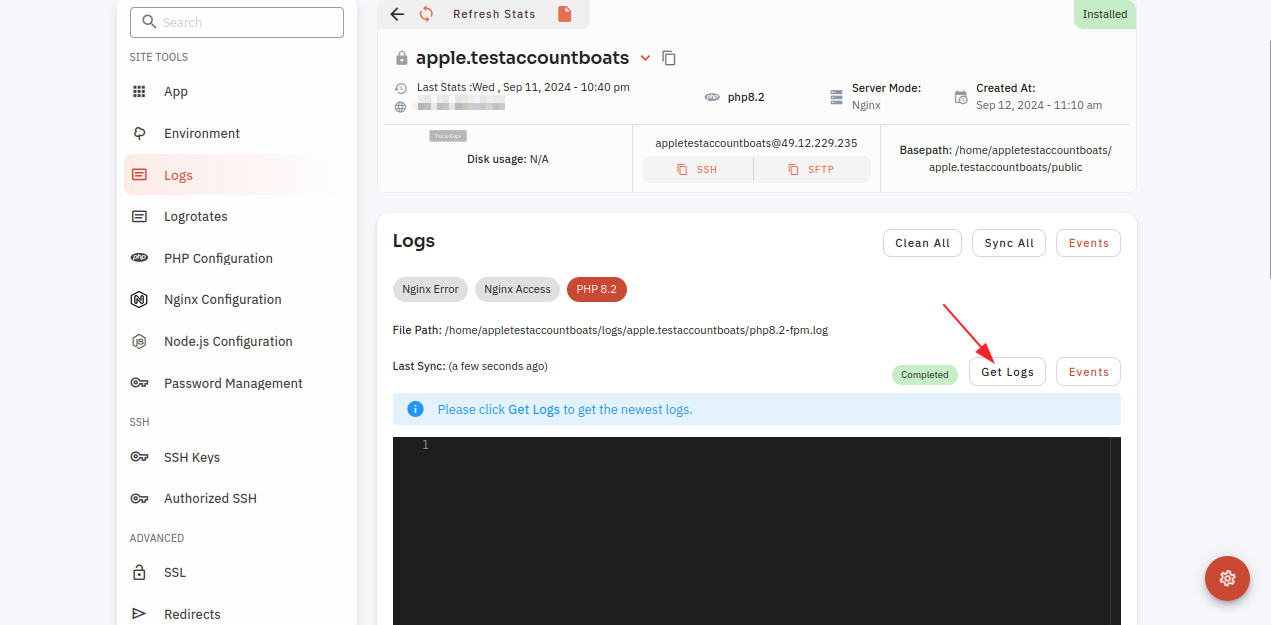
1. Select Server of your choice.
2. Select the Sites option.
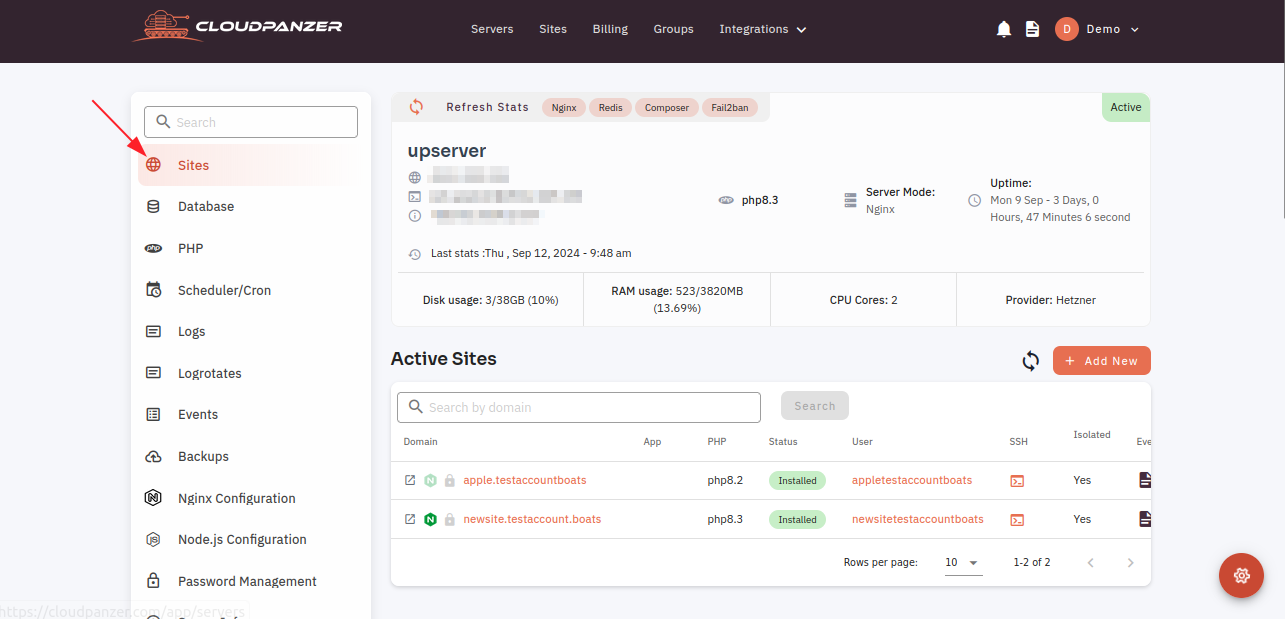
3. Select the Active site. Click on the Logs Option.

4. Click on the PHP button.
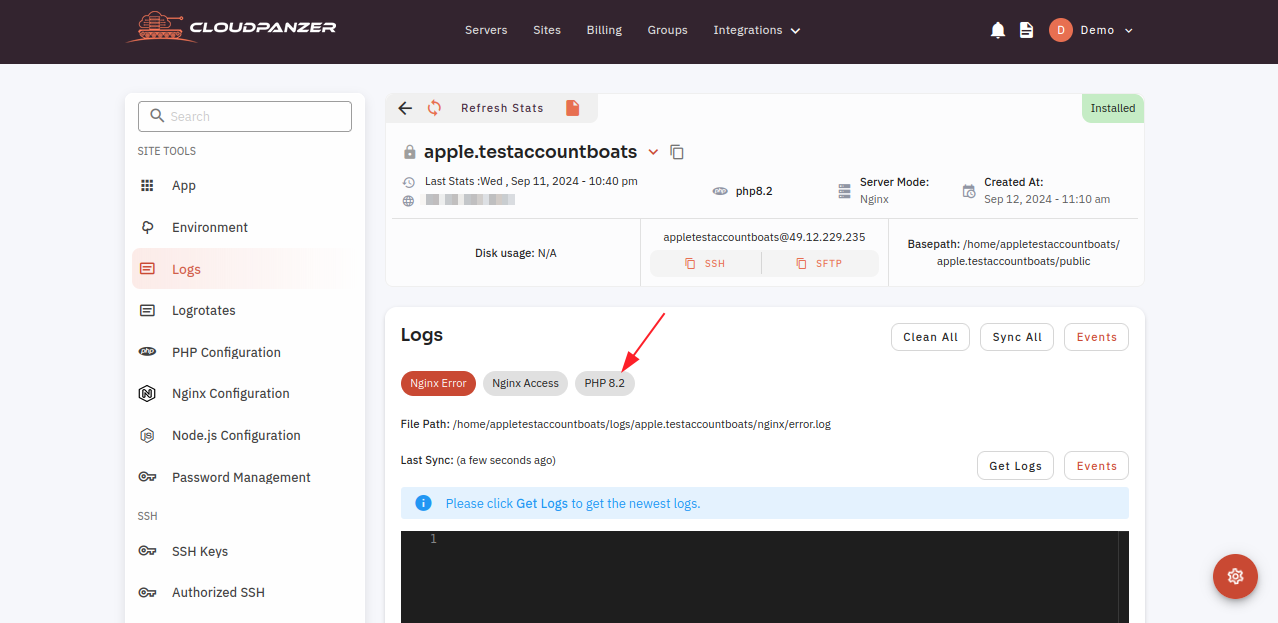
5. Click on the Get Logs button.
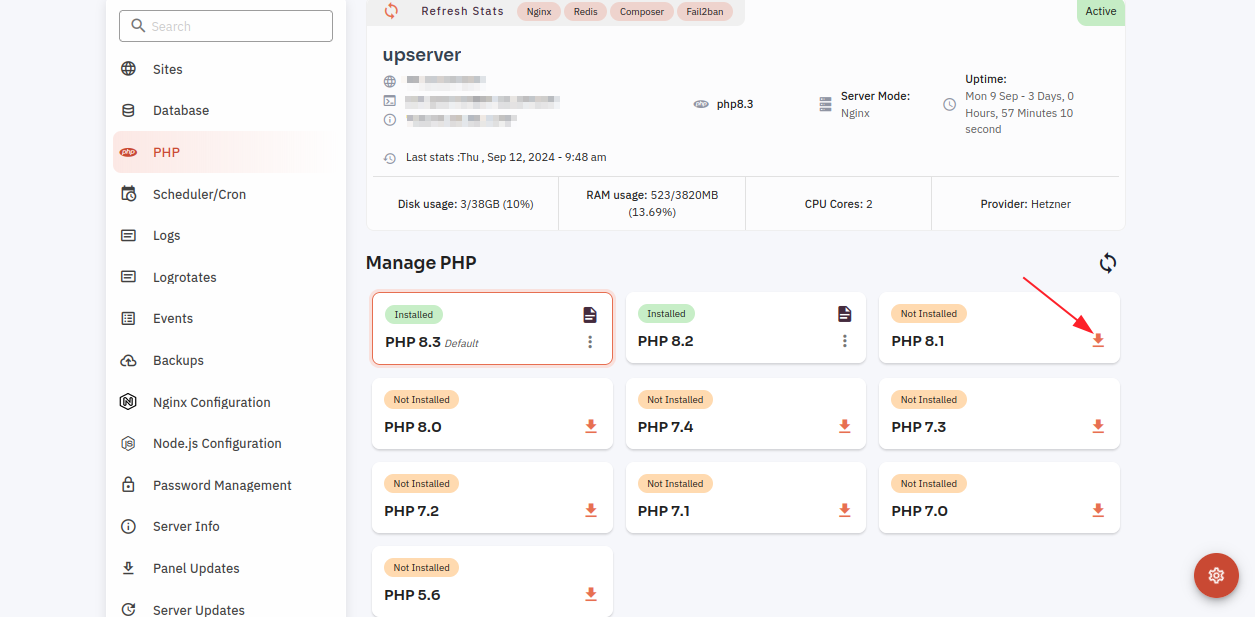
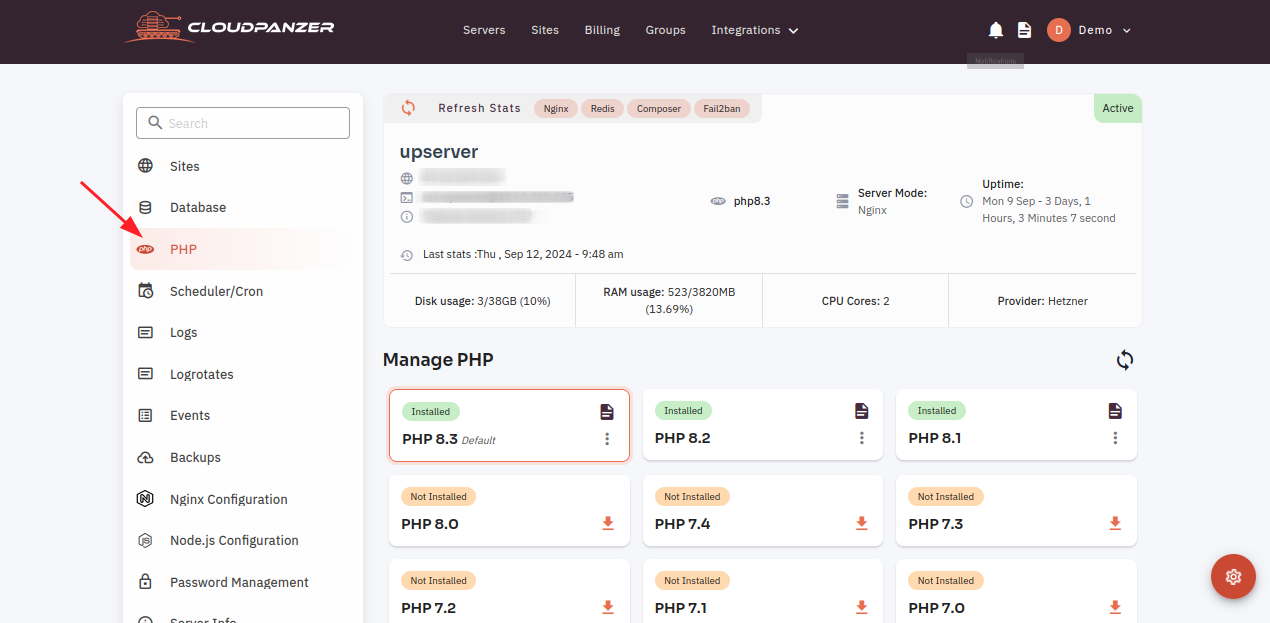
How to install a PHP version on a site in CloudPanzer?
Installing PHP on a server is necessary to enable the server to interpret and execute PHP code, which is essential for building interactive and data-driven websites.
Tutorial :
You can watch the Video or Continue reading the post.
Follow the steps below to install the PHP version
1: Once you are logged in, look for a "Server" and click on it.

2. Select the Sites option.
3. Select the Active site.
4. Select the PHP Config option.
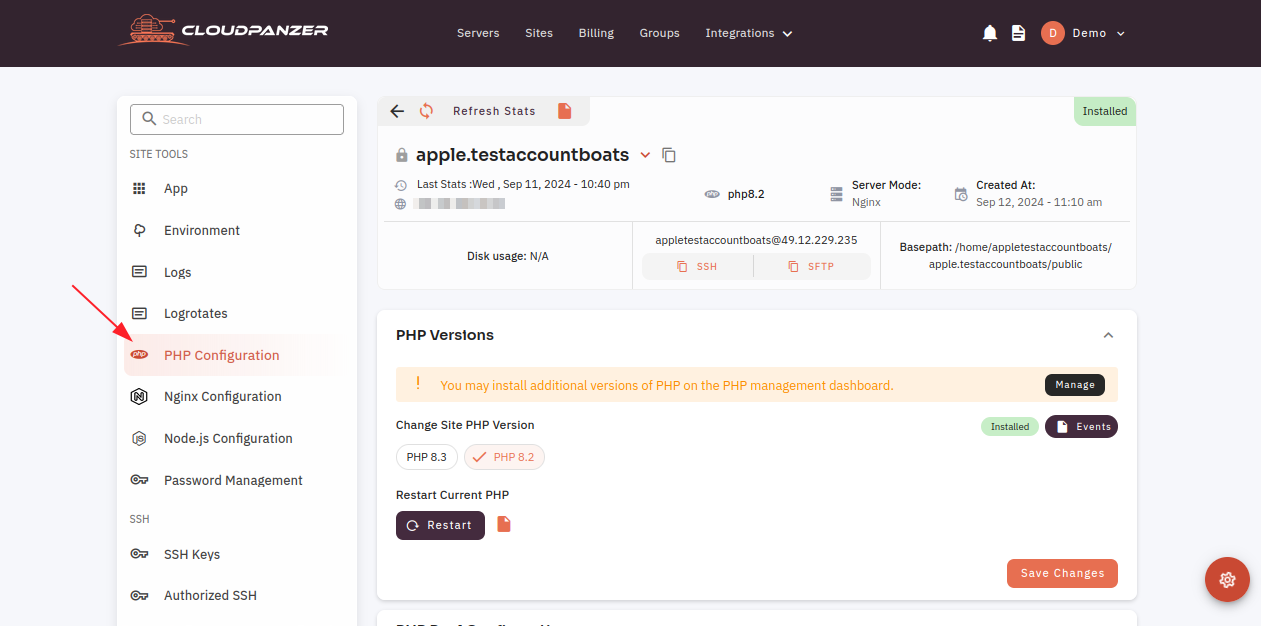
5. Click on the Manage button.

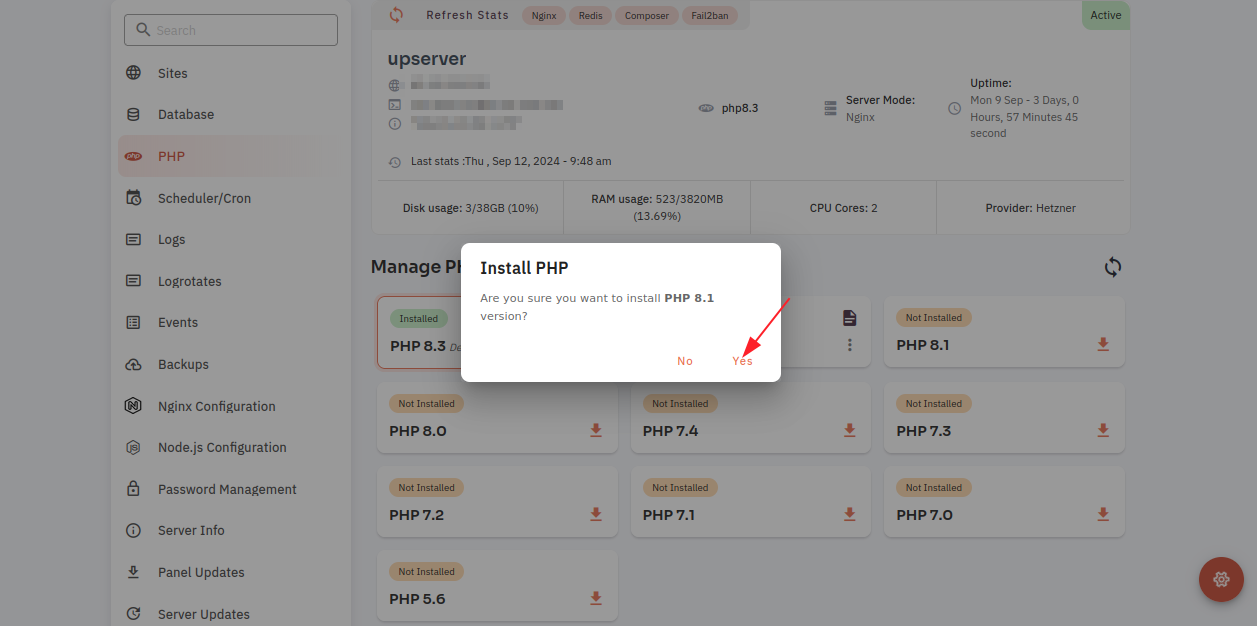
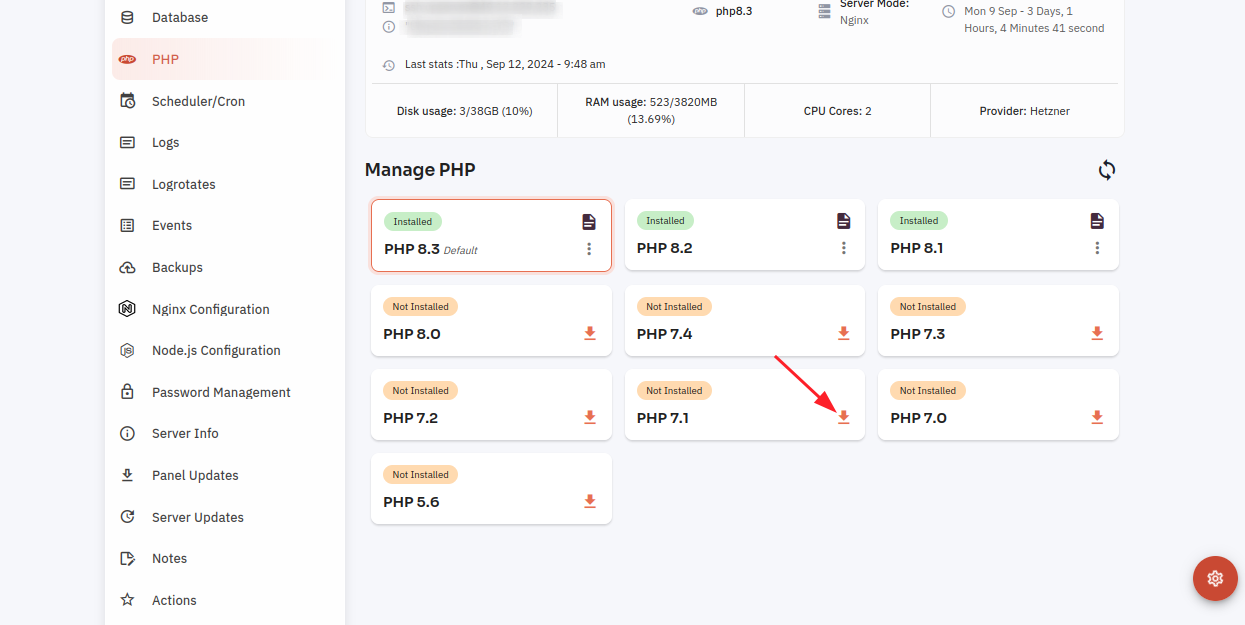
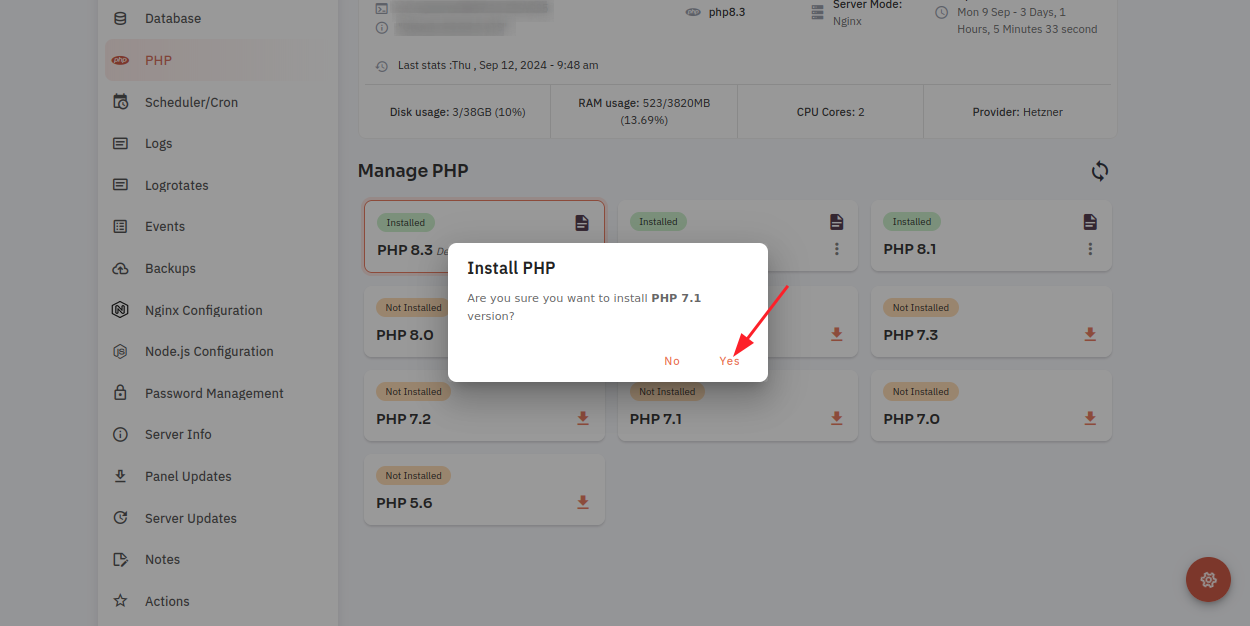
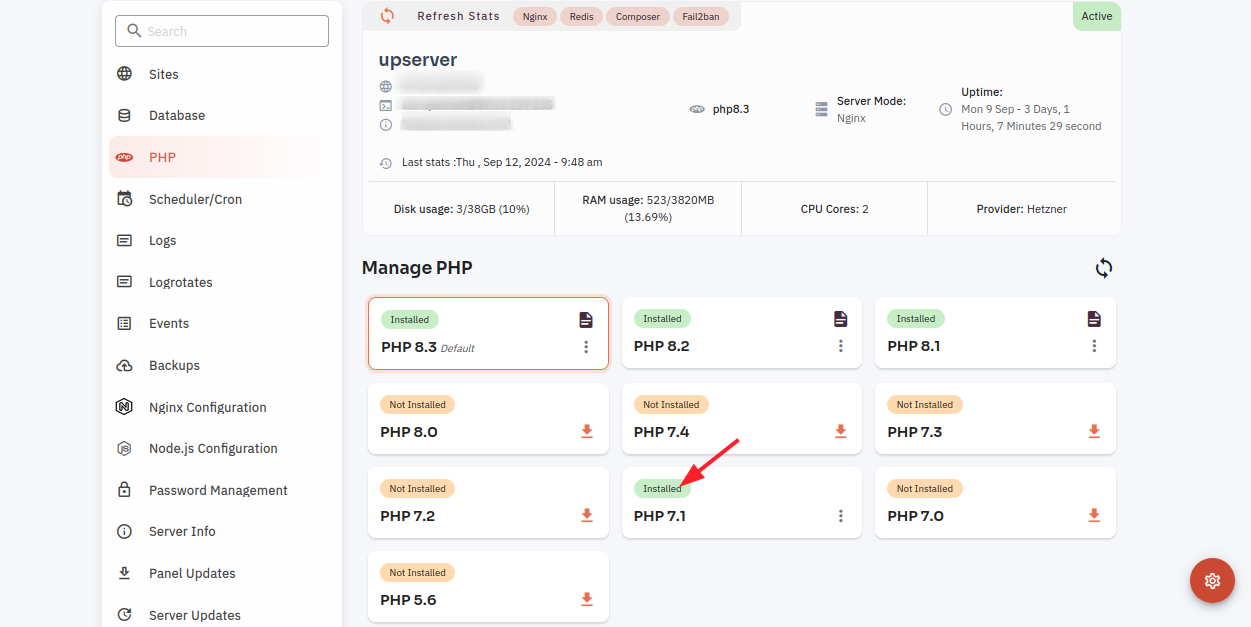
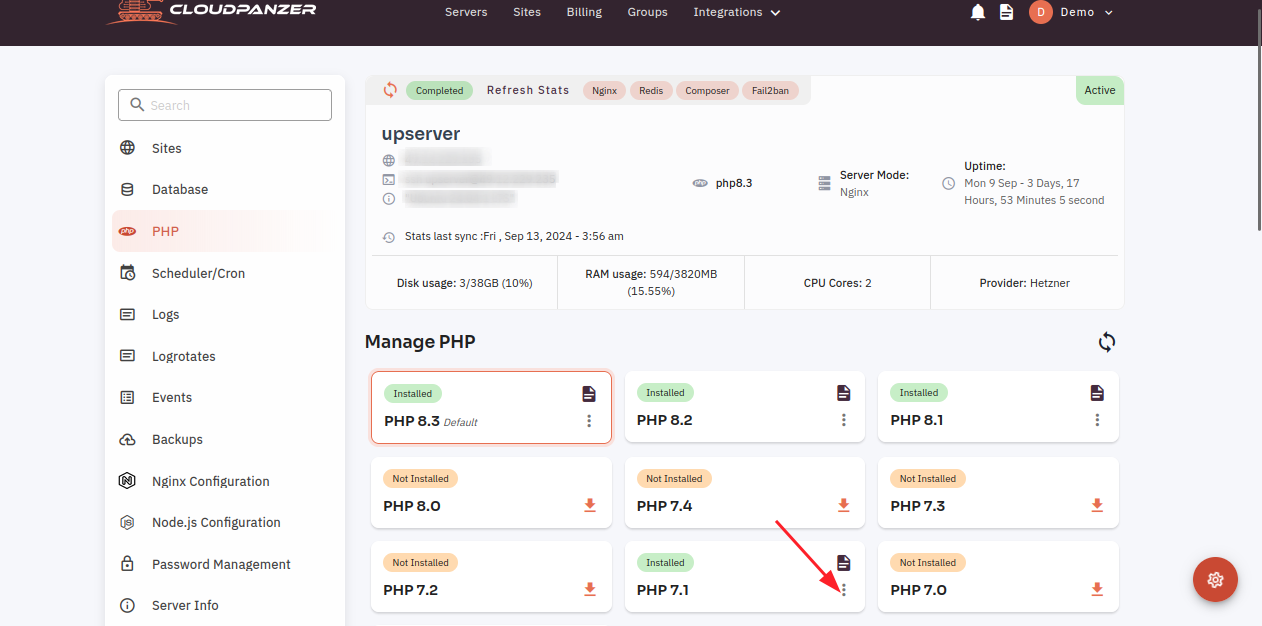
6. Here, different PHP versions will show. You can click on the install button to install a PHP version.
7. Click on the Yes button.
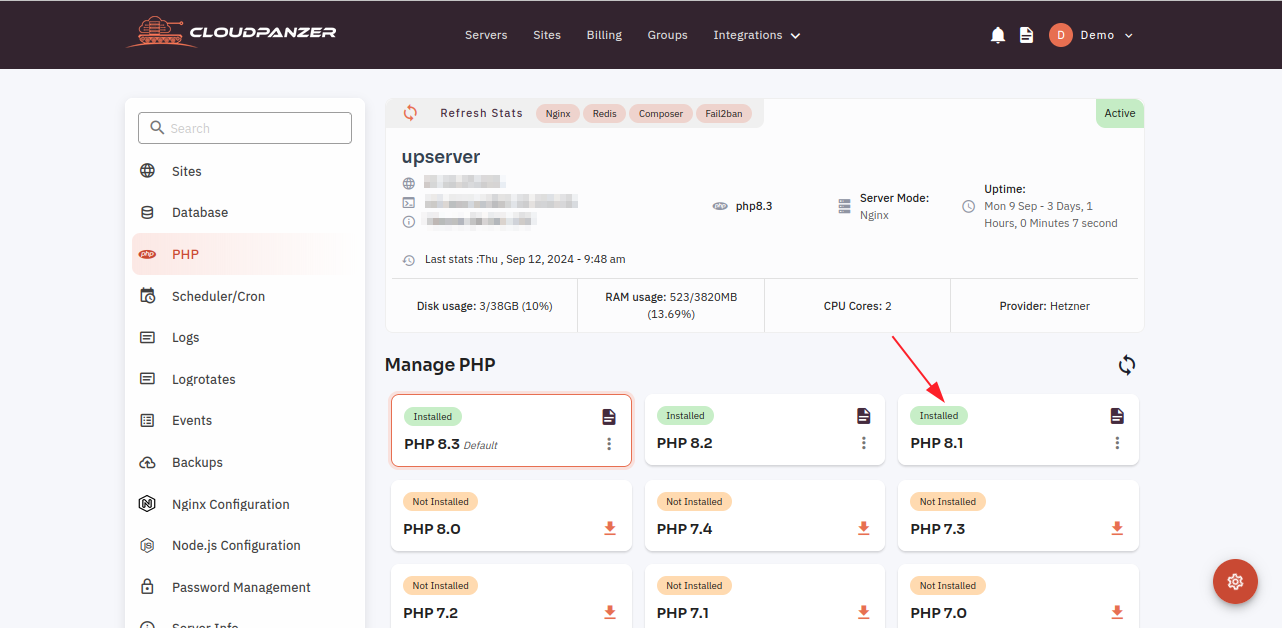
Here. you can see the PHP version installed successfully.
How to install and configure PHP on server in CloudPanzer?
To install PHP on a server, you'll need to follow a series of steps depending on the server's operating system. You may encounter situations where you need to use an older version of PHP for compatibility reasons or to support legacy applications. Here, you can choose the PHP version according to your requirements.
Tutorial :
You can watch the Video or Continue reading the post.
Follow the steps below to install and configure the PHP
1.1 Once you are logged in, look for a "Server" and click on it.
1.2 Click on the PHP option.
1.3 Click on the download button.
1.4 Click on the Yes Button.
1.5 Here you can see within a few seconds PHP has been installed successfully.
Other Options :
2.1 Click on the Menu icon.
2.2 Click on the Restart Option.
2.3 Click on the yes button to restart the PHP version.
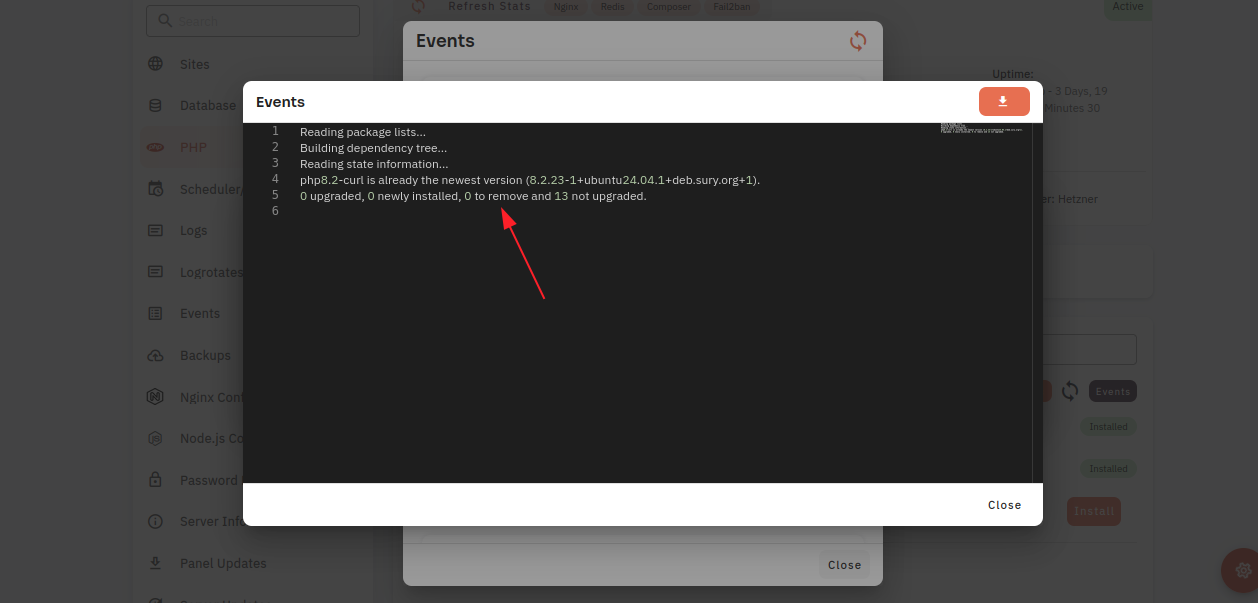
2.4 You can check events by clicking on the file icon.
2.5 The list of events will show and then click on the Eye icon.
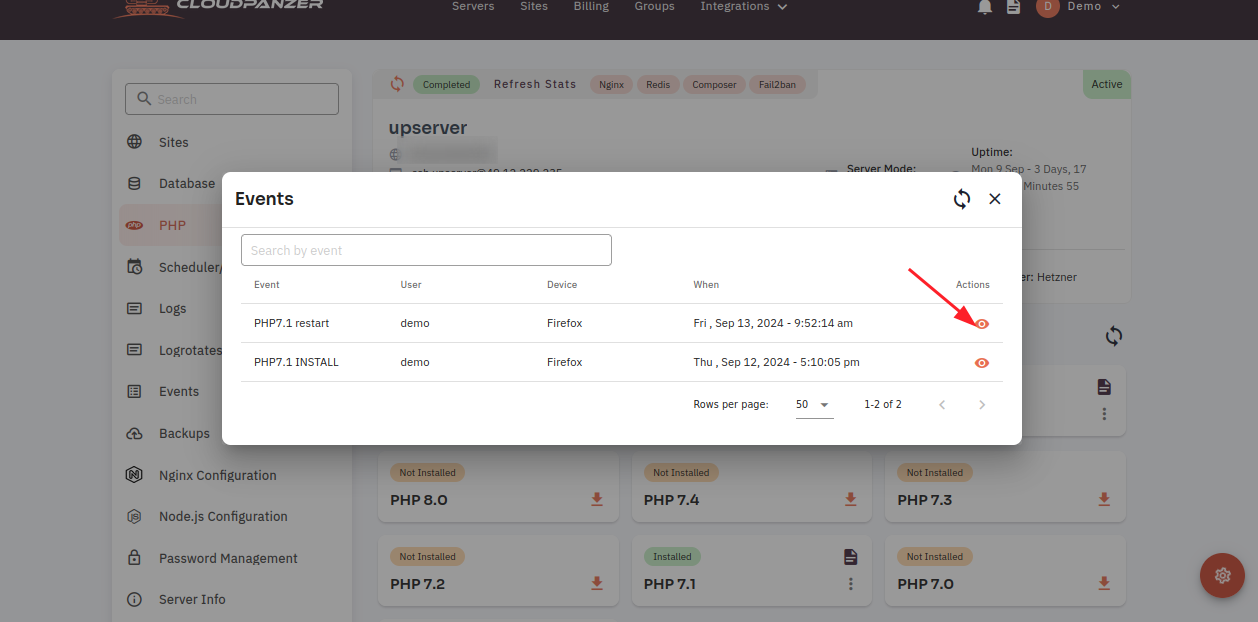
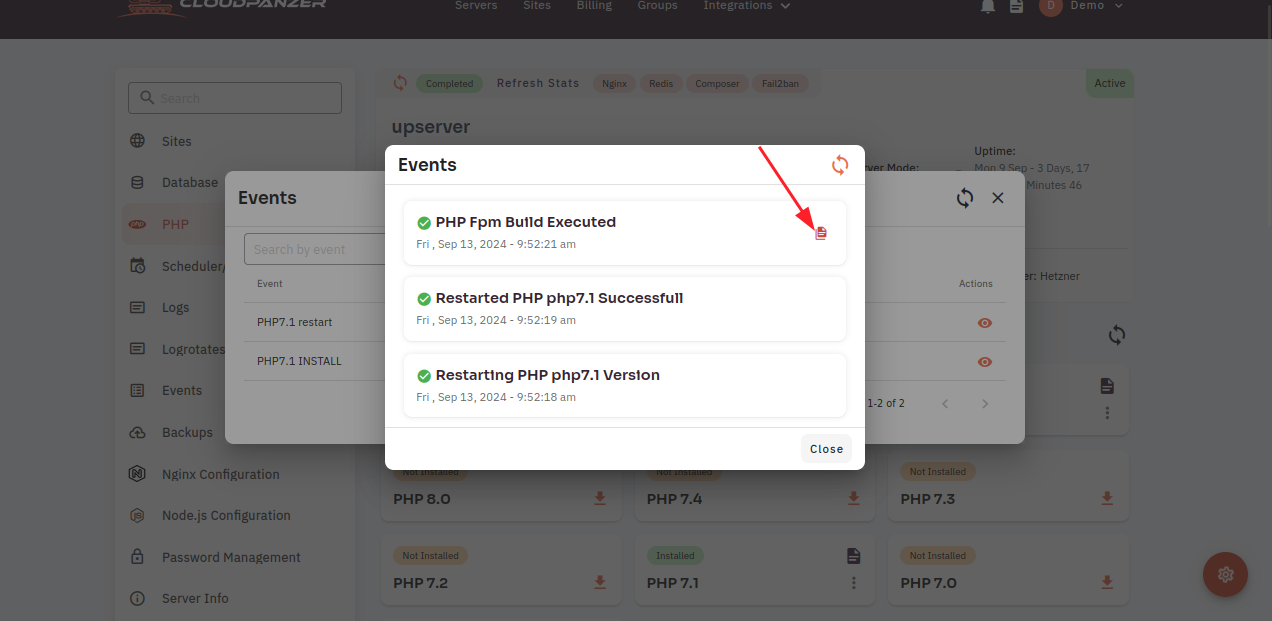
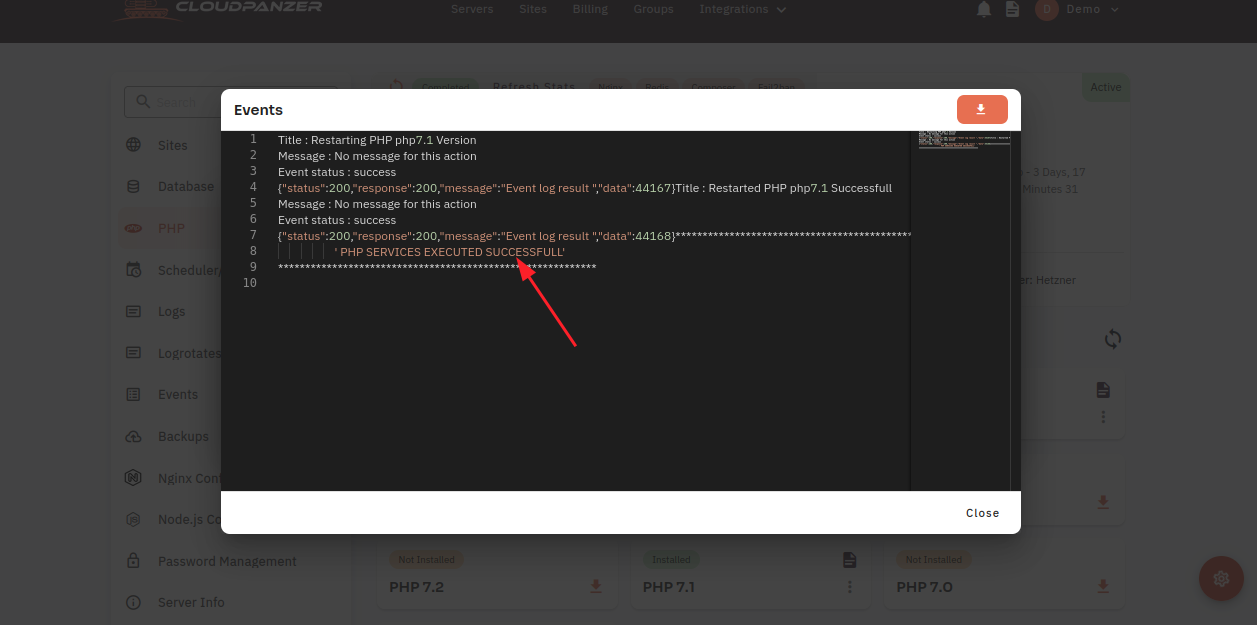
2.6 Here you can see PHP events have shown successfully.
PHP configuration :
3.1 Click on the Poppup menu icon.
3.2 Select option Configurations.
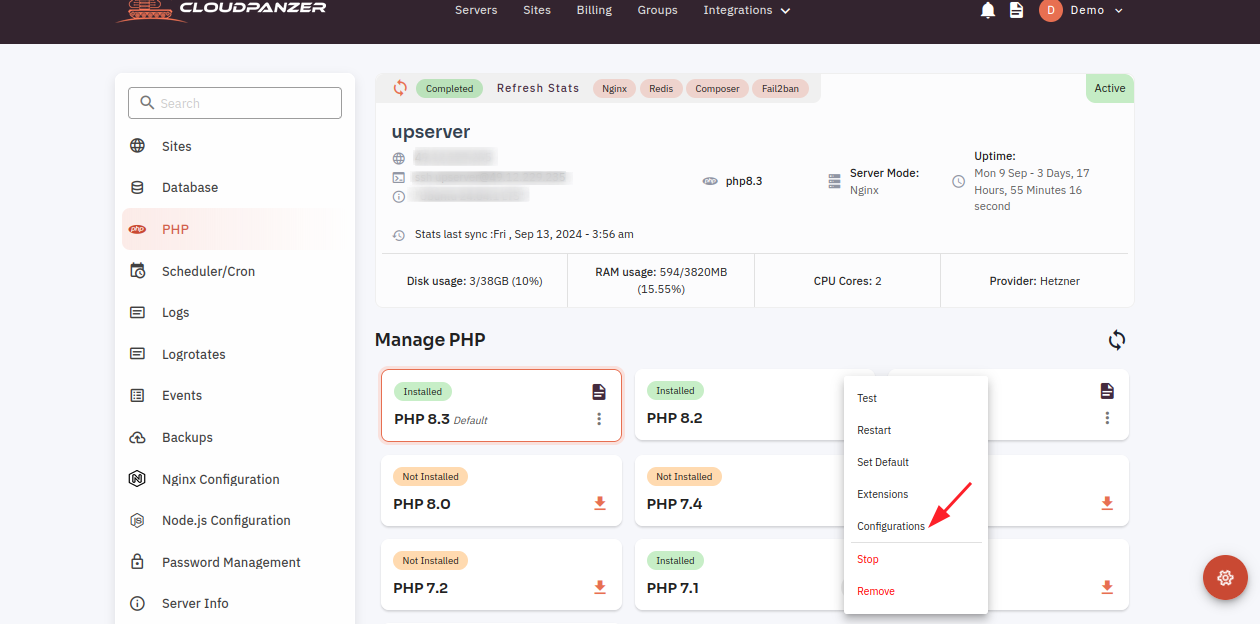
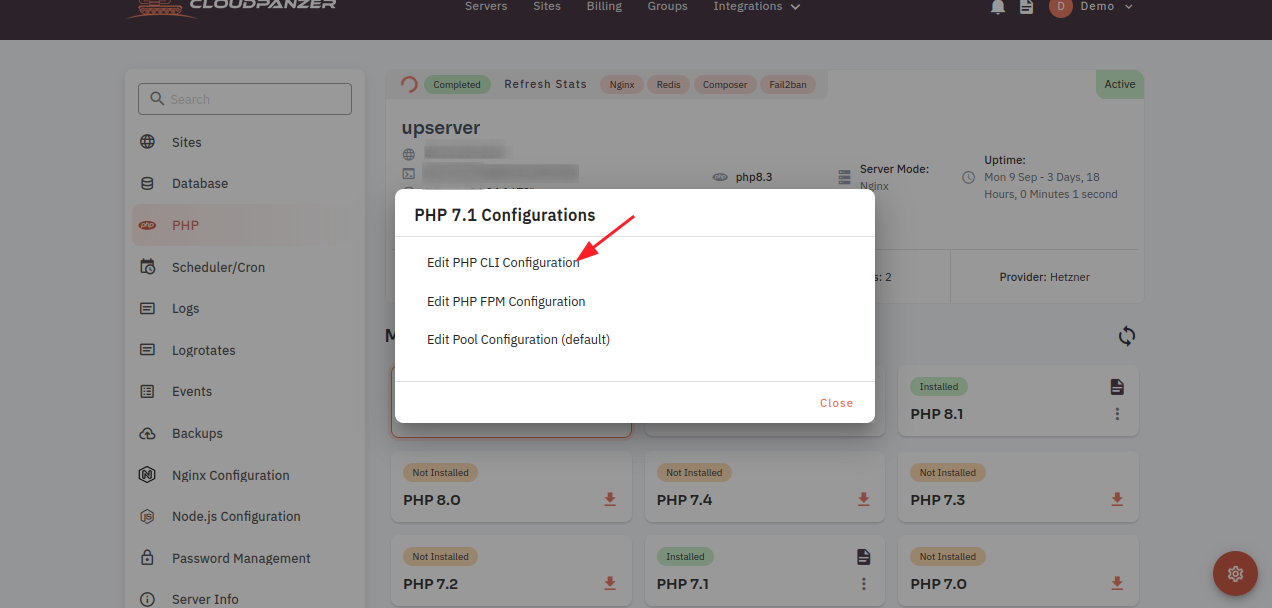
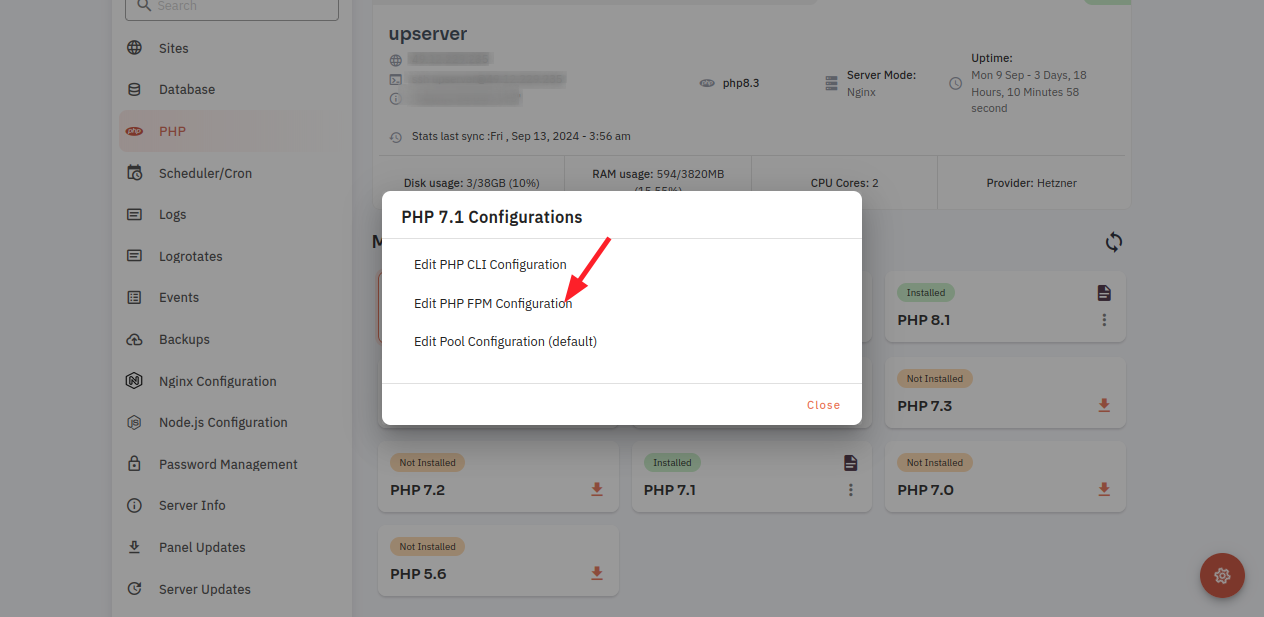
3.2 Open dialog and Click on Edit PHP CLI Configuration. PHP CLI refers to the Command Line Interface version of the PHP interpreter. It allows you to execute PHP scripts directly from the command line.
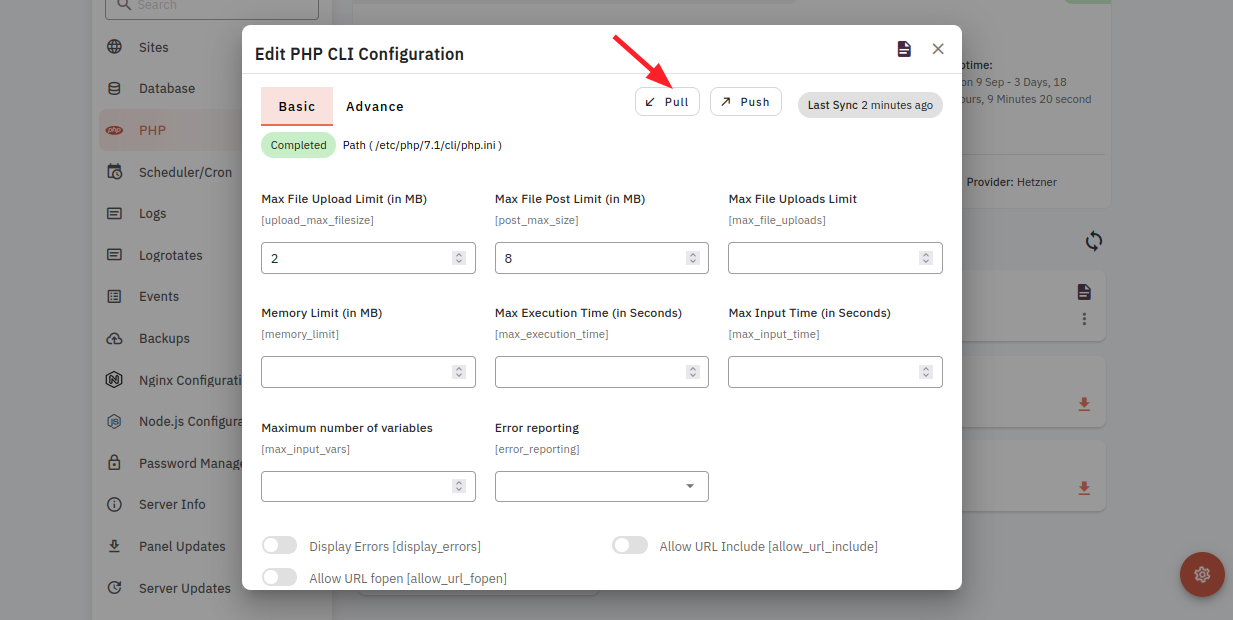
3.3 A dialog box will open with the Basic and Advance tab. By clicking on the Pull button, you can fetch details and you can change any value. You can save these changes by clicking on the push button.
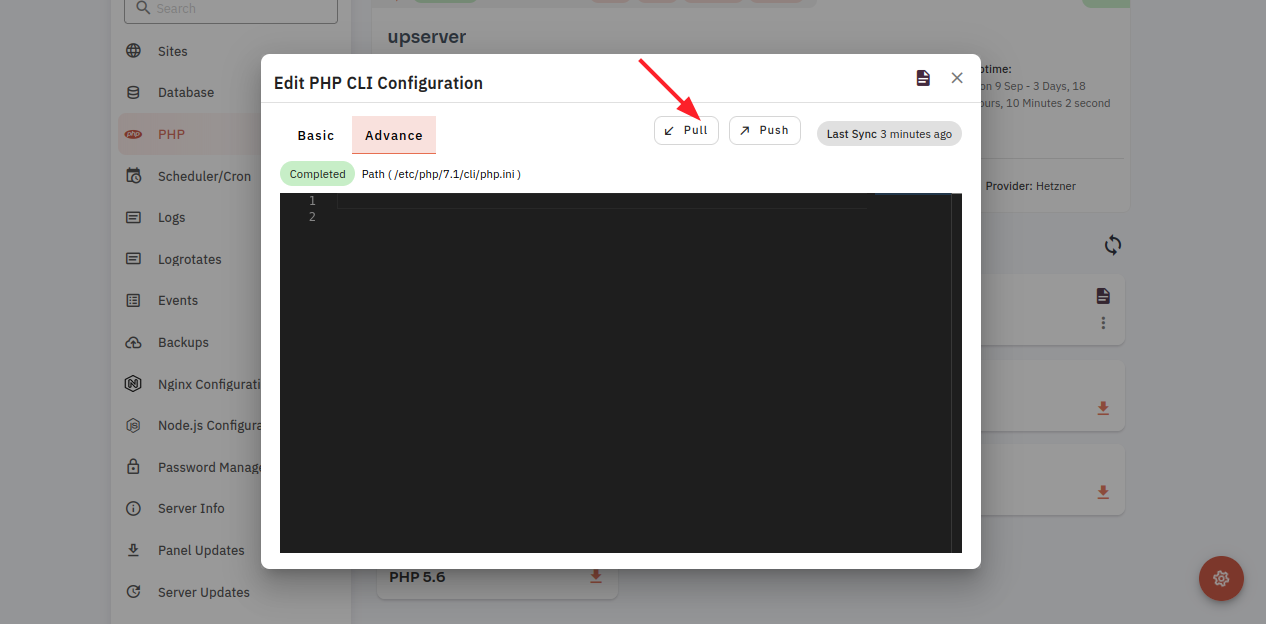
3.4 Click on the Advance tab button. Here, you can see the PHP CLI configuration by clicking on the pull button and save changes by clicking on the push button.
PHP FPM Config :
4.1 Click on Edit PHP FPM Configuration. PHP FPM is a PHP FastCGI(Common Gateway Interface) implementation with some additional features, designed primarily for serving PHP applications web servers. It can handle a large number of requests without consuming excessive server resources.
4.2 Further steps are similar to CLI configuration.
Edit Pool Config (default) :
5.1 Click on Edit Pool Configuration (default). You can also view the list of websites below to edit pool configuration. A PHP-FPM pool configuration defines how the PHP-FPM process manager should behave and how many worker processes it should maintain.
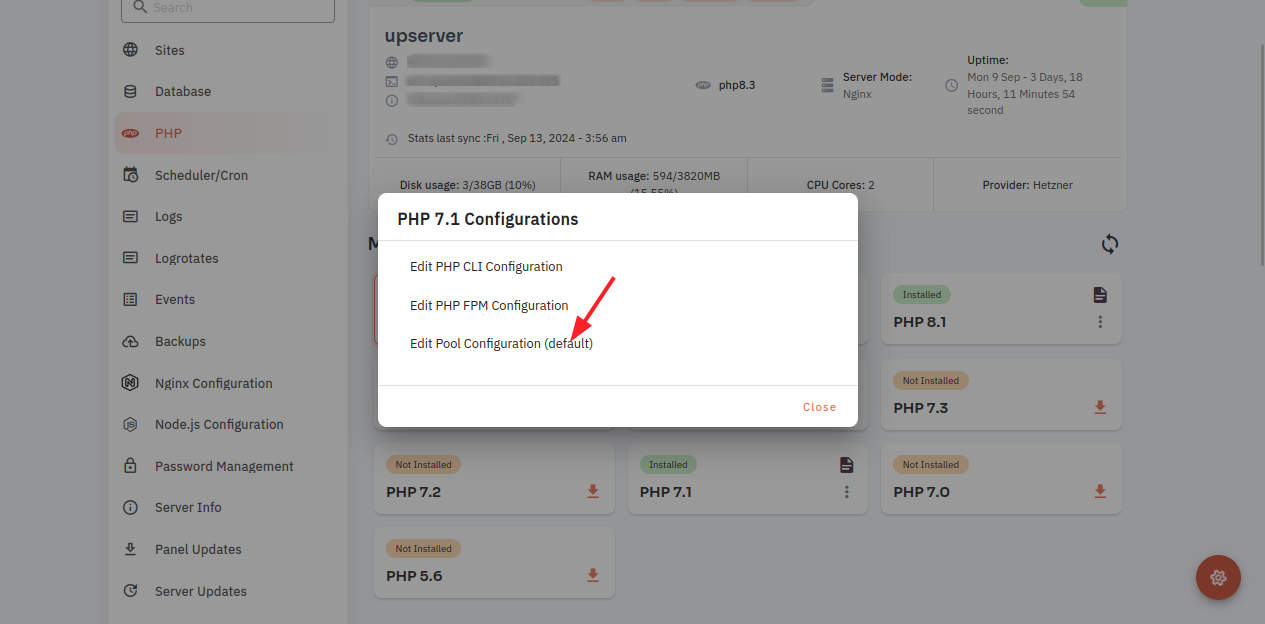
5.2 Further steps are similar to CLI configuration.
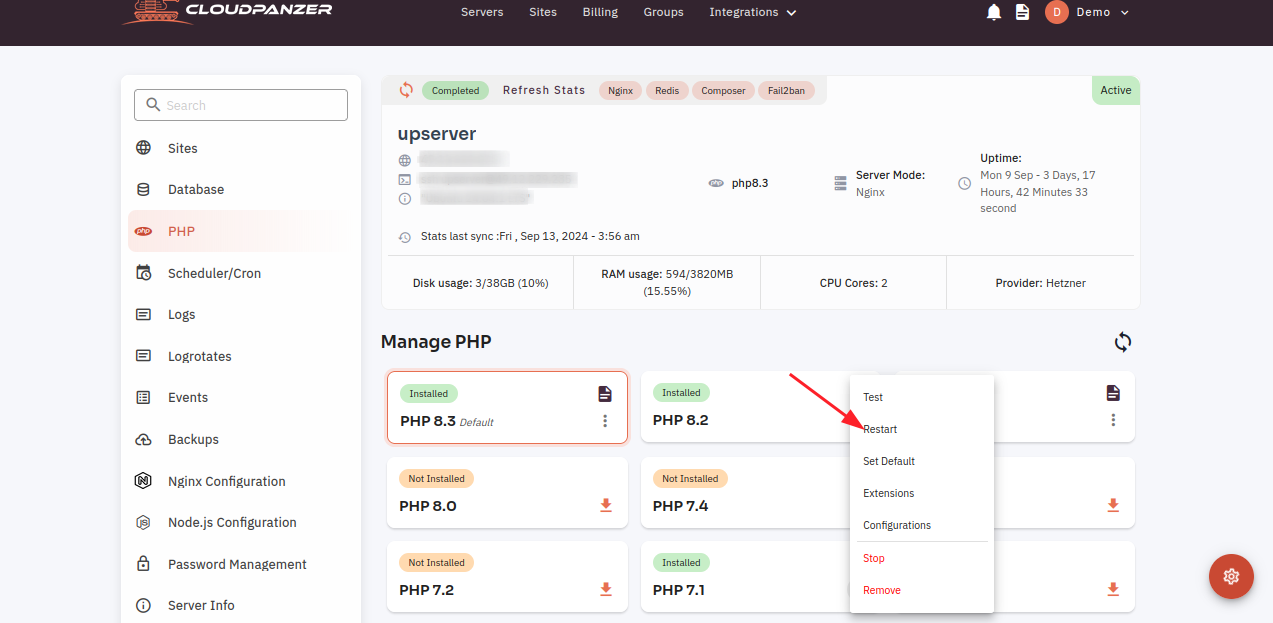
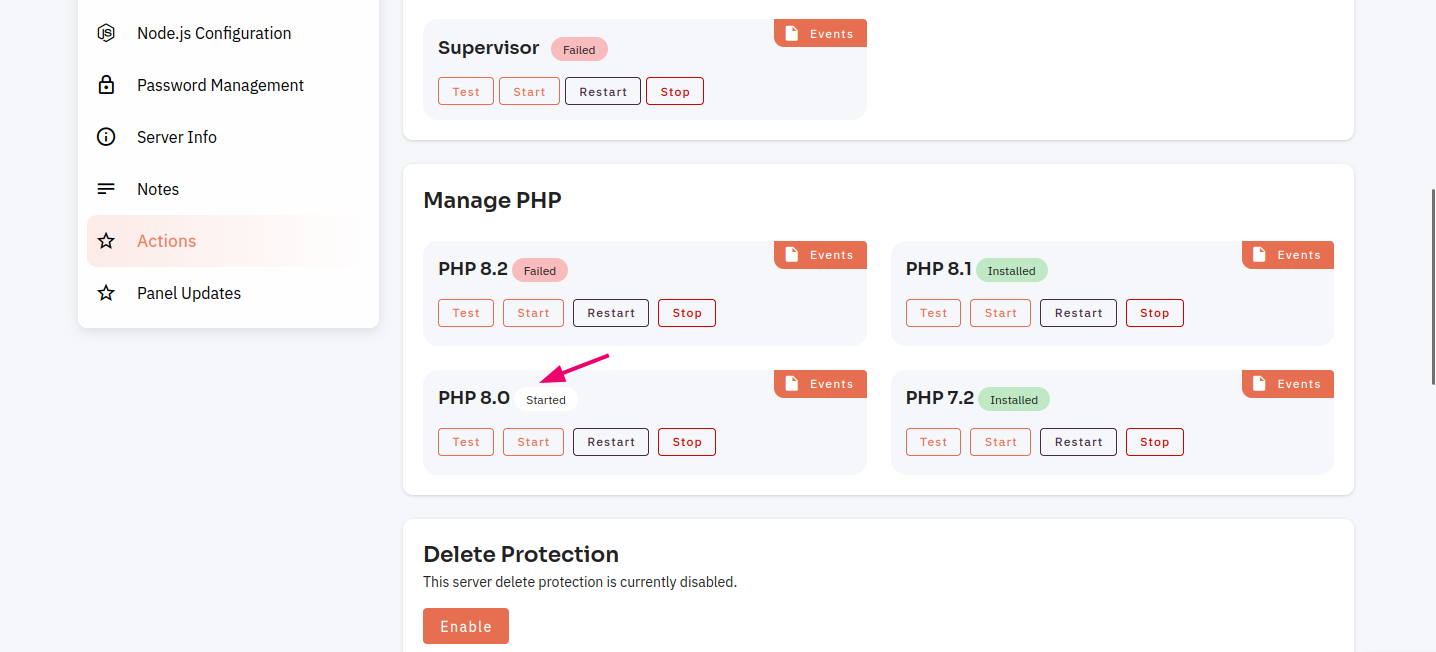
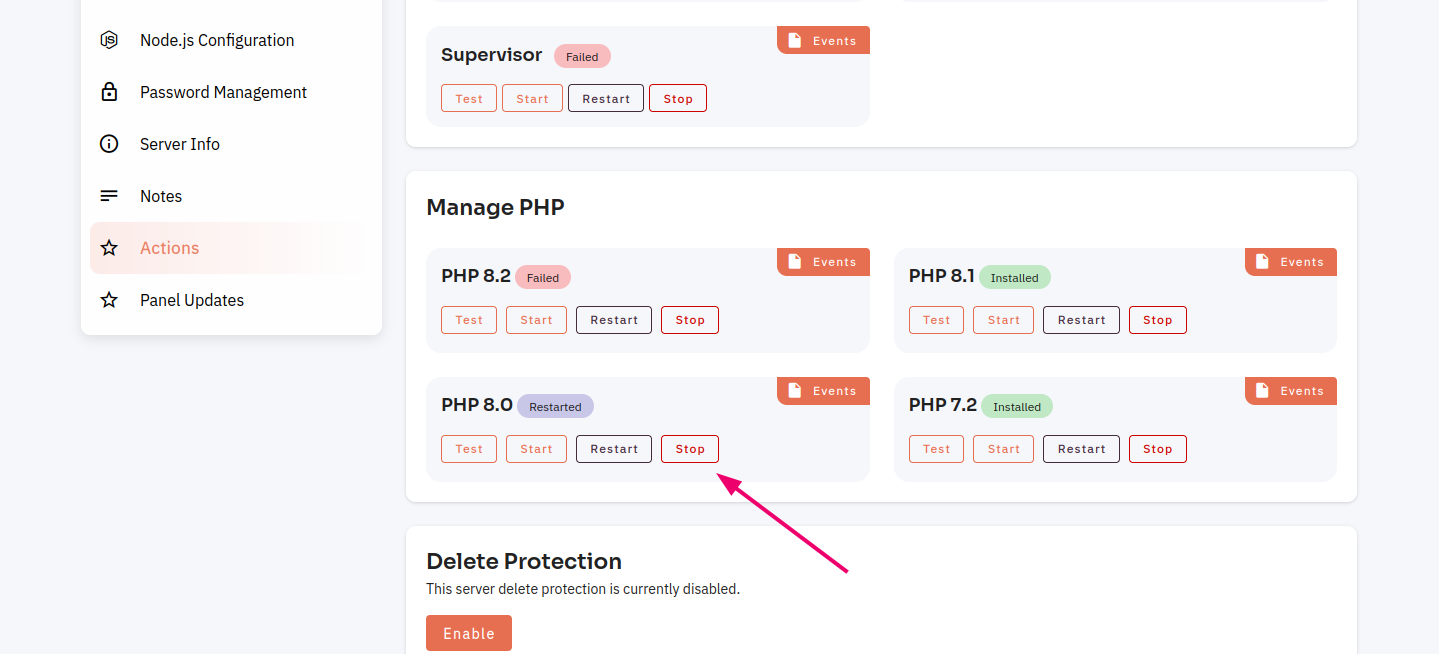
How to Manage PHP on CloudPanzer?
PHP is a widely used server-side programming language that is essential for the development of dynamic websites and web applications. It is constantly evolving and improving, and it is important for developers to keep track of the different versions of PHP and ensure that their applications are compatible with the version they are using.
Tutorial :
You can watch the Video or Continue reading the post.
Follow the steps below to Manage the PHP Version
1: Once you are logged in, look for a "Server" and click on it.

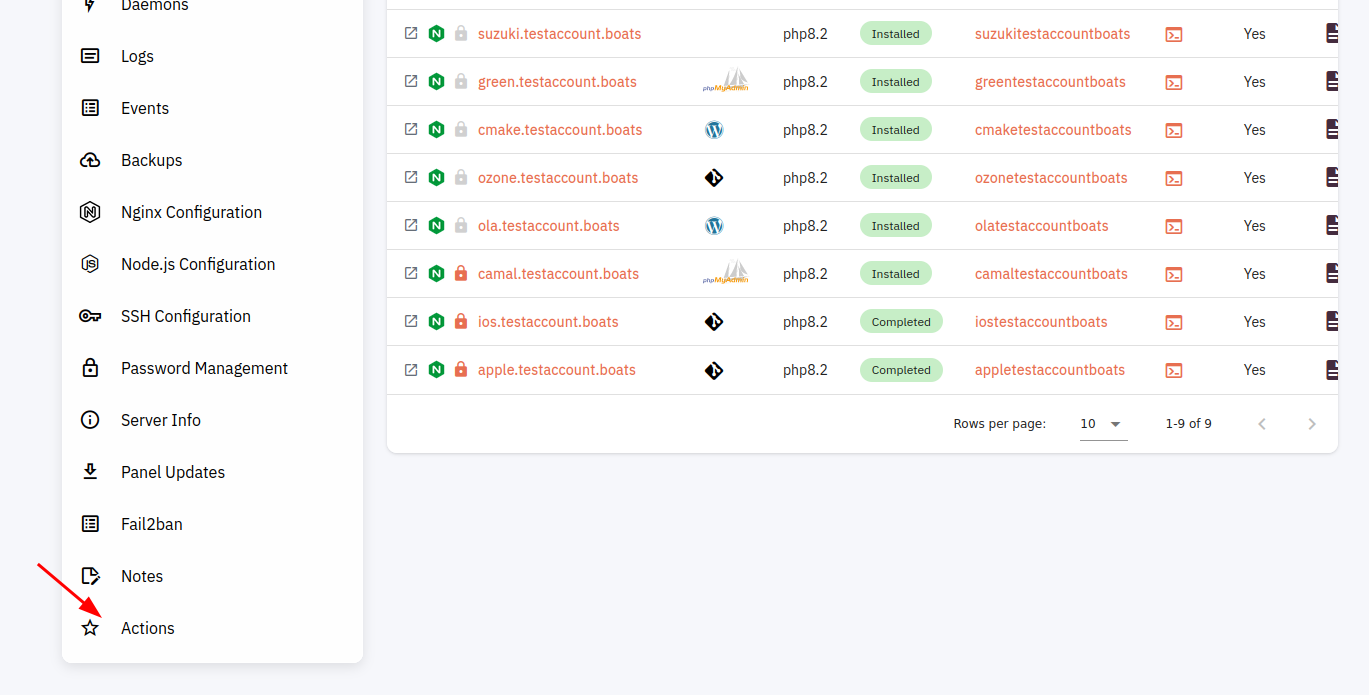
2. Click on Actions.
3. Then, click on the Manage PHP Test Button.
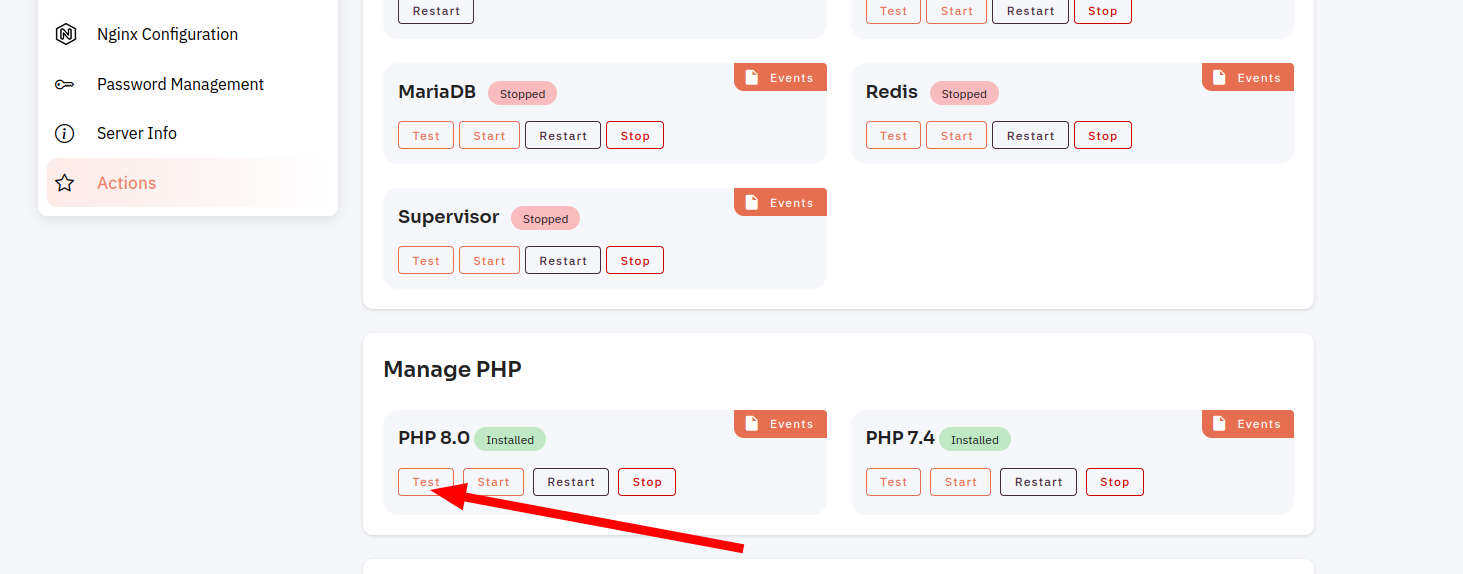
4. Click on the yes button to test the PHP.
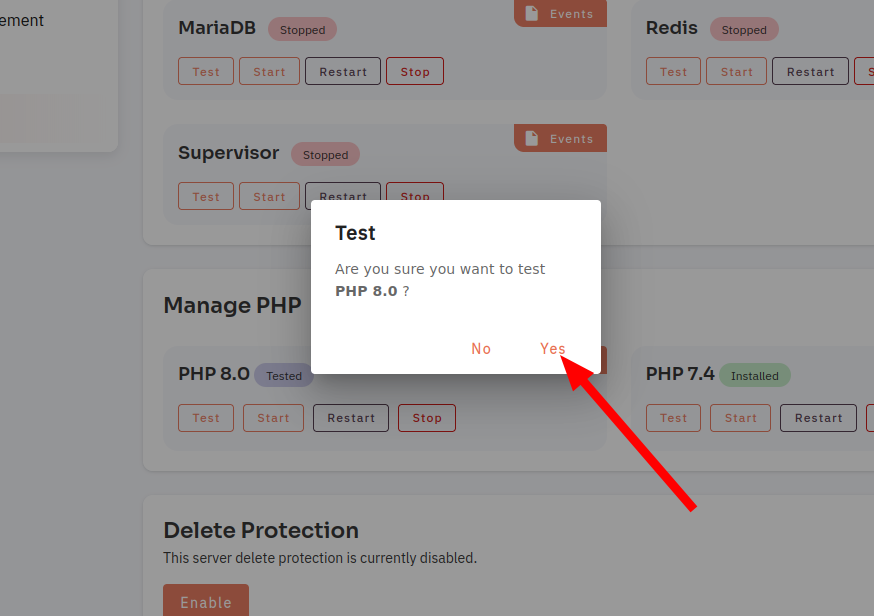
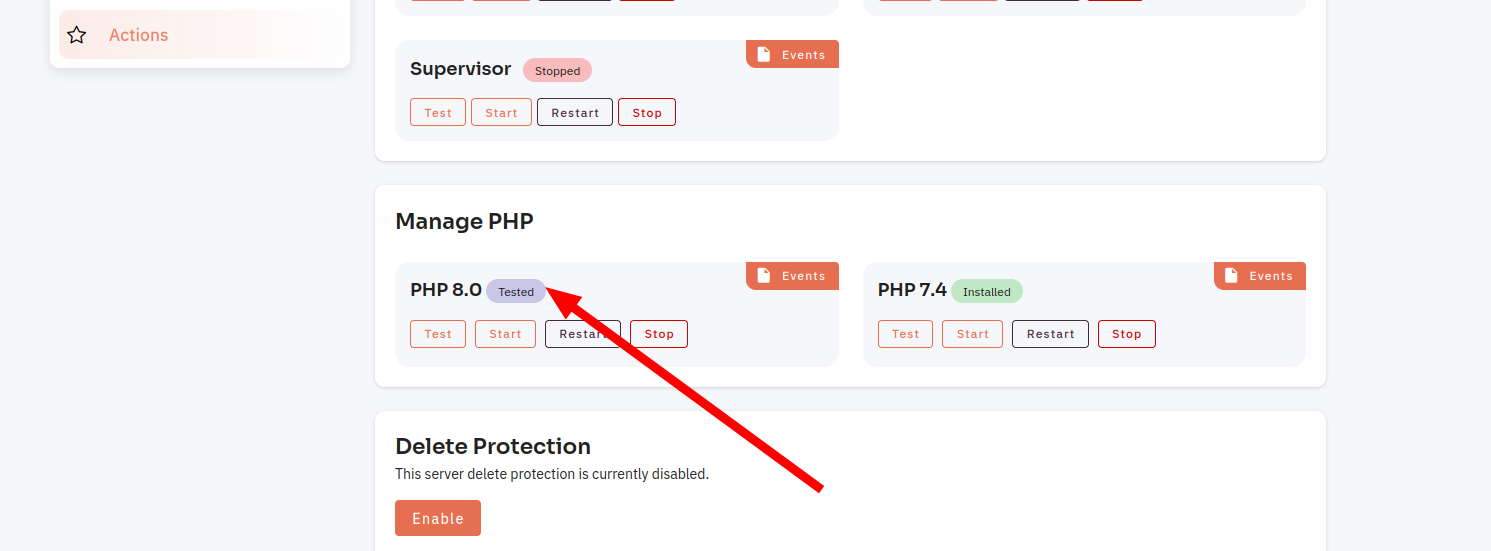
Here, you can see that PHP was Tested successfully.
5. Click on the Start button.
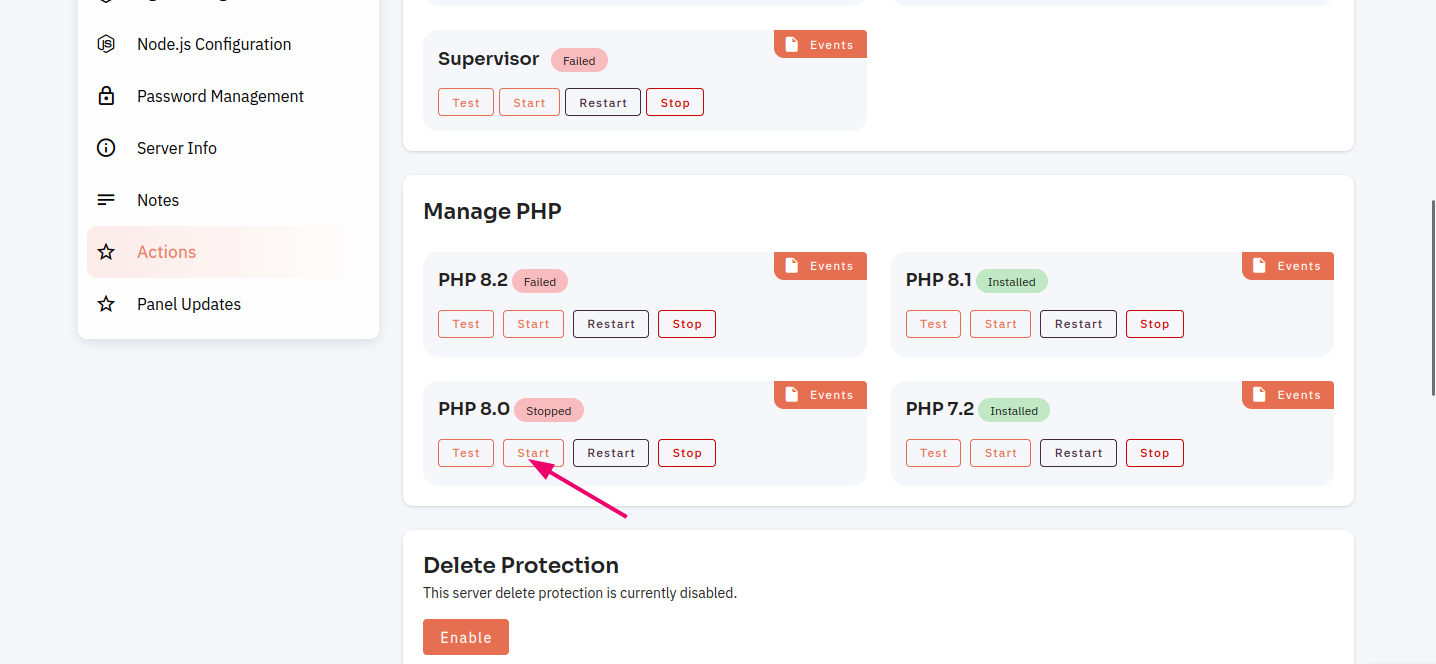
6. A Dialog will open and click on the yes button.
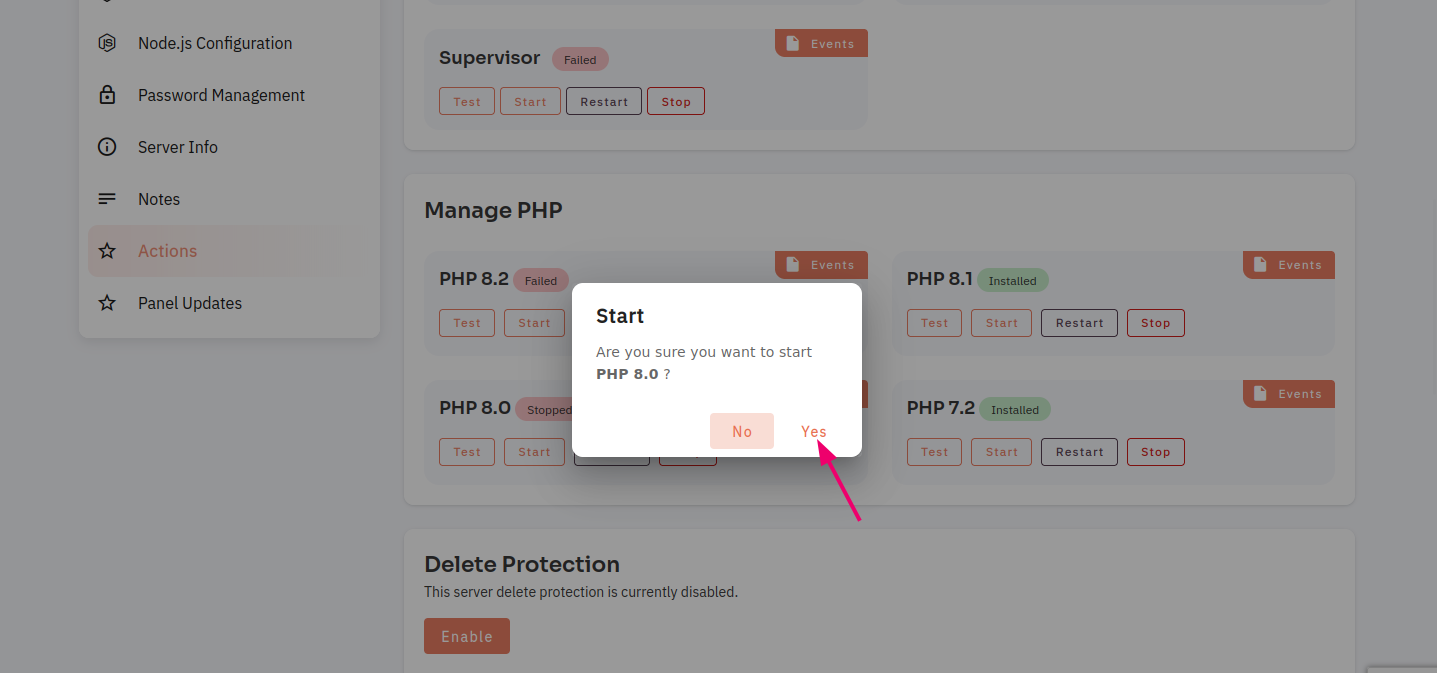
Here you can see that PHP Started successfully.
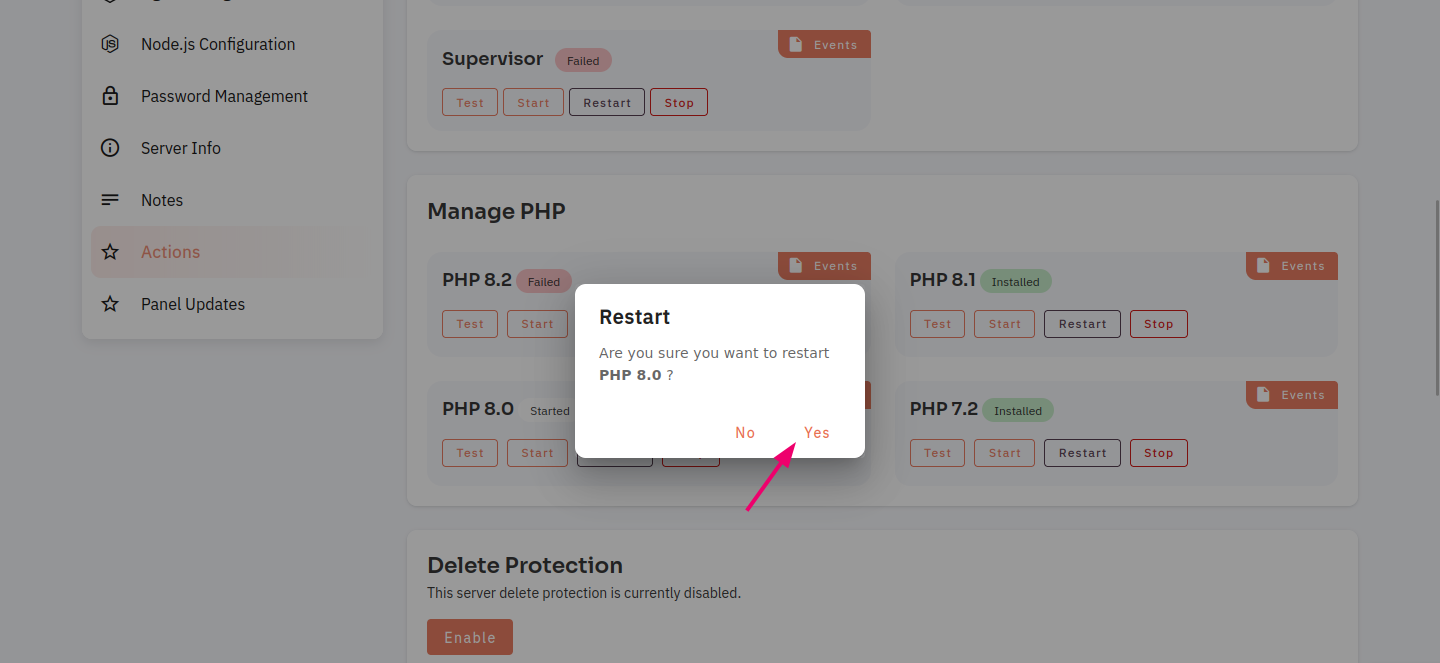
7. Click on the Restart button.
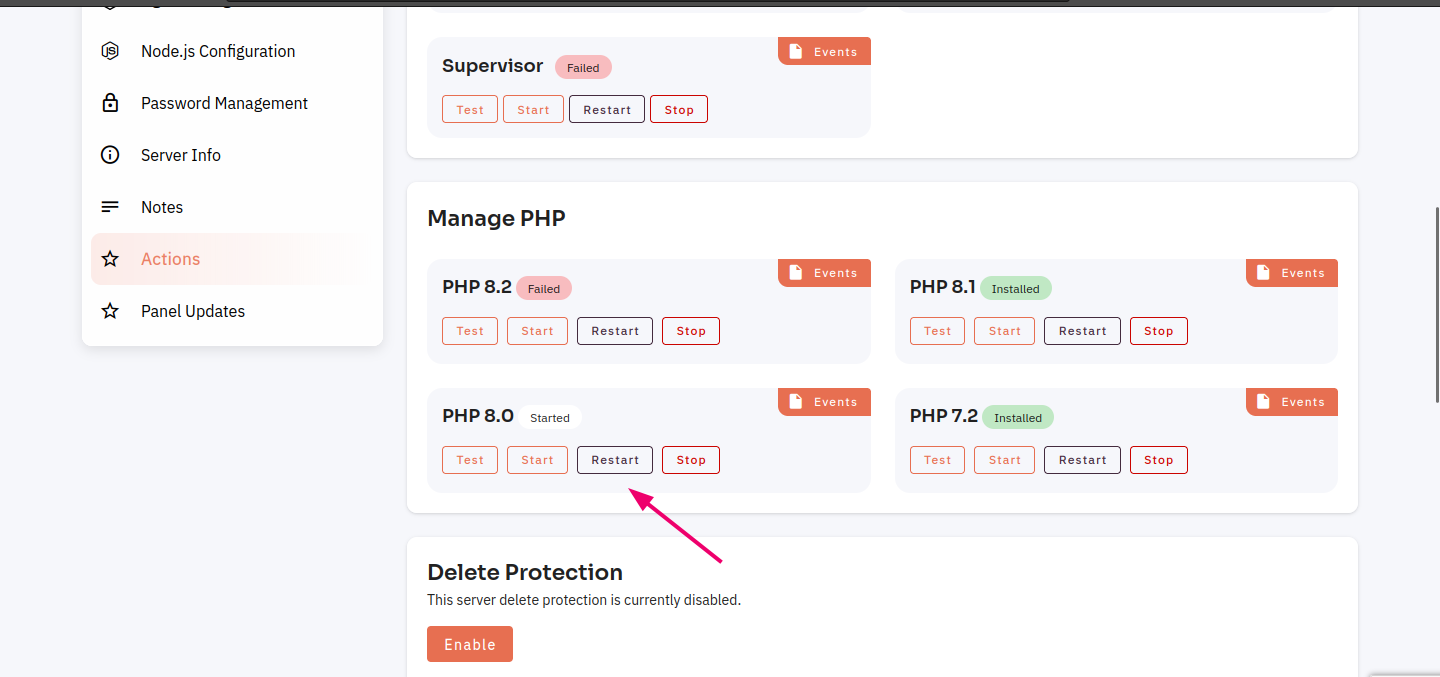
8. A Restart Dialog box will open and click on the Yes button.
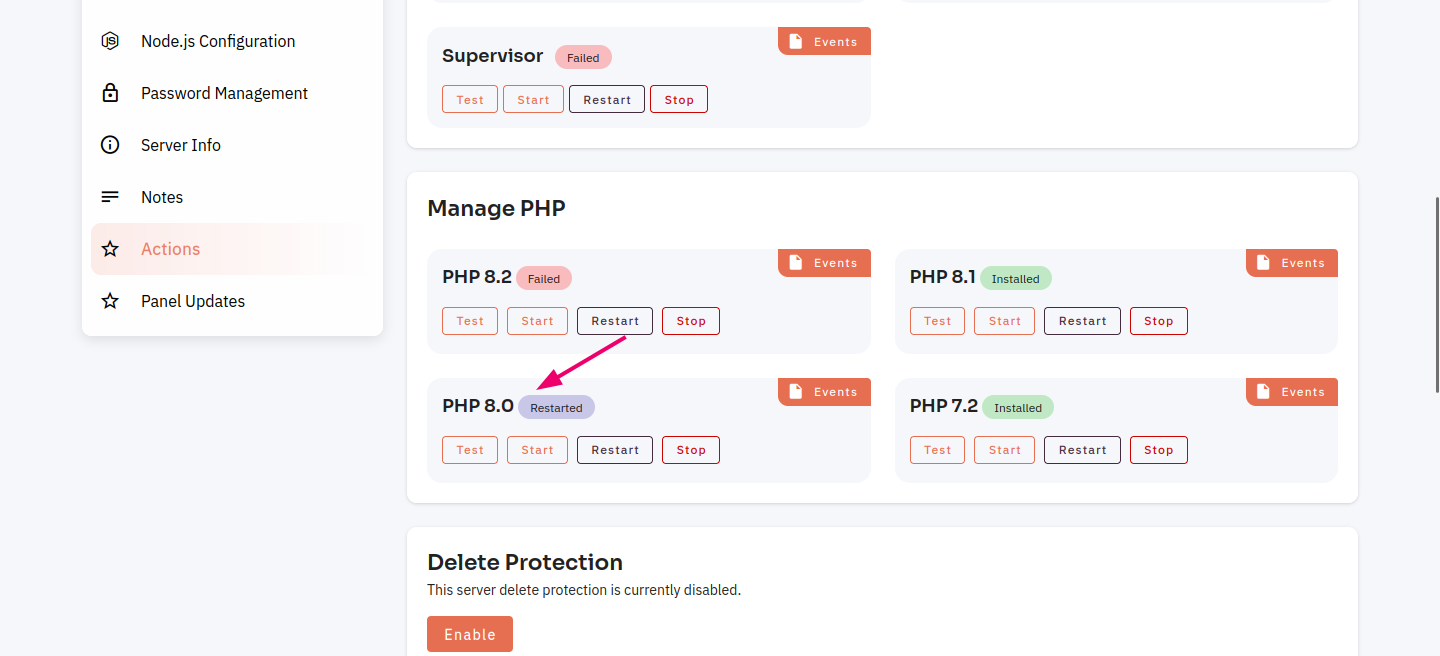
Here you can see that PHP restarted successfully.
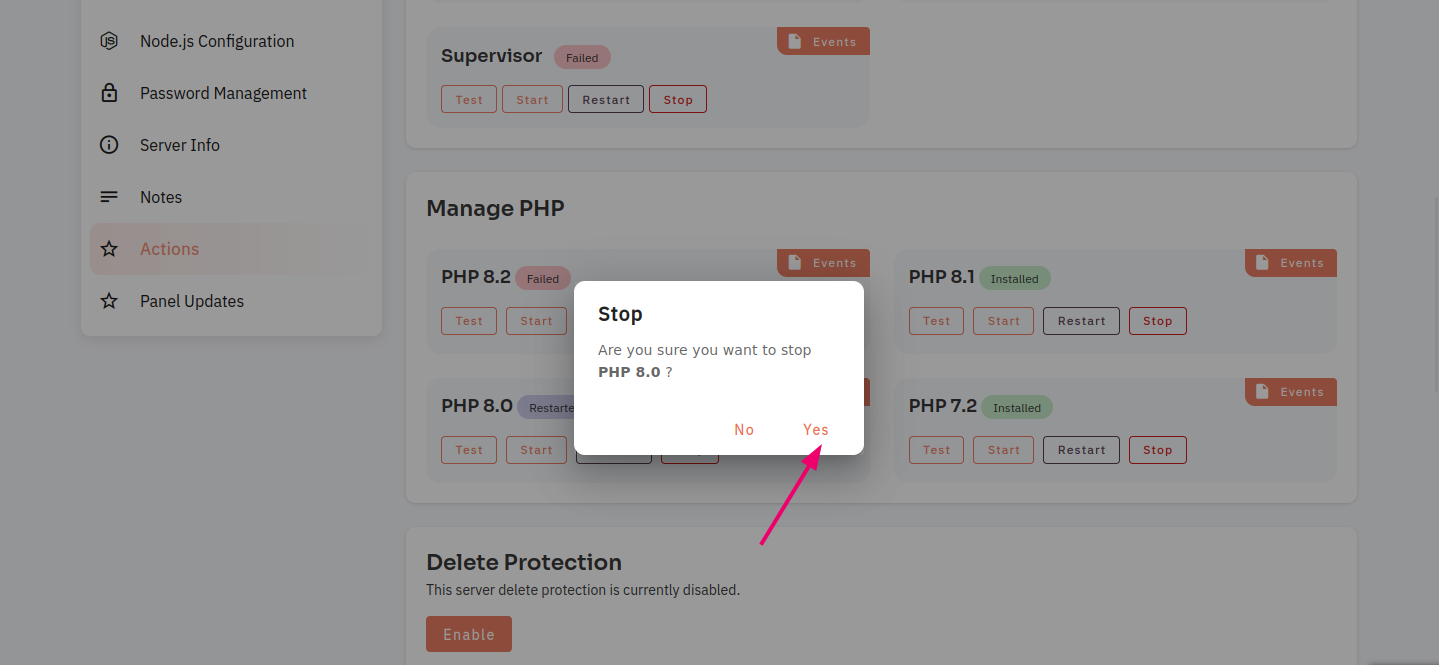
9. Click on the stop button.
10. A Stop dialog box will open and click on the Yes button.
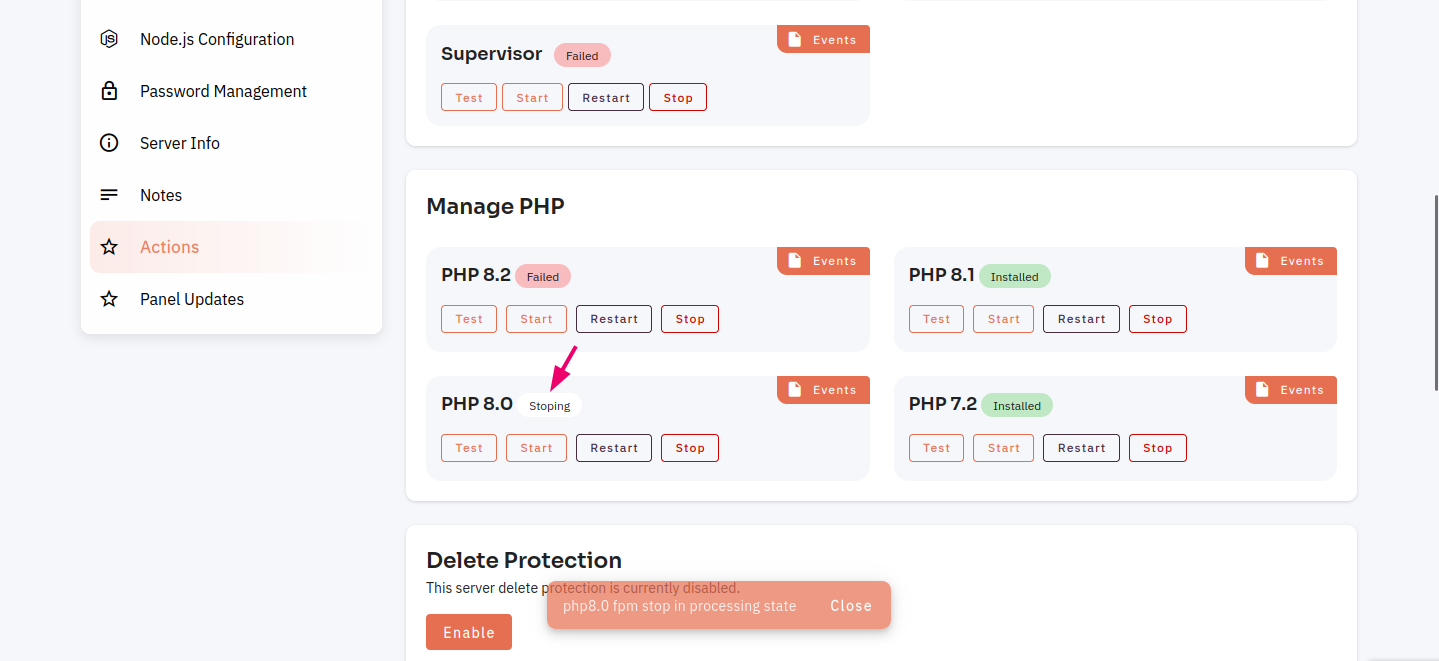
Here you can see that PHP Stopped successfully.
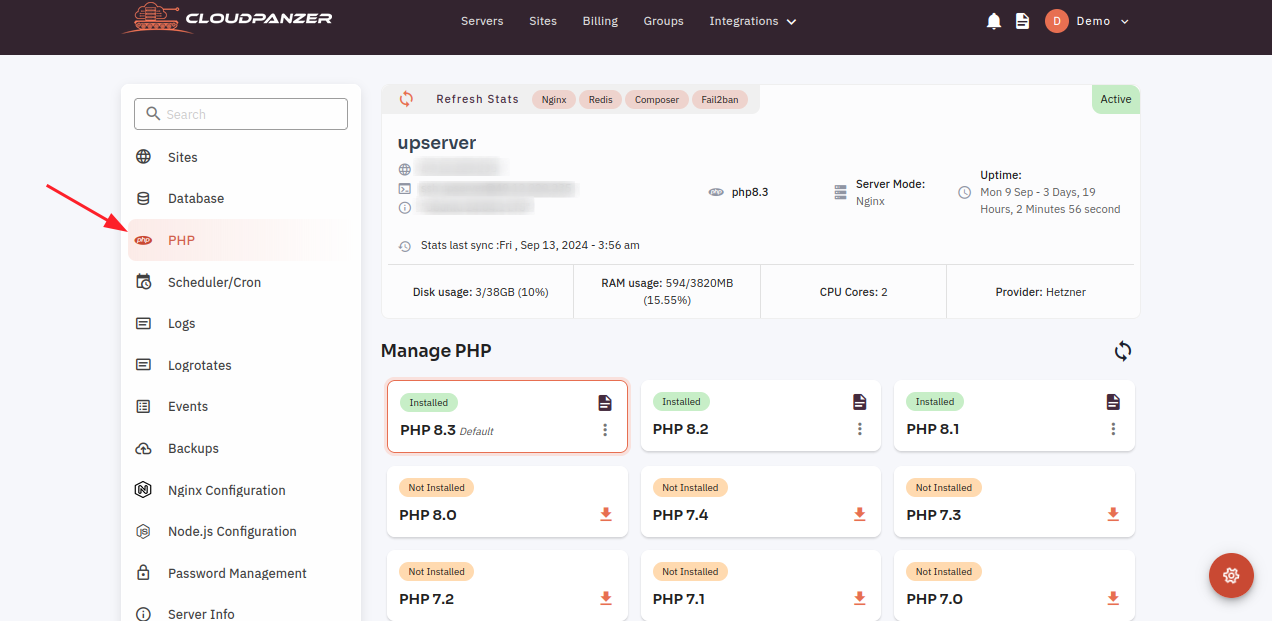
How to remove already installed PHP version?
Follow the steps below to remove the already installed PHP version
1: Once you are logged in, look for a "Server" and click on it.

2. Click on the PHP option.
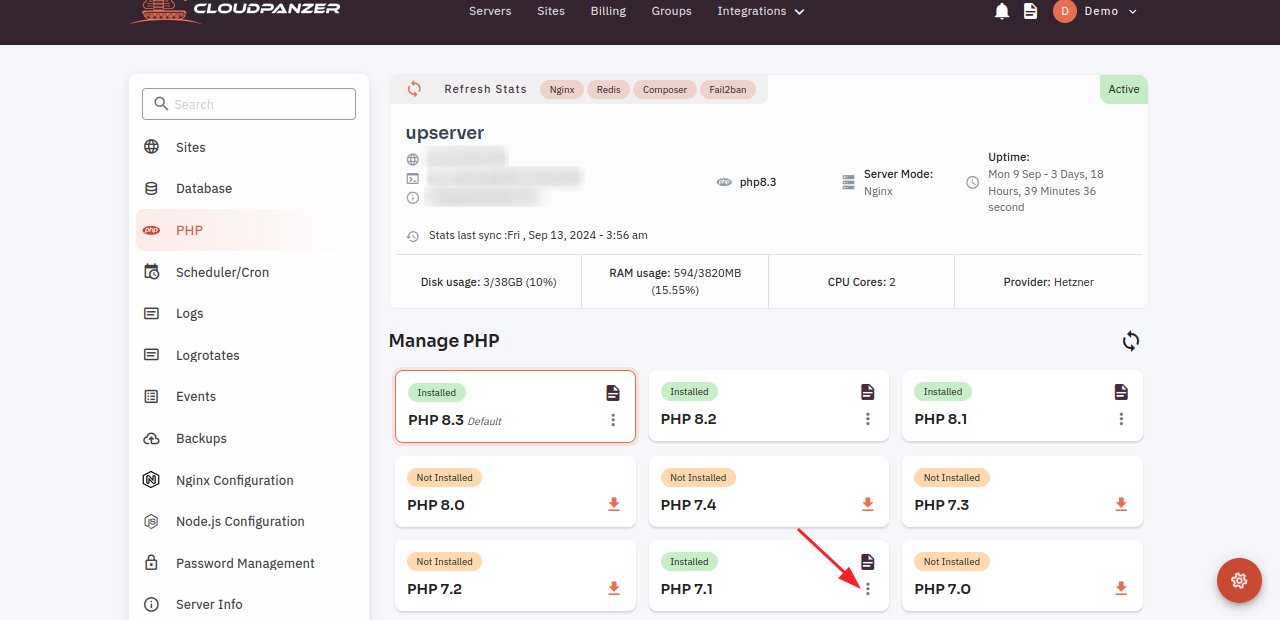
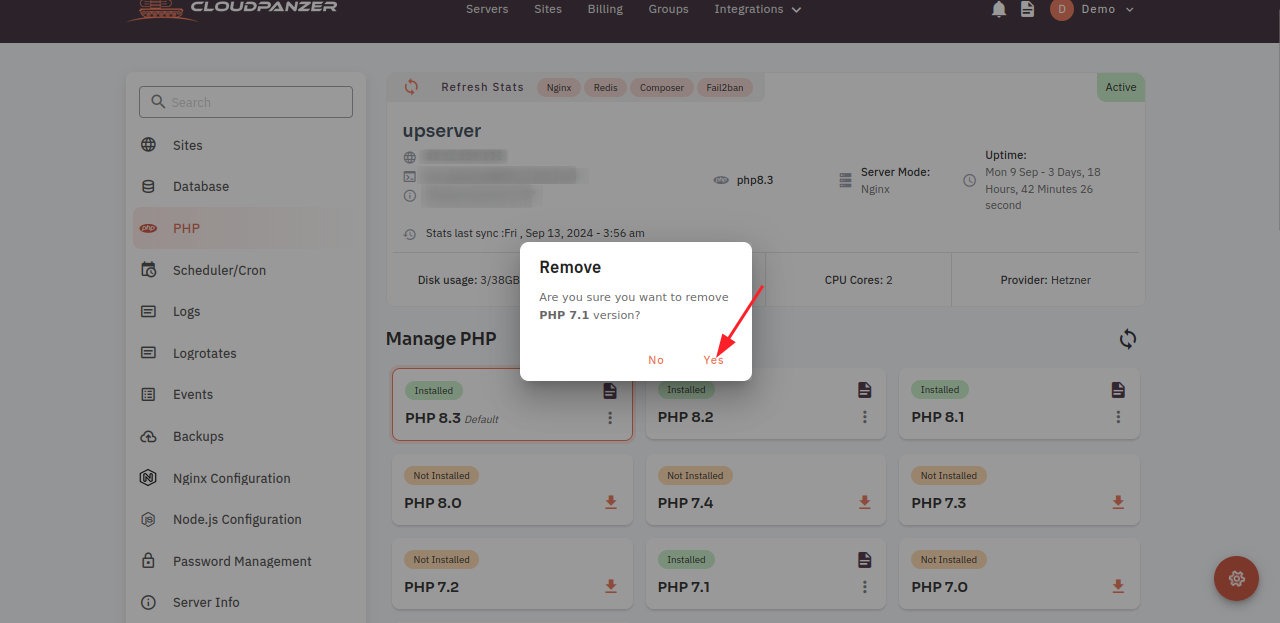
4. Select an remove option.
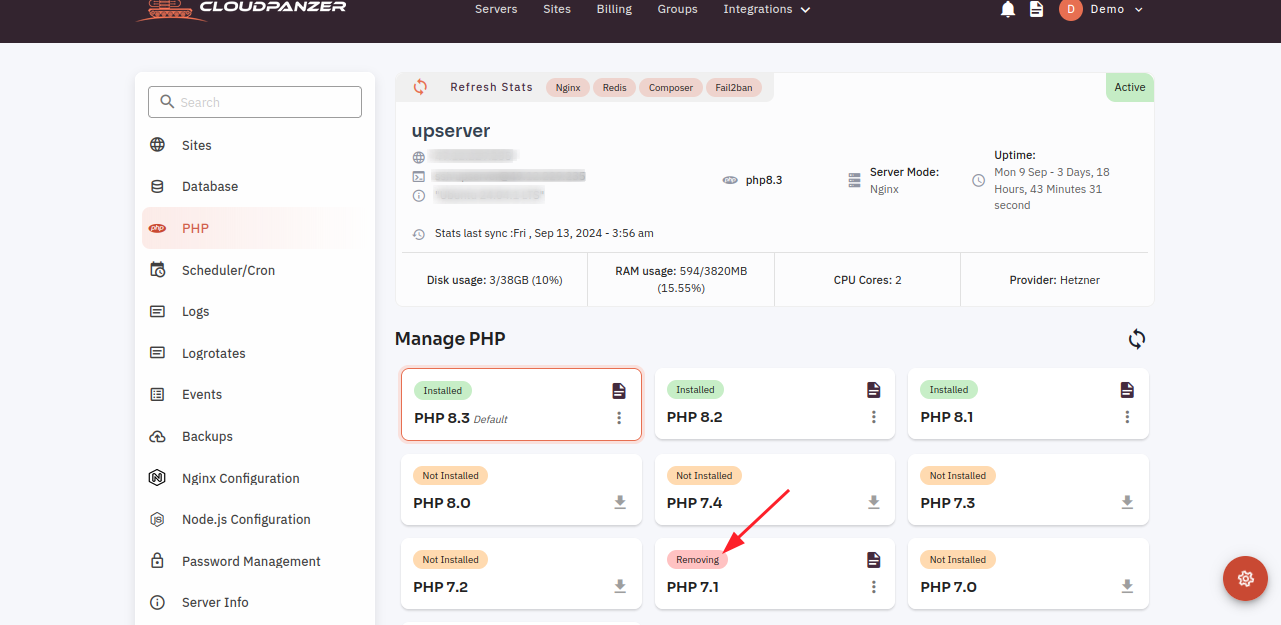
5. Click on the Yes button.
6. Here you can see the installed version removed successfully.
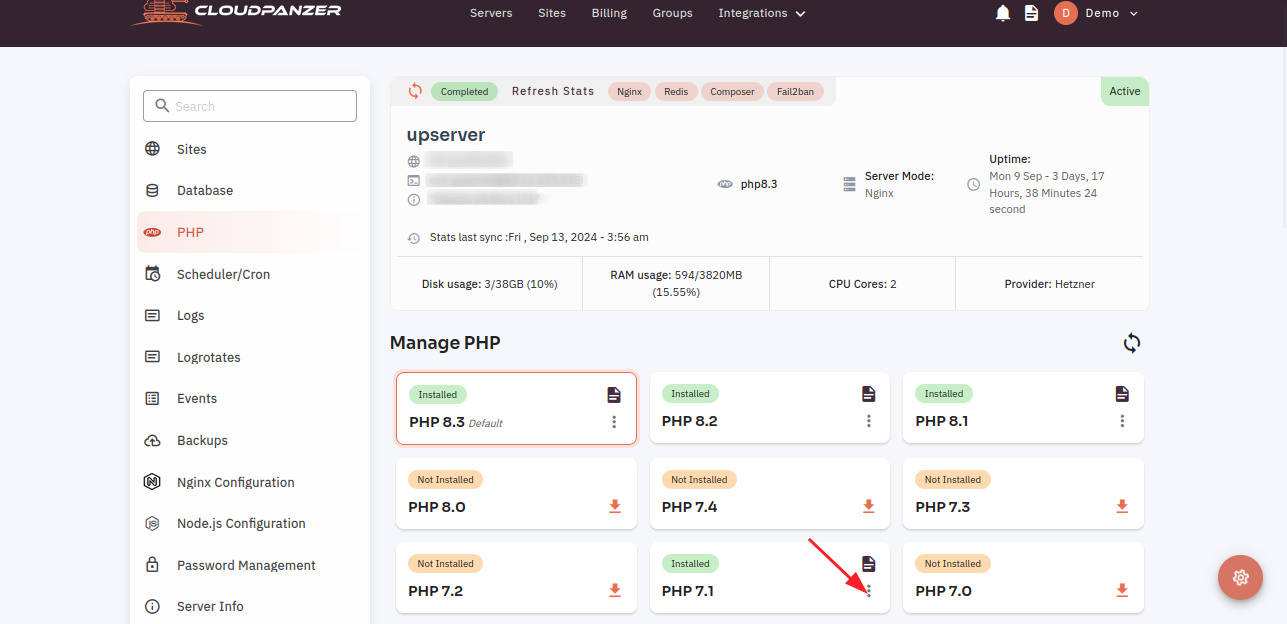
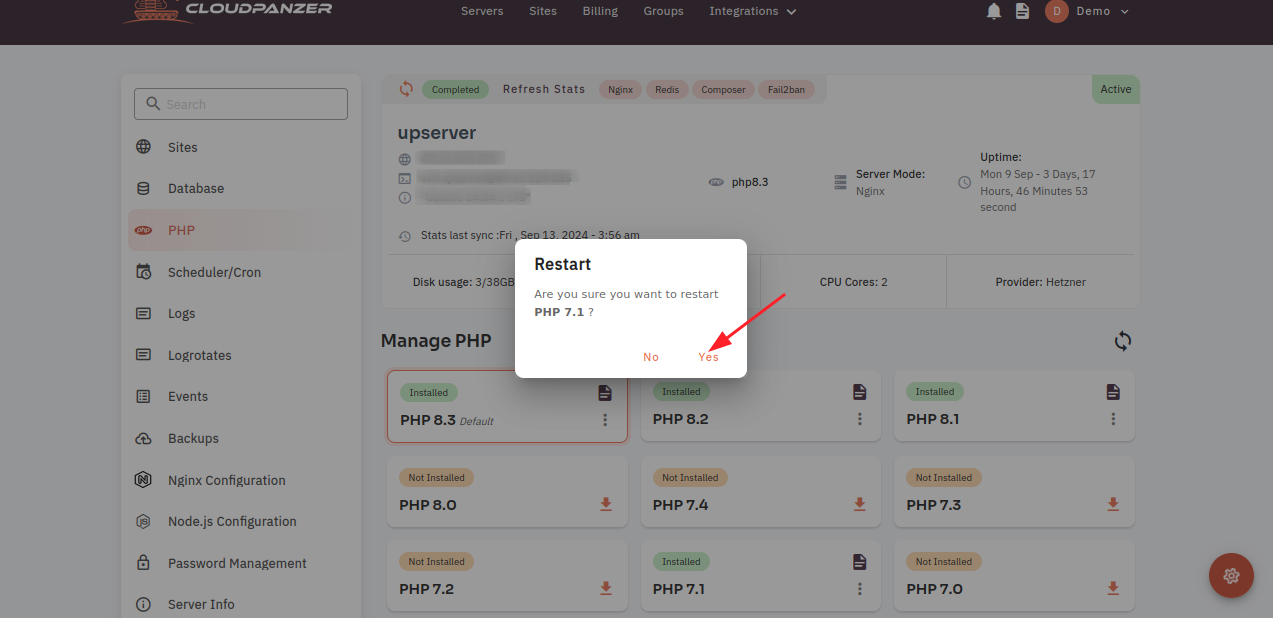
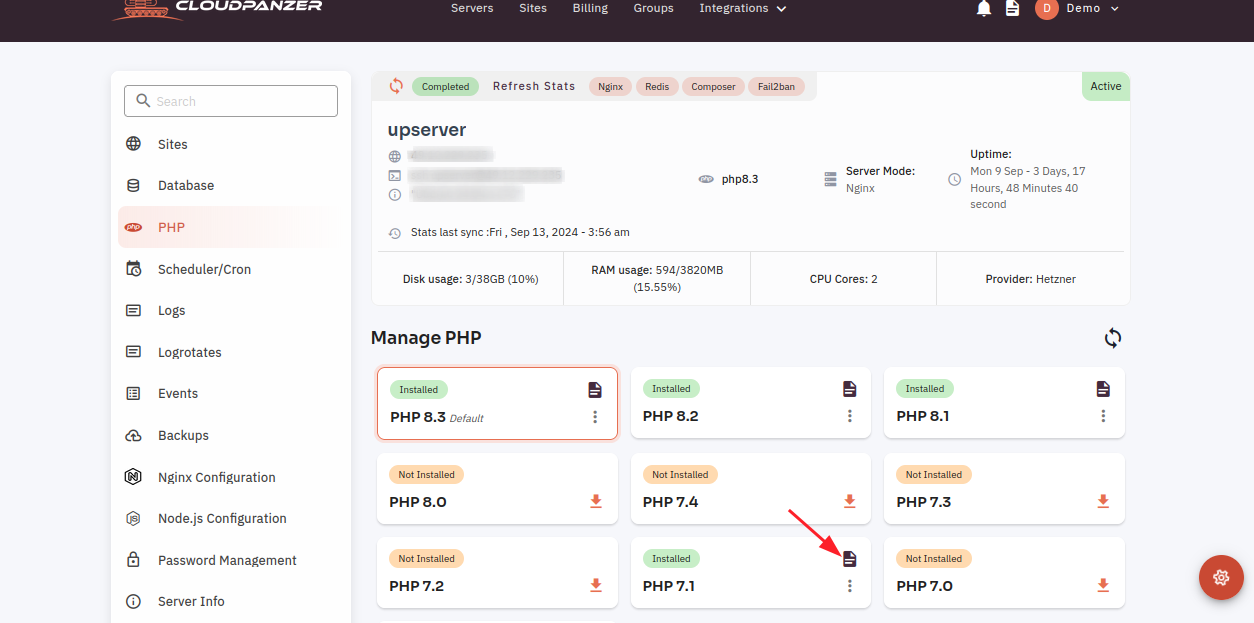
How to restart the current PHP version in CloudPanzer?
You may need to restart the PHP version on a web portal for various reasons. This could include updating to a newer version, troubleshooting issues, or making configuration changes. Whatever the reason, it is essential to know how to restart the PHP version on your web portal to ensure that your website continues to function correctly.
Tutorial :
You can watch the Video or Continue reading the post.
Follow the steps below to restart the current PHP version in CloudPanzer
1: Once you are logged in, look for a "Server" and click on it.

2. Select the Sites option.
3. Select the Active site.

4. Select the PHP Config option.
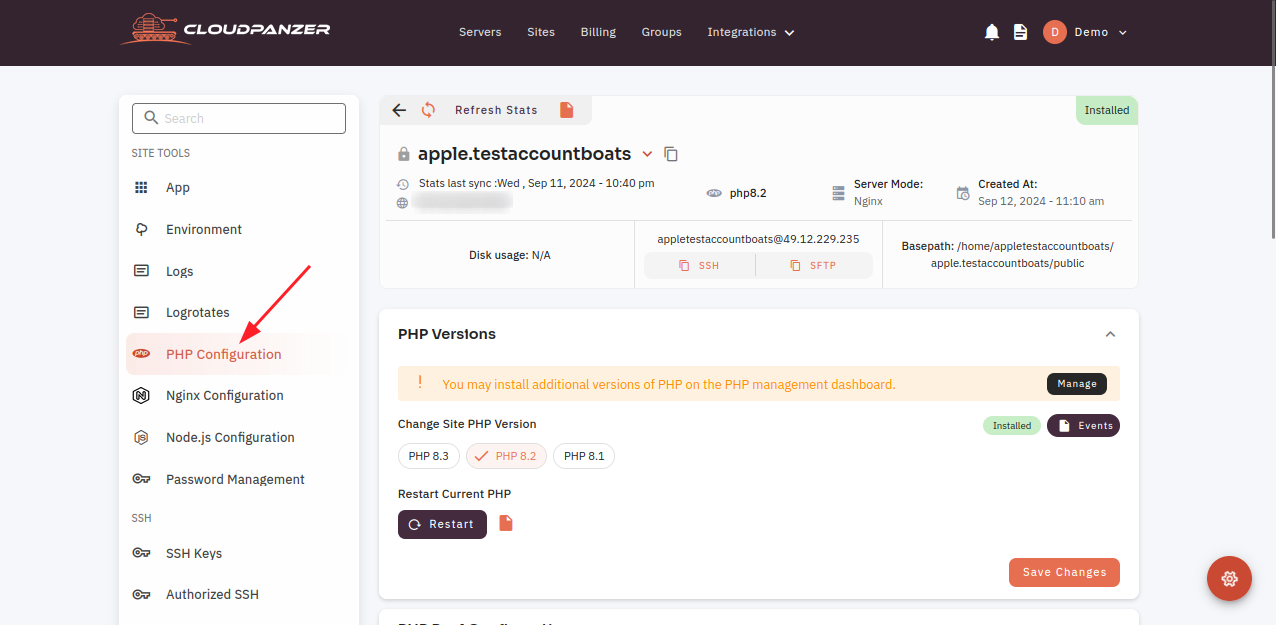
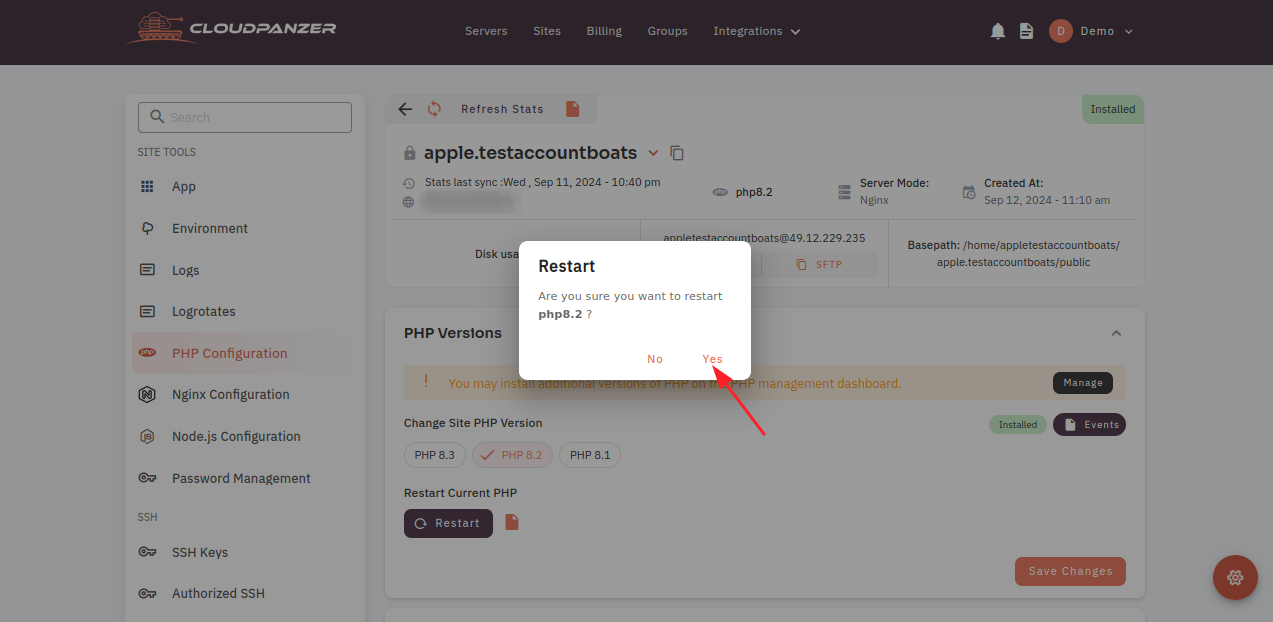
5. Click on the restart button.

6. Click on the yes button.
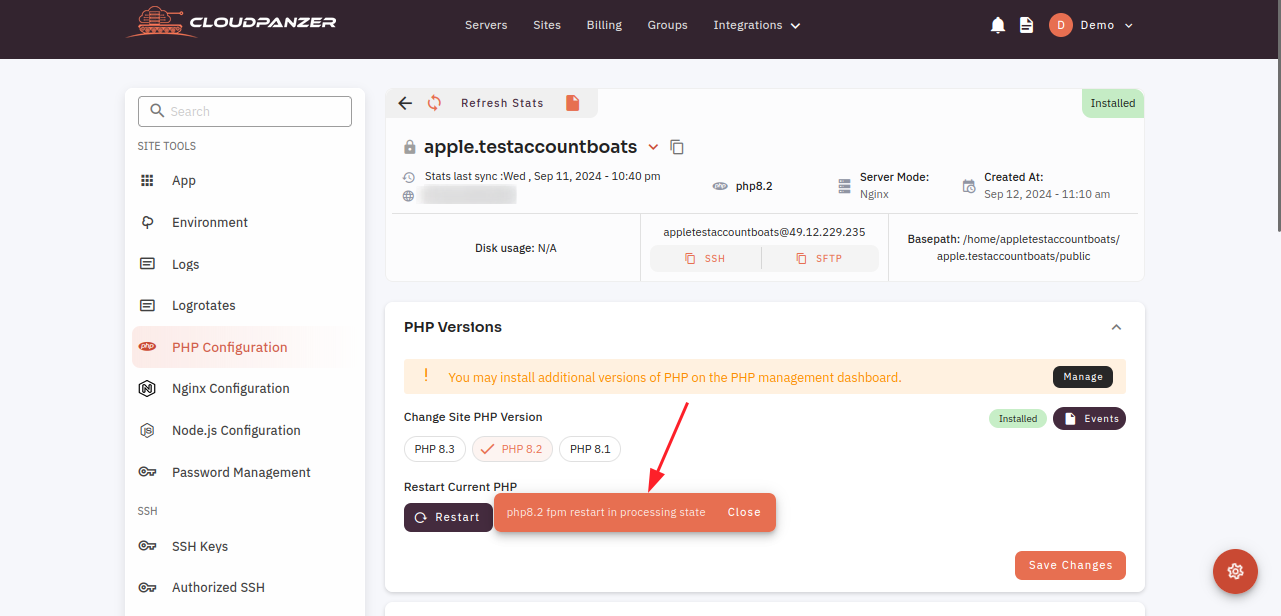
Here, you can see the PHP version restarted successfully. You can also check events by clicking on the file icon.
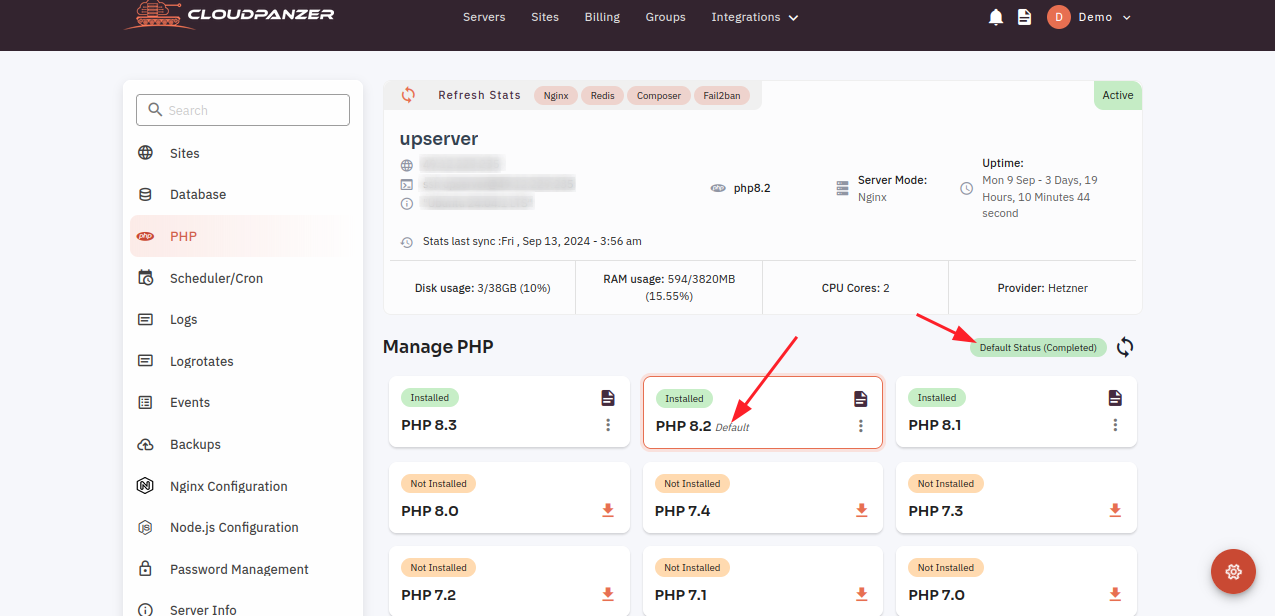
How to Set Default PHP version ?
Follow the steps below to Set the Default PHP version
1. Once you are logged in, look for a "Server" and click on it.

2. Click on the PHP option.
3. Click on the menu icon.
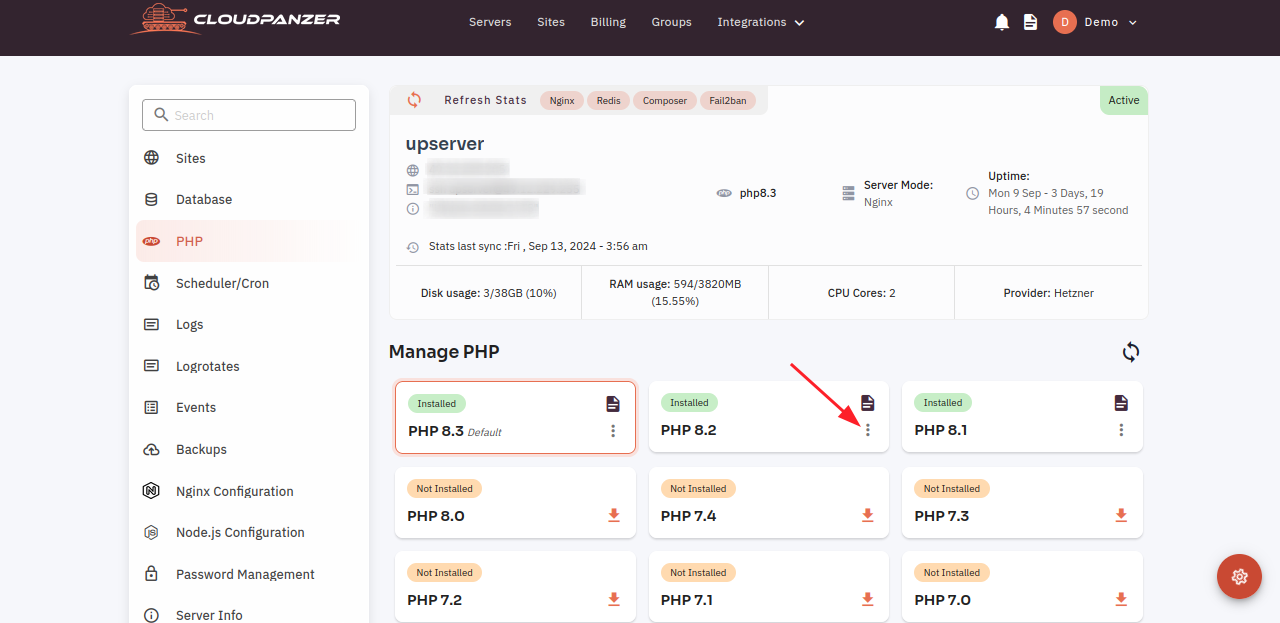
4. Select the Set Default option.
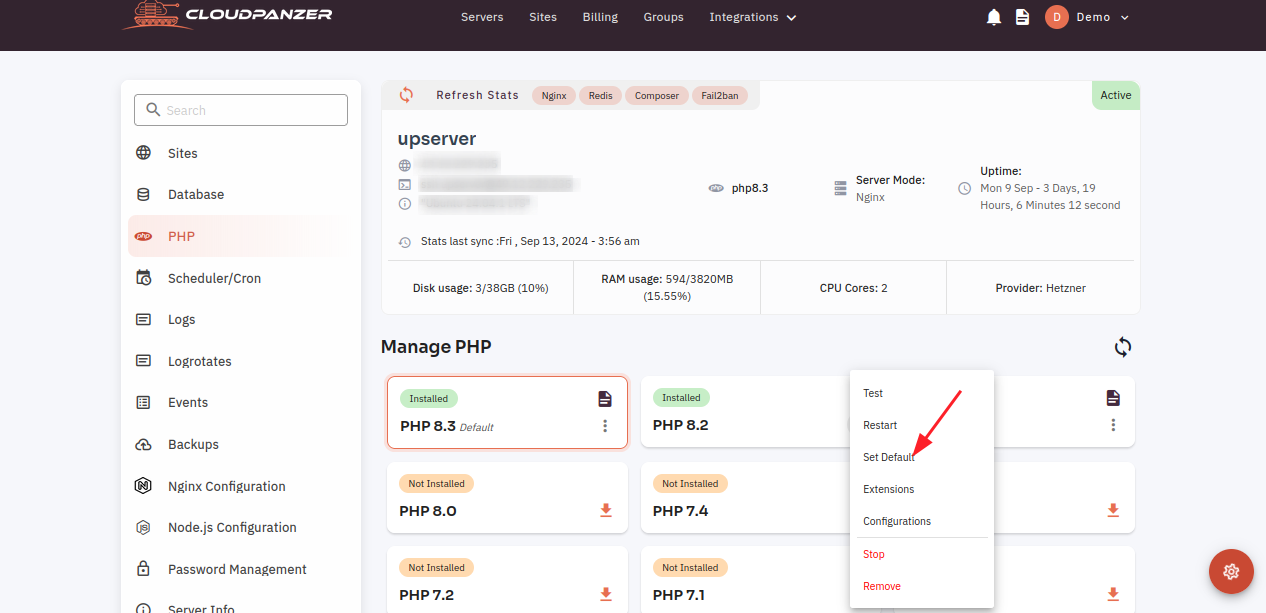
5. Click on the Yes button.
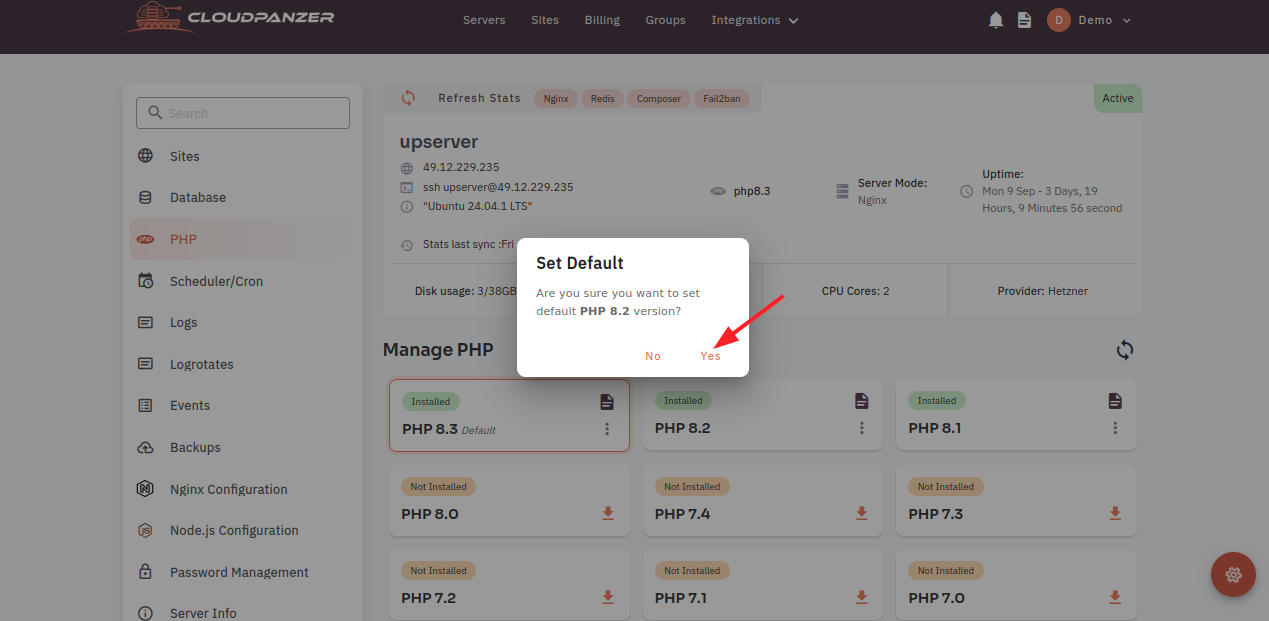
Here you can see the Default PHP version set successfully.
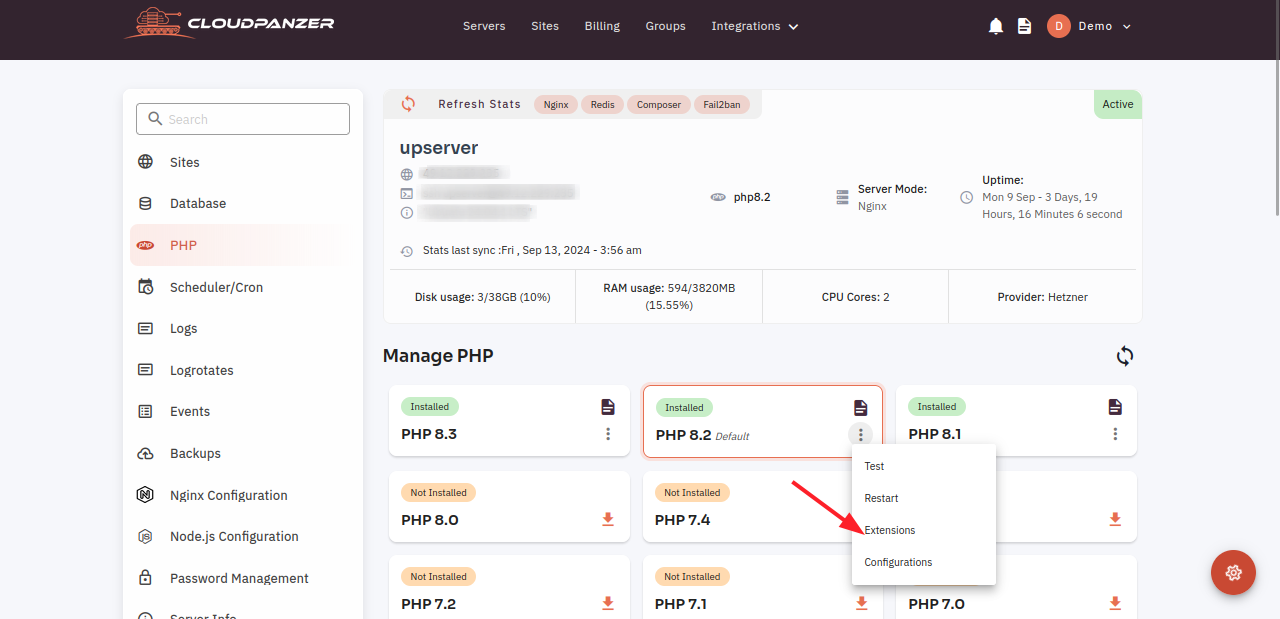
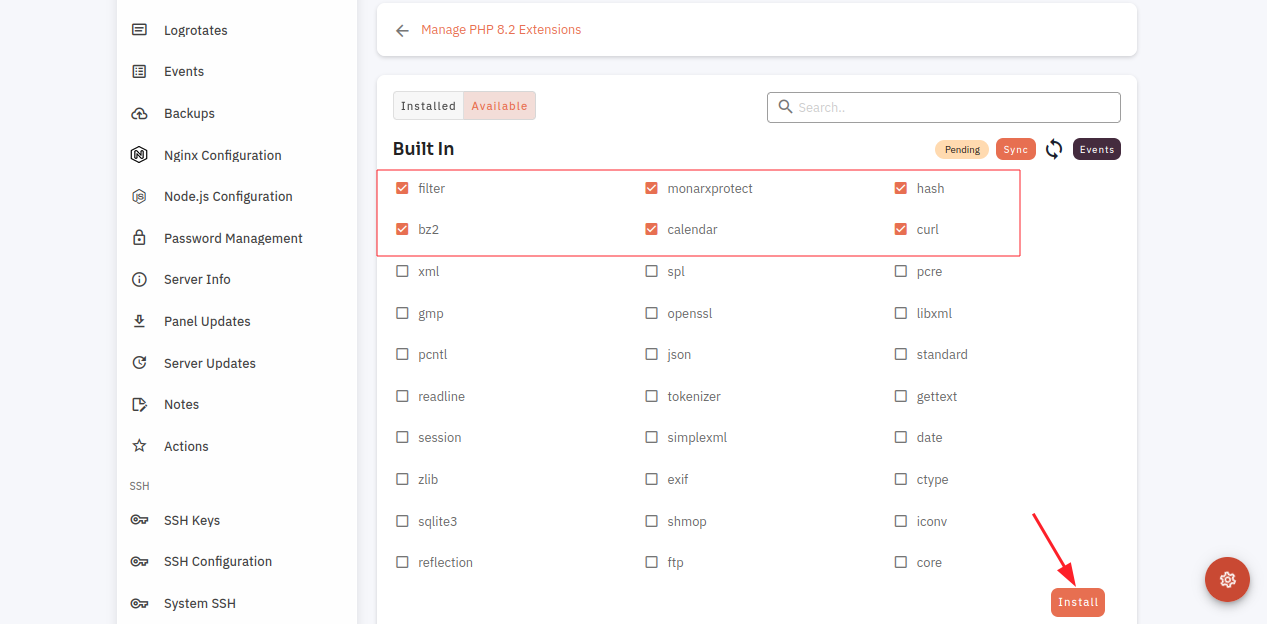
How to use PHP Built In Extensions ?
PHP provides a variety of built-in extensions that enhance its functionality and allow developers to perform a wide range of tasks. These built-in extensions cover areas such as database access, file manipulation, networking, encryption, and more.
Follow the steps below to use PHP Built-In Extensions
- Once you are logged in, look for a "Server" and click on it.

2. Click on the PHP option.

3. Click on the Menu icon.

4. Select Extensions Option.
4. Click on the available button. Select extensions of your choice and click on the Save Button.
5. Here, you can see the list of extensions installed successfully.
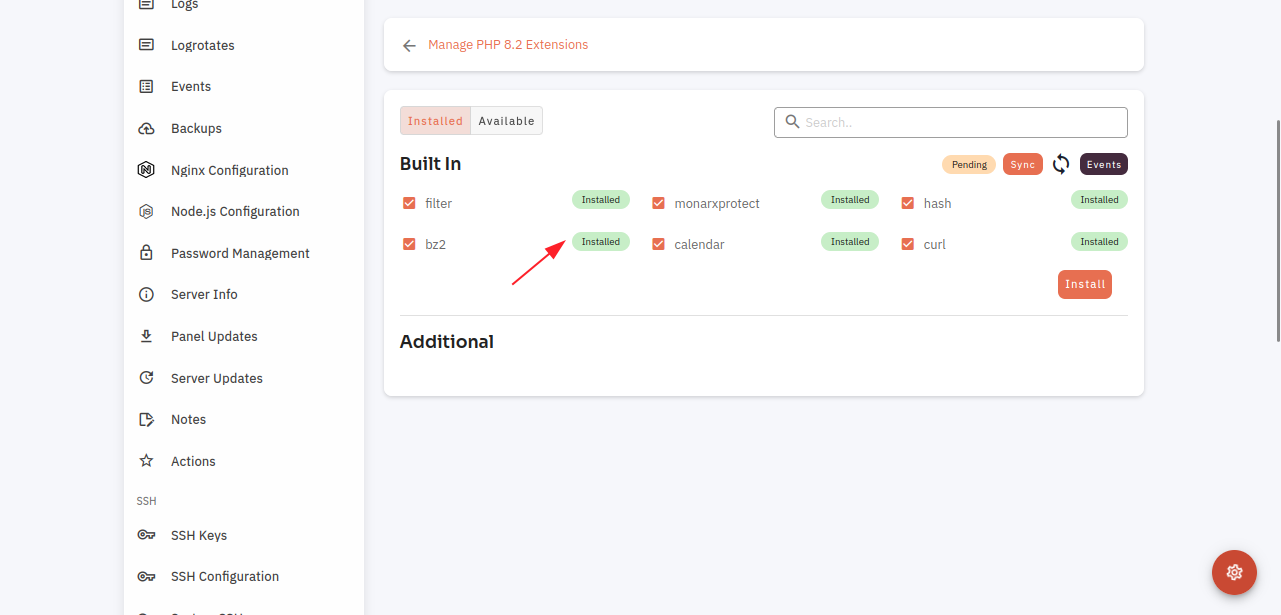
6. You can also check Events by clicking on the Events button.

7. Here, you can see a list of events. You can also check logs by clicking on the Eye icon.
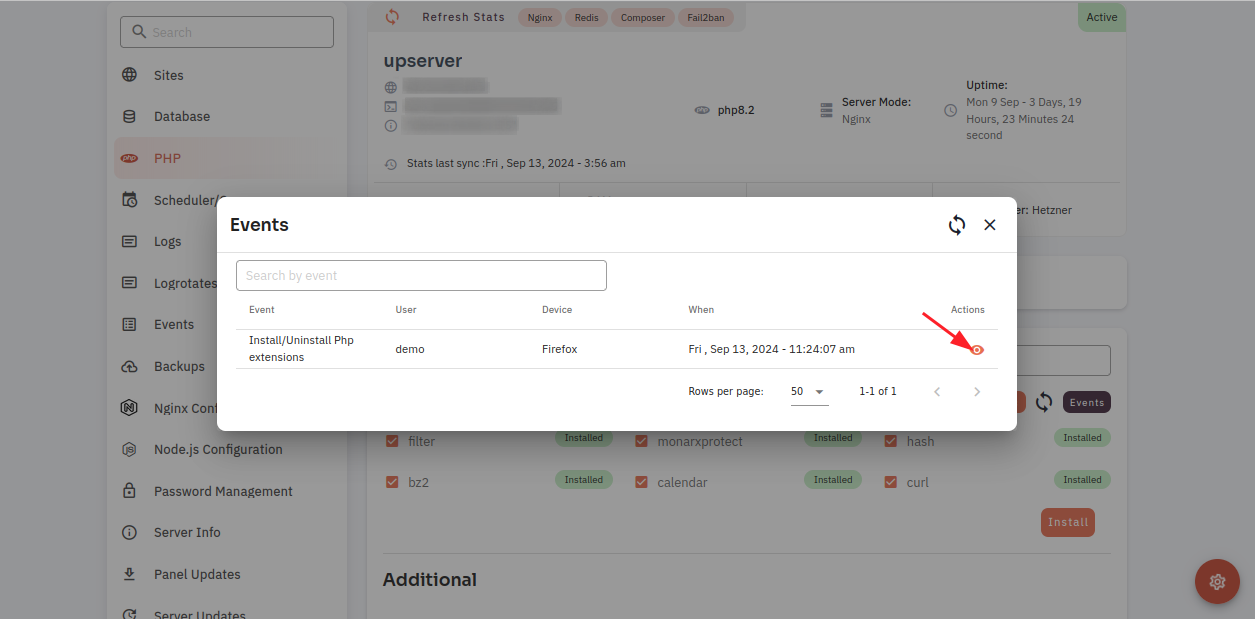
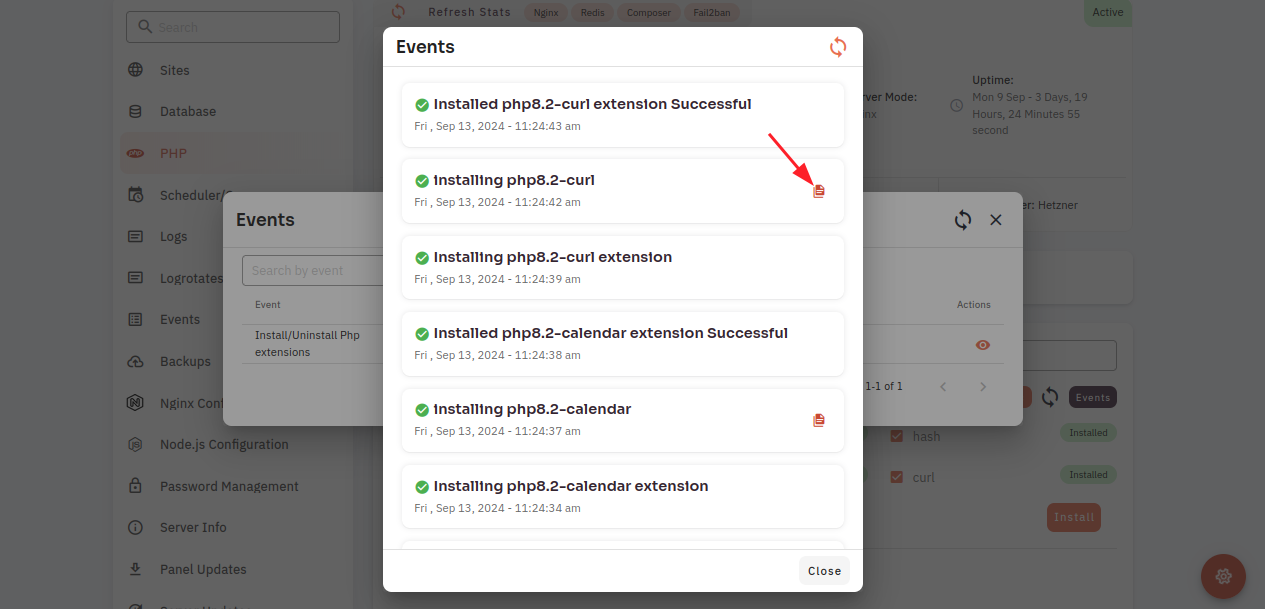
Here, a log file will appear.