Scheduler
- How to check Scheduler Events through the cloudpanzer website?
- How to Create Scheduler through the cloudpanzer website?
- How to disable Scheduler through the cloudpanzer webite ?
- How to Navigate Scheduler ?
- How to view Cron Logs through the cloudpanzer website?
- How to view Scheduler through the cloudpanzer website?
- How to enable Scheduler through the cloudpanzer webite ?
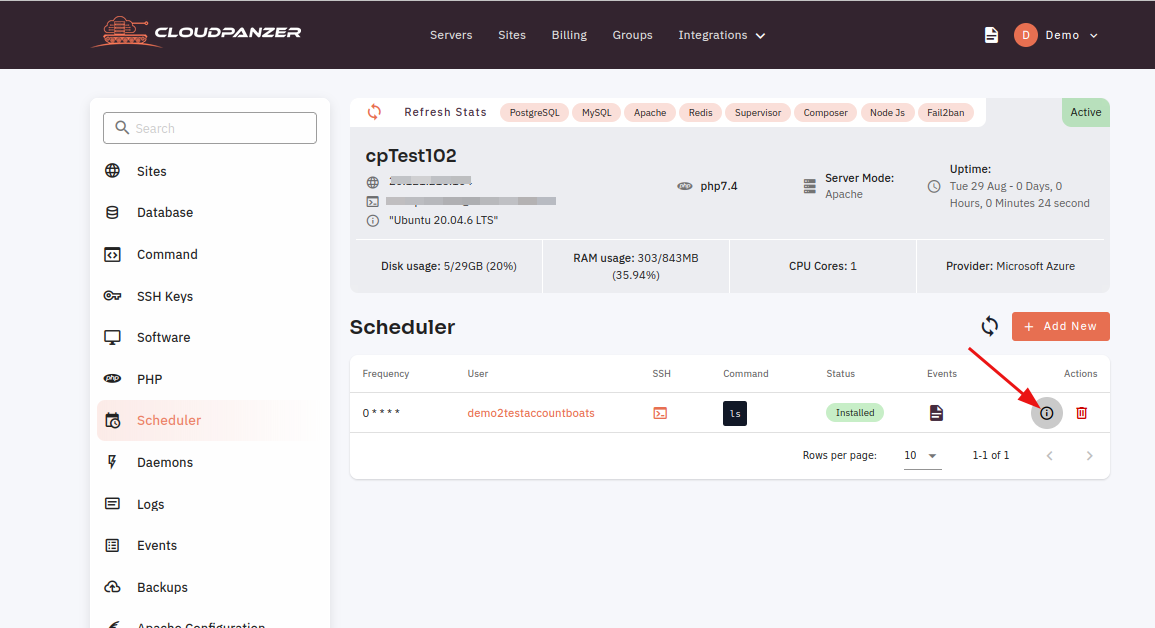
How to check Scheduler Events through the cloudpanzer website?
Monitoring the status of scheduled events is a crucial task for any system administrator. It helps to ensure that automated processes are running smoothly and any issues can be addressed on time.
Prerequisites :
You must have an Active Server. You can jump to the tutorial section if the above conditions are correct, or first follow the links below to set up the prerequisites.
How to install a Server
Tutorial :
You can watch the Video or Continue reading the post.
Follow the steps below to check Scheduler Events
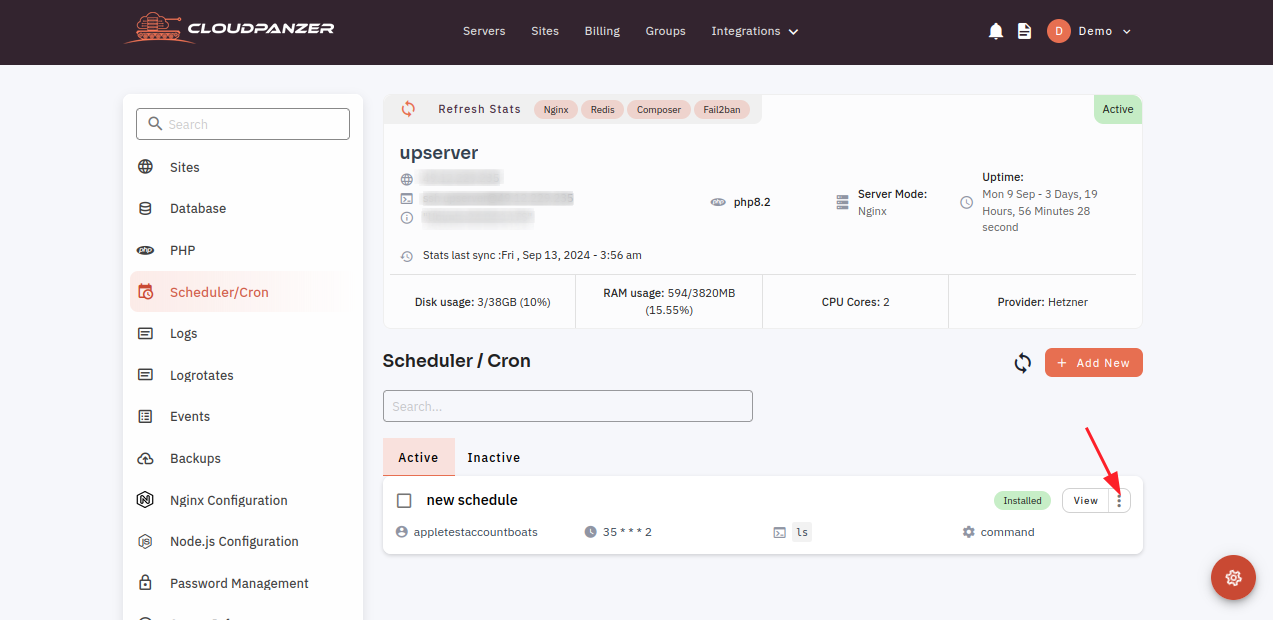
Navigate to the Scheduler
(Use this link to view How to Navigate
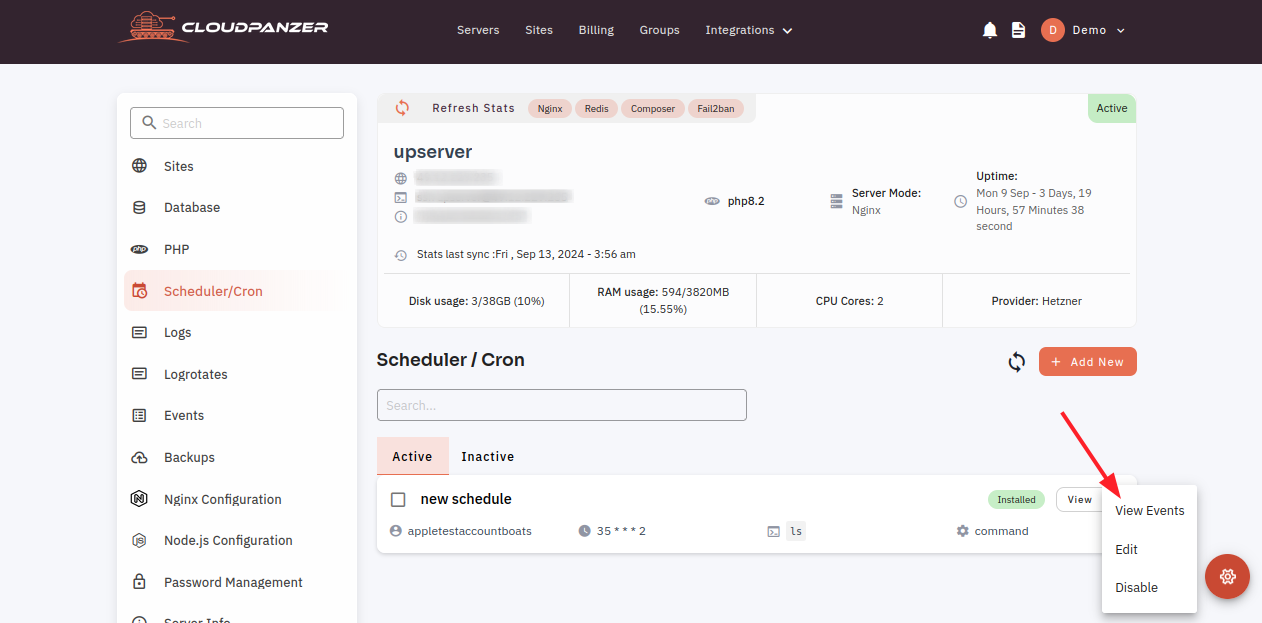
3: Click on the Menu icon.
4. Select View Events Option.
5. Click on the Eye Icon.
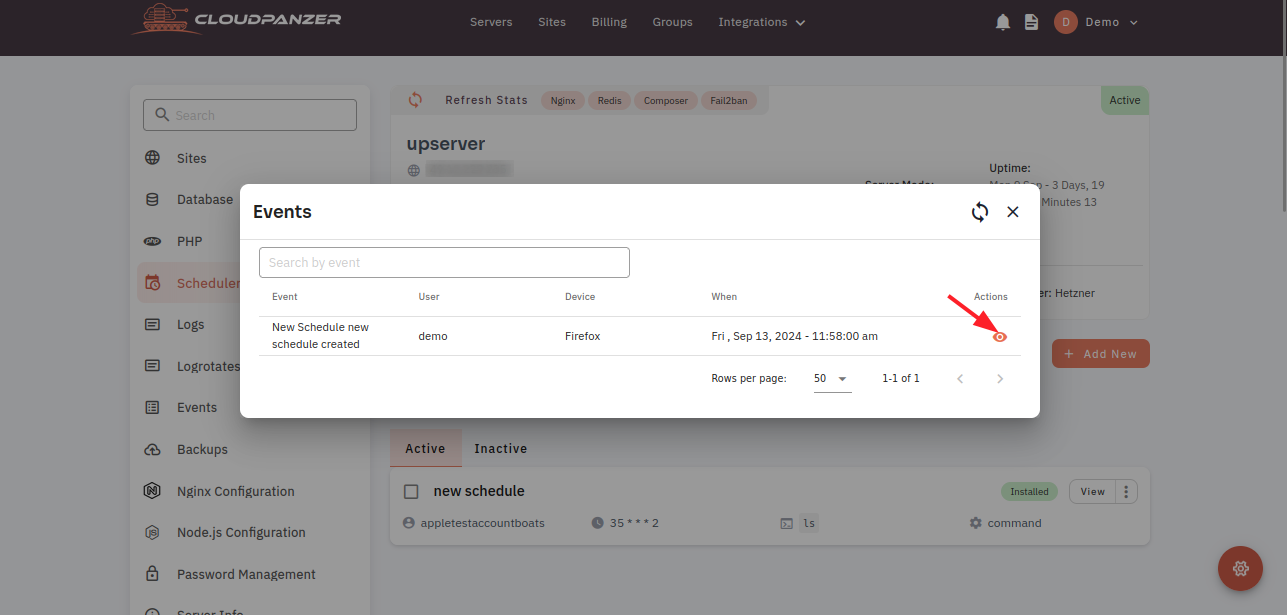
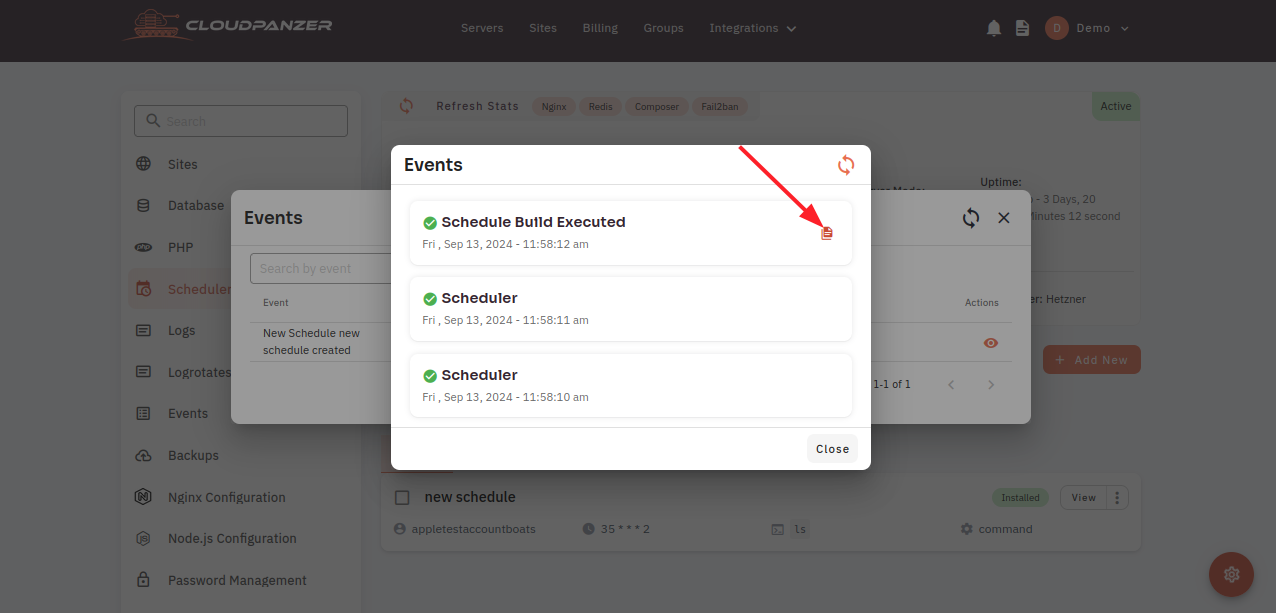
Here, you can see the event data of the scheduler.

How to Create Scheduler through the cloudpanzer website?
A scheduler is a useful tool for organizing and managing tasks, appointments, and events within Cloudpanzer. It allows users to schedule and track the progress of their work, as well as collaborate with others.
Prerequisites :
You must have an Active Server. You can jump to the tutorial section if the above conditions are proper, Or first follow the links below to set up the prerequisites.
How to install a Server
Tutorial :
You can watch the Video or Continue reading the post.
Follow the steps below to Create a Scheduler
Navigate to the Scheduler
(Use this link to view How to Navigate
3. Click on the Add New button.

4. Fill in the data and click on the Add New button.
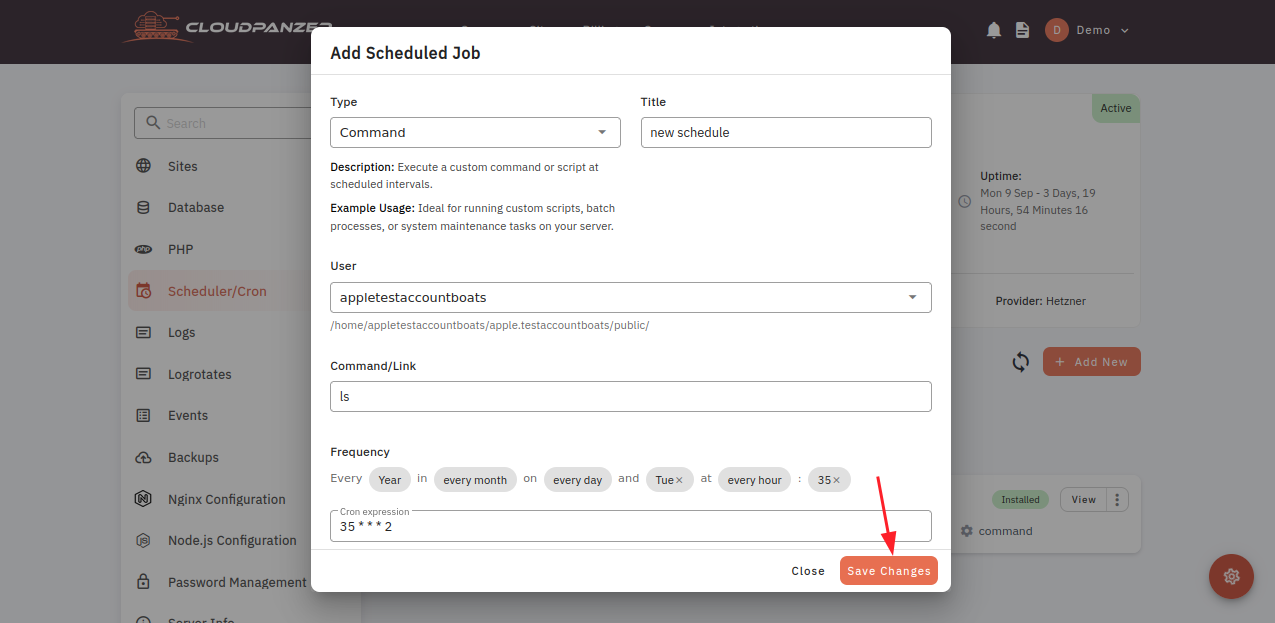
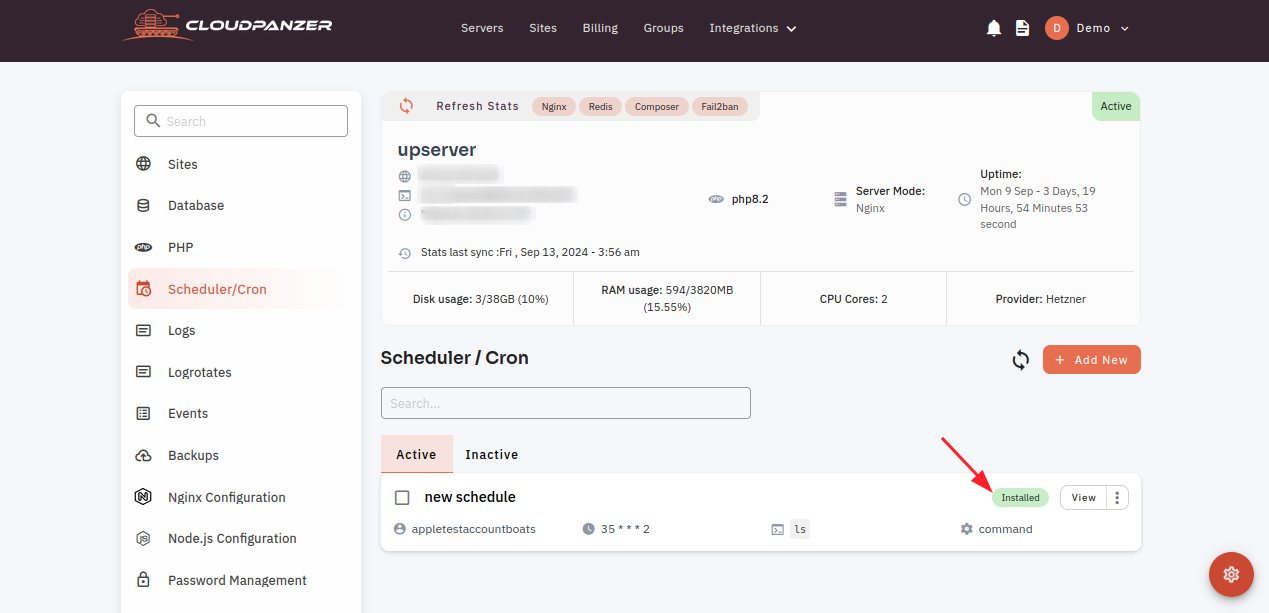
Here, you can see the Scheduler added successfully.
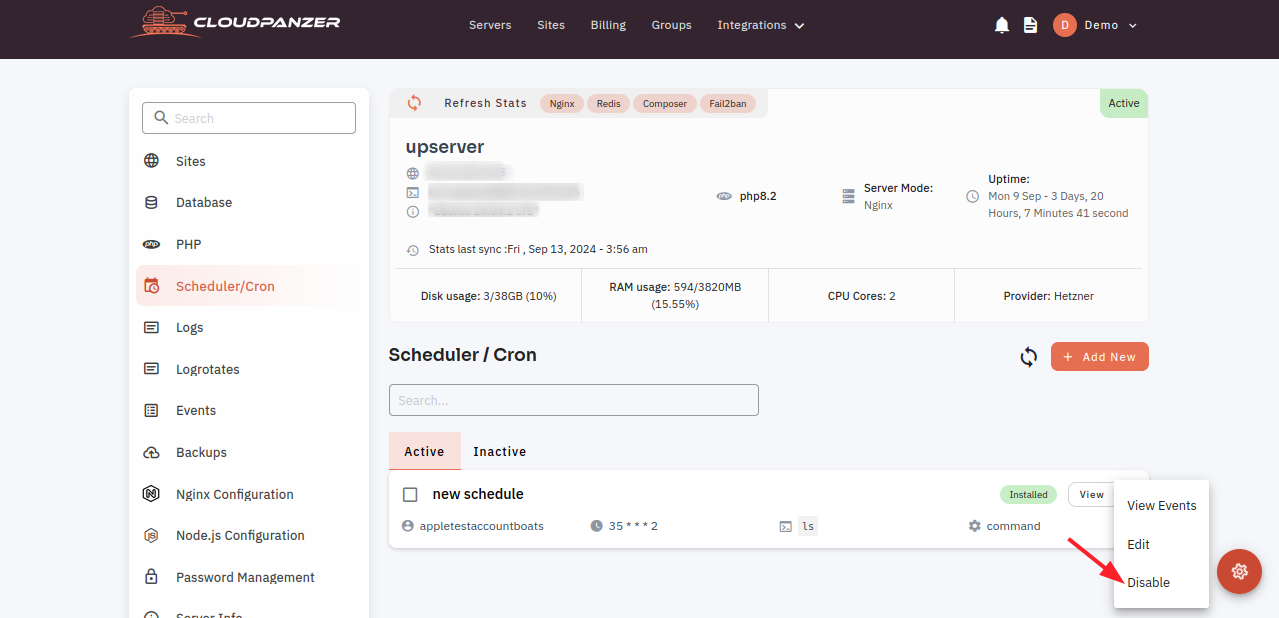
How to disable Scheduler through the cloudpanzer webite ?
Disabling a scheduler is not a permanent action and you can be undone. Make sure you want to delete the scheduler before proceeding.
Prerequisites :
You must have an Active Server. You can jump to the tutorial section if the above conditions are correct, or first follow the links below to set up the prerequisites.
How to install a Server
Tutorial :
You can watch the Video or Continue reading the post.
Follow the steps below to disable the Scheduler
Navigate to the Scheduler
(Use this link to view How to Navigate
3. Click on the Menu icon.
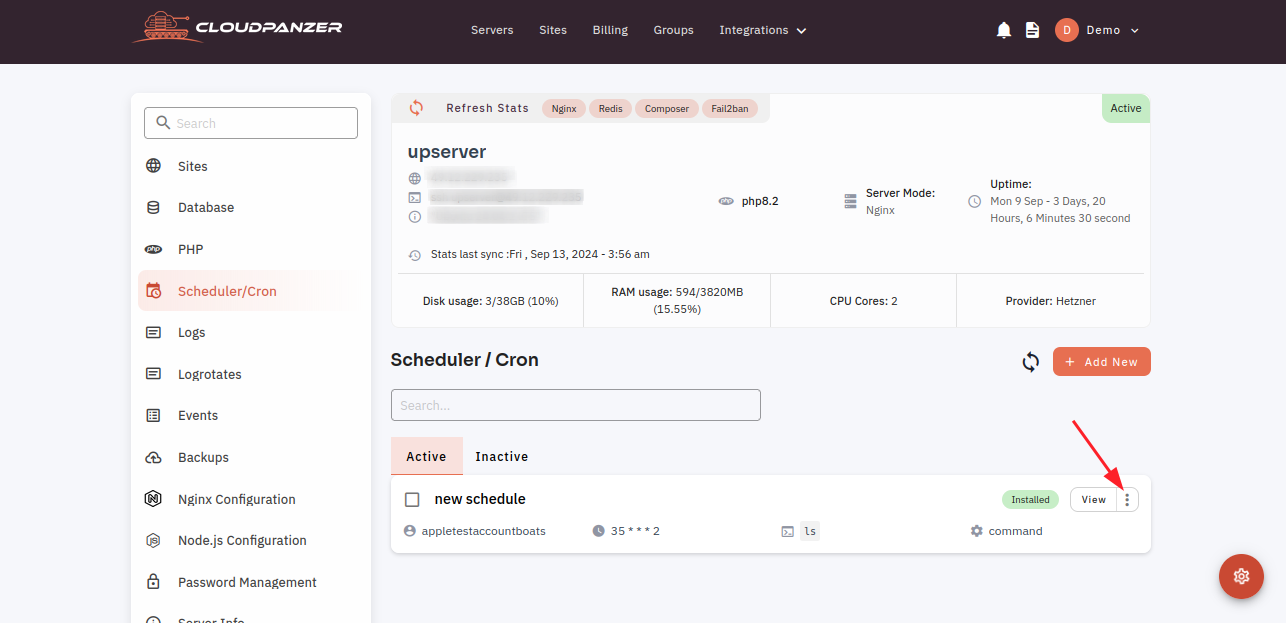
4. Select the Disable Option.
5. Click on the Yes Button.
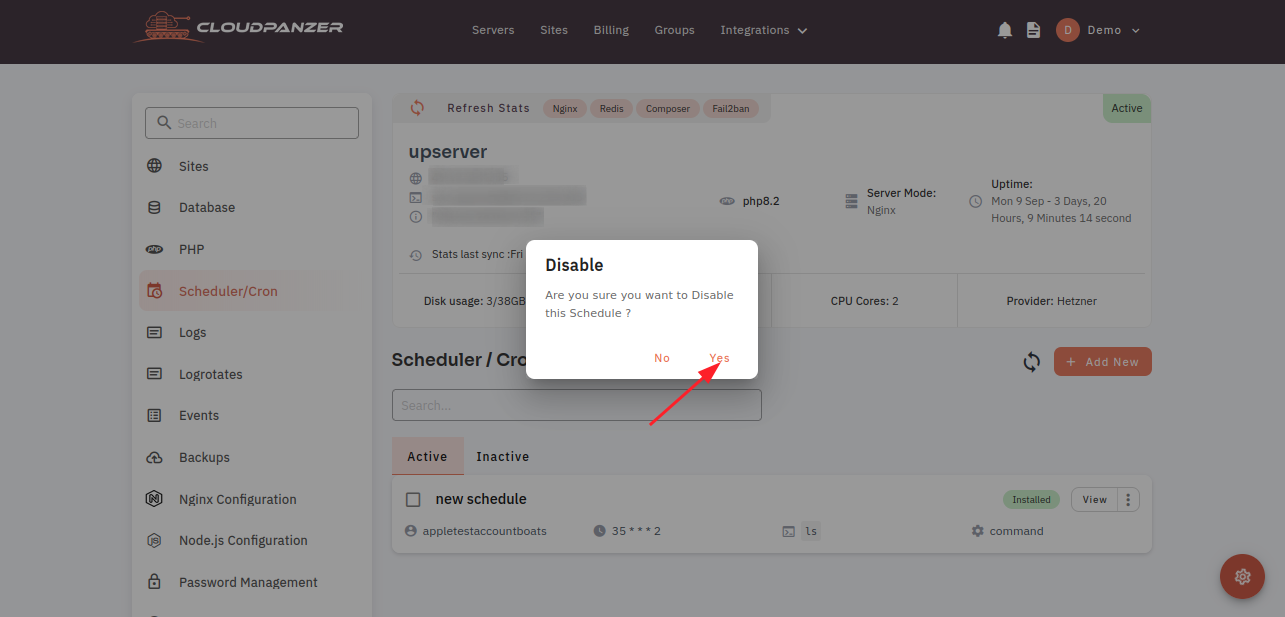
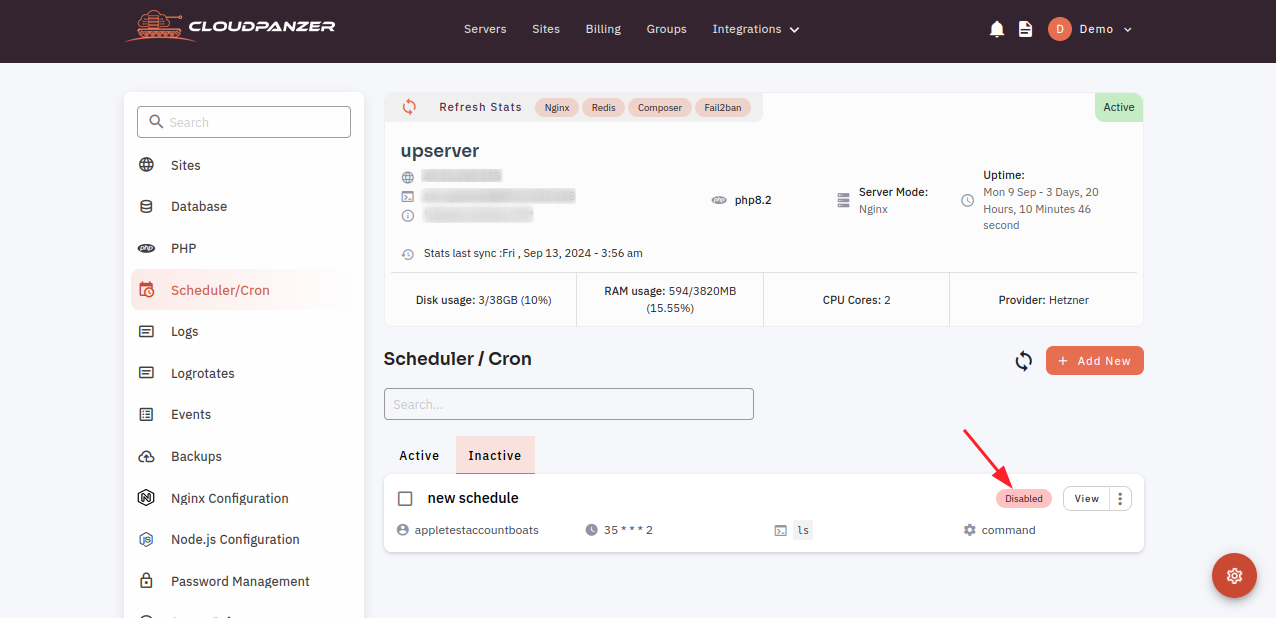
Here, you can see the Scheduler disabled Successfully.
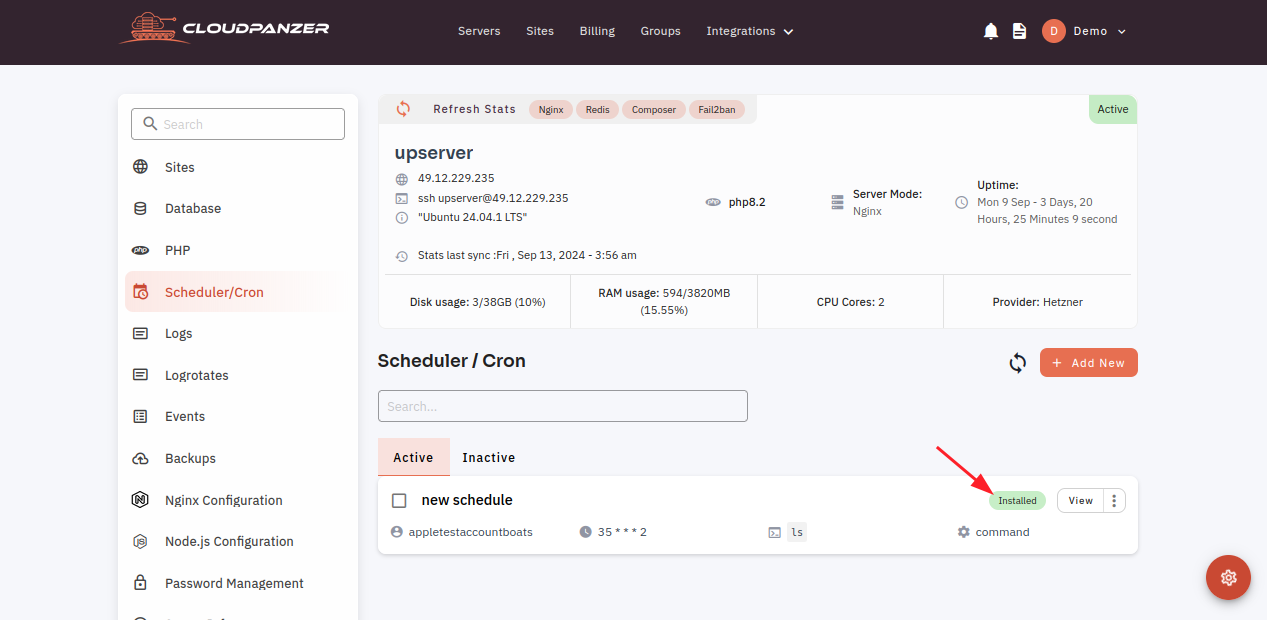
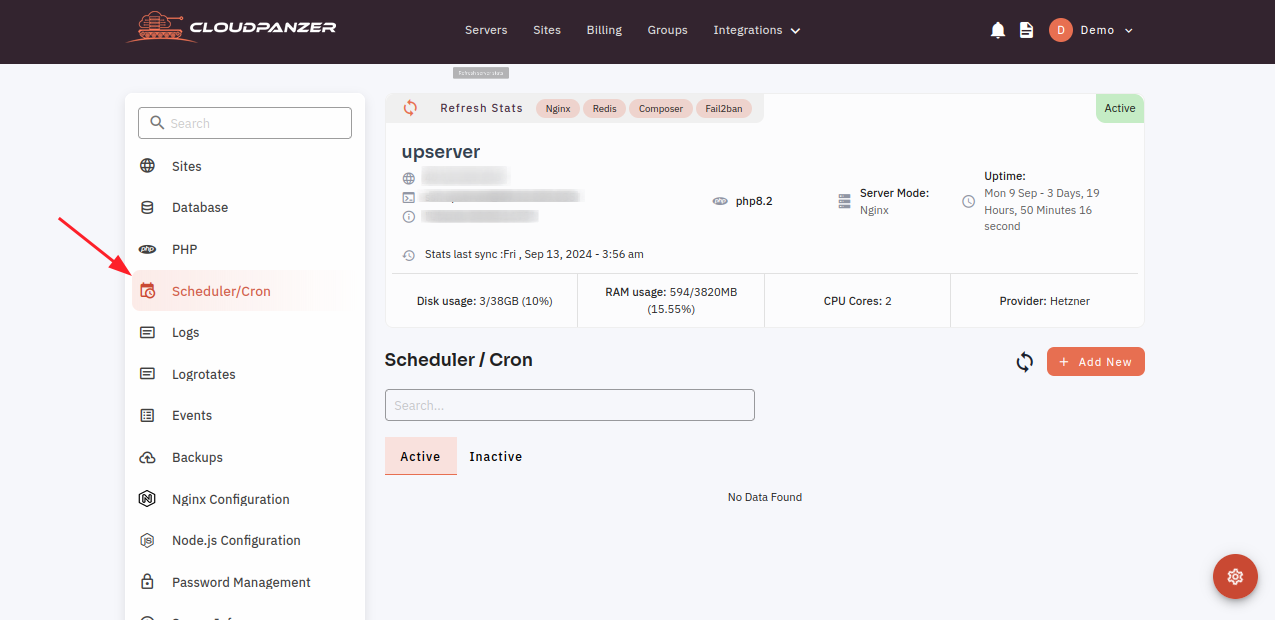
How to Navigate Scheduler ?
Follow the steps below to Scheduler
1: Once logged in, look for a "Server" and click on it.
2. Click on the Scheduler option.
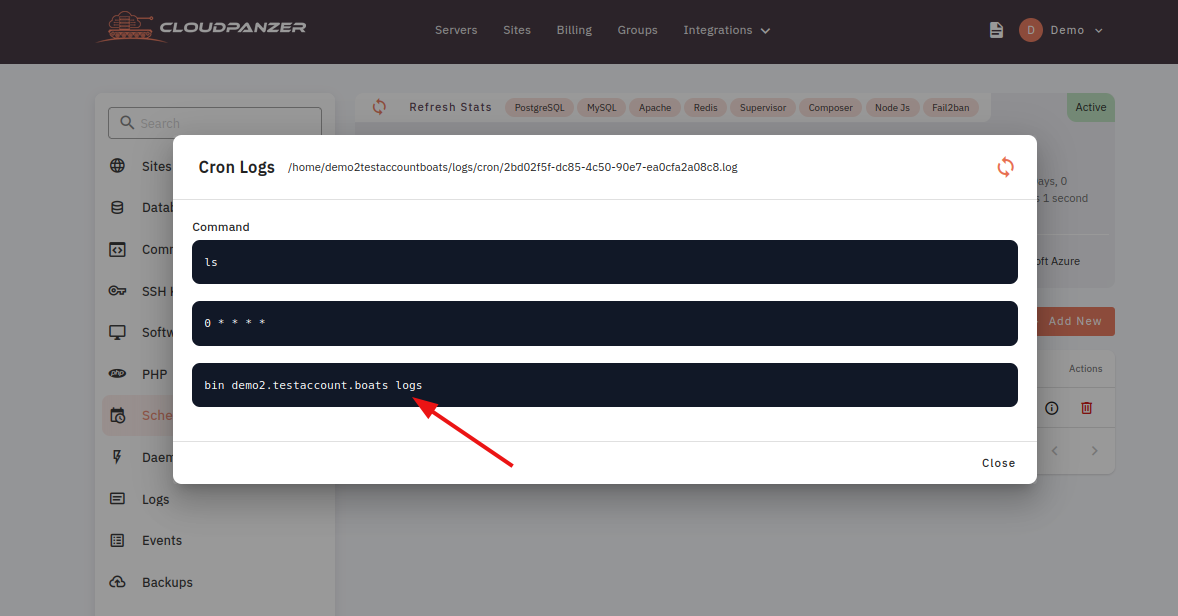
How to view Cron Logs through the cloudpanzer website?
Tutorial :
You can watch the Video or Continue reading the post.
Follow the steps below to view Cron Logs
Navigate to the Scheduler
(Use this link to view How to Navigate
3. Click on the Cron Logs Icon.
4. Here you can see Scheduler Cron logs are showing.
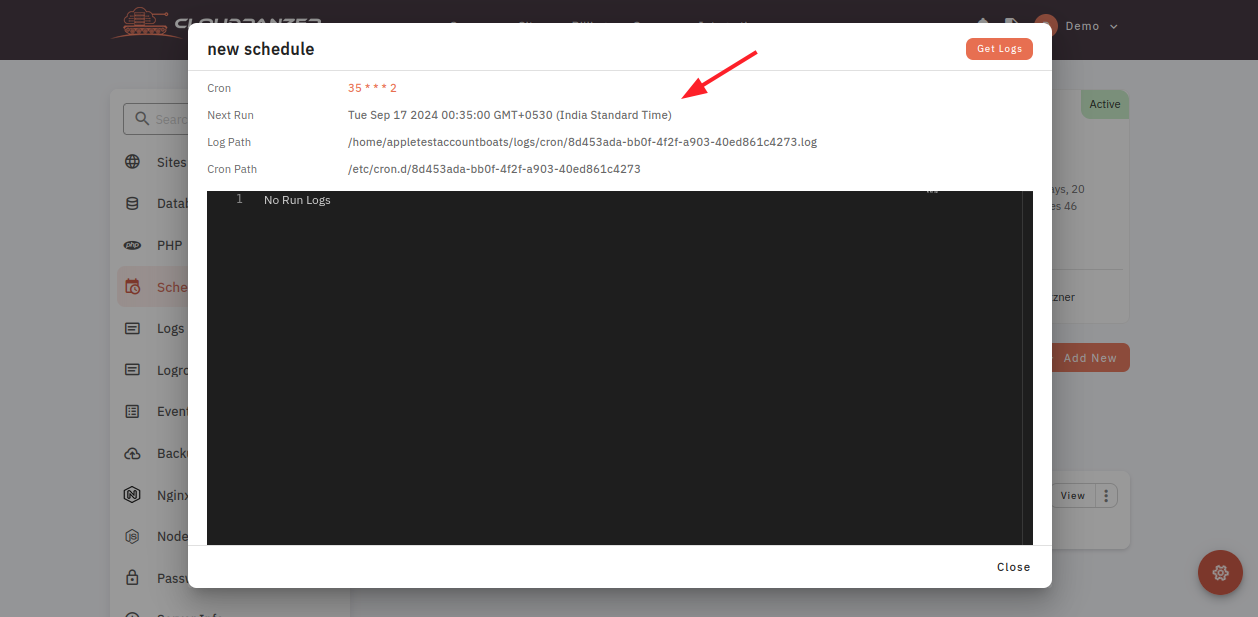
How to view Scheduler through the cloudpanzer website?
A scheduler is a useful tool for organizing and managing tasks, appointments, and events within Cloudpanzer. It allows users to schedule and track the progress of their work, as well as collaborate with others.
Prerequisites :
You must have an Active Server. You can jump to the tutorial section if the above conditions are correct, or first follow the links below to set up the prerequisites.
How to install a Server
Tutorial :
You can watch the Video or Continue reading the post.
Follow the steps below to View a Scheduler
Navigate to the Scheduler
(Use this link to view How to Navigate
3. Click on the view button.
Here, you can view the scheduler.
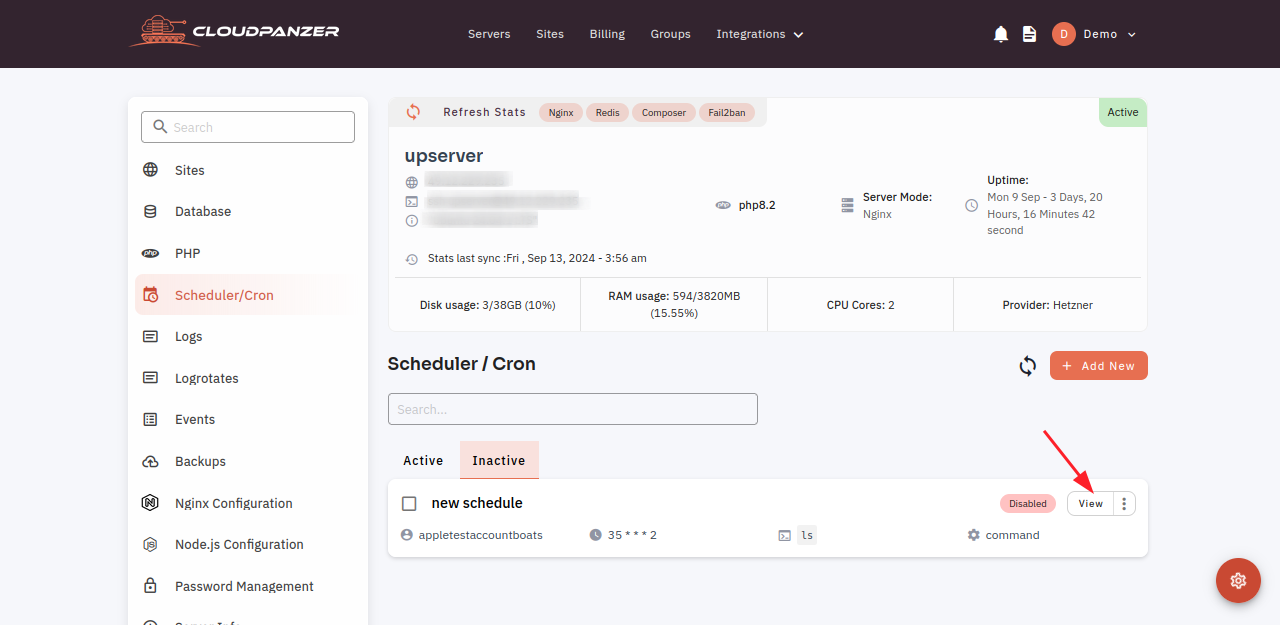
How to enable Scheduler through the cloudpanzer webite ?
Enabling a scheduler refers to the process of reactivating it after it has been disabled for some reason. This action allows the scheduler to resume its tasks or processes as initially intended.
Prerequisites :
You must have an Active Server. You can jump to the tutorial section if the above conditions are correct, or first follow the links below to set up the prerequisites.
How to install a Server
Tutorial :
You can watch the Video or Continue reading the post.
Follow the steps below to enable the Scheduler
Navigate to the Scheduler
(Use this link to view How to Navigate
3. Click on the Menu icon.

4. Select the Enable Option.

5. Click on the Yes Button.
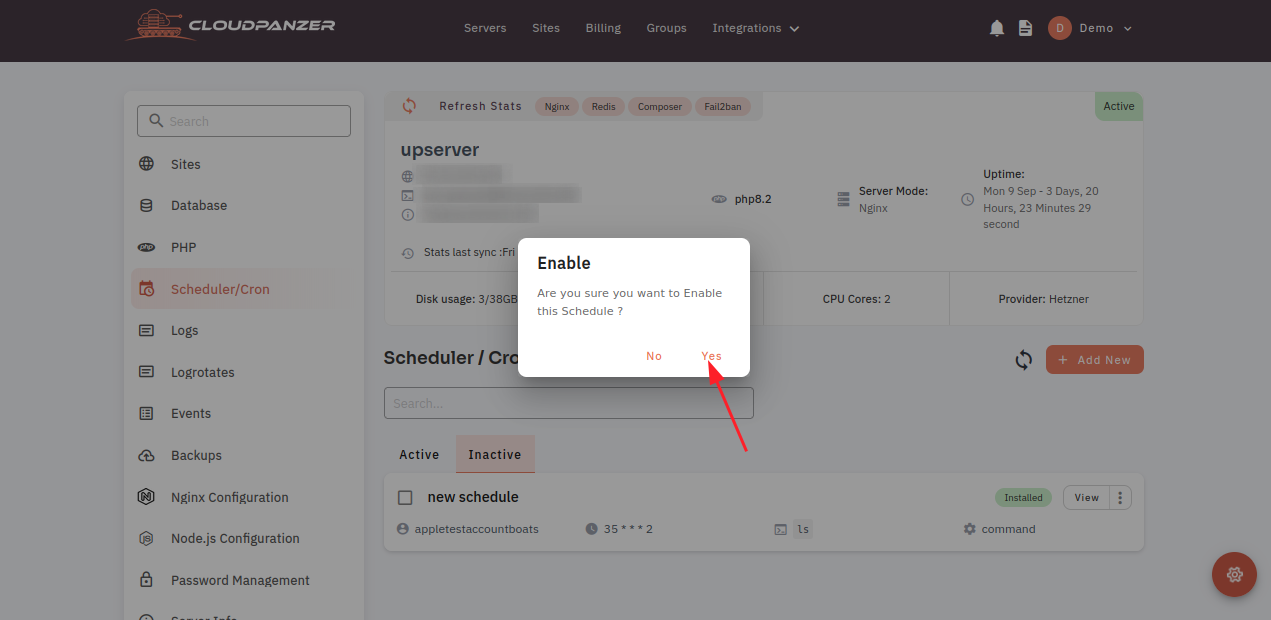
Here, you can see the Scheduler enabled Successfully.