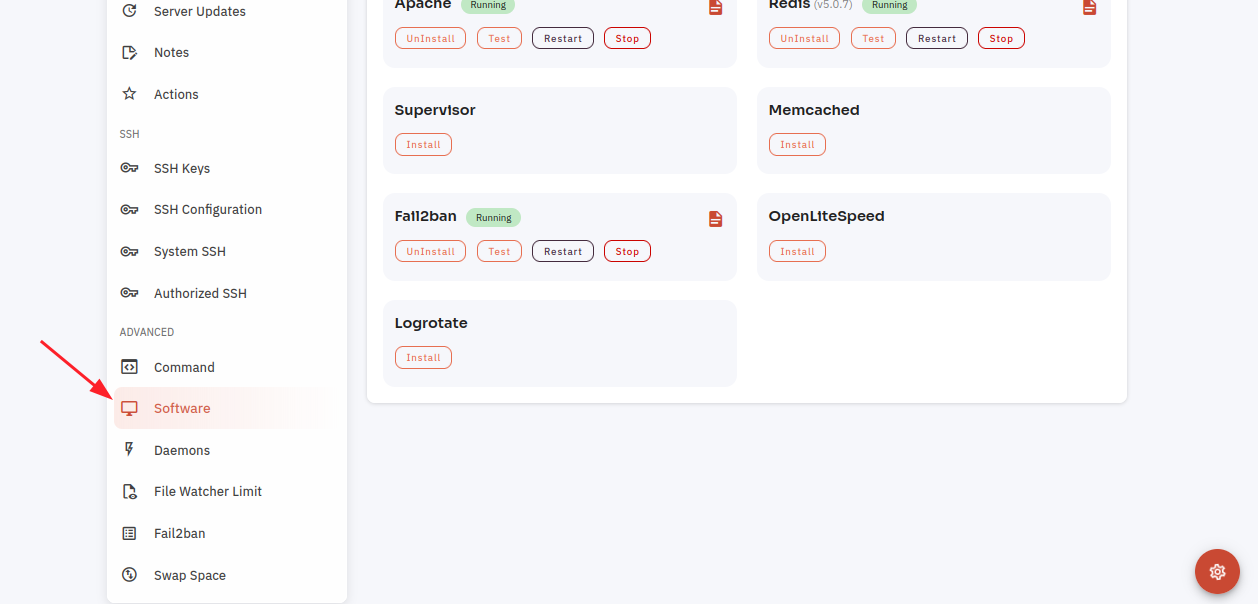
Server Software
- How to configure Apache Software through the cloudpanzer website?
- How to configure Fail2ban Software through the cloudpanzer website?
- How to configure MariaDB Software through the cloudpanzer website?
- How to configure Memcached Software through the cloudpanzer website?
- How to configure MySql Software through the cloudpanzer website?
- How to configure Nginx Software through the cloudpanzer website?
- How to configure PostgreSQL Software through the cloudpanzer website?
- How to configure Redis Software through the cloudpanzer website?
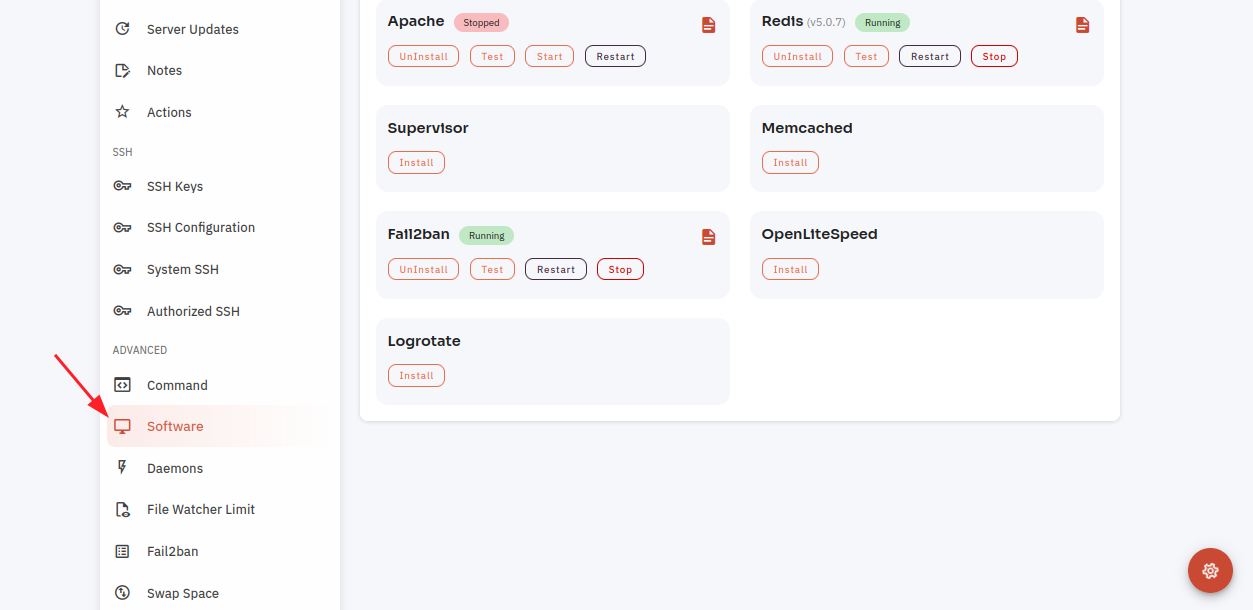
- How to configure Supervisor Software through the cloudpanzer website?
- How to configure OpenLiteSpeed Software through the cloudpanzer website?
- How to configure Logrotate Software through the cloudpanzer website?
How to configure Apache Software through the cloudpanzer website?
Testing, starting, and restarting the Apache HTTP Server software involves using commands to manage its operations.
Follow the steps below to configure Apache Software.
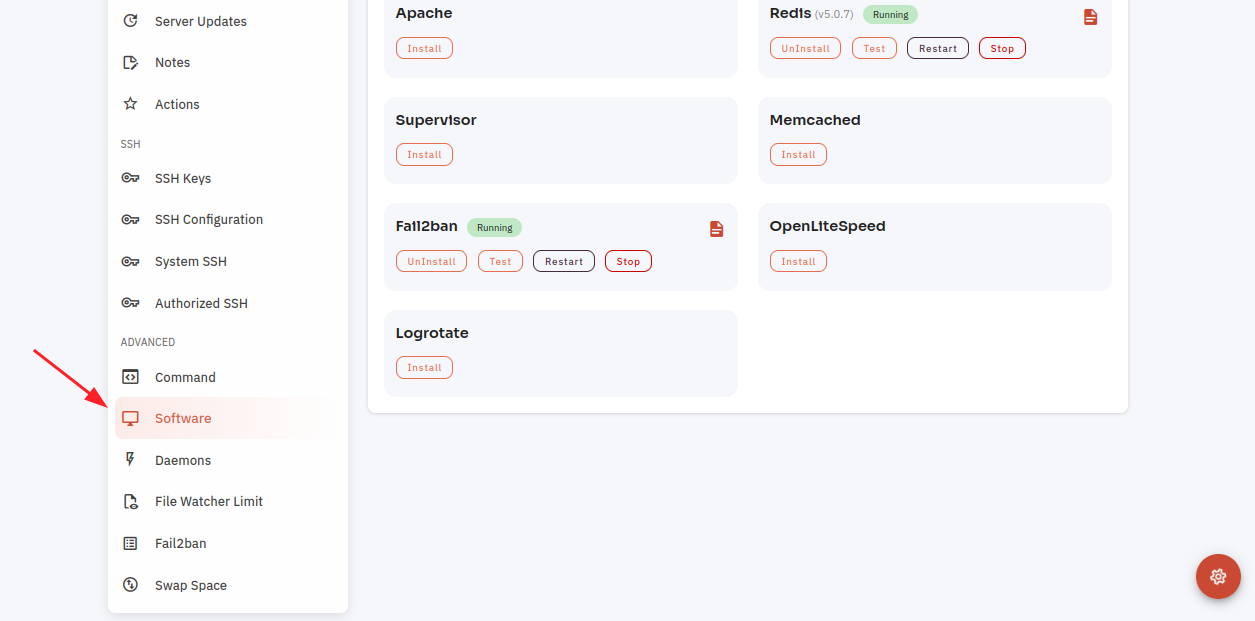
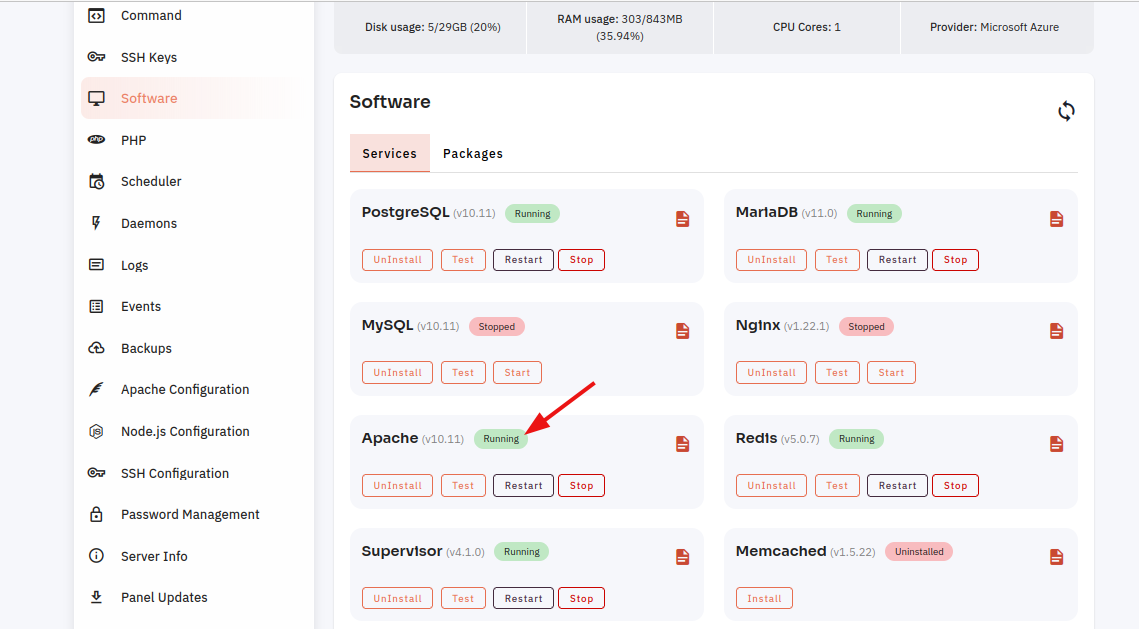
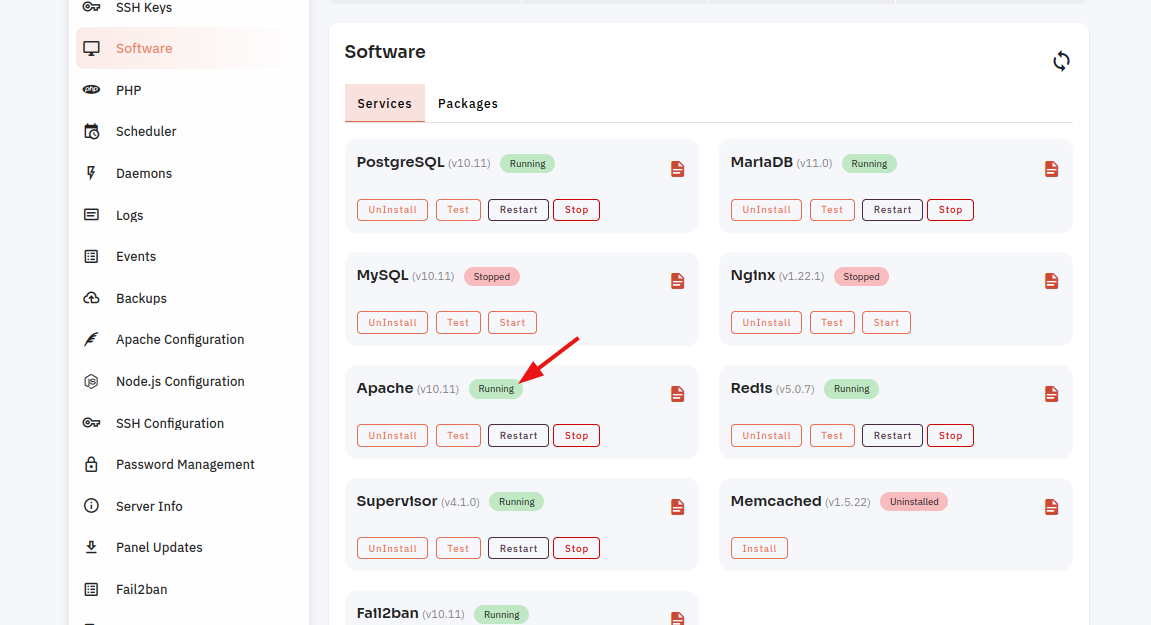
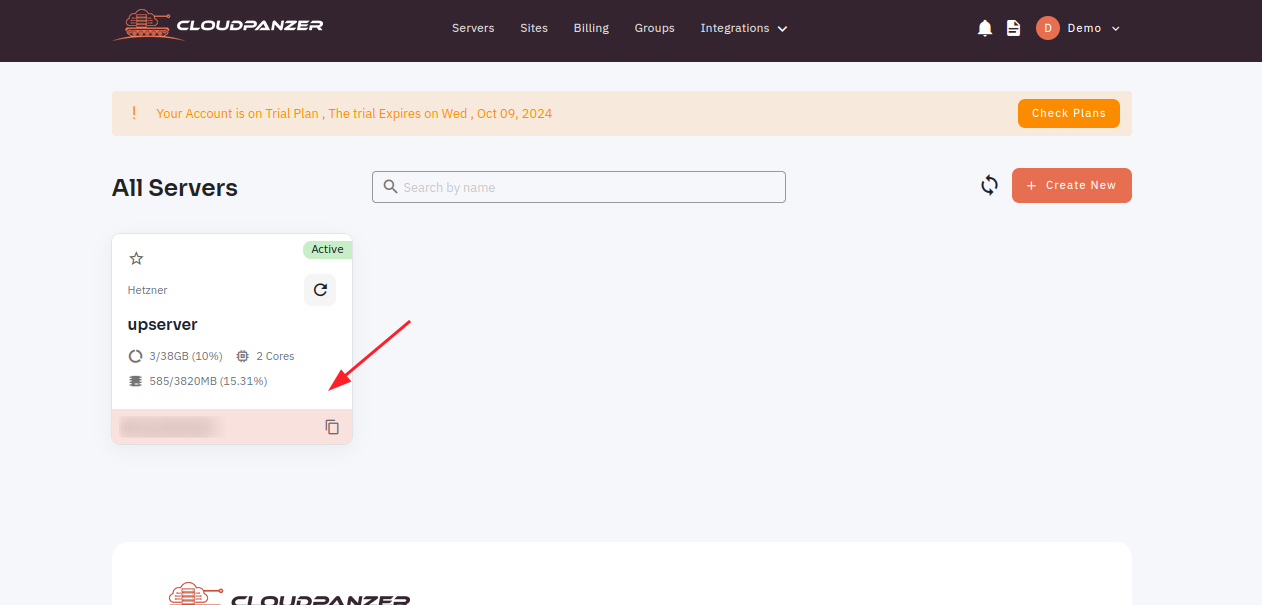
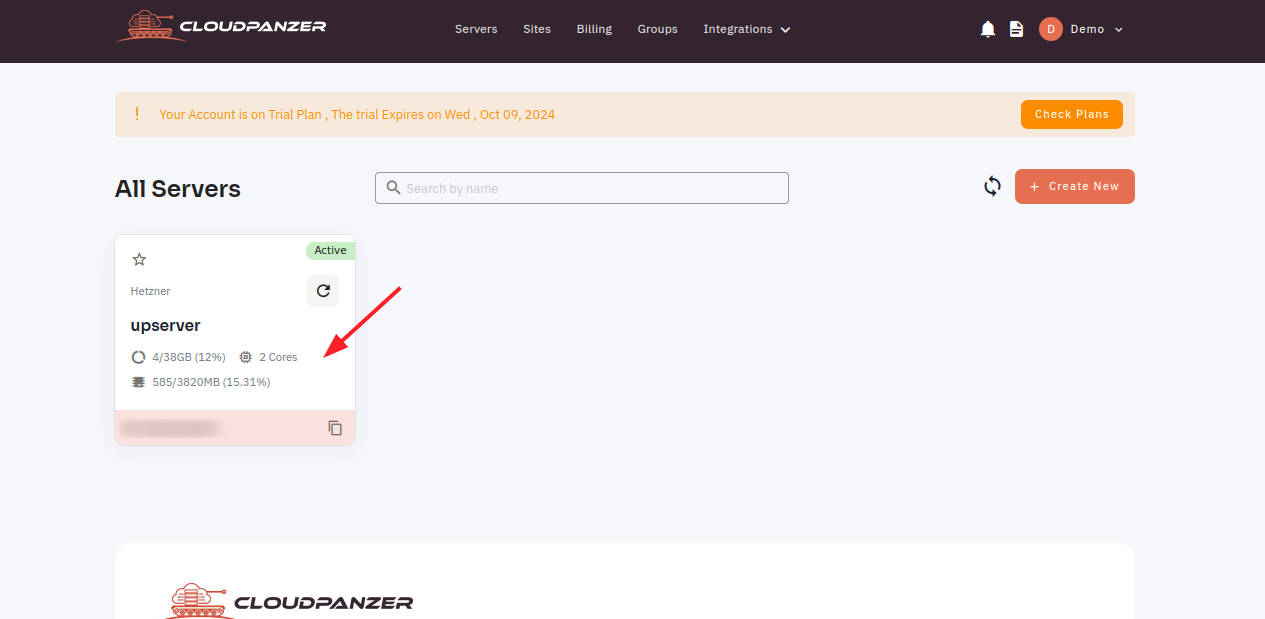
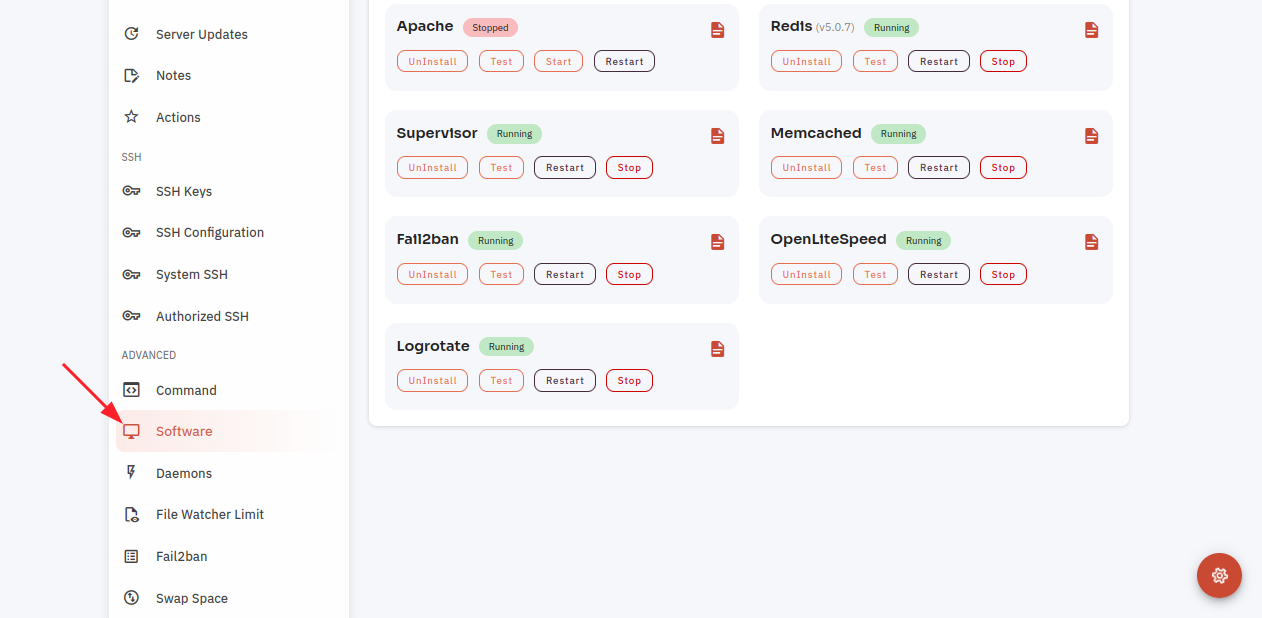
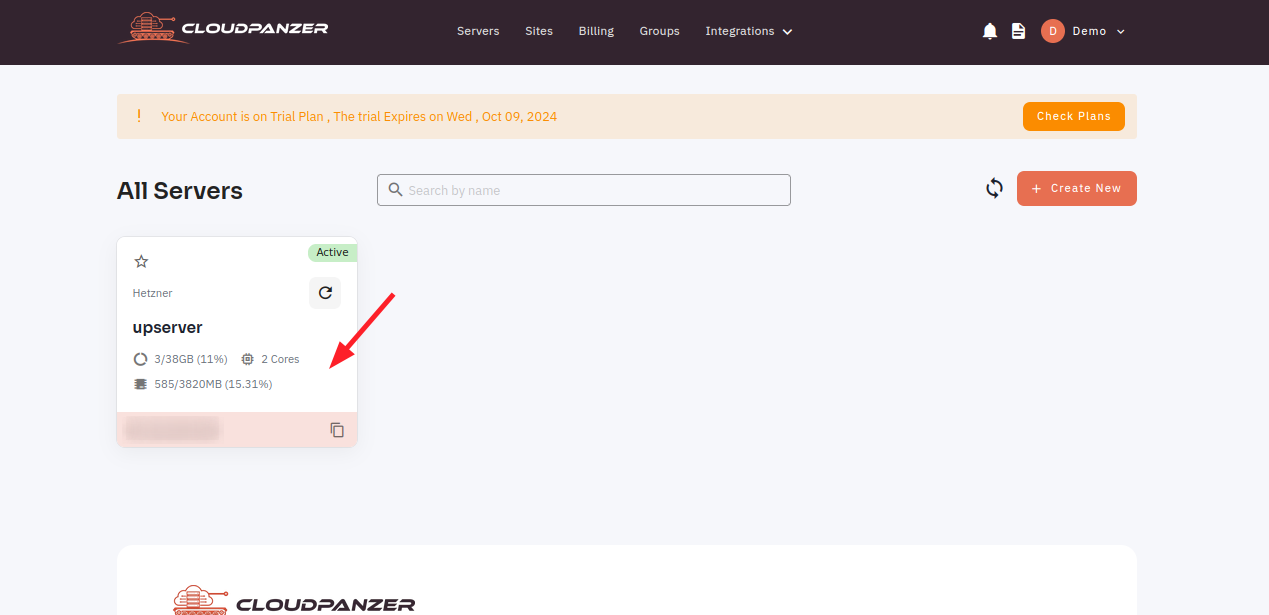
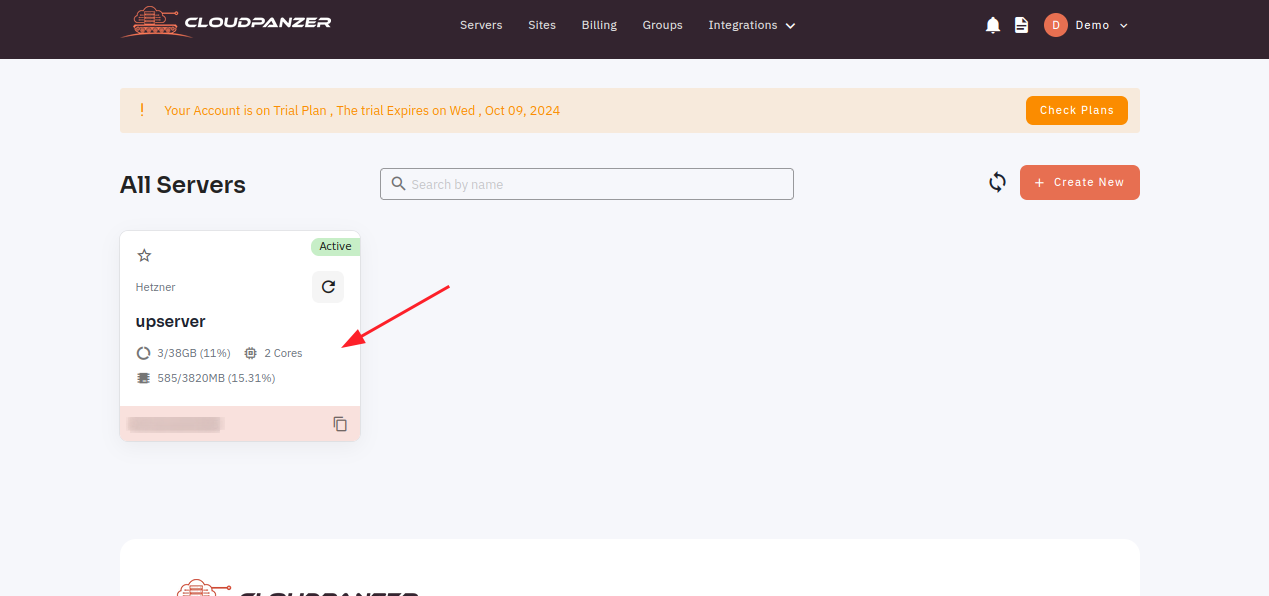
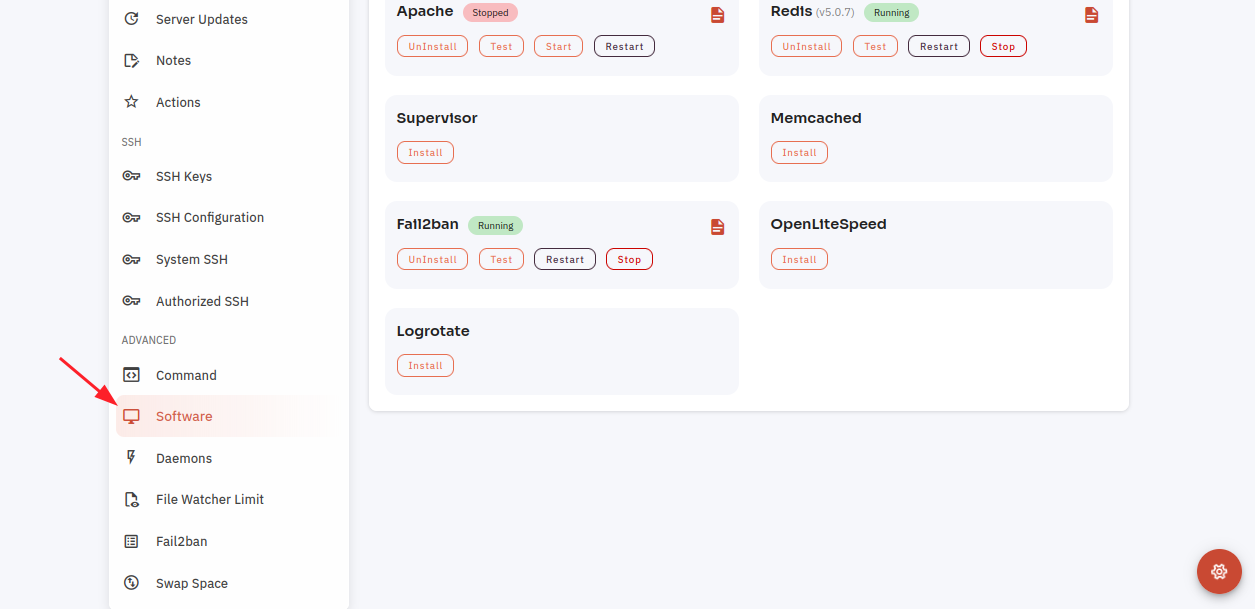
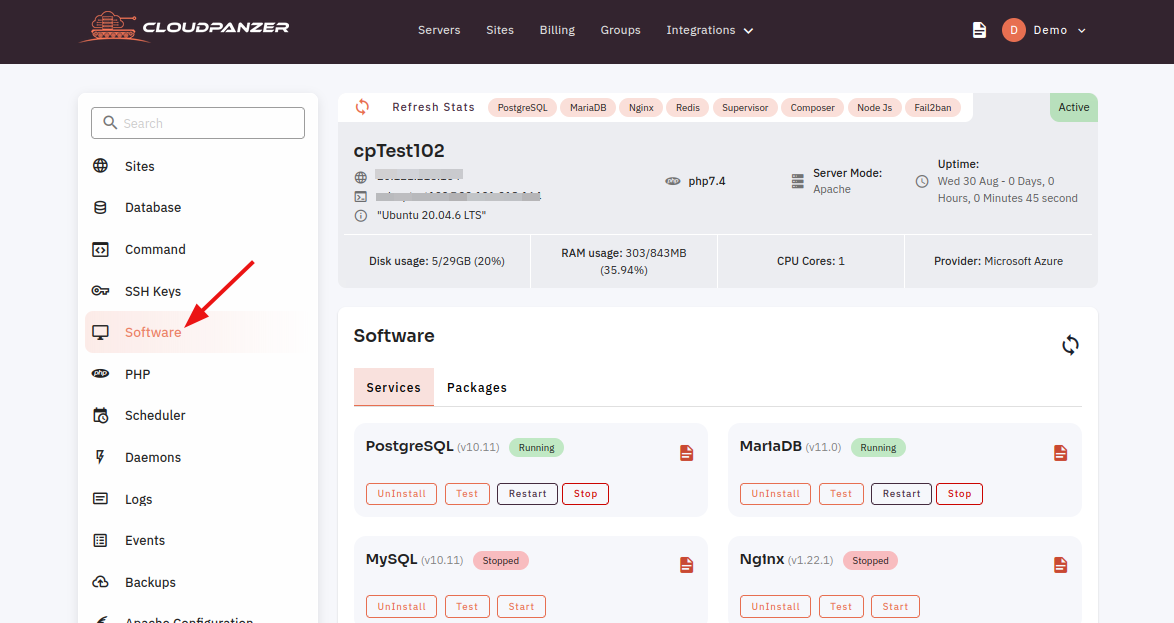
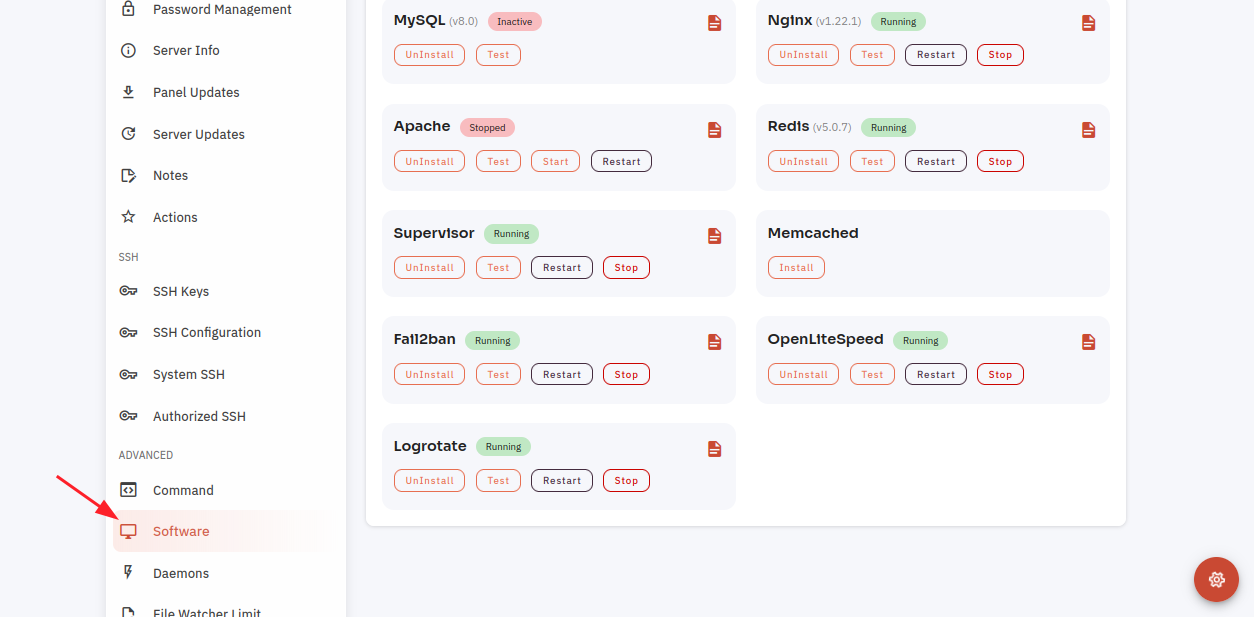
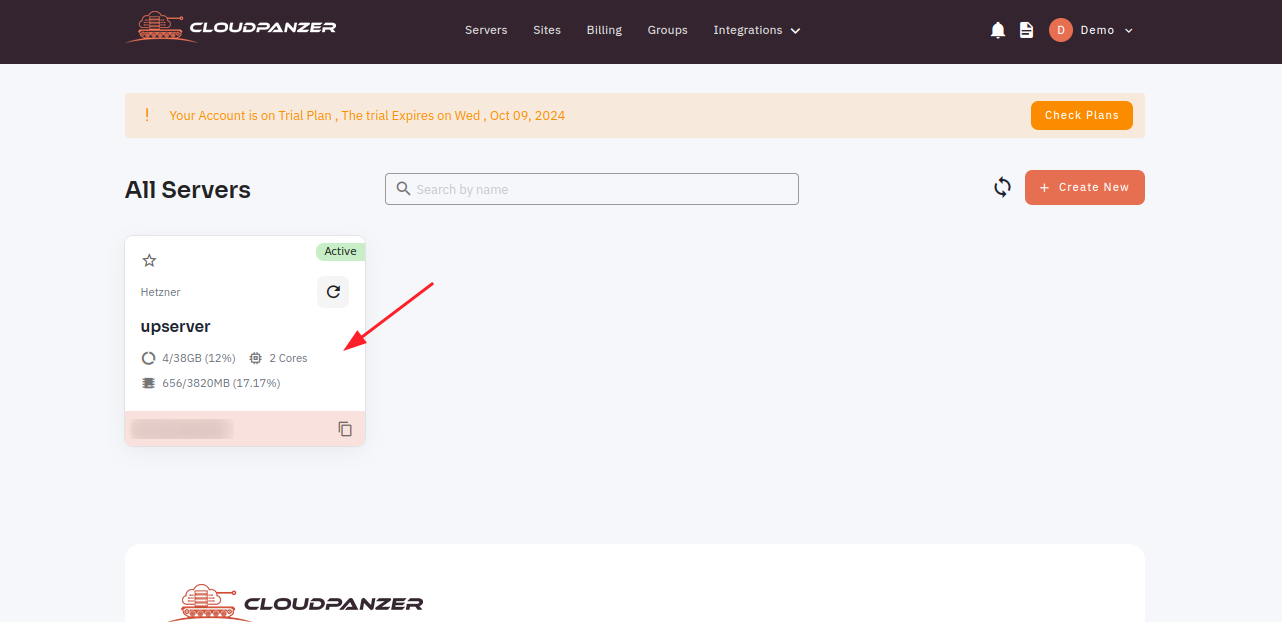
1: Once logged in, look for a "Server" and click on it.

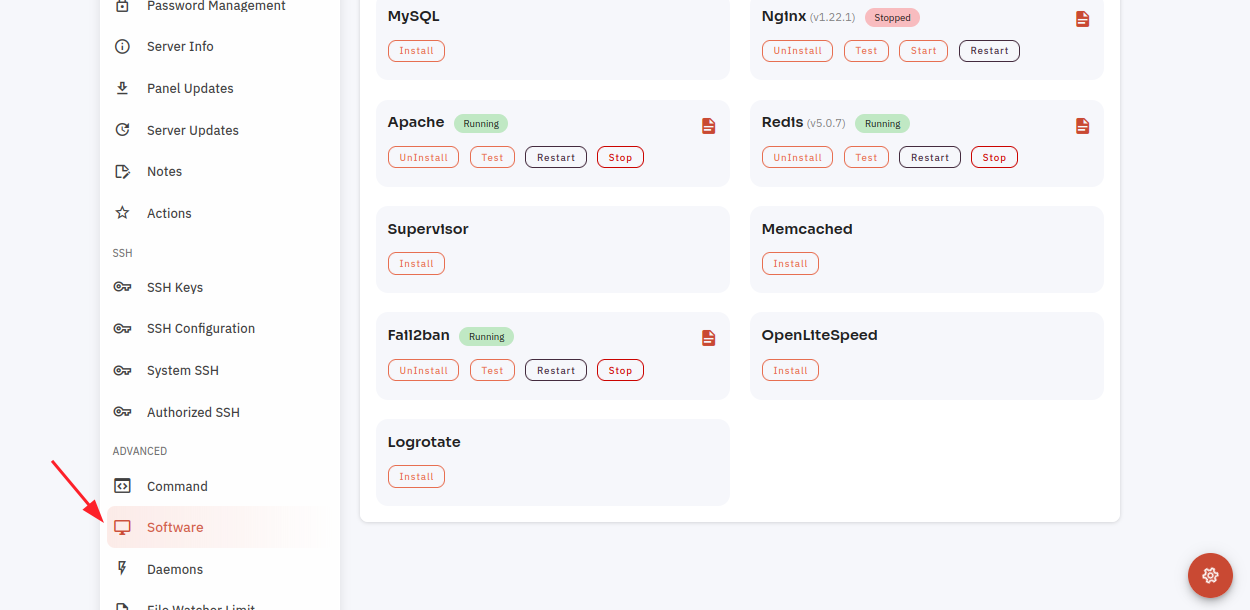
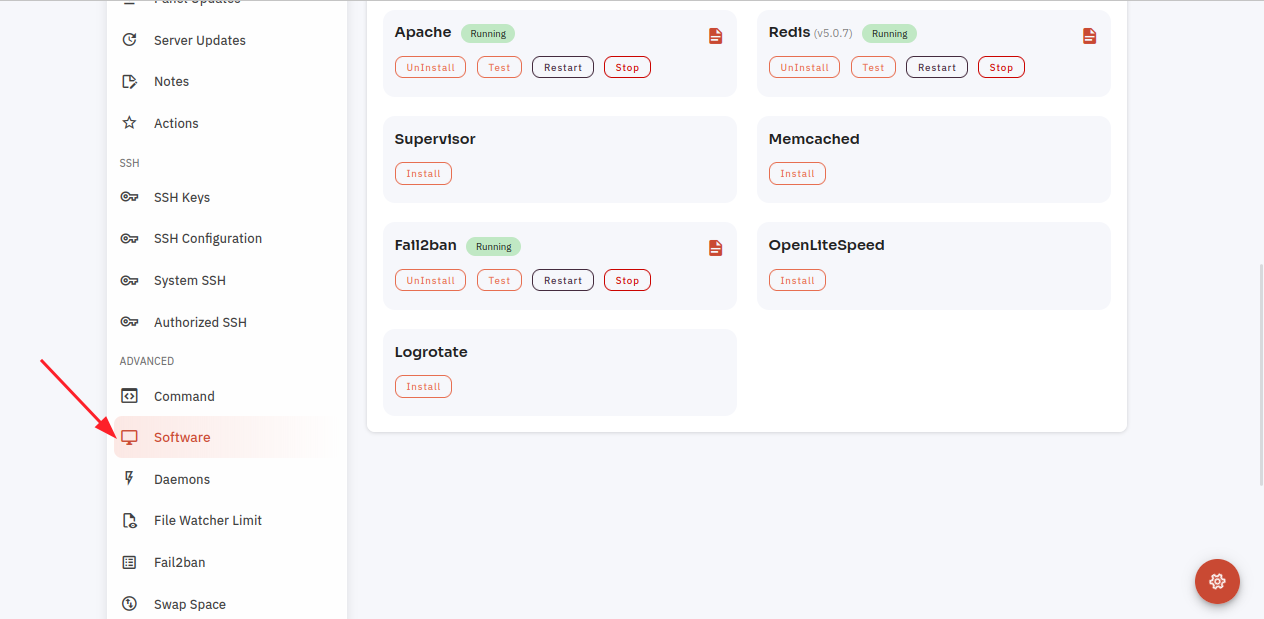
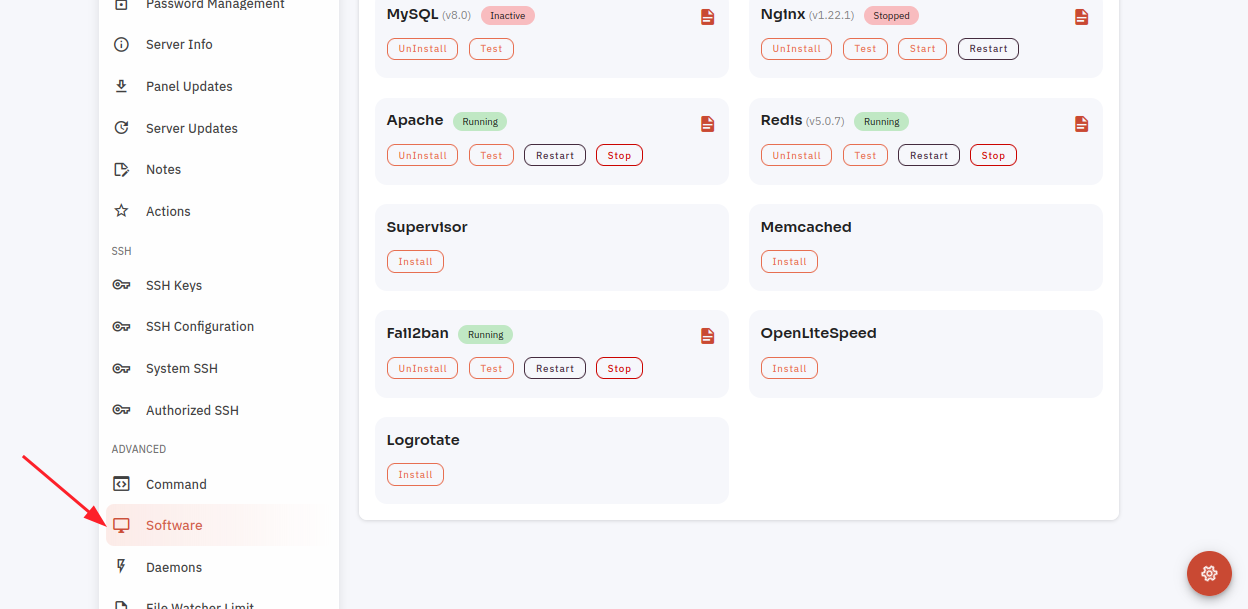
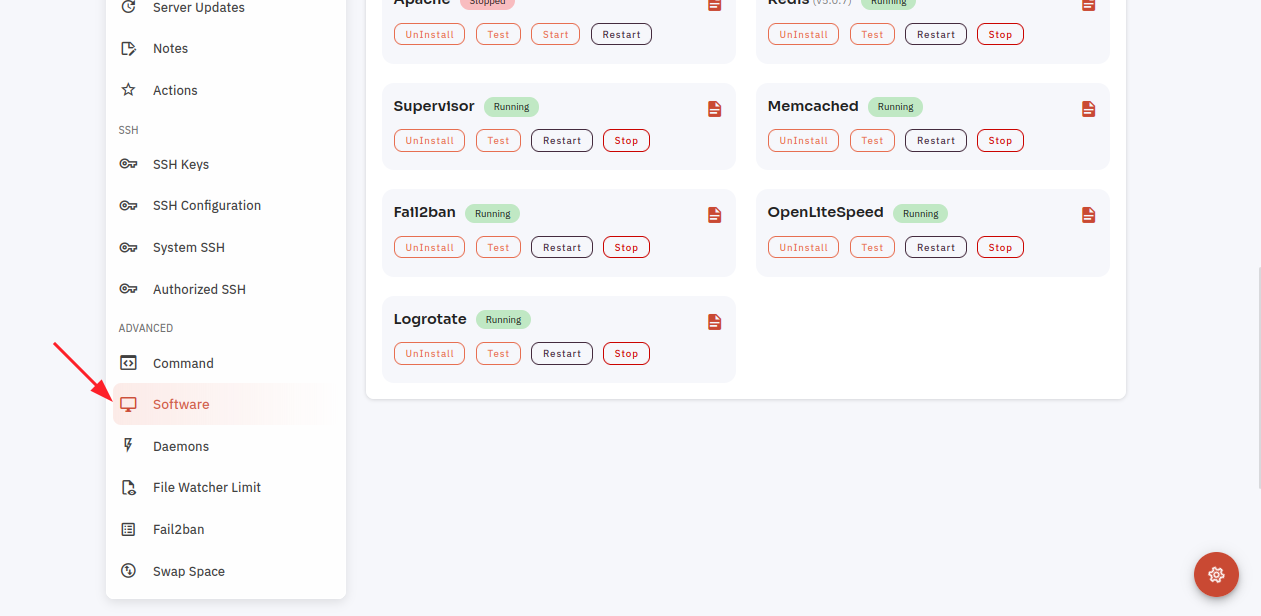
2. Select the Software Option.
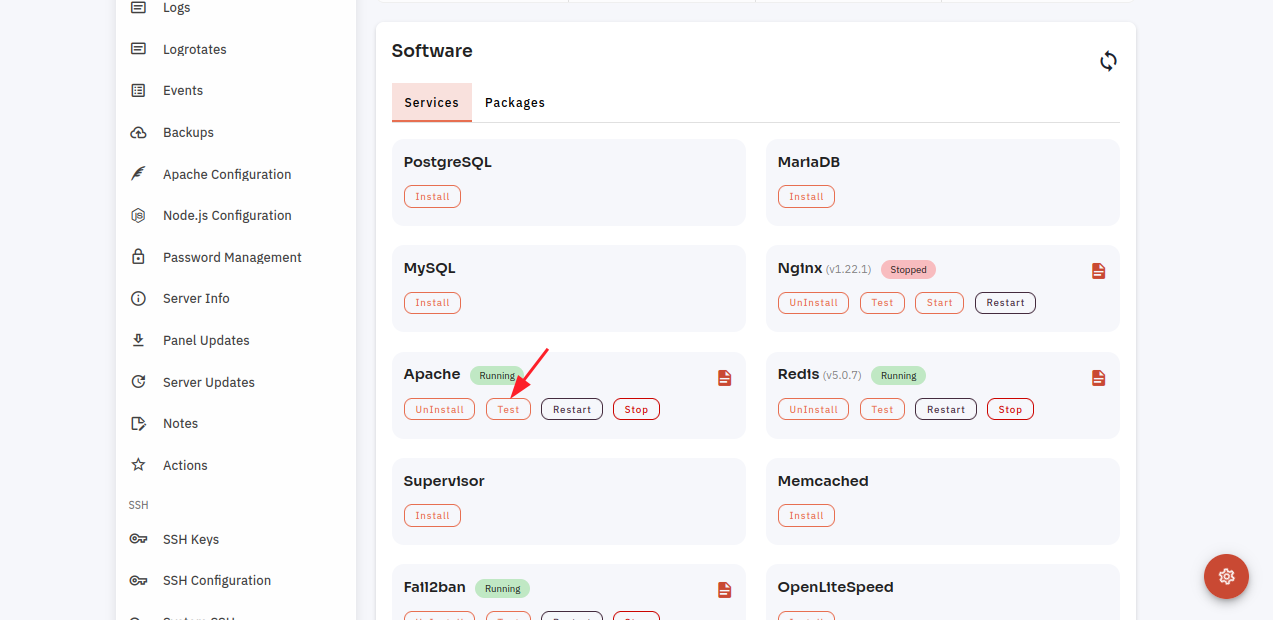
4. Open a dialog and click the "Text" button to test the Apache software.
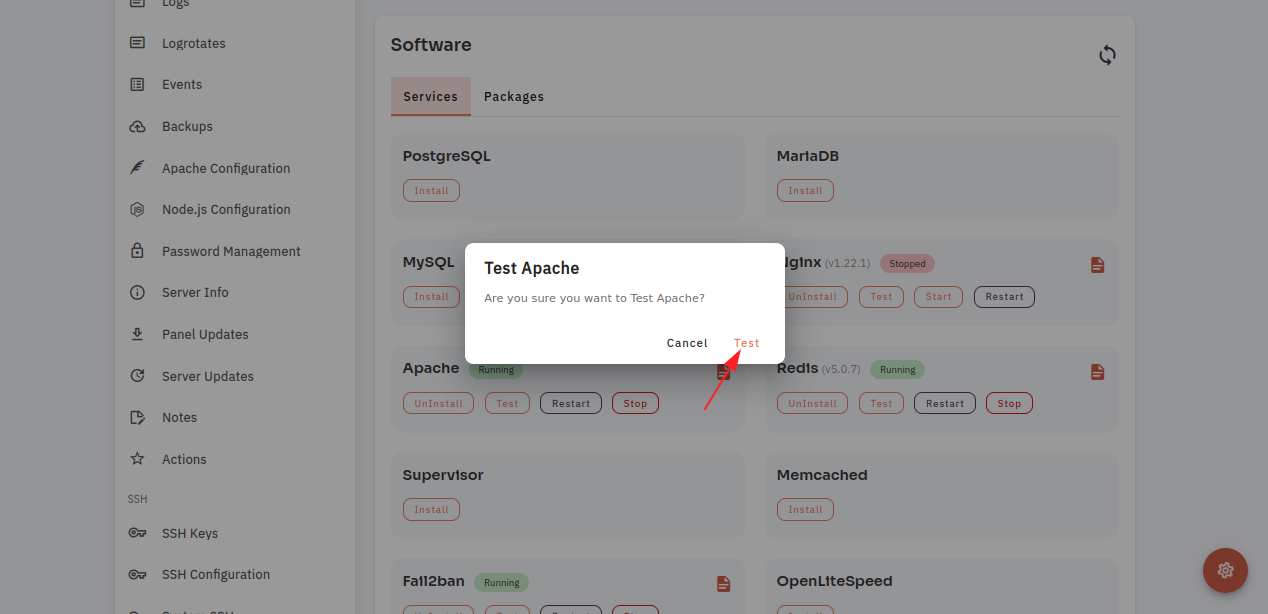
Here, you can see the Apache Test successfully.

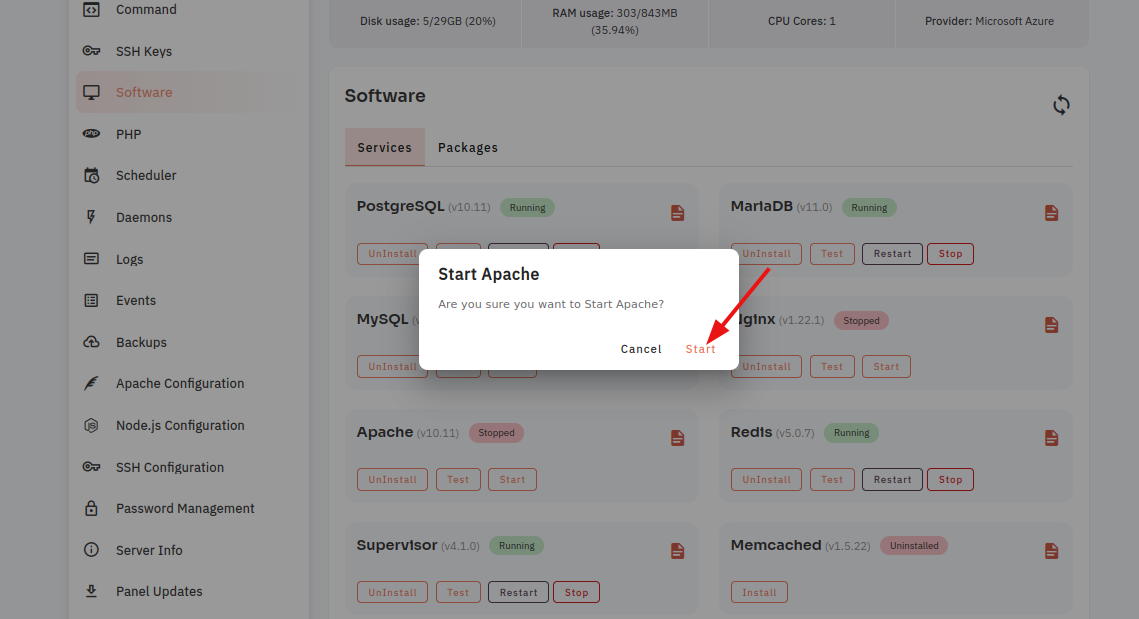
6. Open a Dialog and Click on the Start Button to start Apache software.
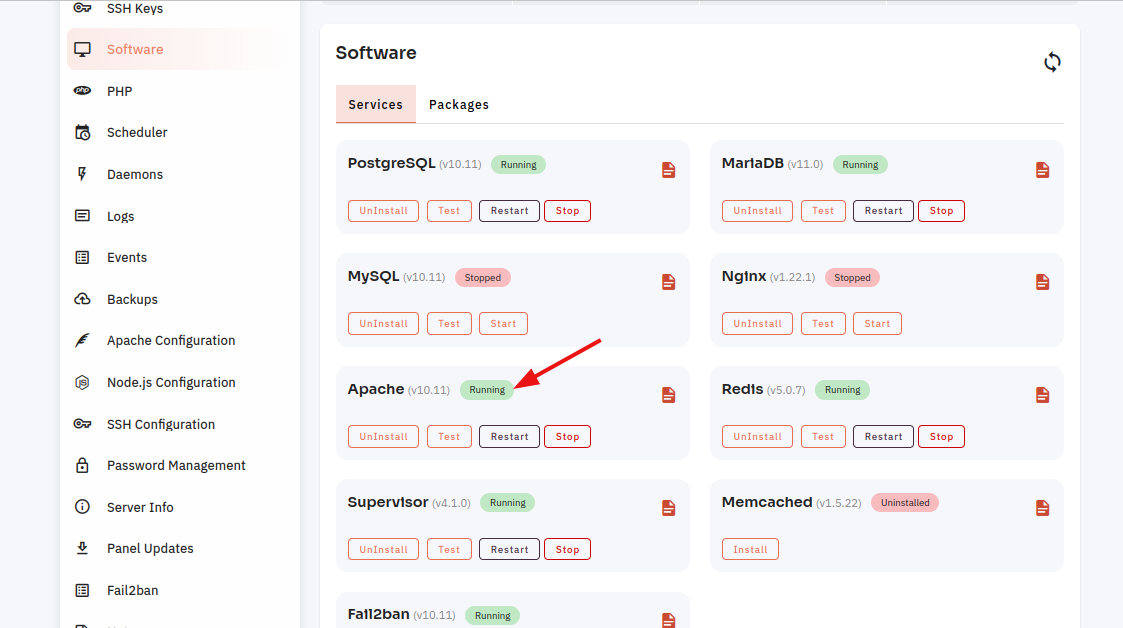
Here, you can see Apache Started successfully.
7. Select the Stop option.
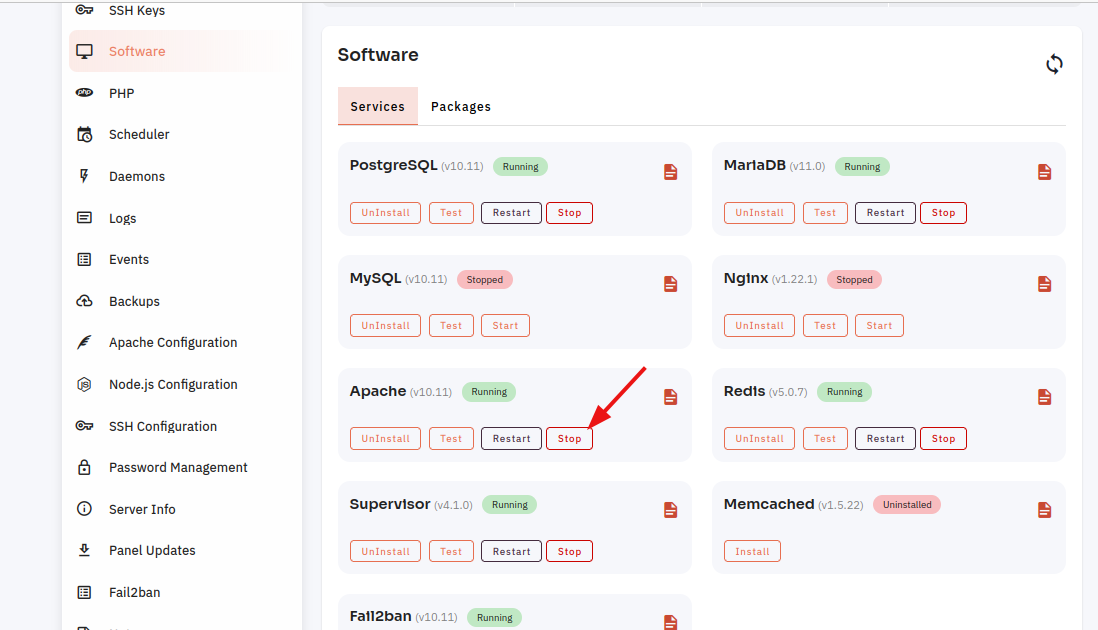
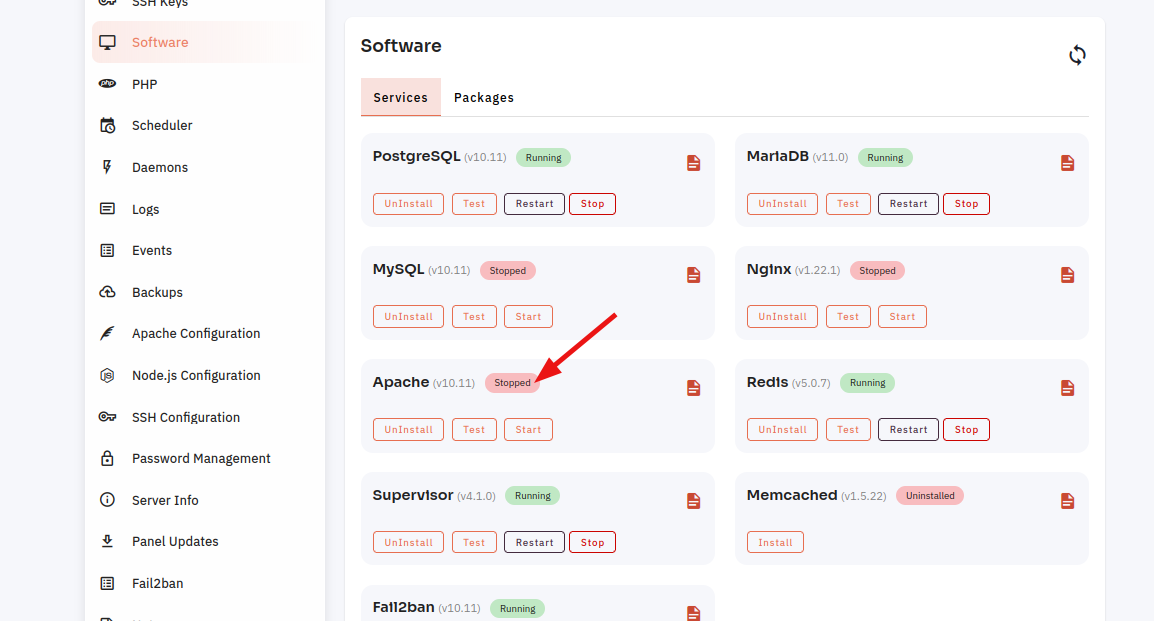
8. Open a dialog and click the stop button to stop the Apache software.
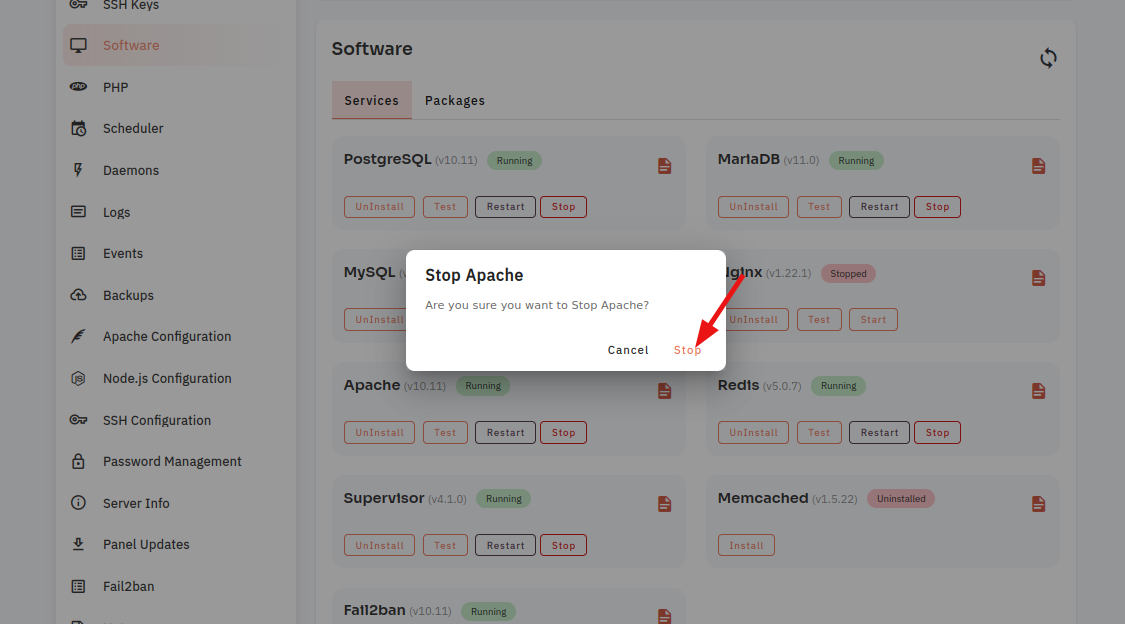
Here, you can see Apache Stopped successfully.
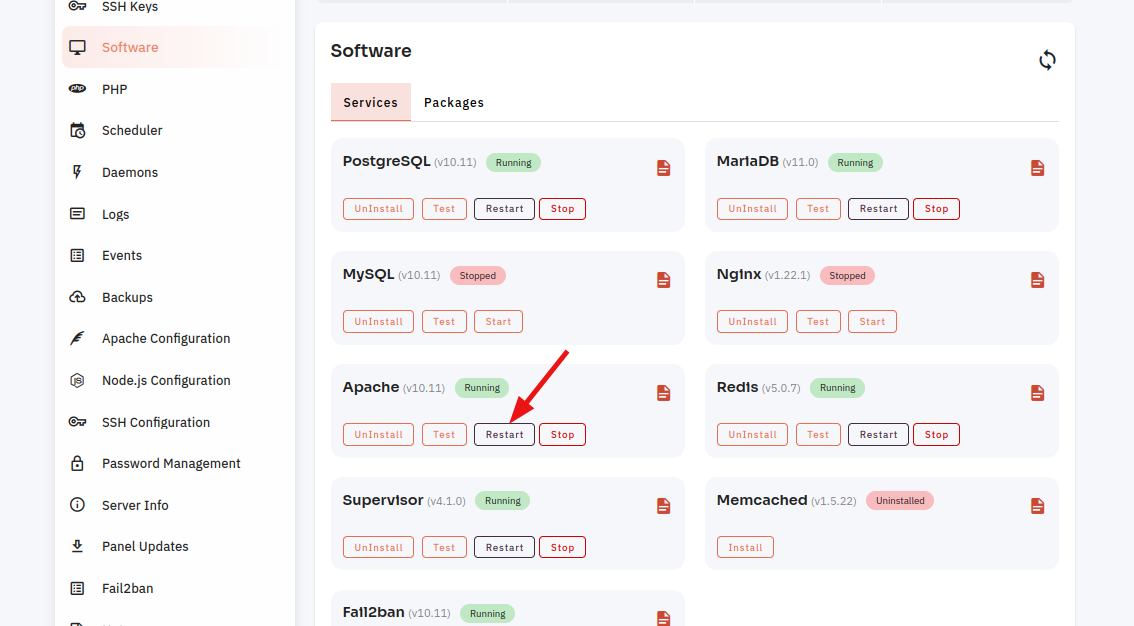
9. Select the Restart Option.
10. Open a dialog and click the restart button to restart the Apache software.
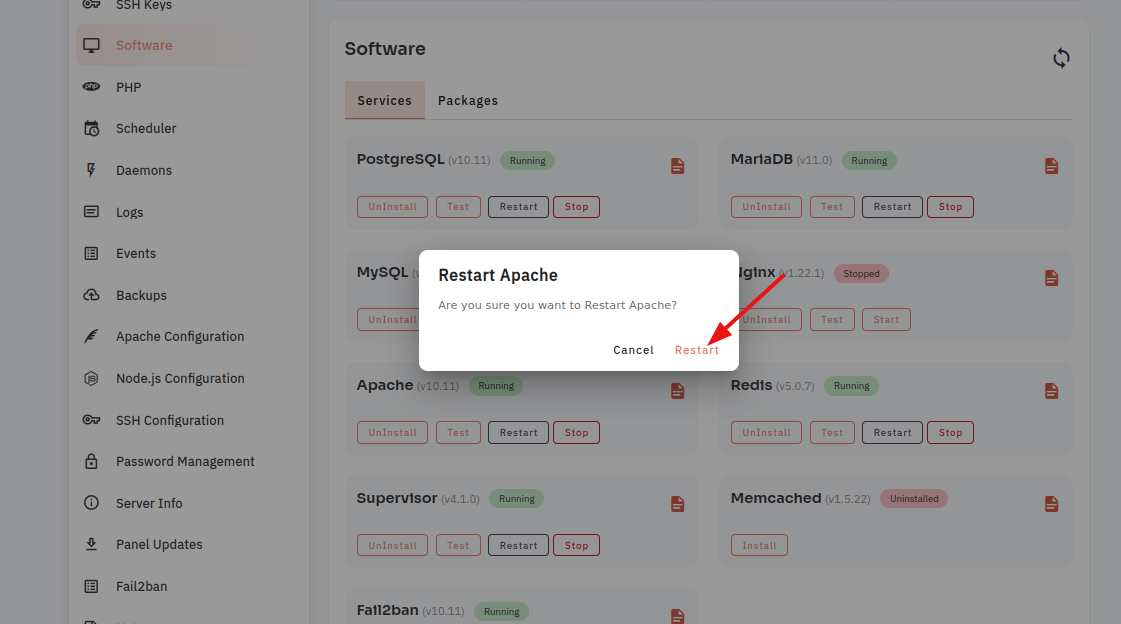
Here, you can see that Apache restarted successfully.
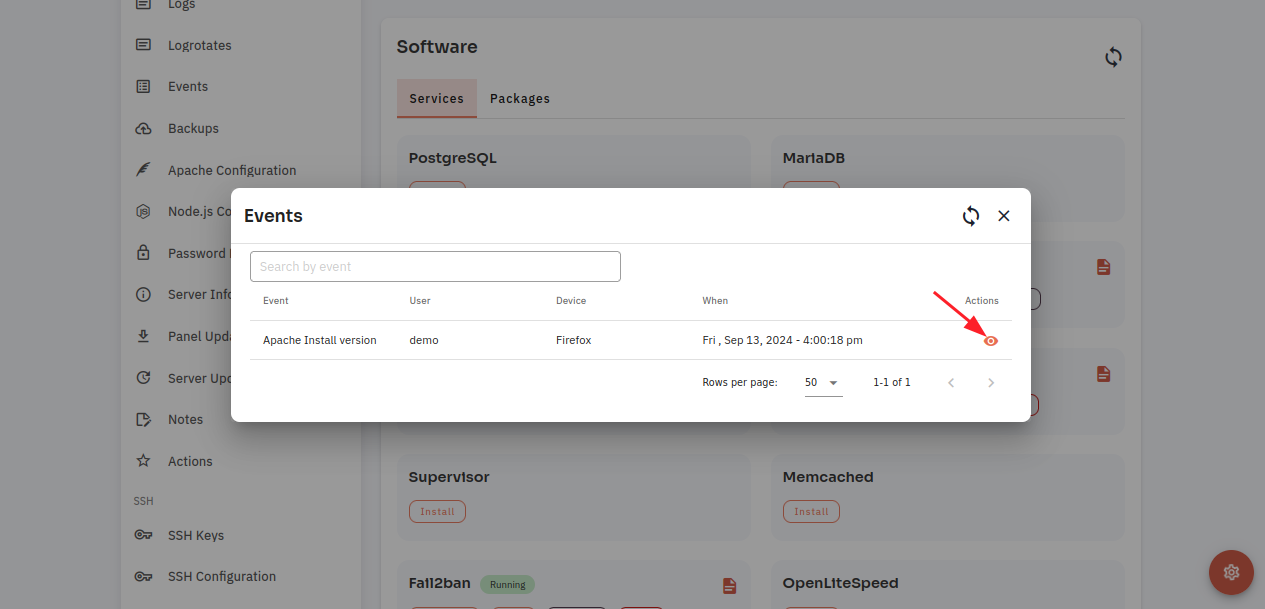
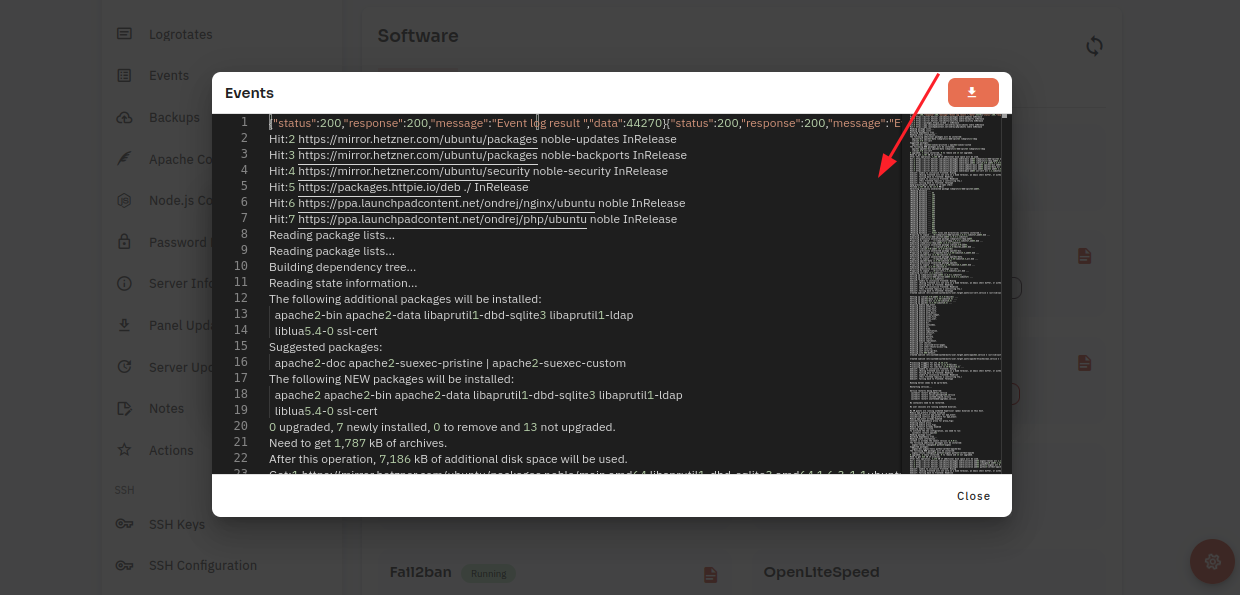
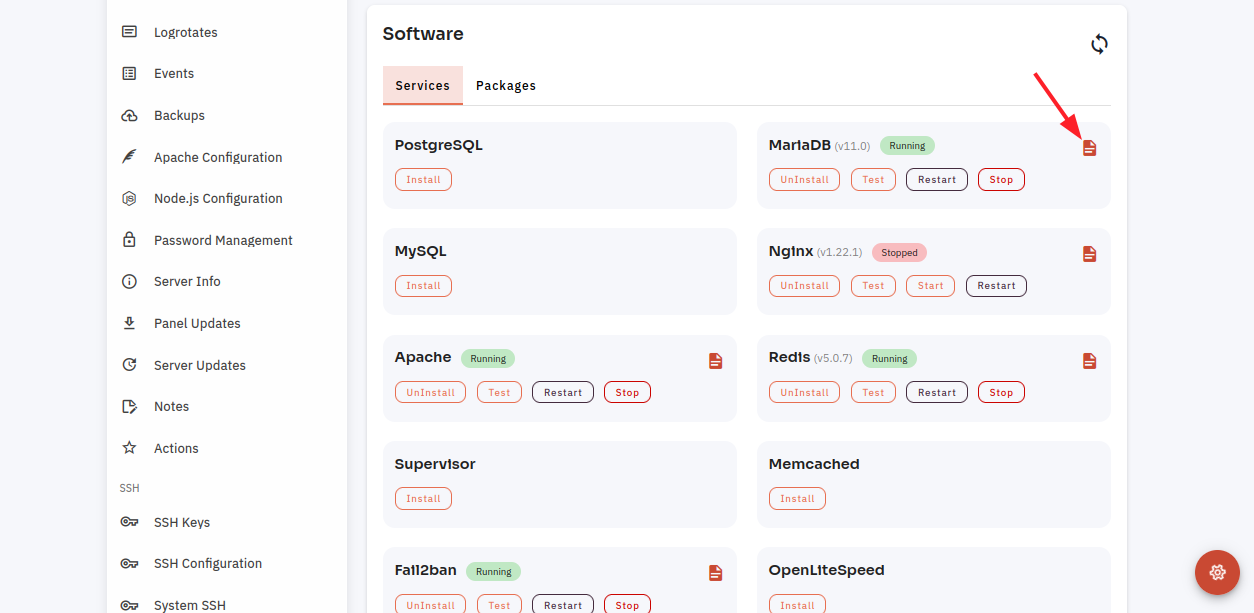
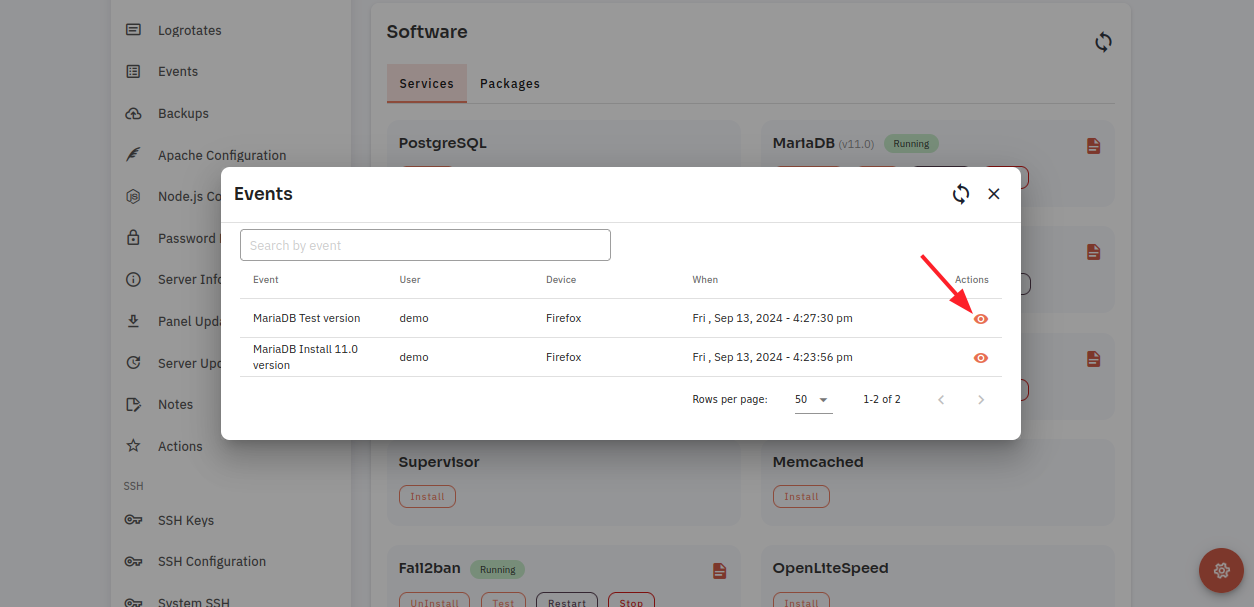
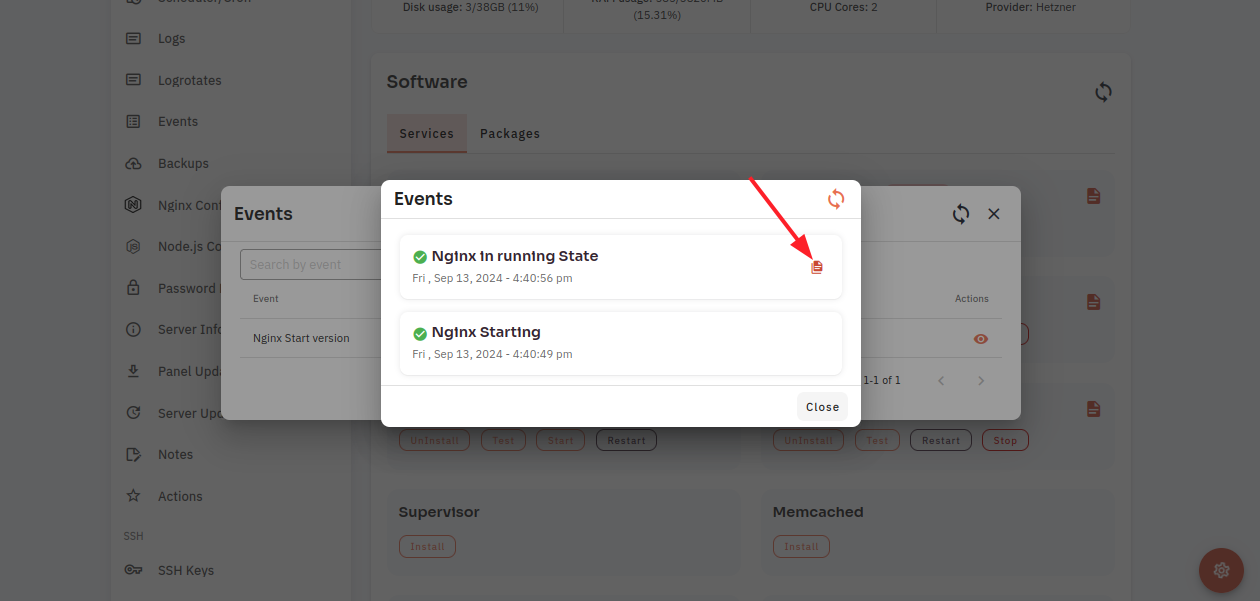
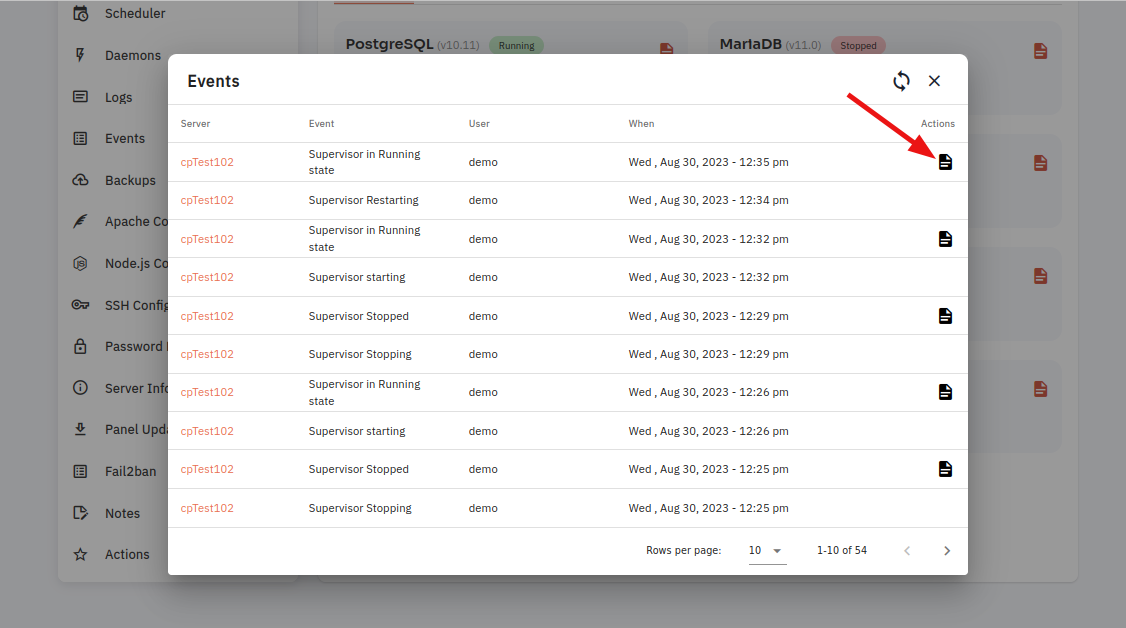
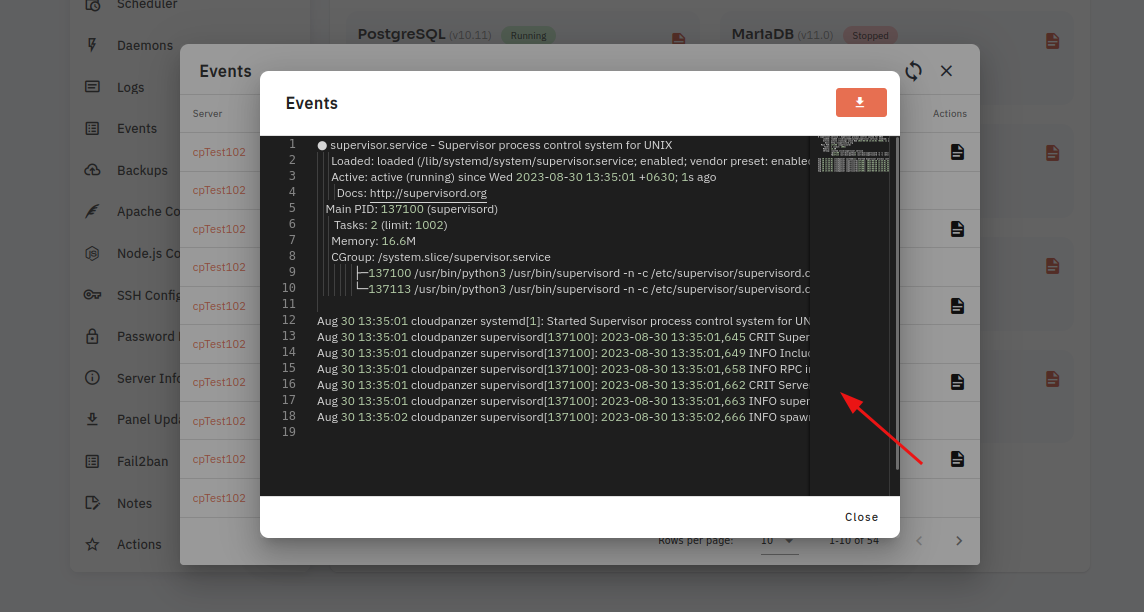
11. Click on the Event Button.
12. Click on the Eye icon.
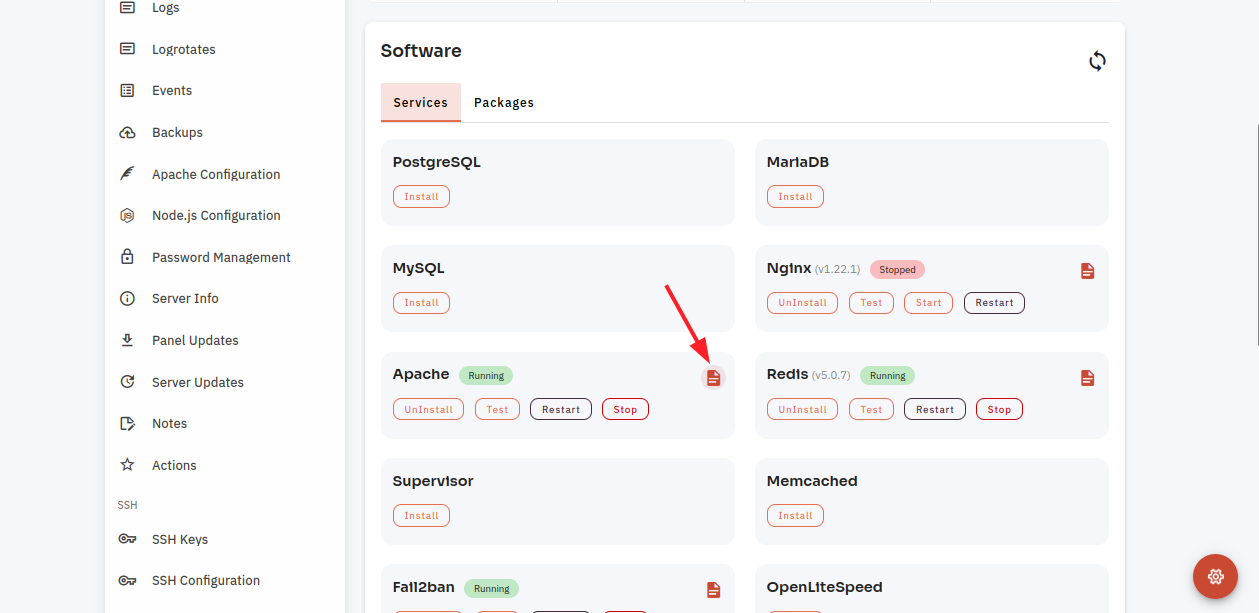
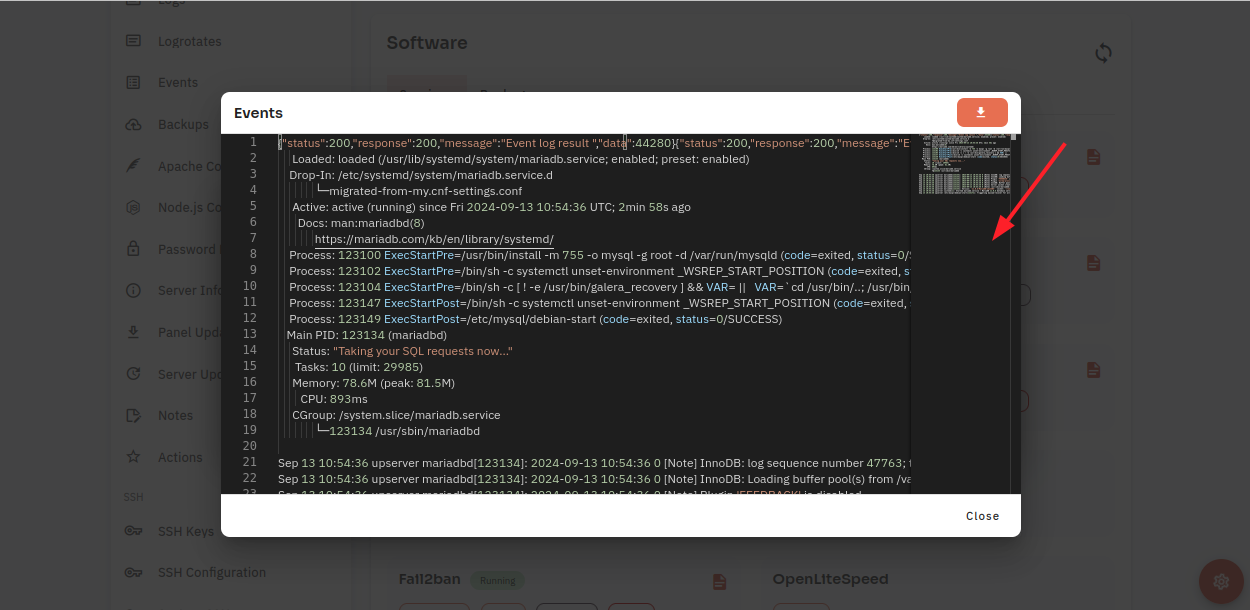
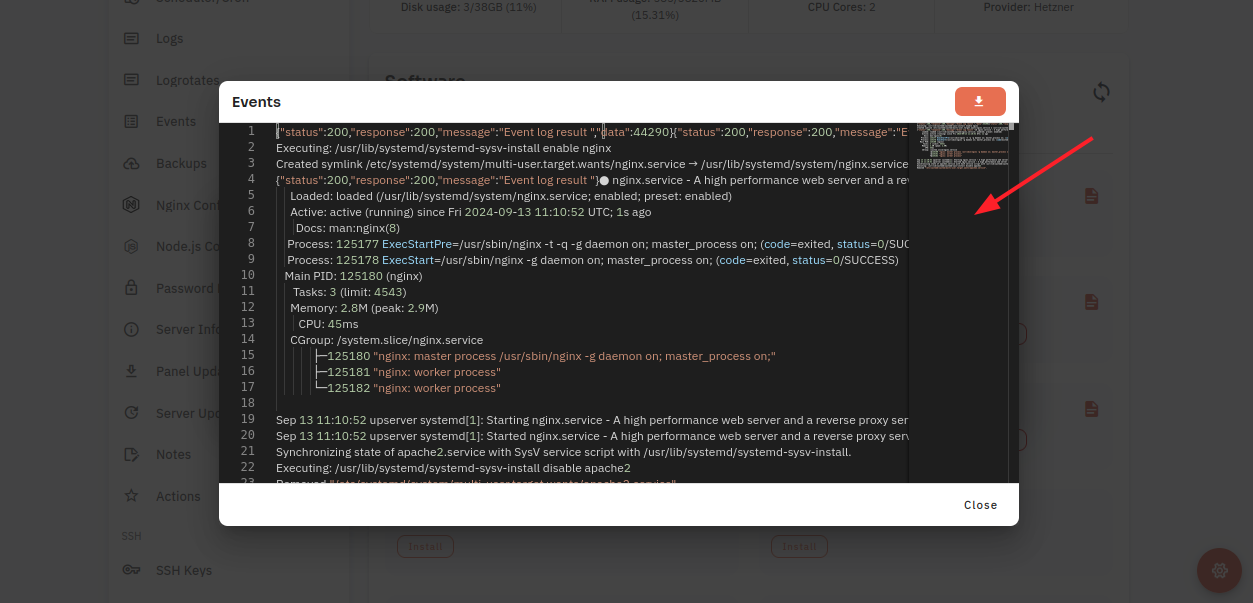
13. Click on the File icon.
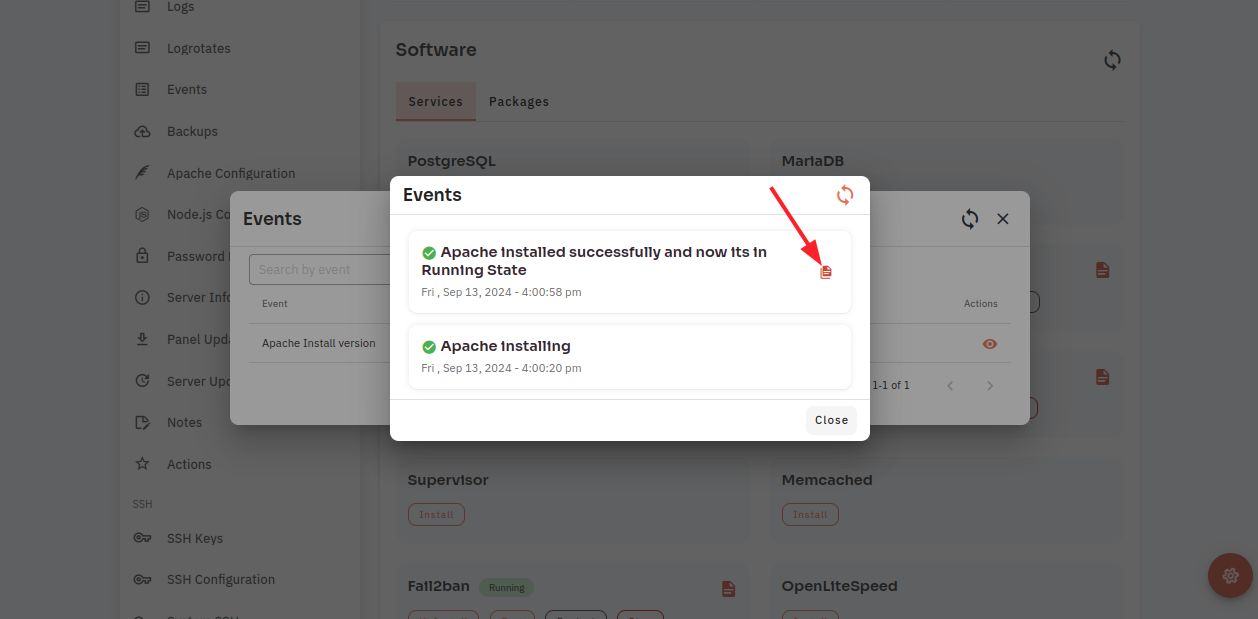
Here, you can see Apache Event data.
How to configure Fail2ban Software through the cloudpanzer website?
Fail2ban is a popular open-source intrusion prevention software that helps protect your server by monitoring log files and blocking IP addresses that show signs of malicious activity.
Follow the steps below to configure Fail2ban Software.
1: Once logged in, look for a "Server" and click on it.
2. Select the Software Option.
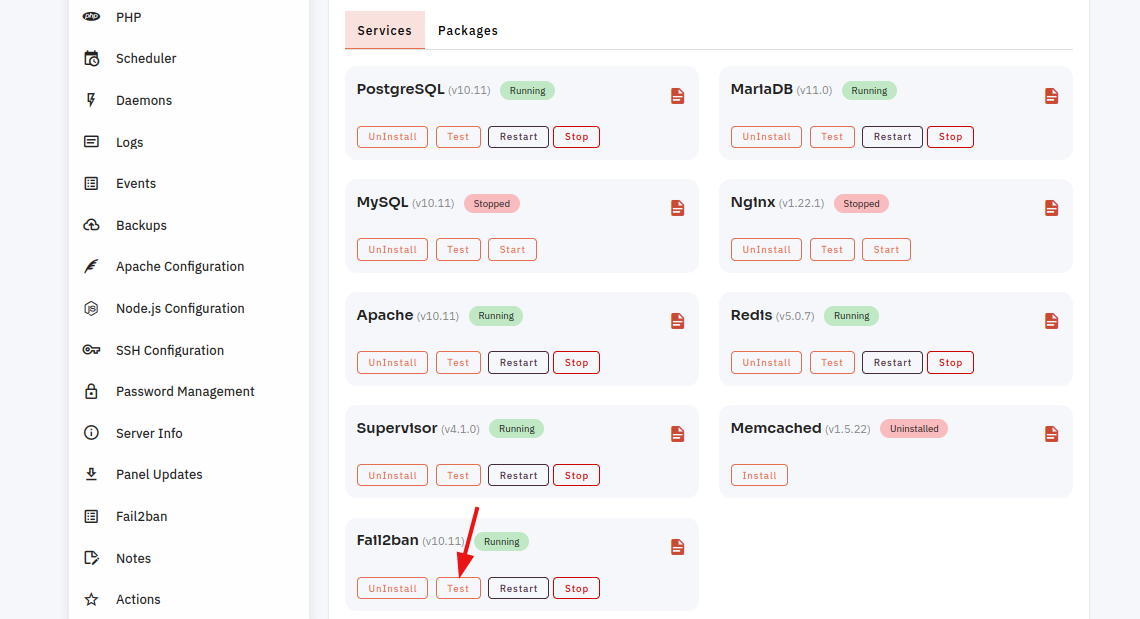
4. Open a dialog and click the "Text" button to test the Fail2ban software.
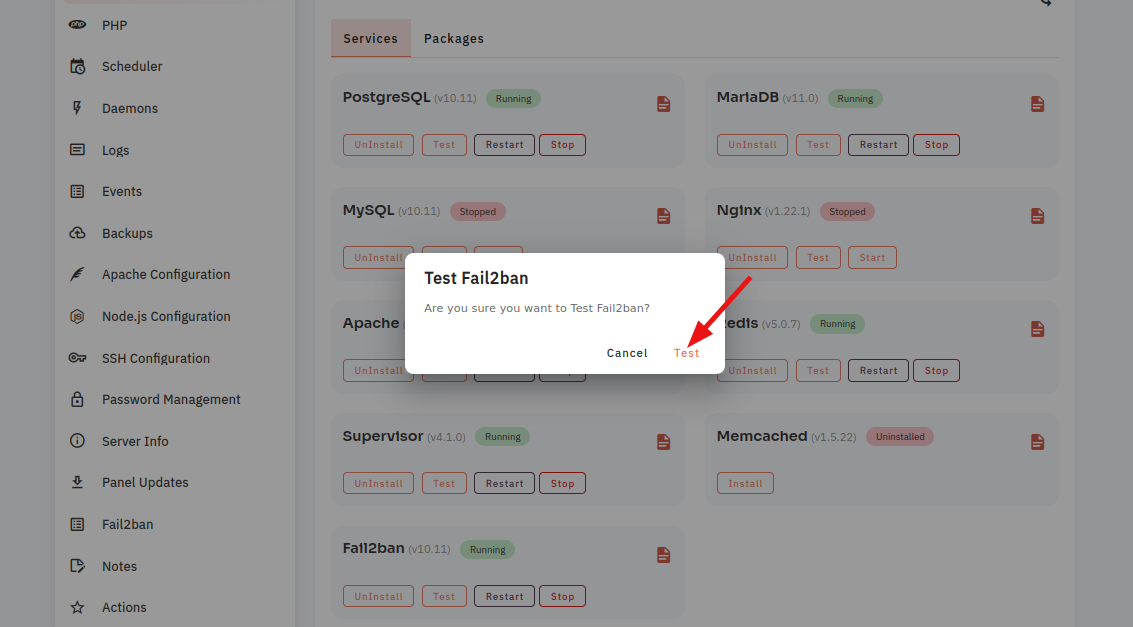
Here, you can see the Fail2ban Test successfully.
6. Open a Dialog and Click on the Start Button to start Fail2ban software.
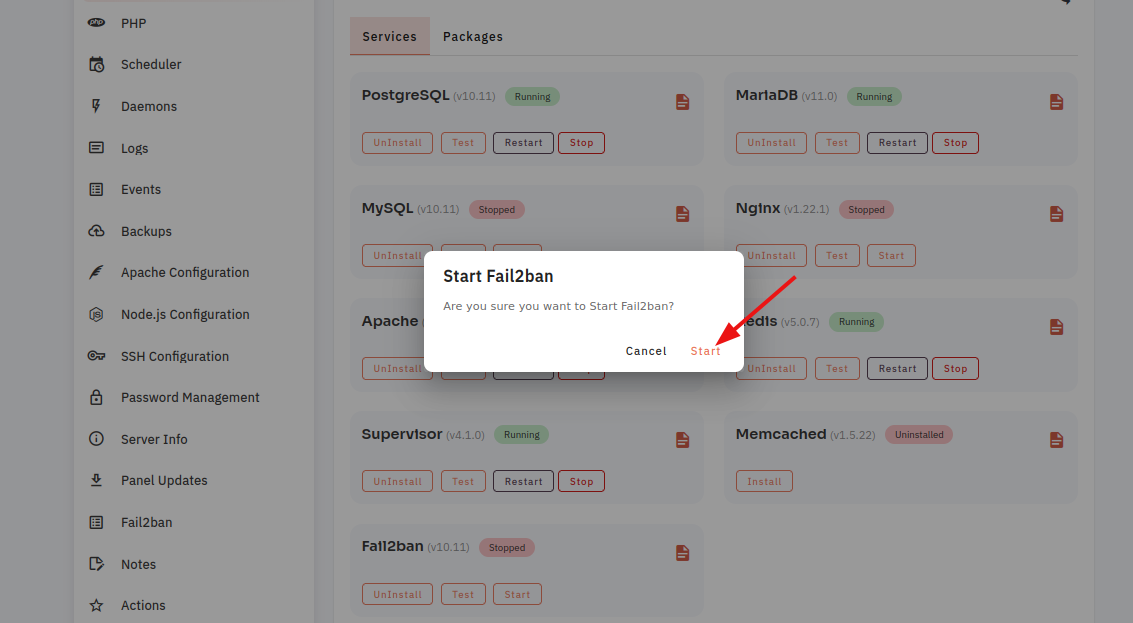
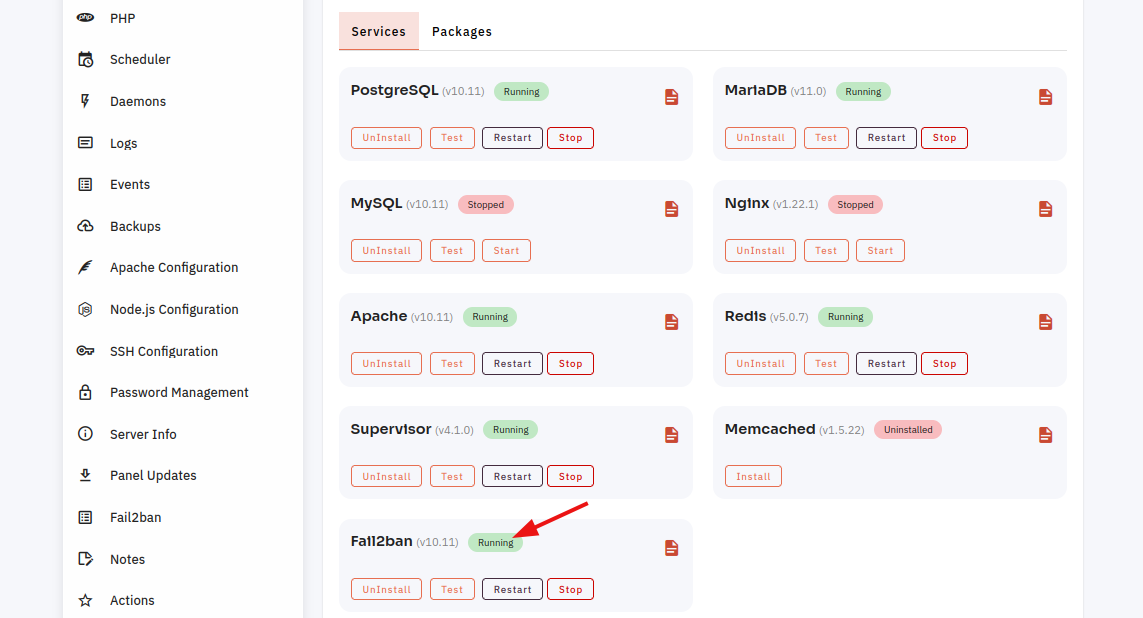
Here, you can see that Fail2ban started successfully.
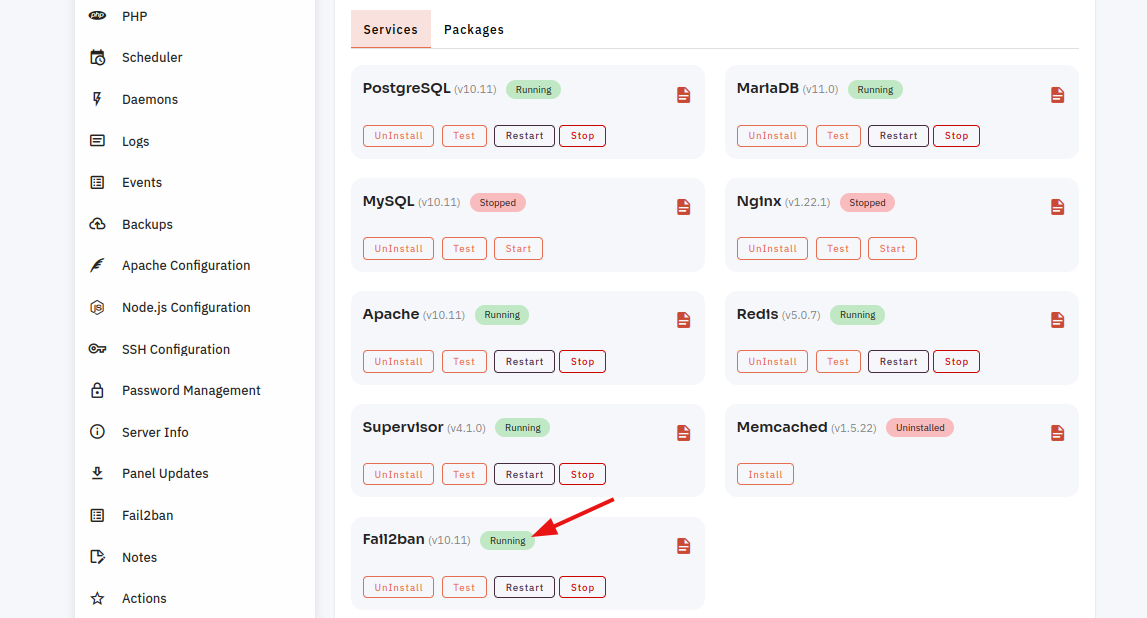
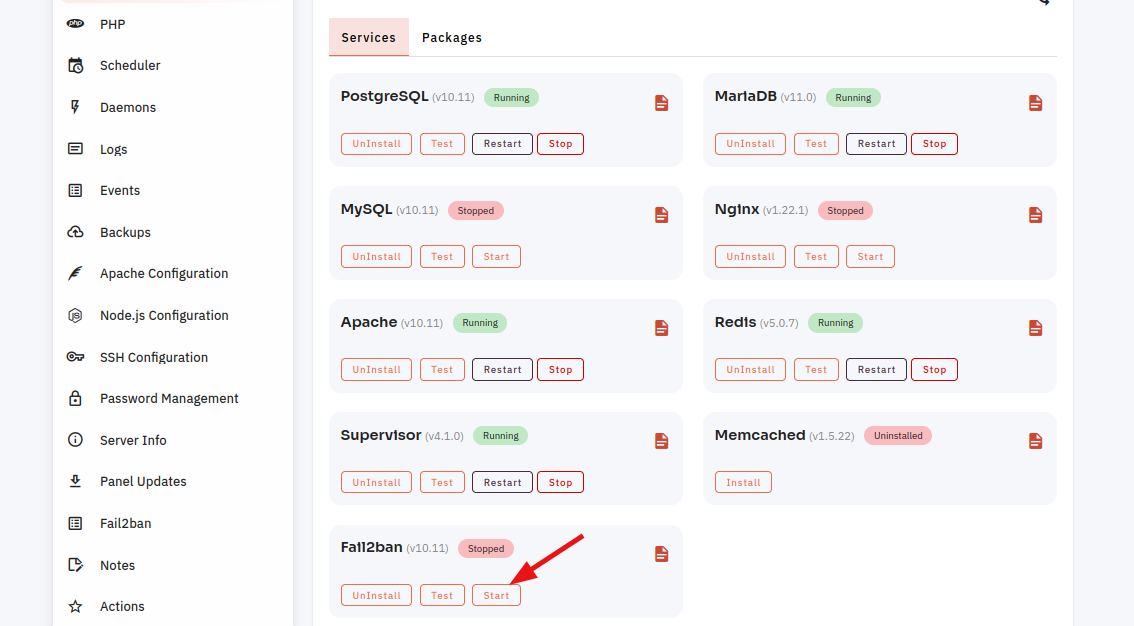
7. Select the Stop option.
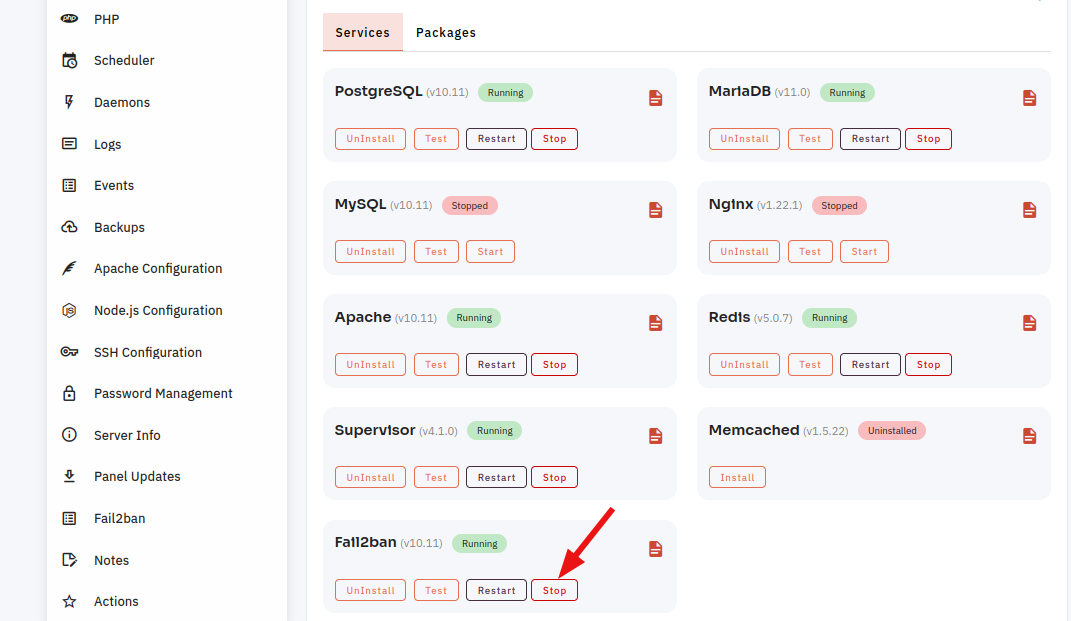
8. Open a Dialog and Click on the Stop Button to Stop Fail2ban software.
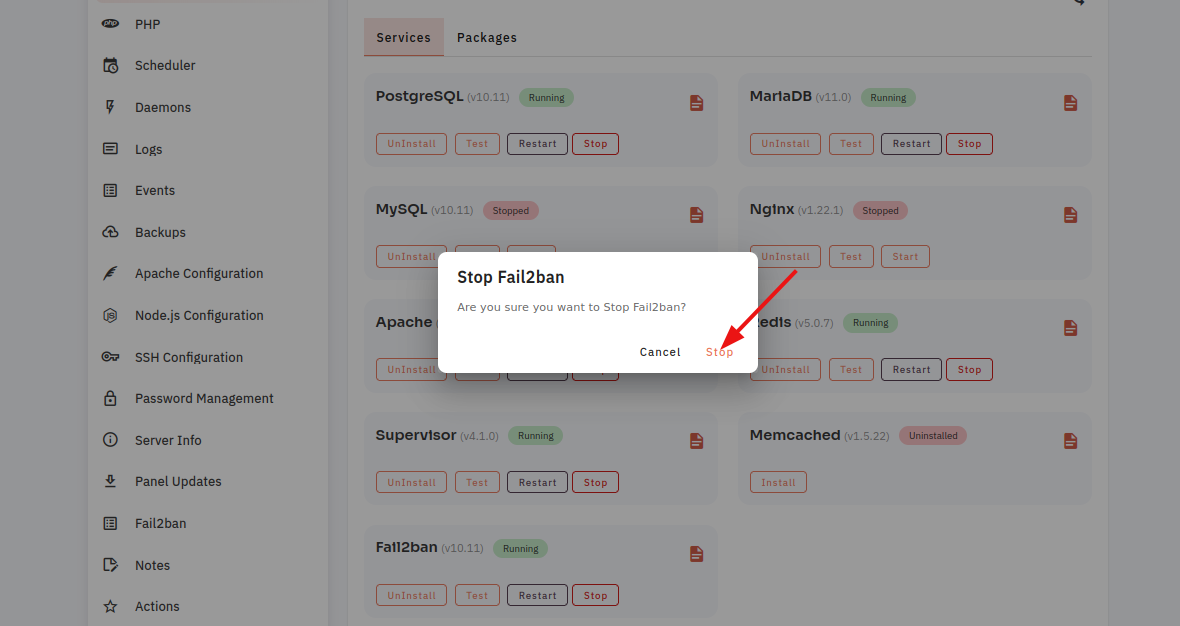
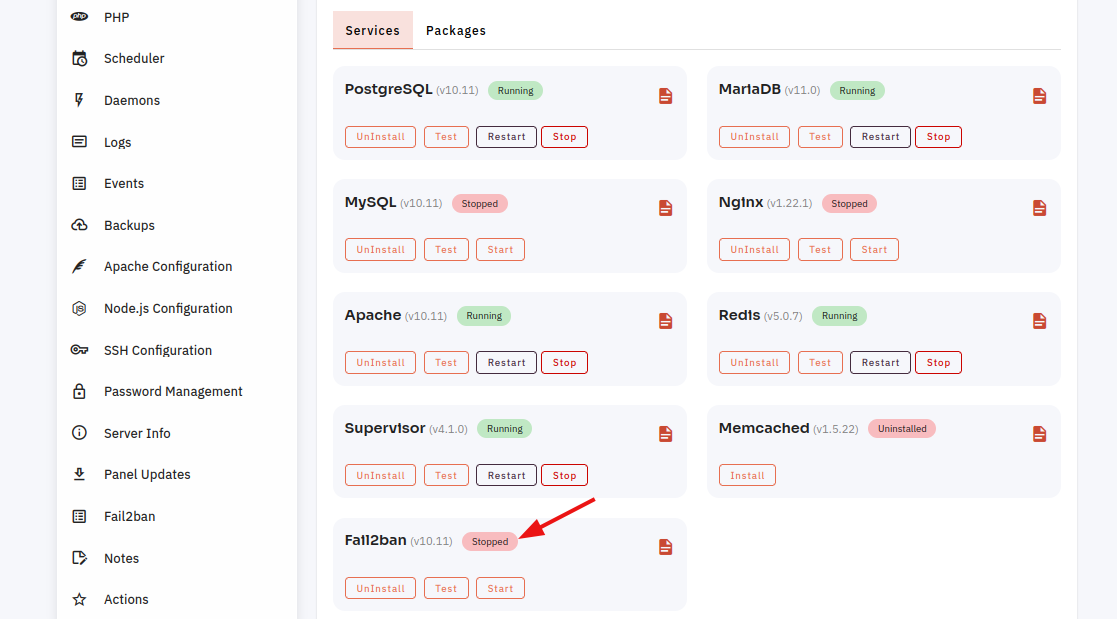
Here, You can see Fail2ban Stopped successfully.
9. Select the Restart Option.
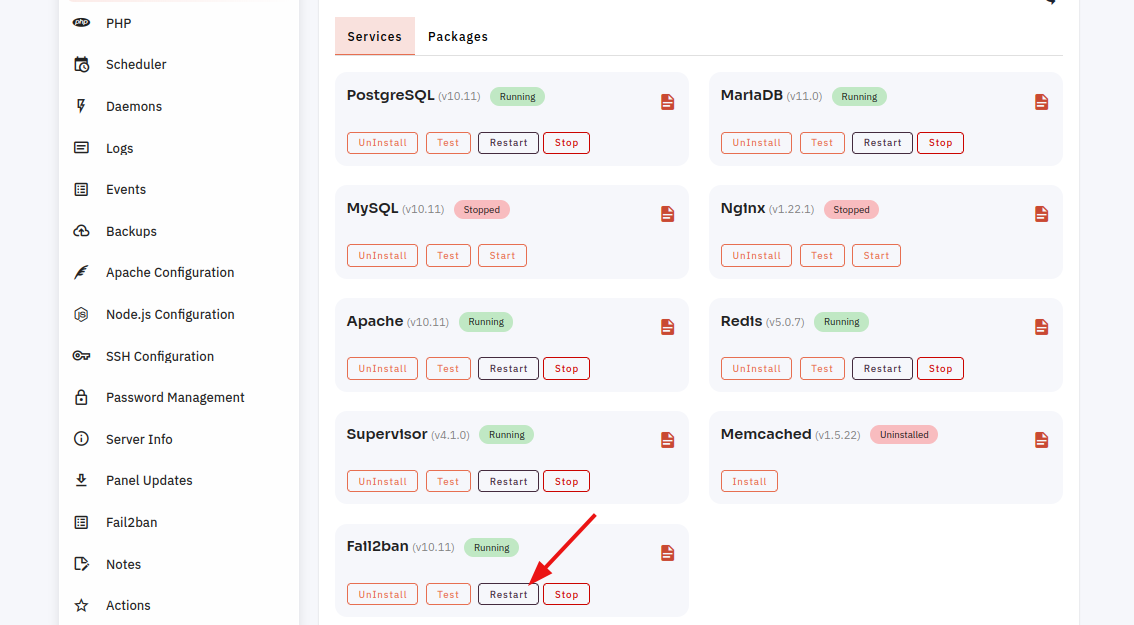
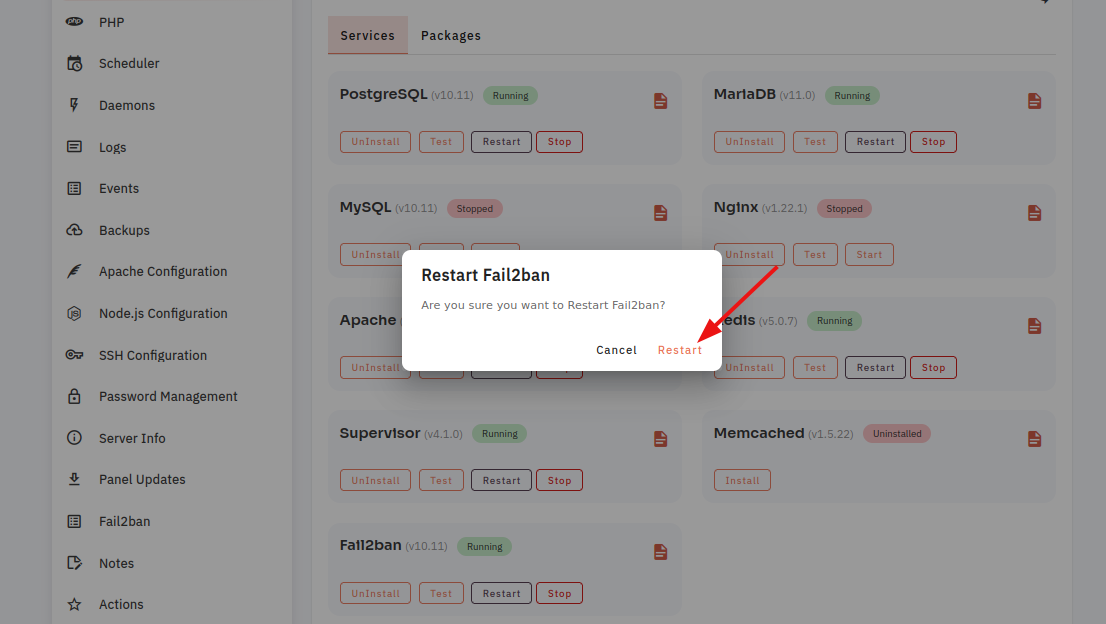
10. Open a dialog and click the restart button to restart the Fail2ban software.
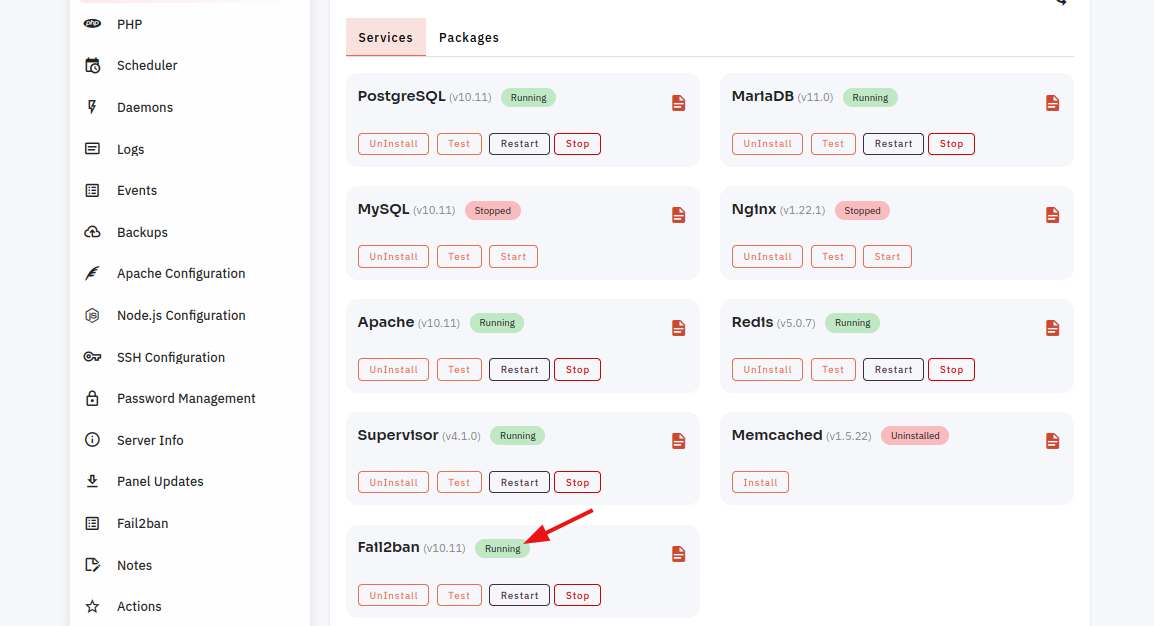
Here, you can see that Fail2ban restarted successfully.
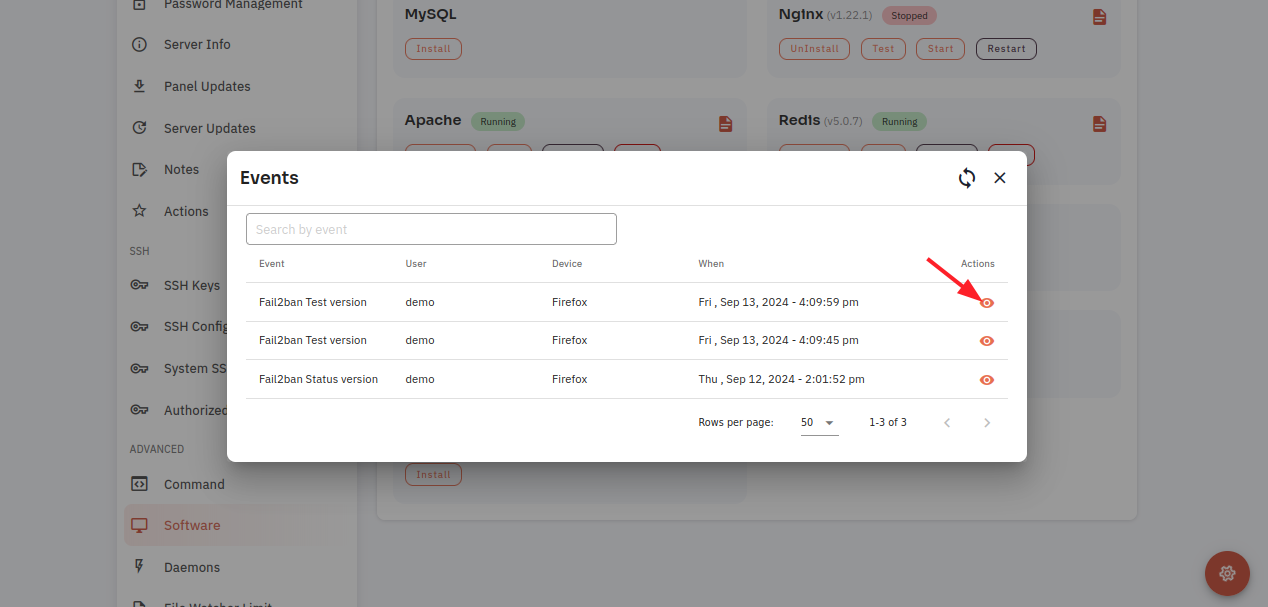
11. Click on the Event Button.
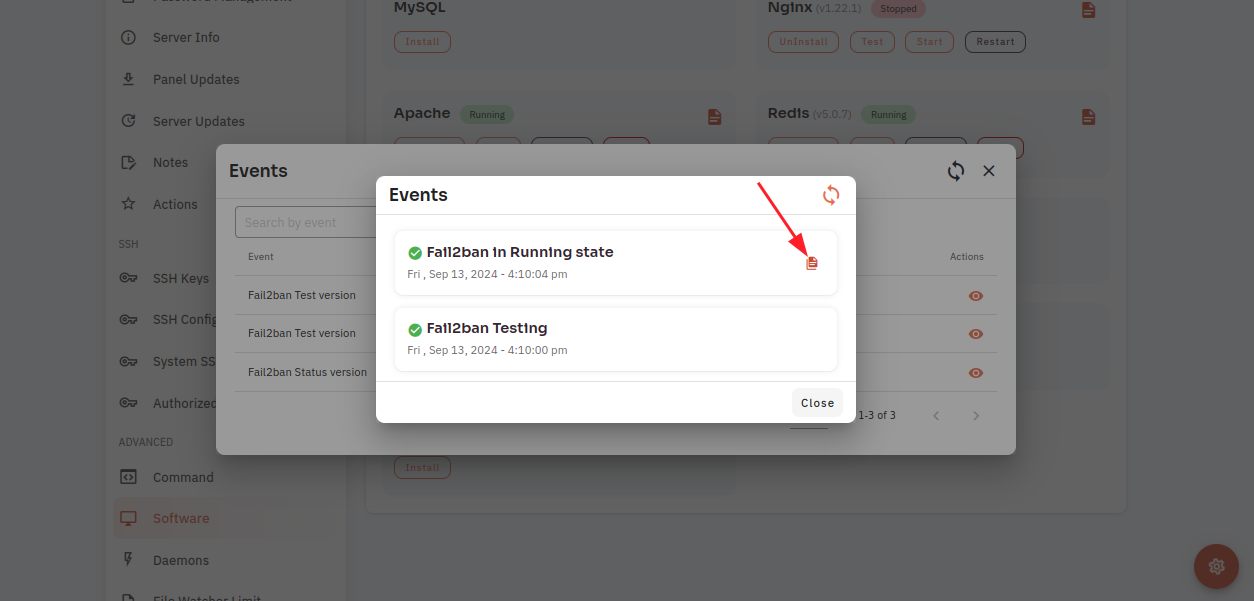
12. Click On the Eye icon.
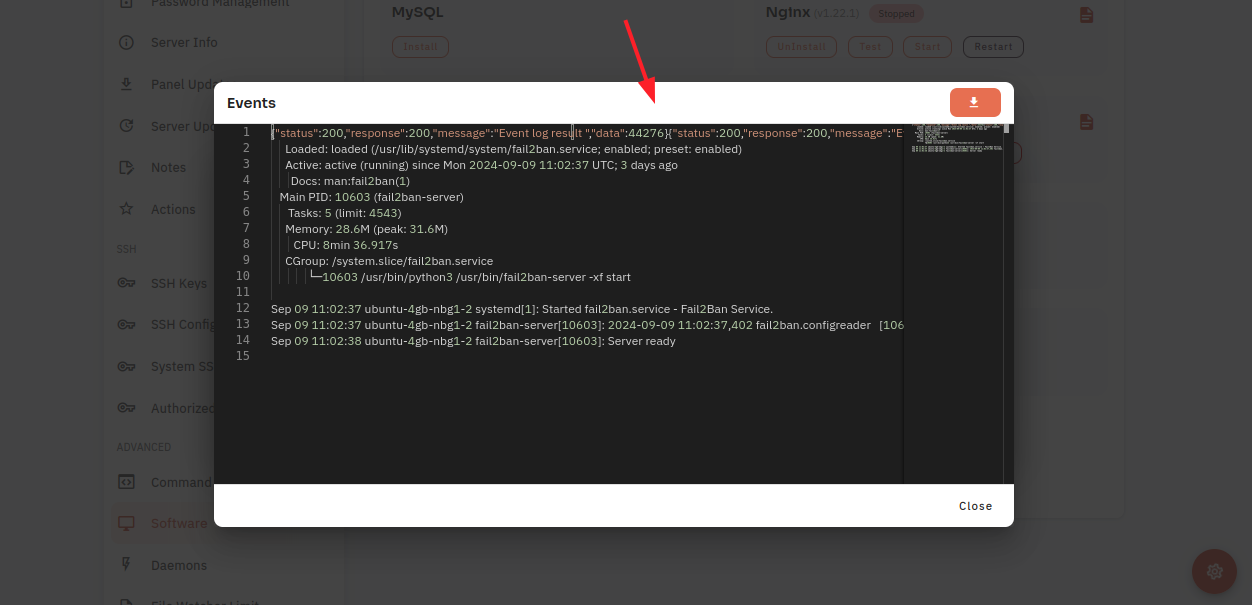
13. Click on the File icon.
Here, you can see Event data.
How to configure MariaDB Software through the cloudpanzer website?
Testing, starting, and restarting MariaDB software involves interacting with the command line interface. MariaDB is commonly managed through system service commands.
Follow the steps below to configure MariaDB Software.
1: Once logged in, look for a "Server" and click on it.

2. Select the Software Option.
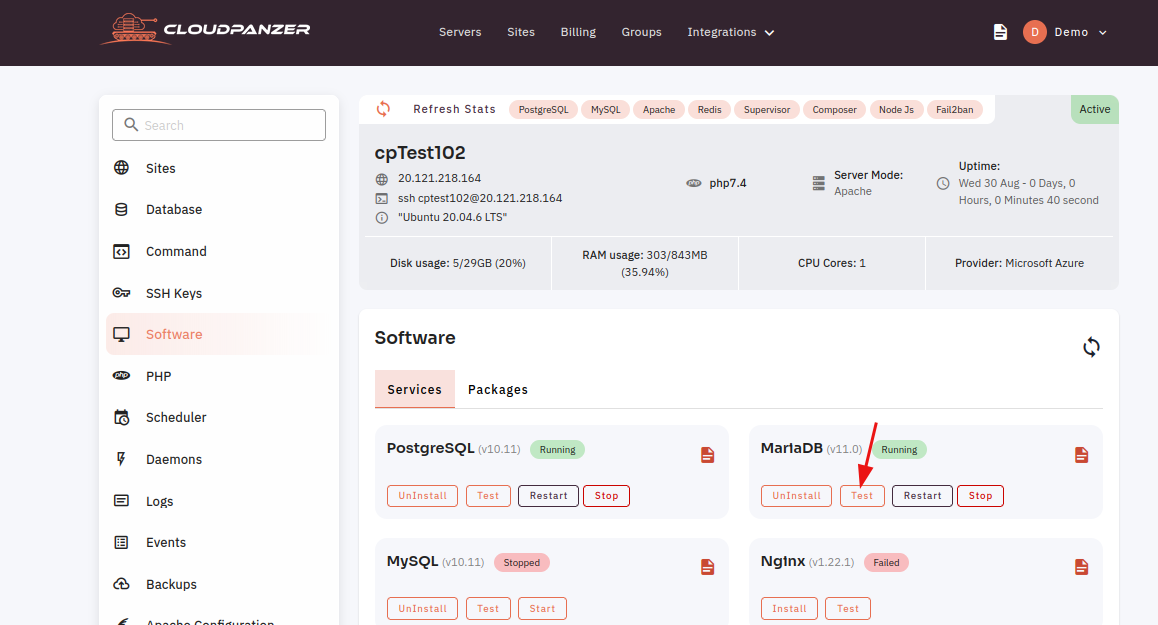
4. Click on the Test Button.
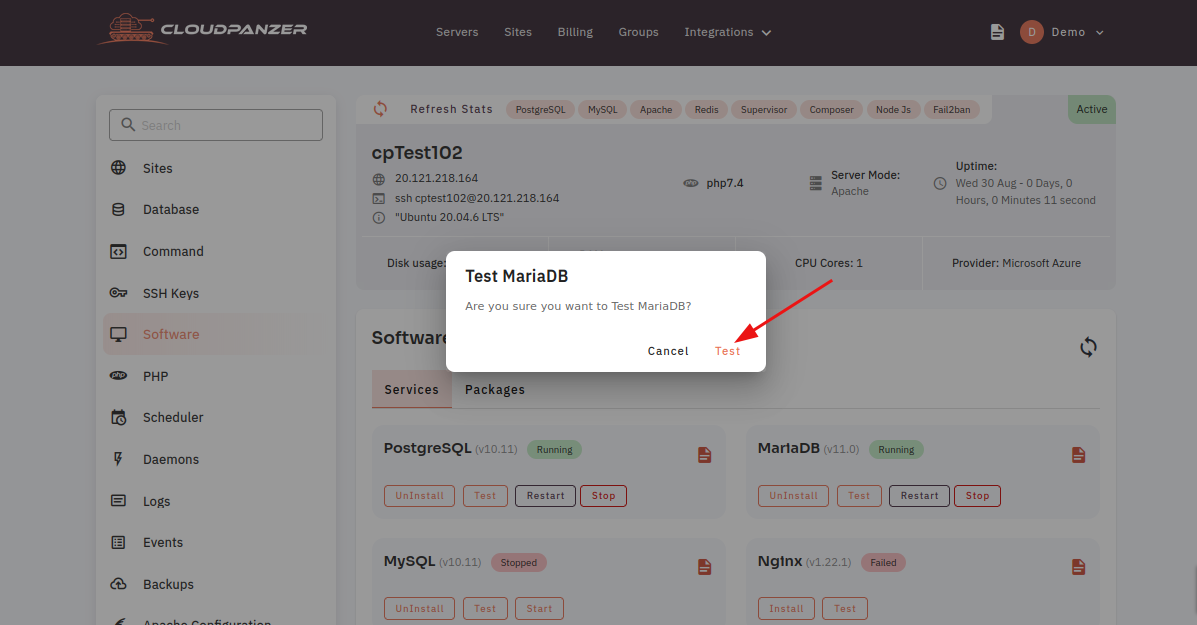
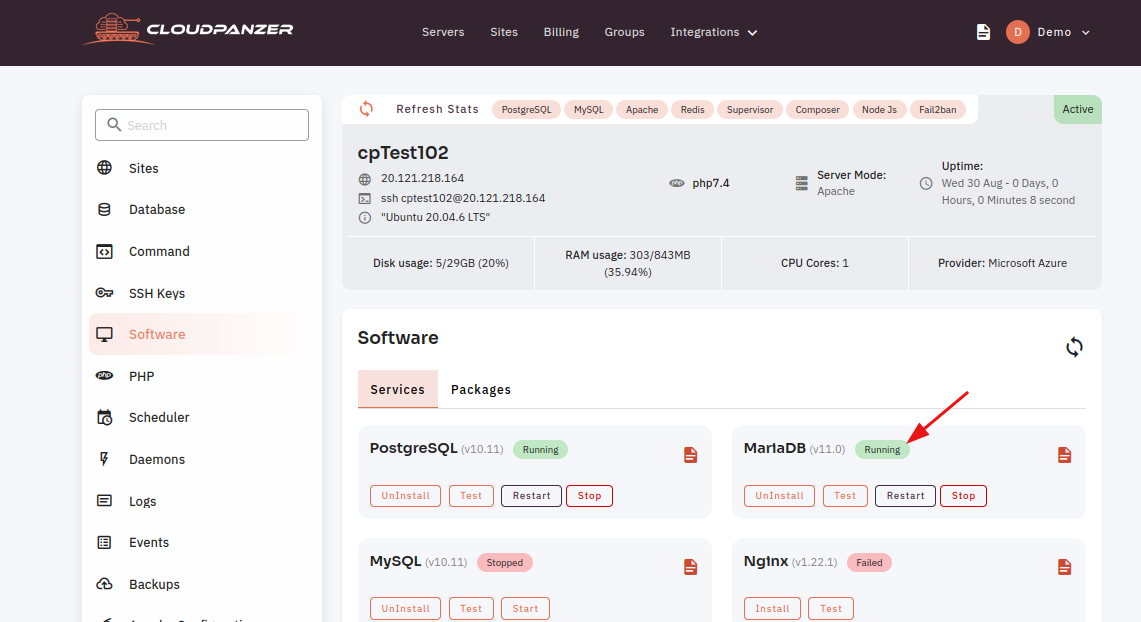
Here, you can see the MariaDb Test successfully.
5. Select the Start option.
6. Click on the Start Button.
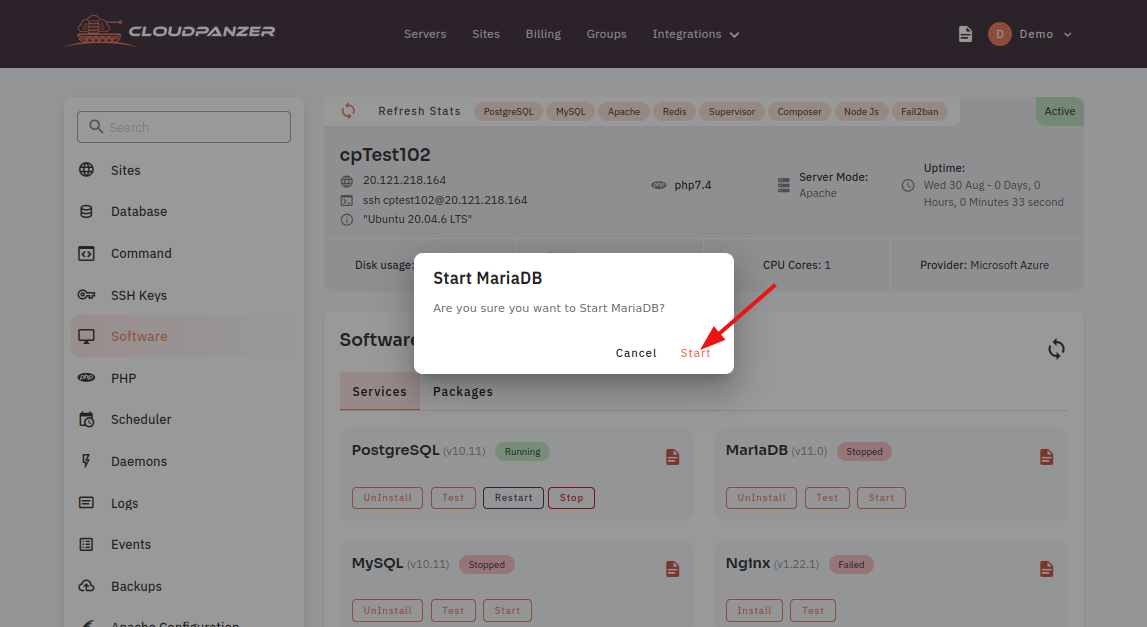
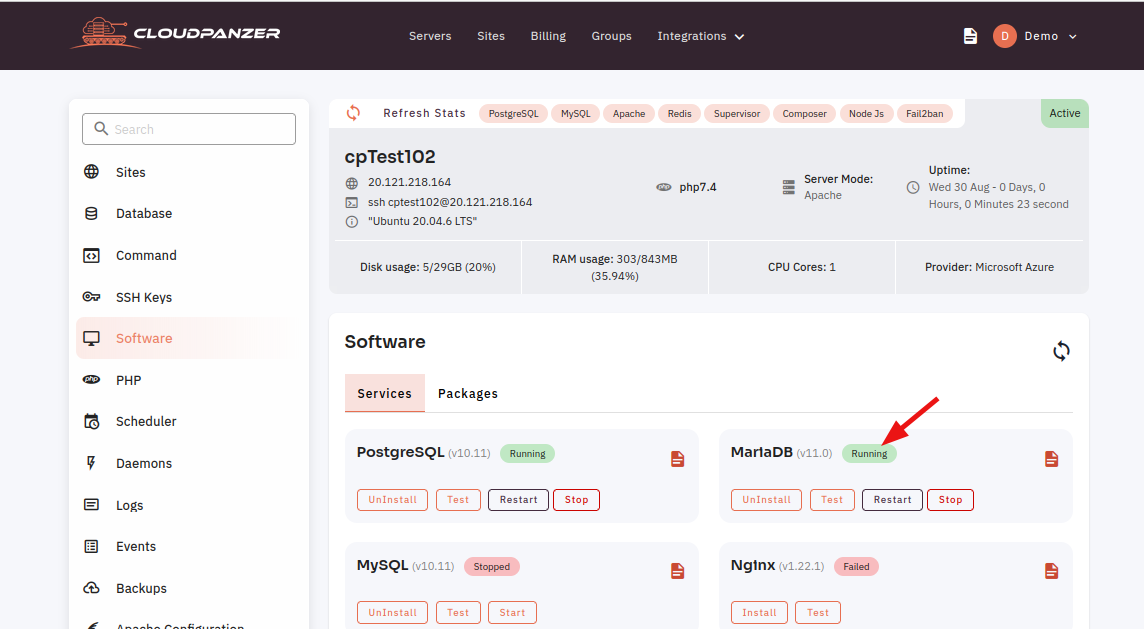
Here, you can see MariaDB started successfully.
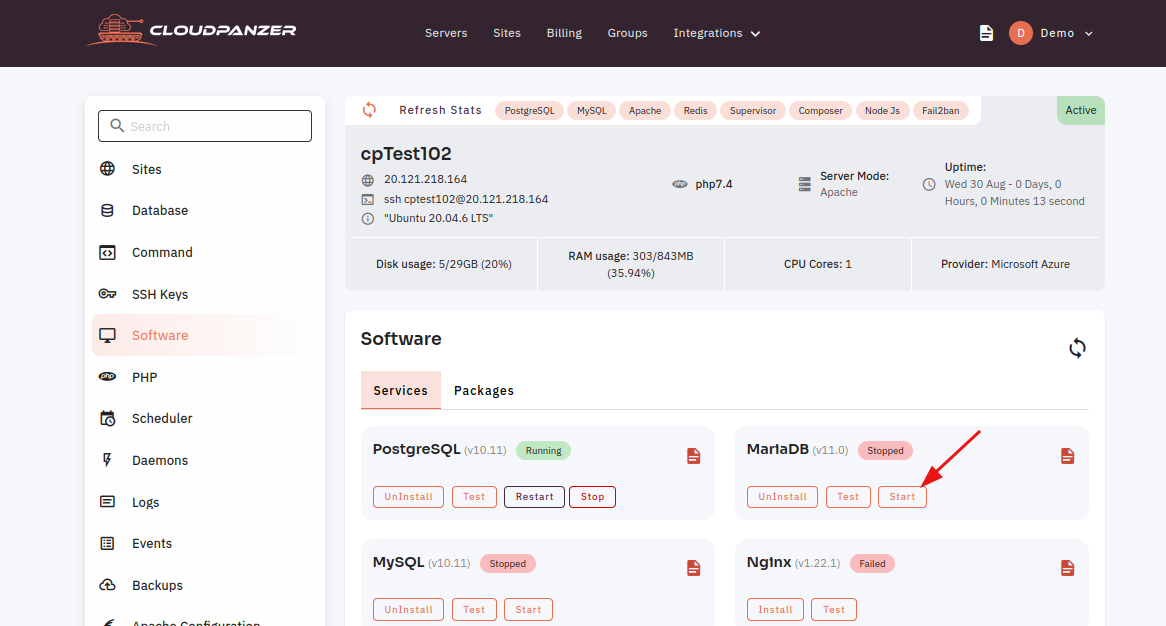
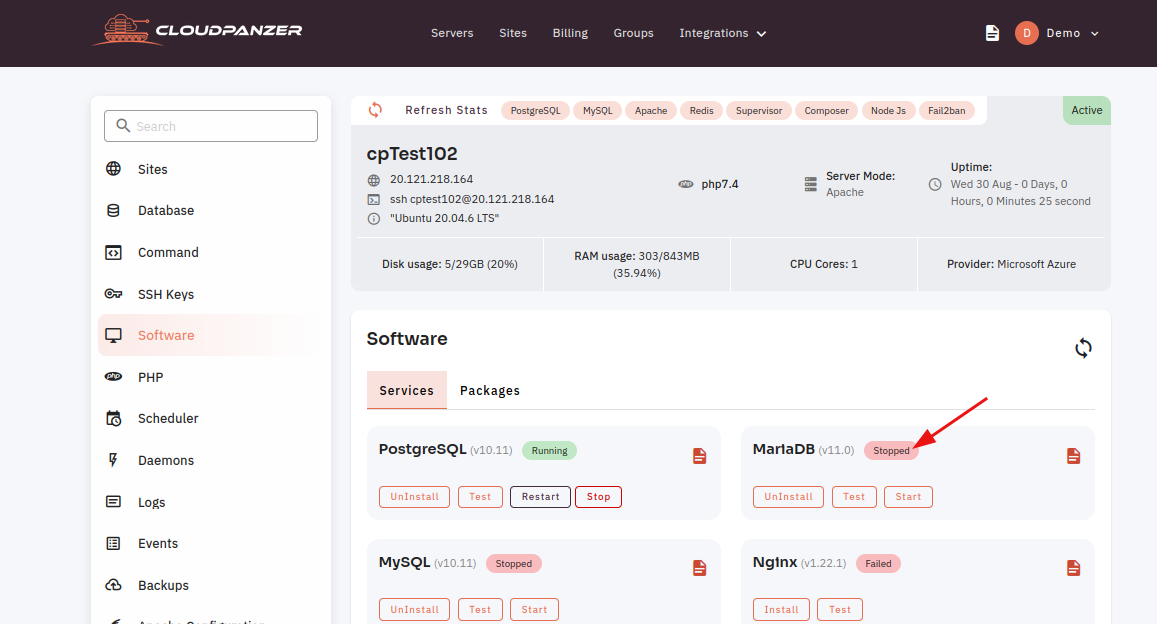
7. Select the Stop option.
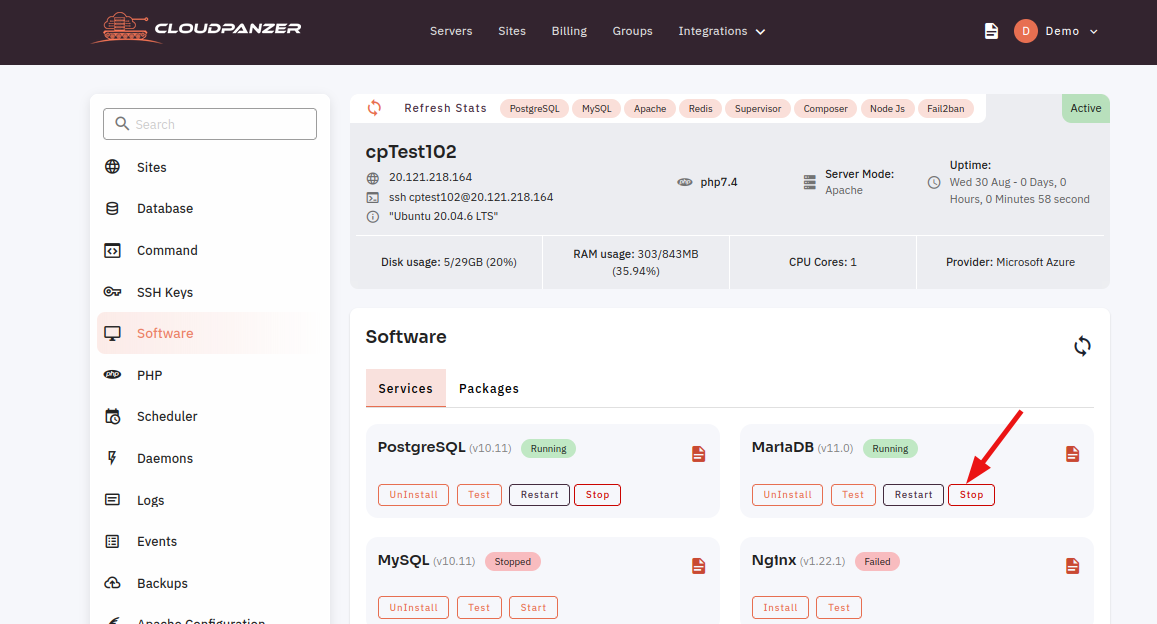
8. Click on the Stop Button.
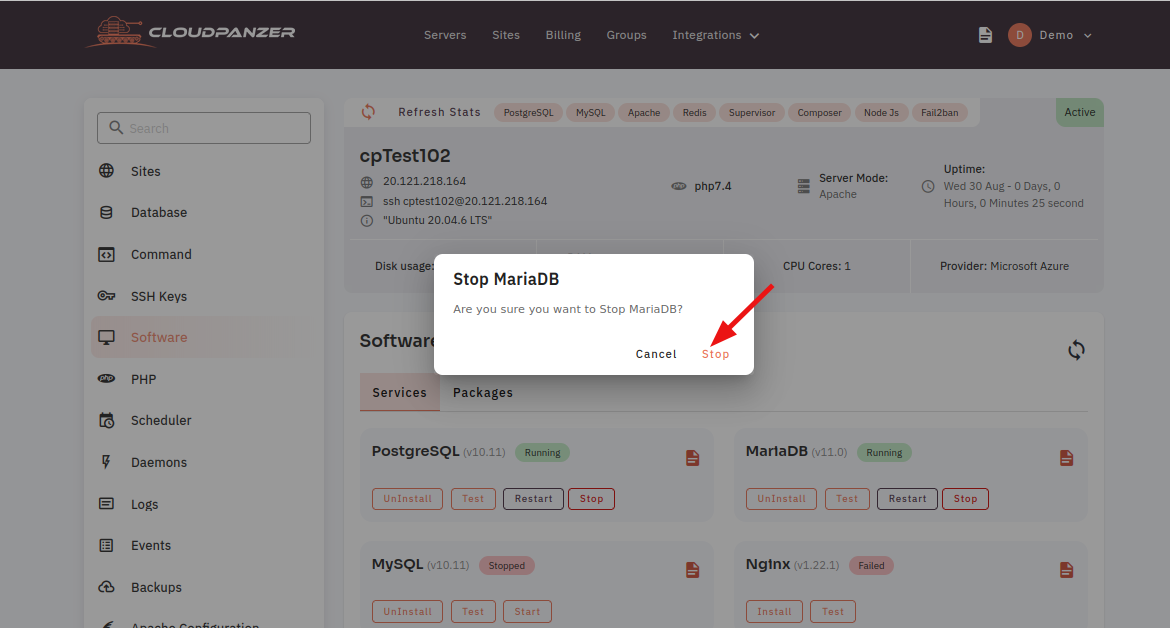
Here, You can see MariaDB Stopped successfully.
9. Select the Restart Option.
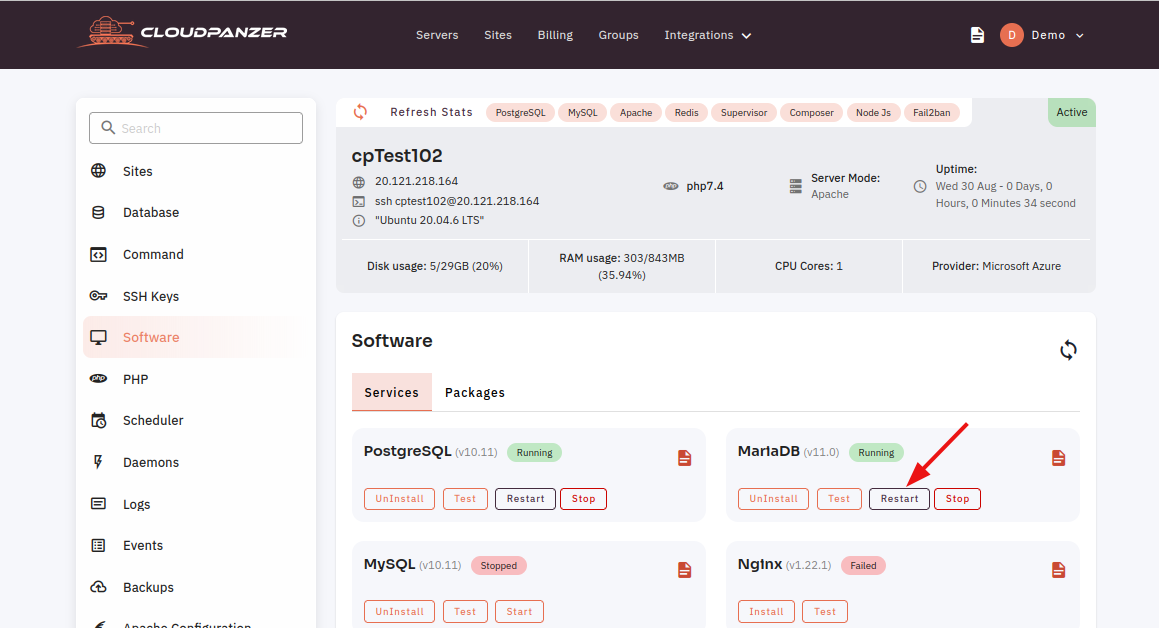
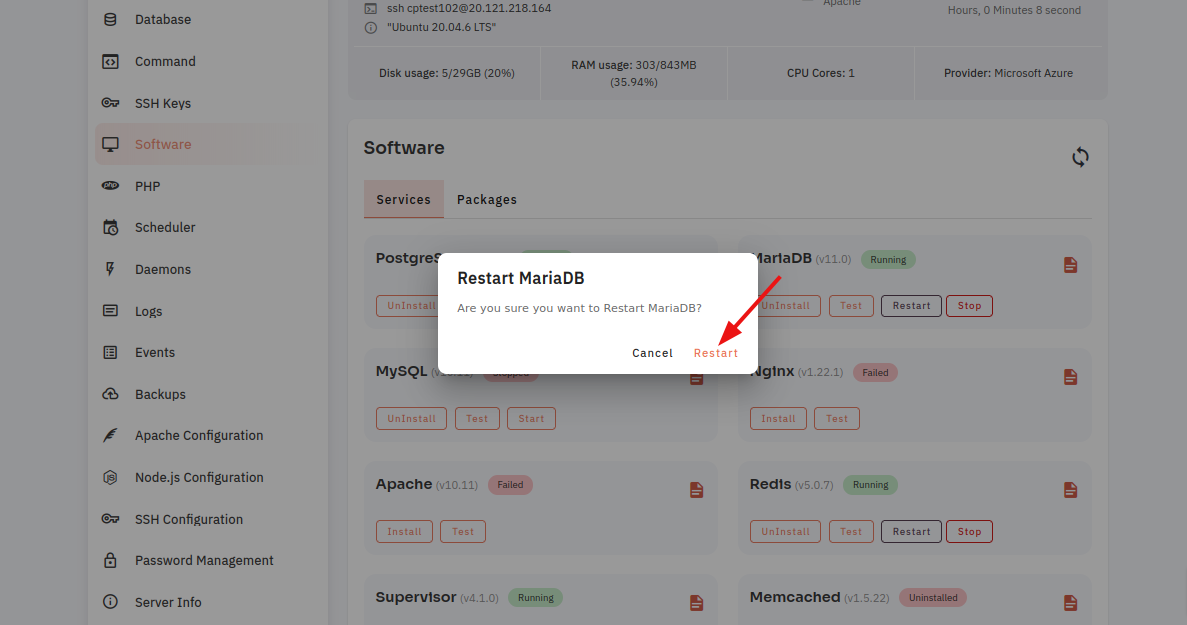
10. Open a dialog and click the restart button to restart the MariaDb software.
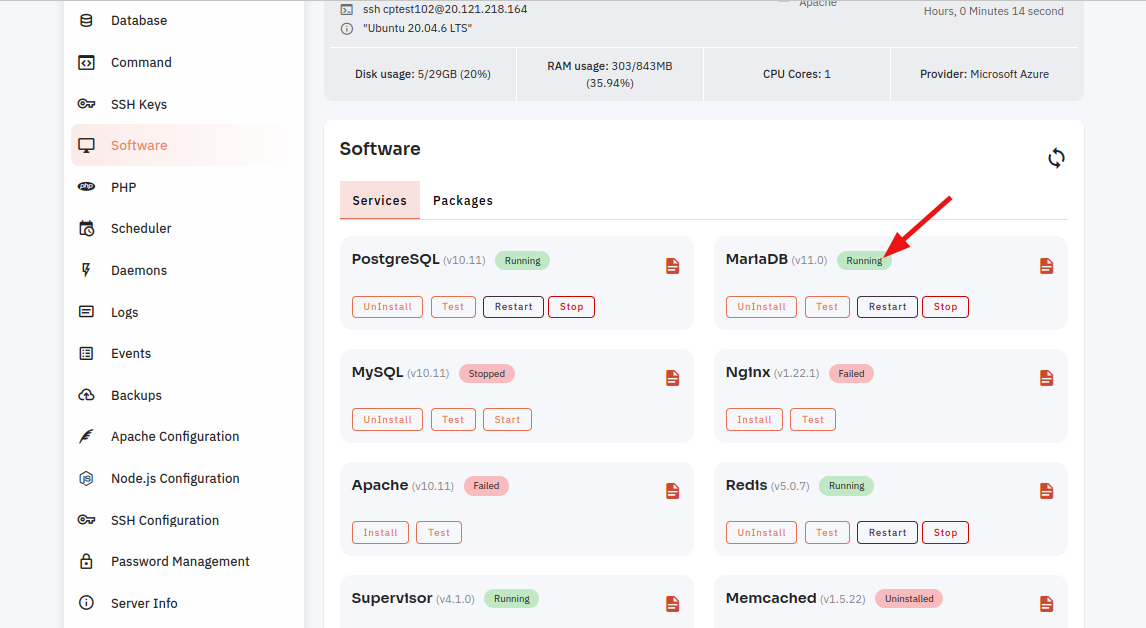
Here, you can see that Maria restarted successfully.
11. Click on the Event Button.
12. Click on the Eye icon.
13. Click on the File icon.

Here, you can see MariaDB Event data.
How to configure Memcached Software through the cloudpanzer website?
Testing, starting, and restarting Memcached software can vary slightly depending on your operating system and the way Memcached was installed.
Follow the steps below to configure Memcached Software.
1: Once logged in, look for a "Server" and click on it.
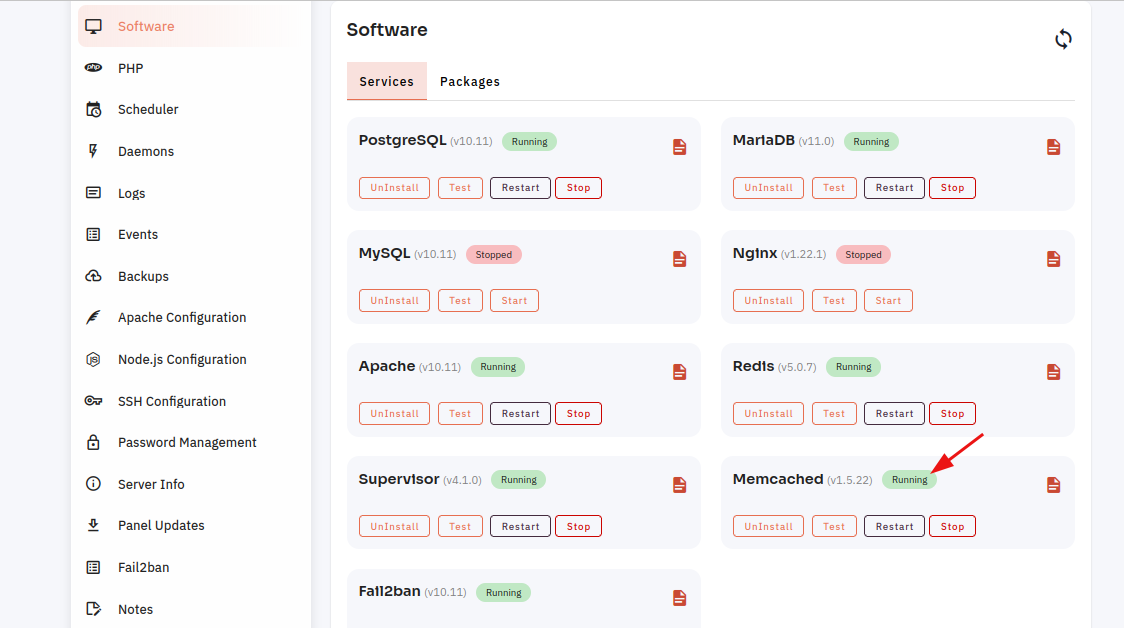
2. Select the Software Option.
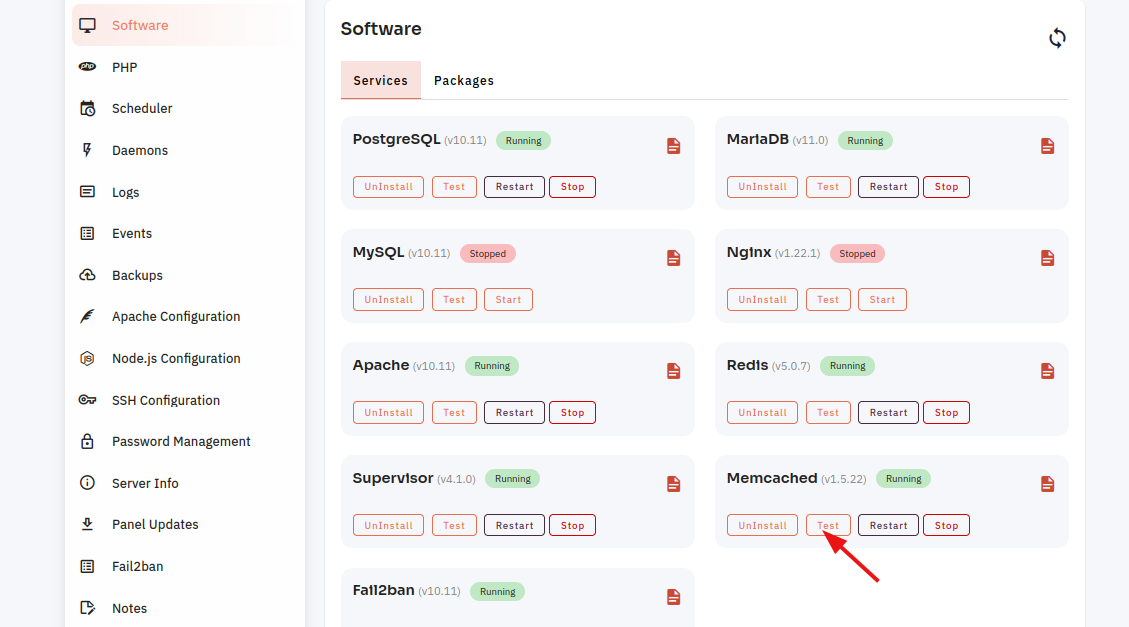
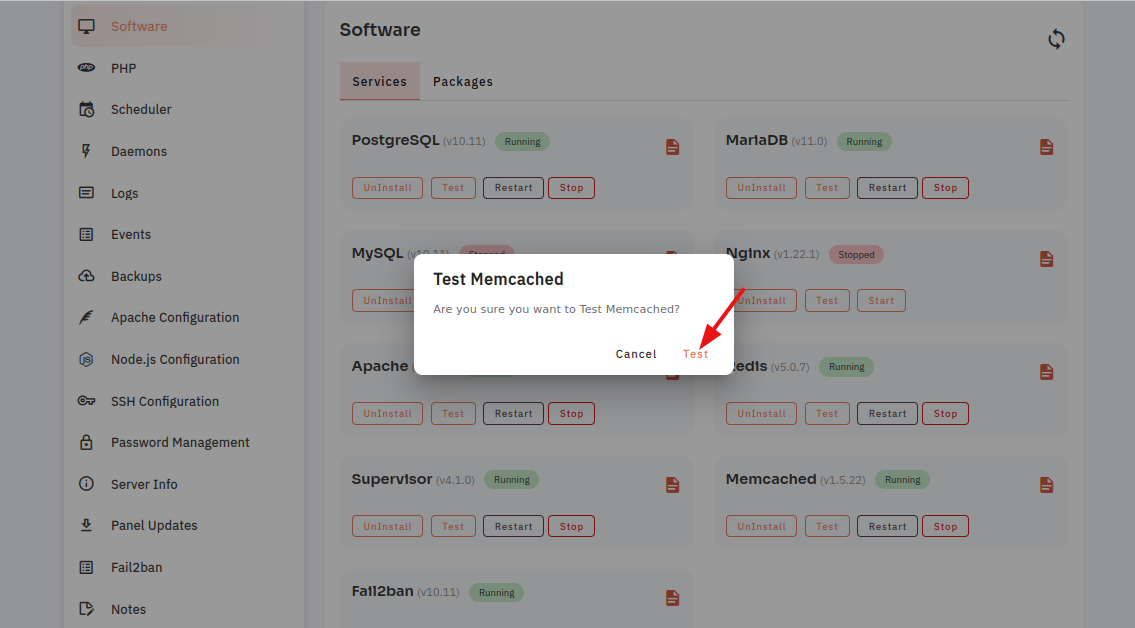
4. Open a dialog and click the "Text" button to test the Memcached software.
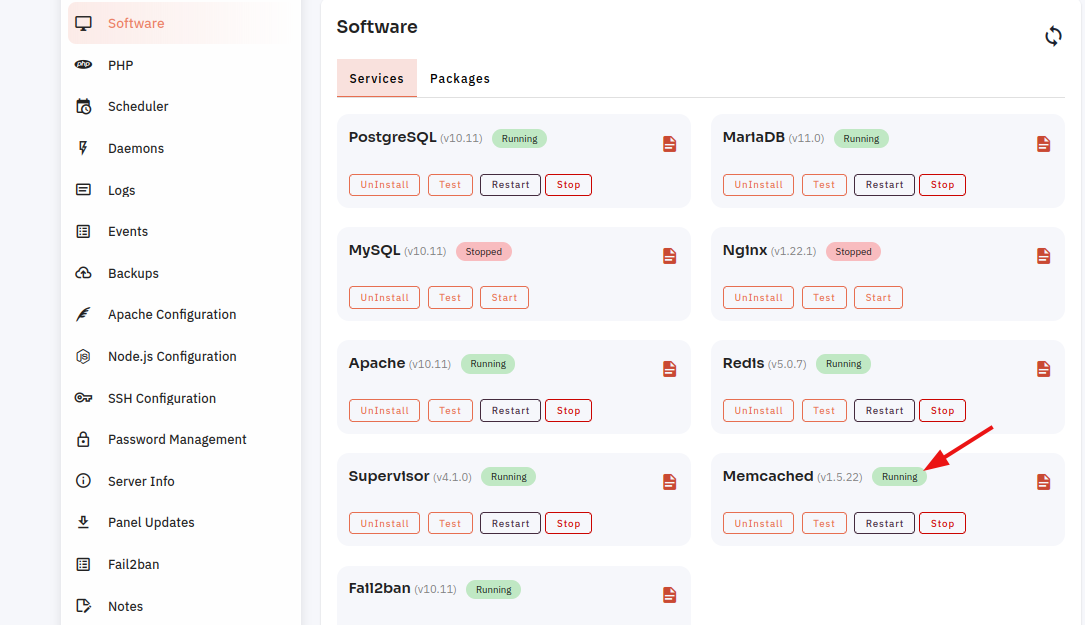
Here, you can see the Memcached Test successfully.
5. Select the Stop option.
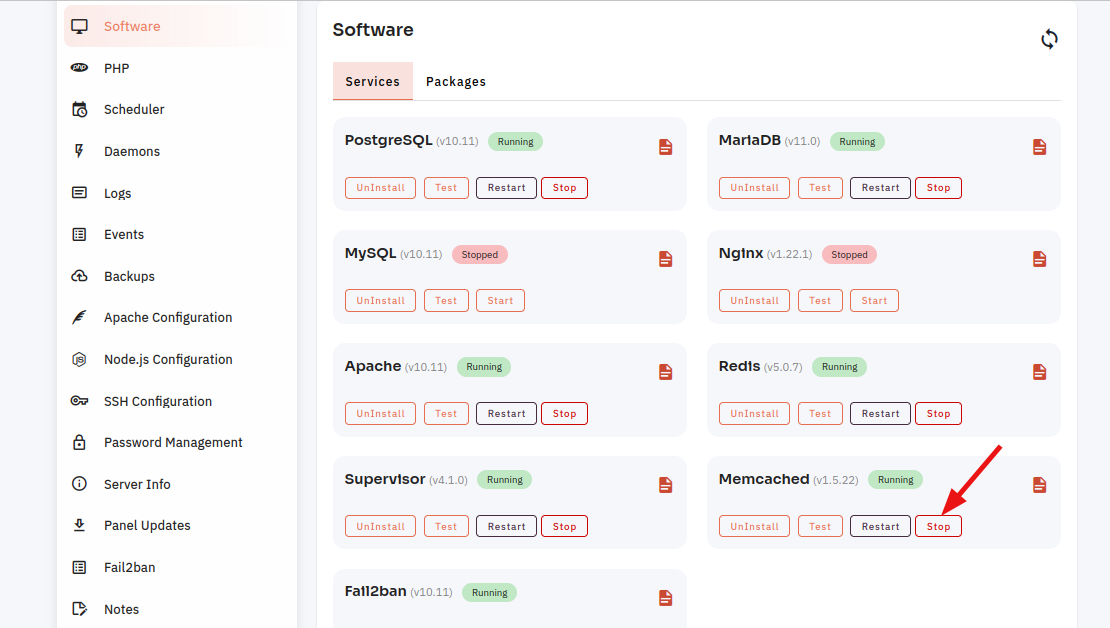
6. Open a Dialog and Click on the Stop Button to stop Memcached software.
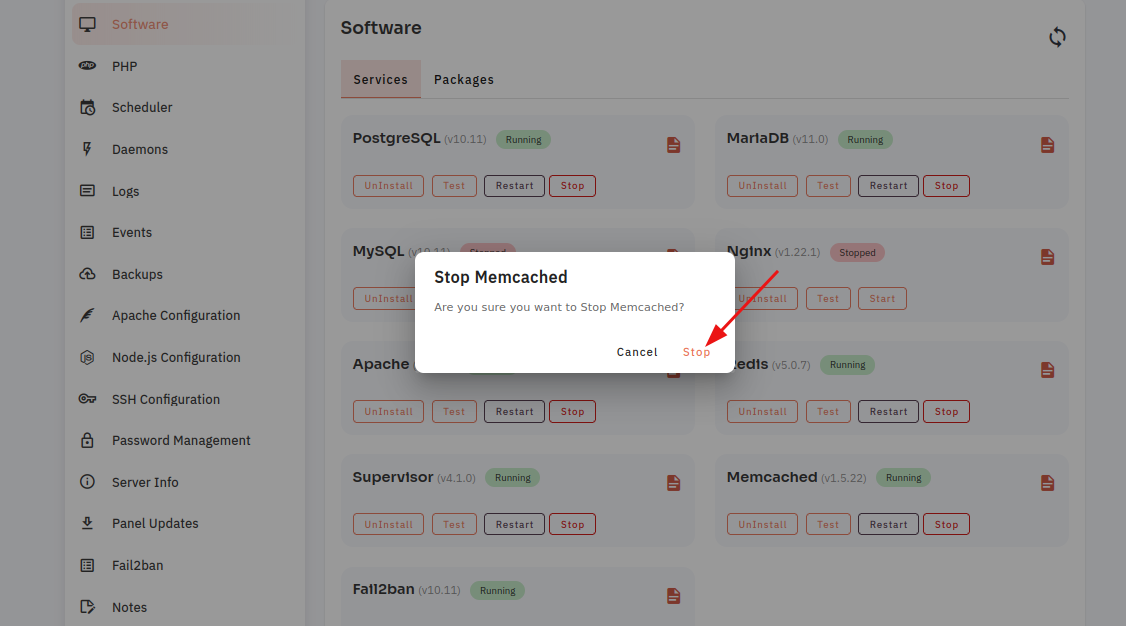
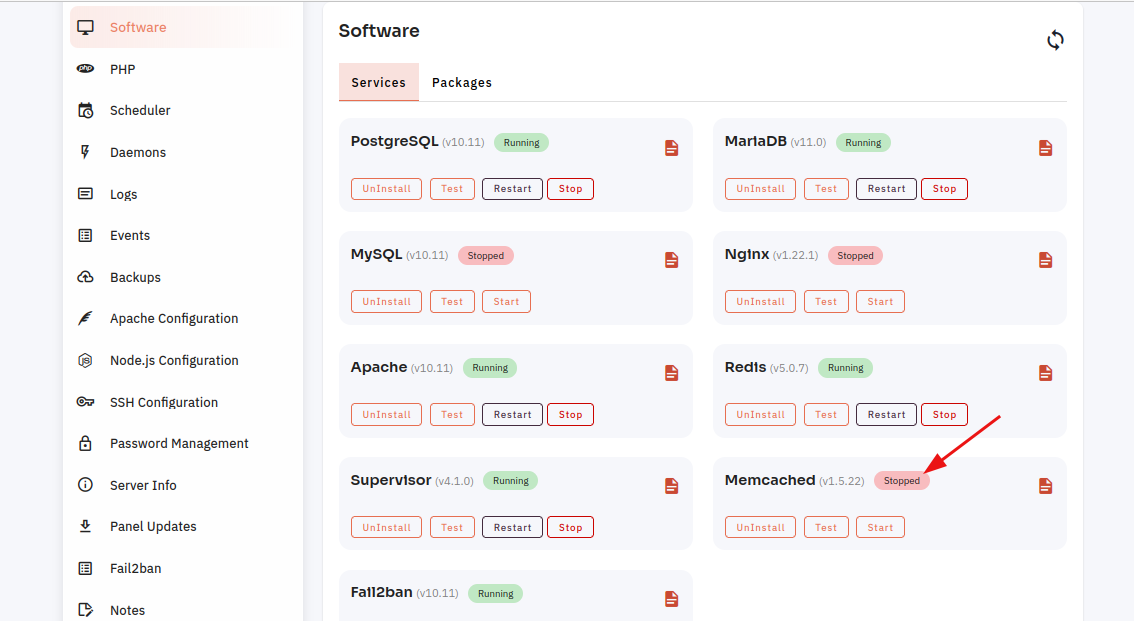
Here, you can see Memcached stopped successfully.
7. Select the Start option.

8. Open a Dialog and Click on the Start Button to start Memcached software.
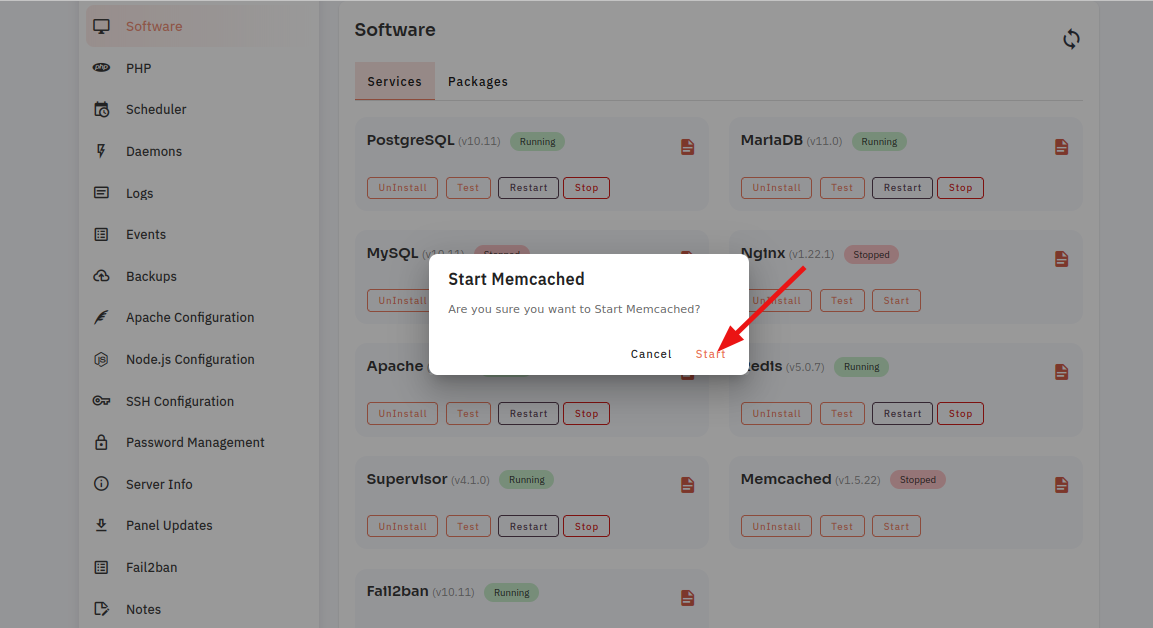
Here, you can see Memcached started successfully.
9. Select the Restart Option.
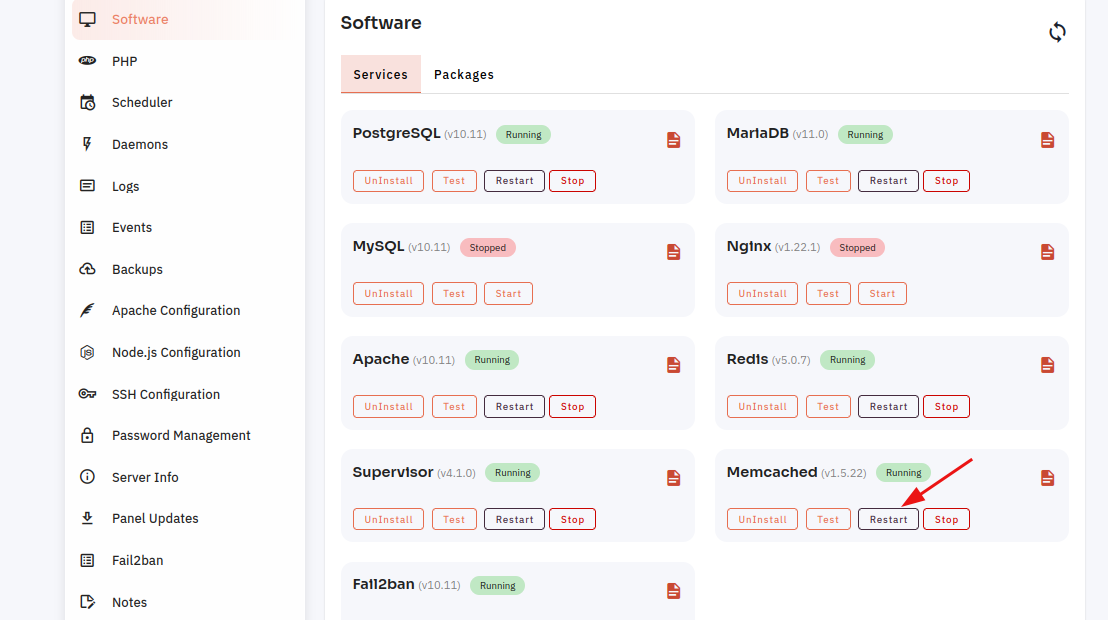
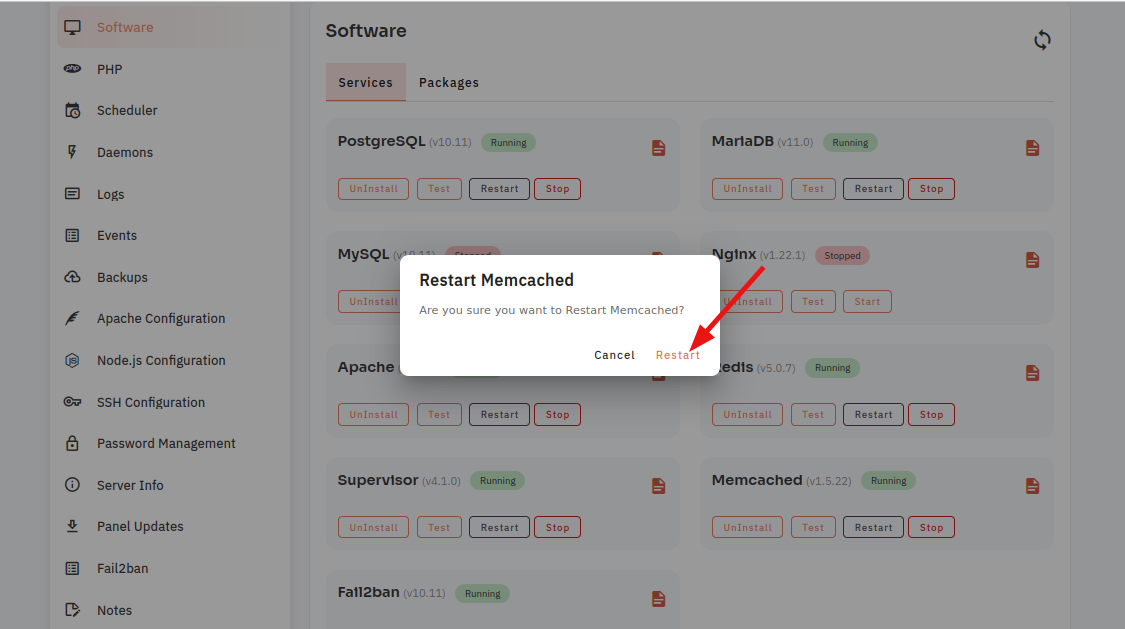
10. Open a dialog and click the restart button to restart the Memcached software.
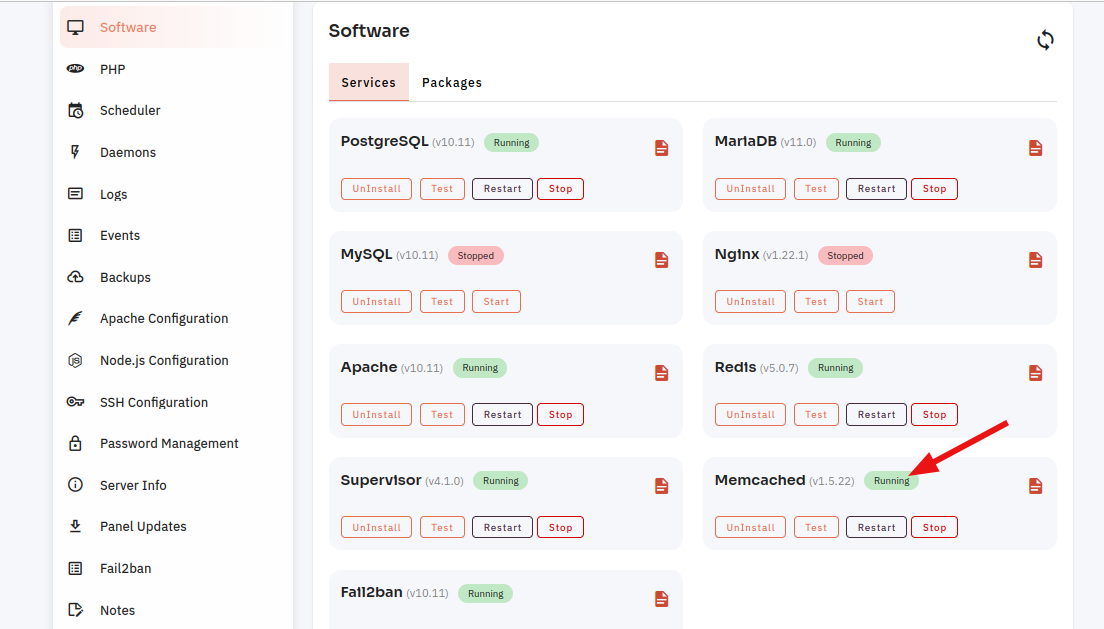
Here, you can see that the Memcached restarted successfully.
11. Click on the Event Button.
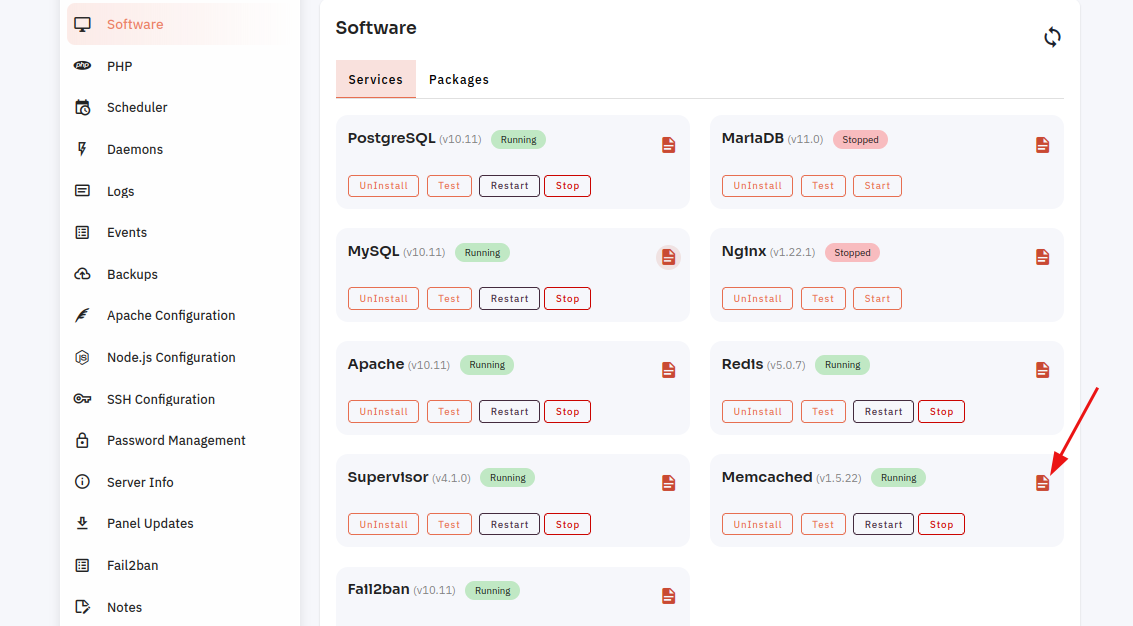
12. Click on the Eye Icon.
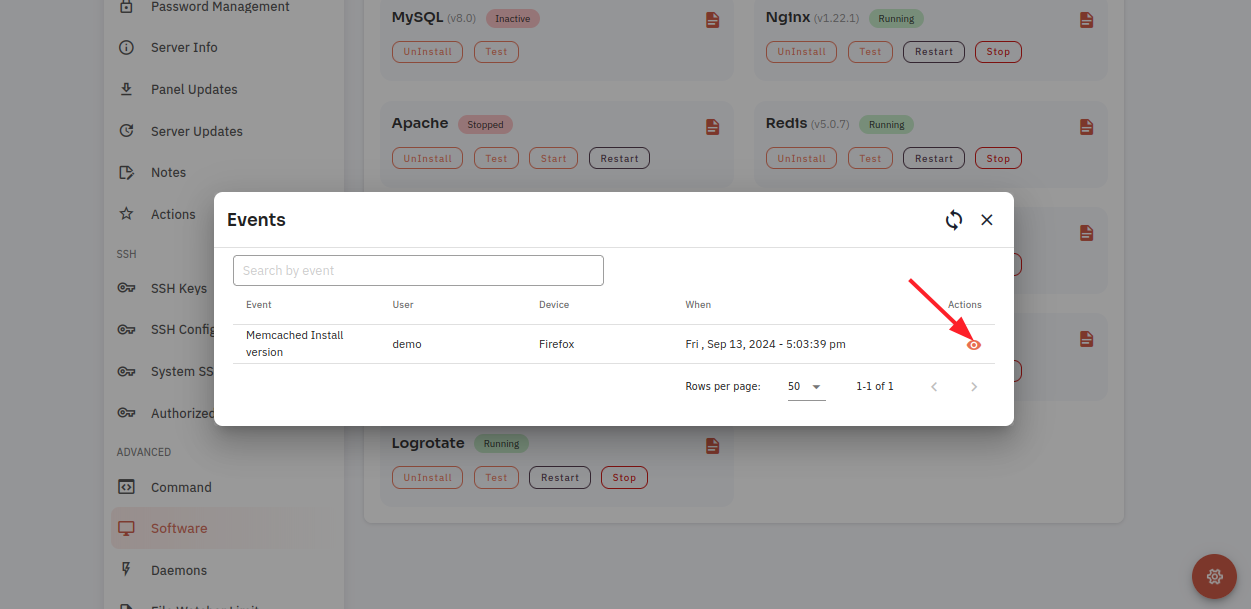
12. Click on the File Icon.
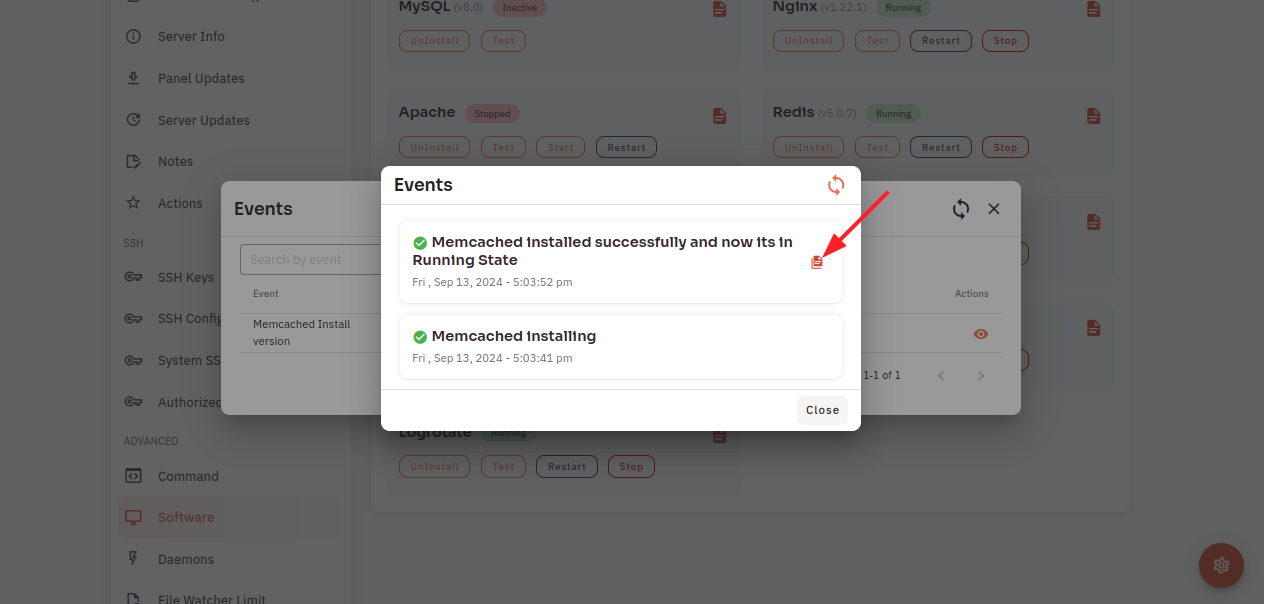
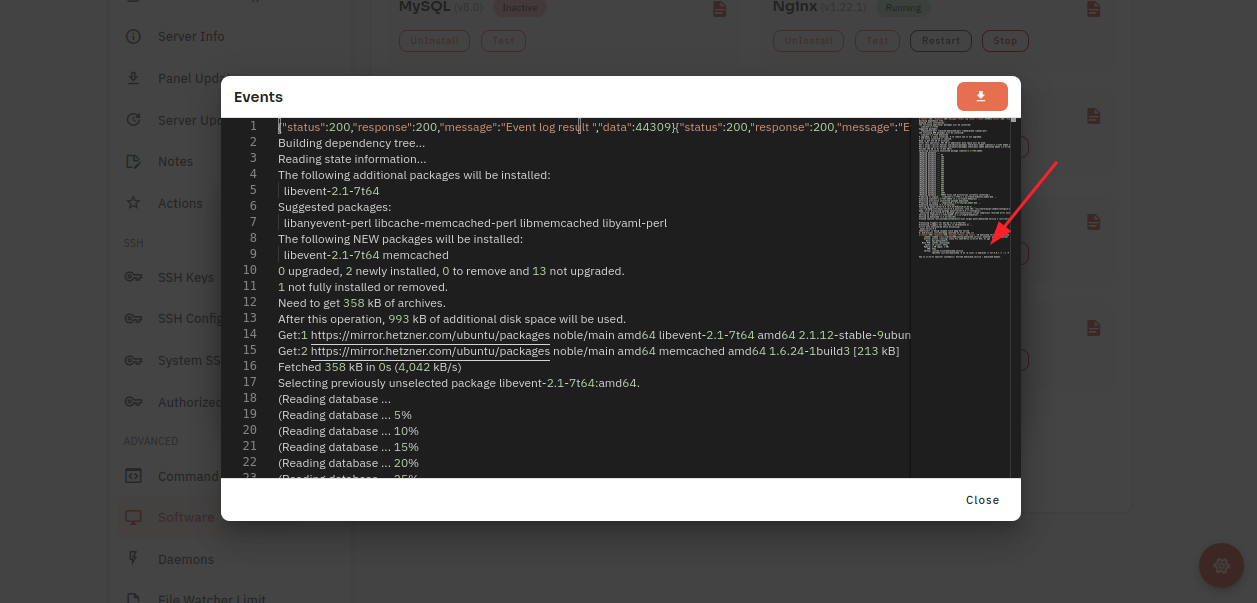
Here, you can see Memcached Event data.
How to configure MySql Software through the cloudpanzer website?
To test, start, and restart MySQL (a popular open-source relational database management system), you can follow these steps depending on your operating system.
Follow the steps below to configure MySql Software.
1: Once logged in, look for a "Server" and click on it.
2. Select the Software Option.
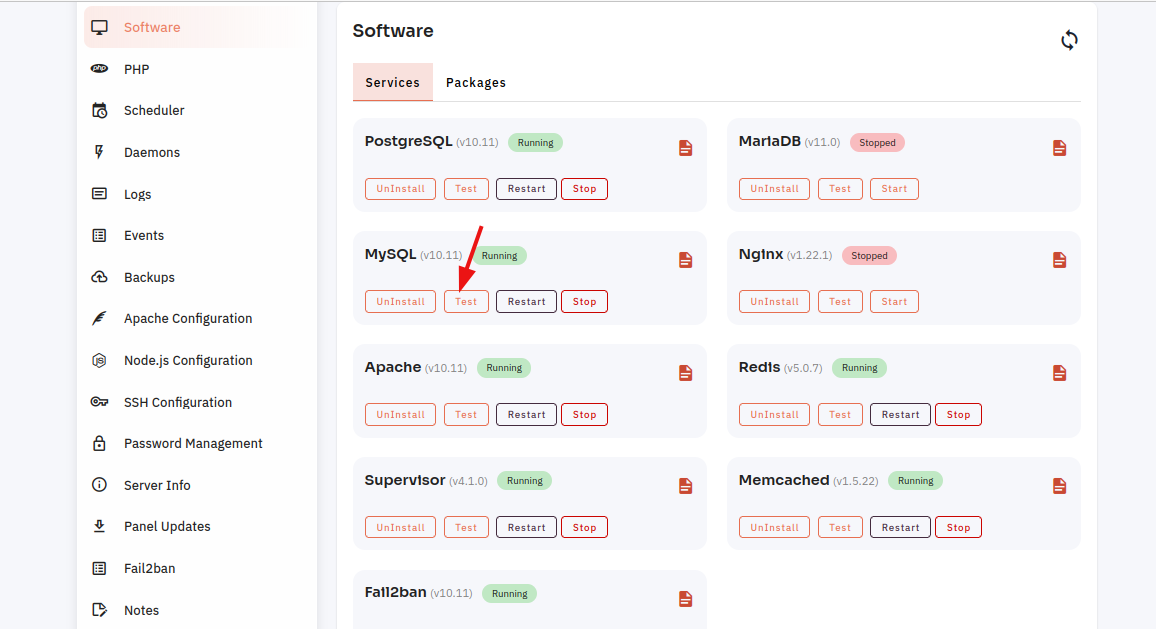
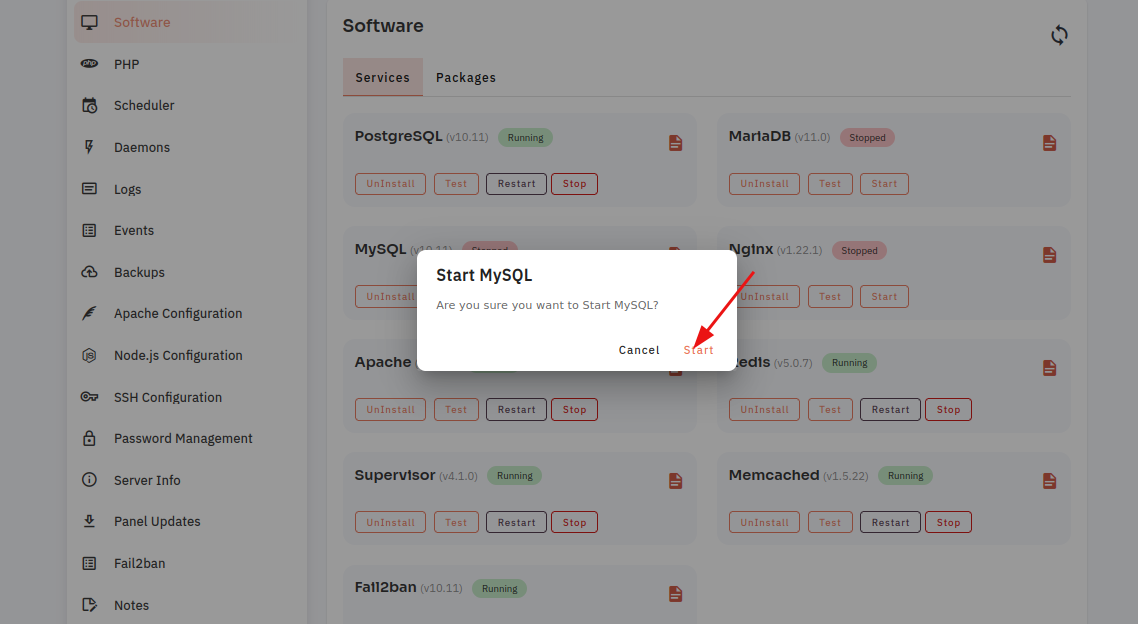
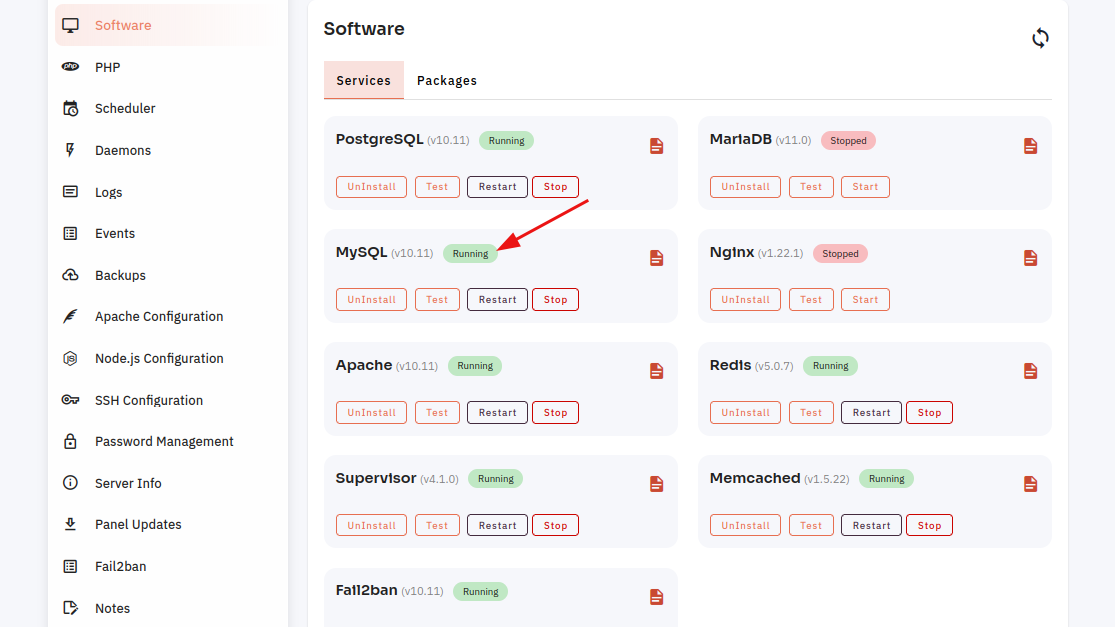
4. Open a dialog and click the "Text" button to test the MySql software.

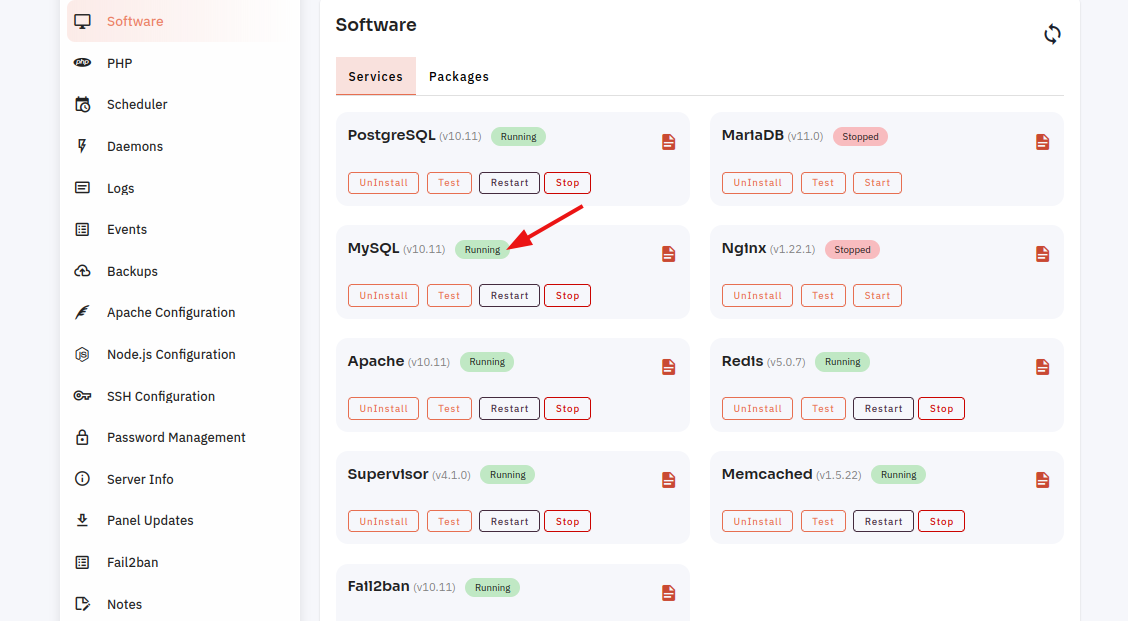
Here, you can see the MySql Test successfully.
5. Select the Stop option.
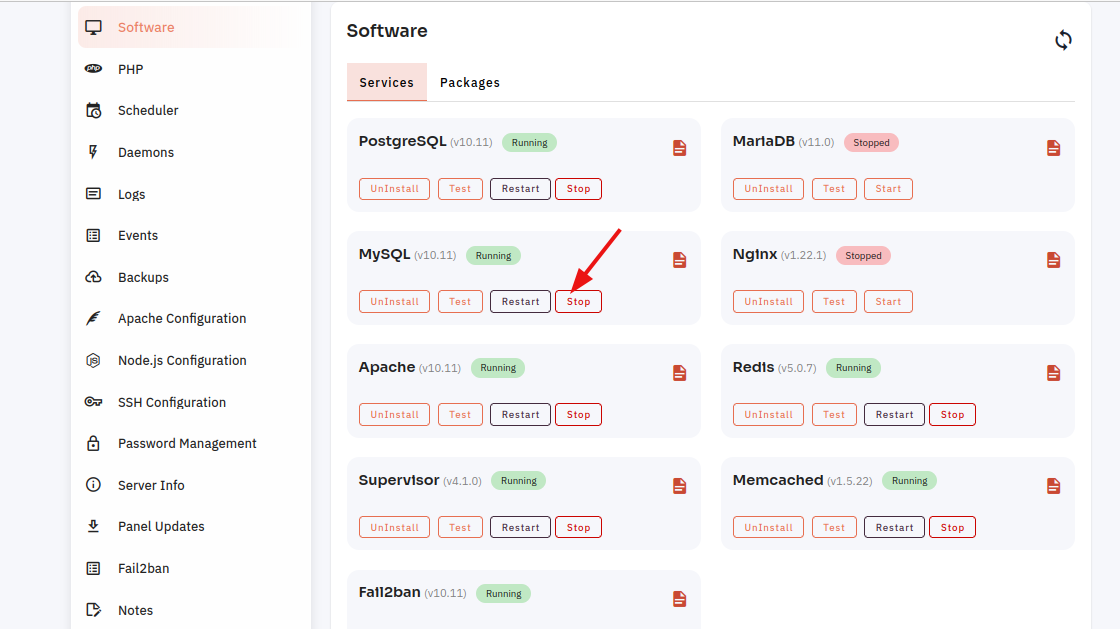
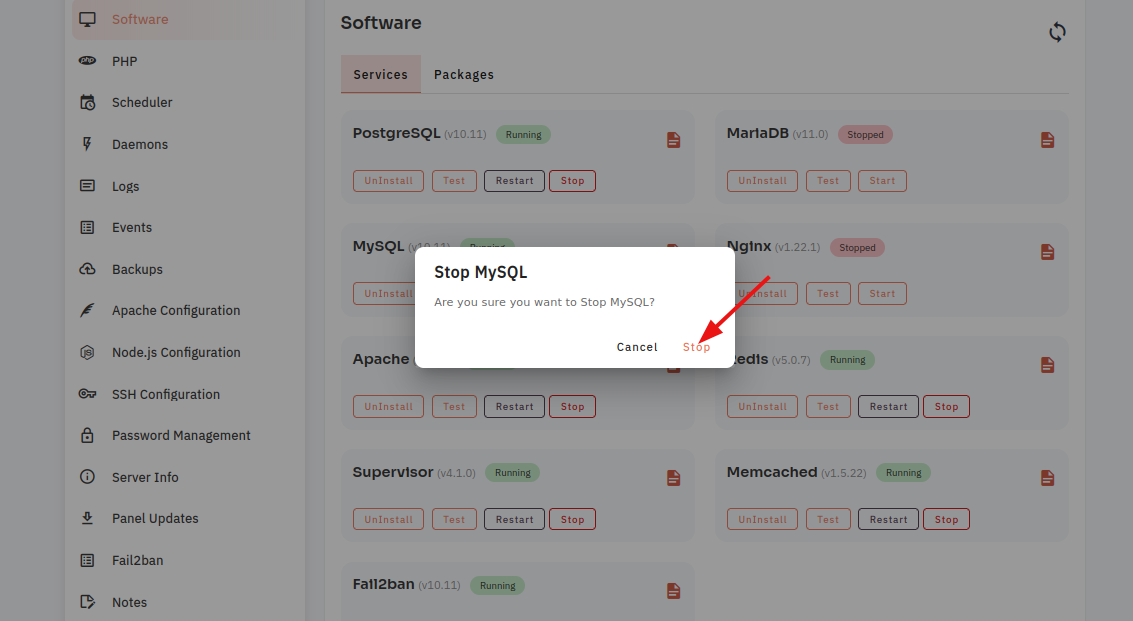
6. Open a Dialog and Click on the Stop Button to stop MySql software.
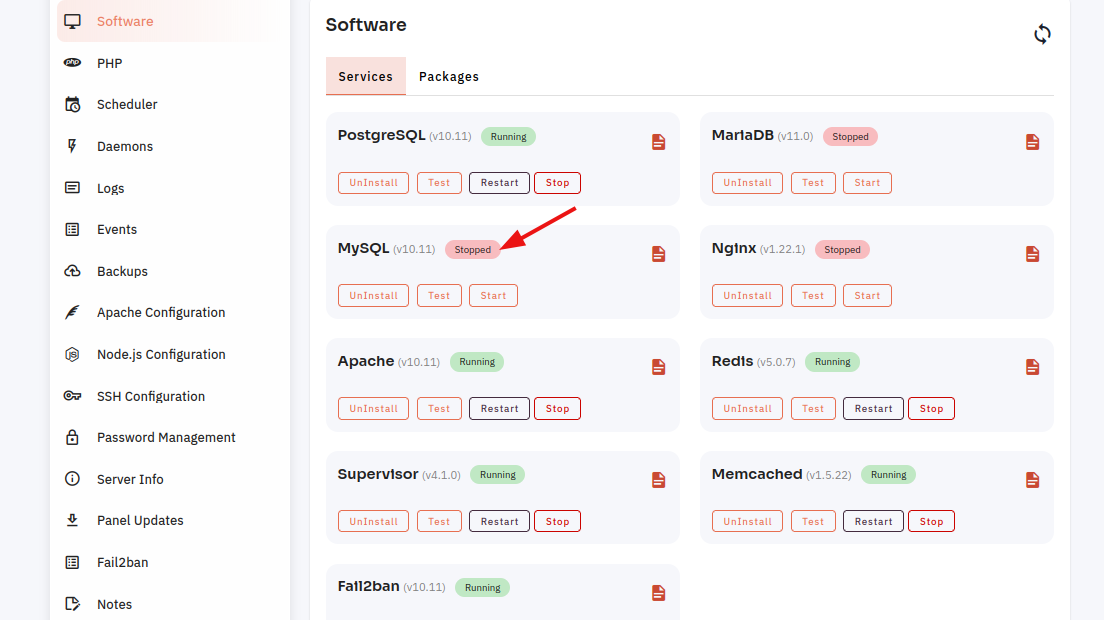
Here, you can see MySql stopped successfully.
7. Select the Start option.
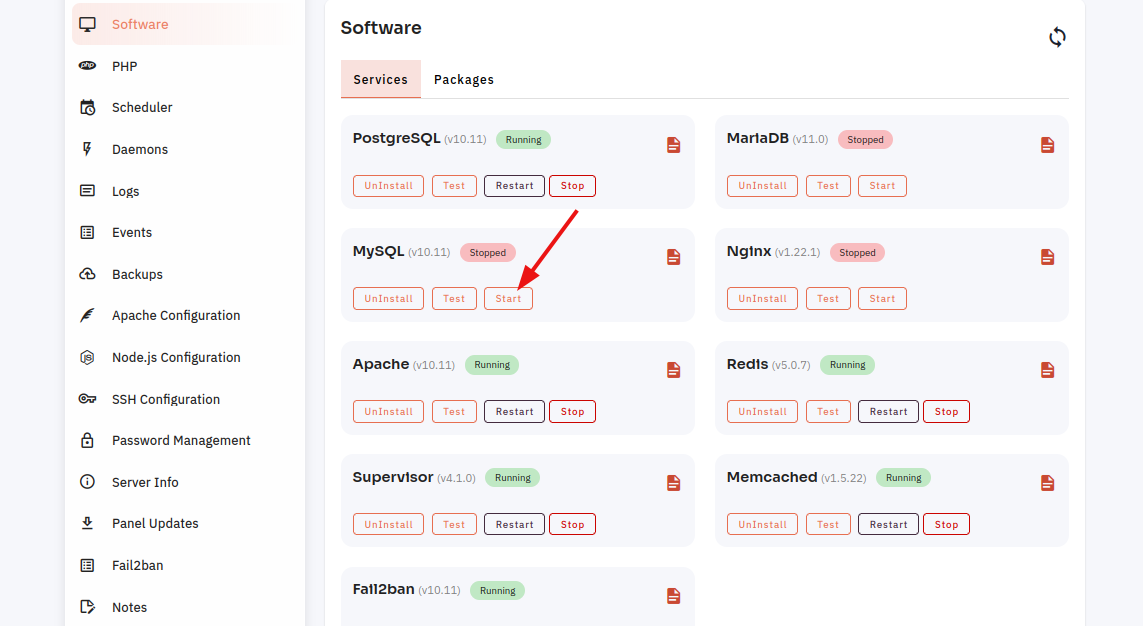
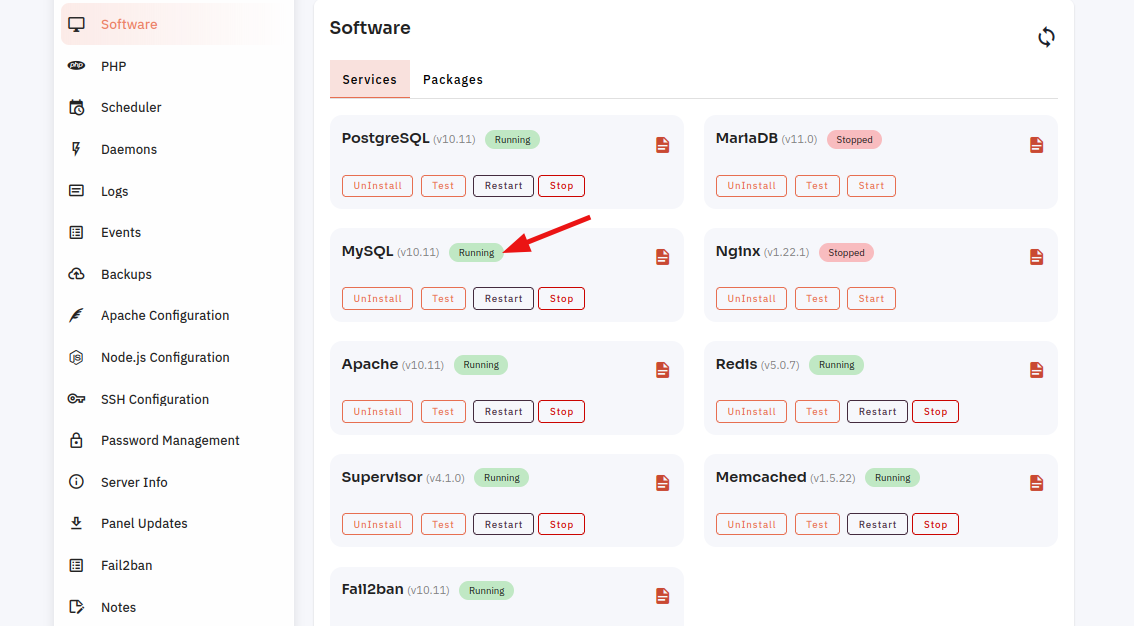
8. Open a Dialog and Click on the Start Button to start MySql software.
Here, you can see MySql started successfully.
9. Select the Restart Option.
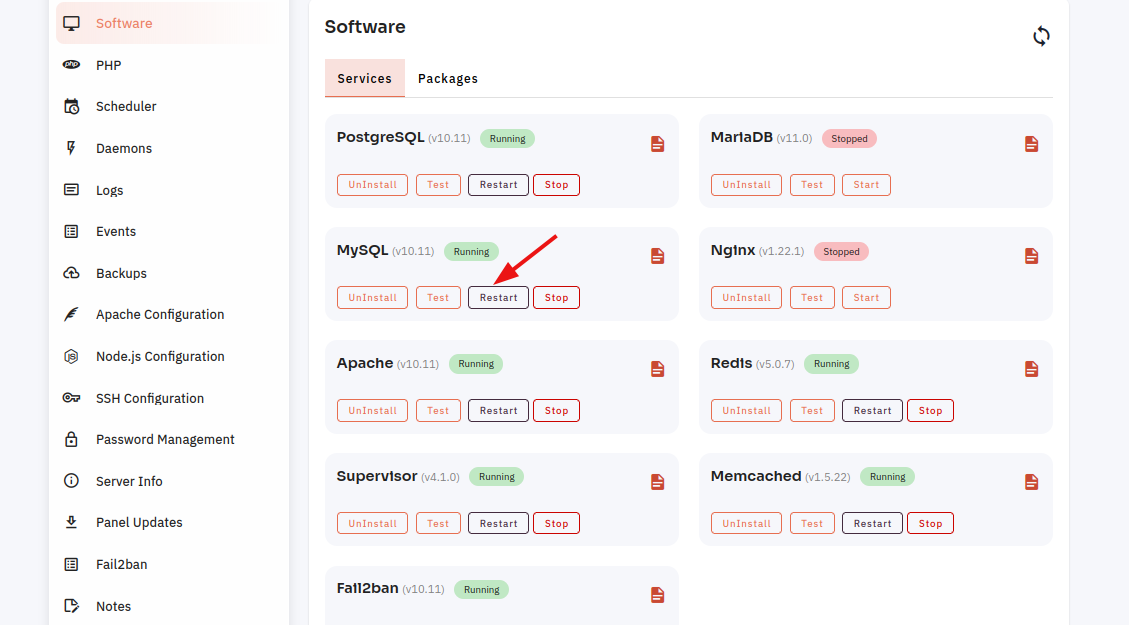
10. Open a dialog and click the restart button to restart the MySql software.
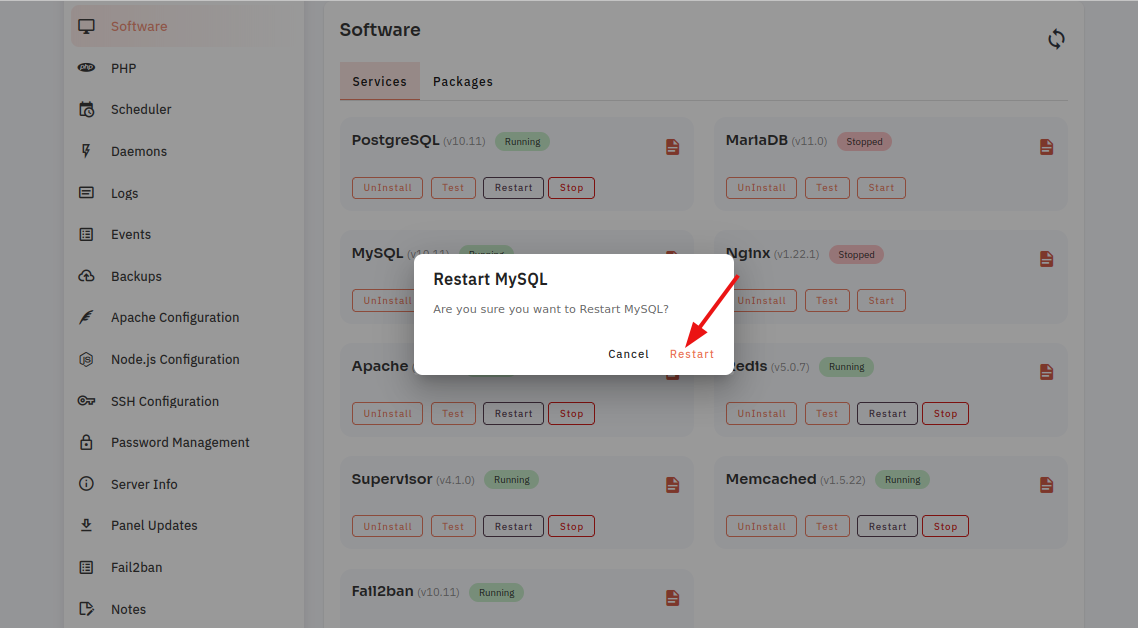
Here, you can see that the MySql restarted successfully.
11. Click on the Event Button.
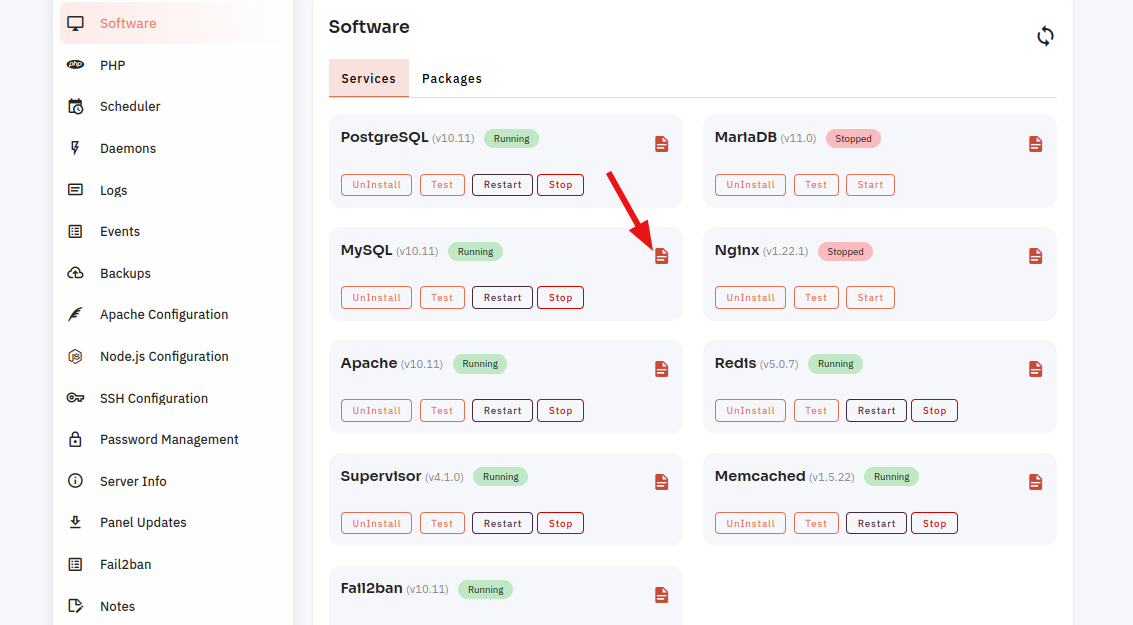
12. Click on the Eye Icon.
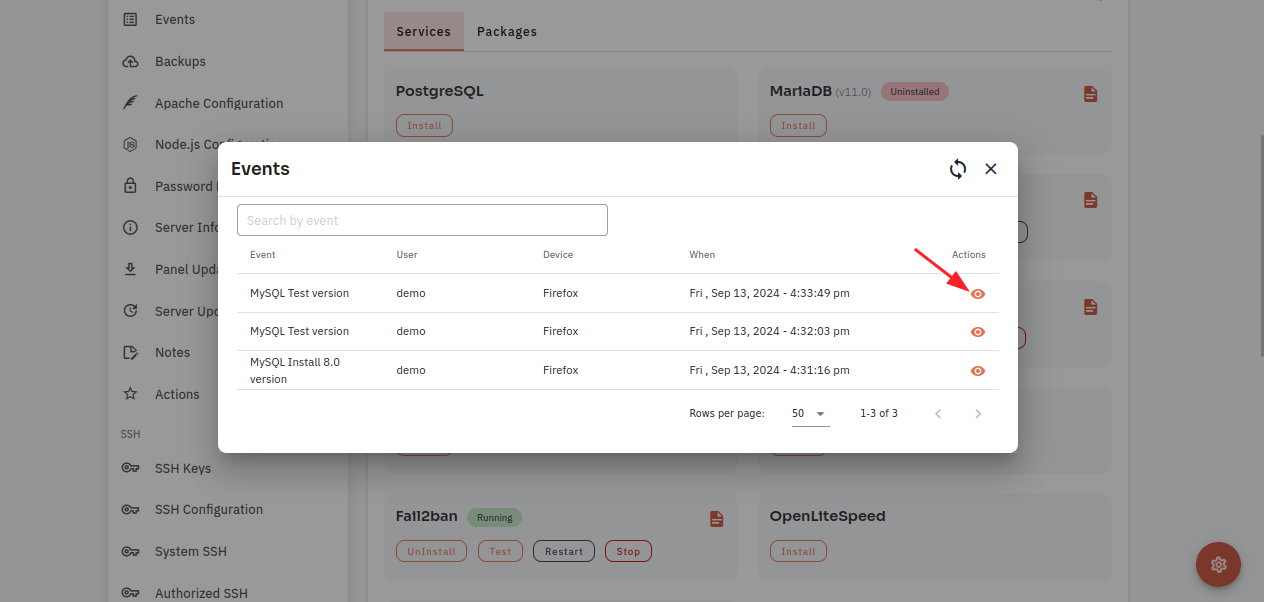
13. Click on the File Data.

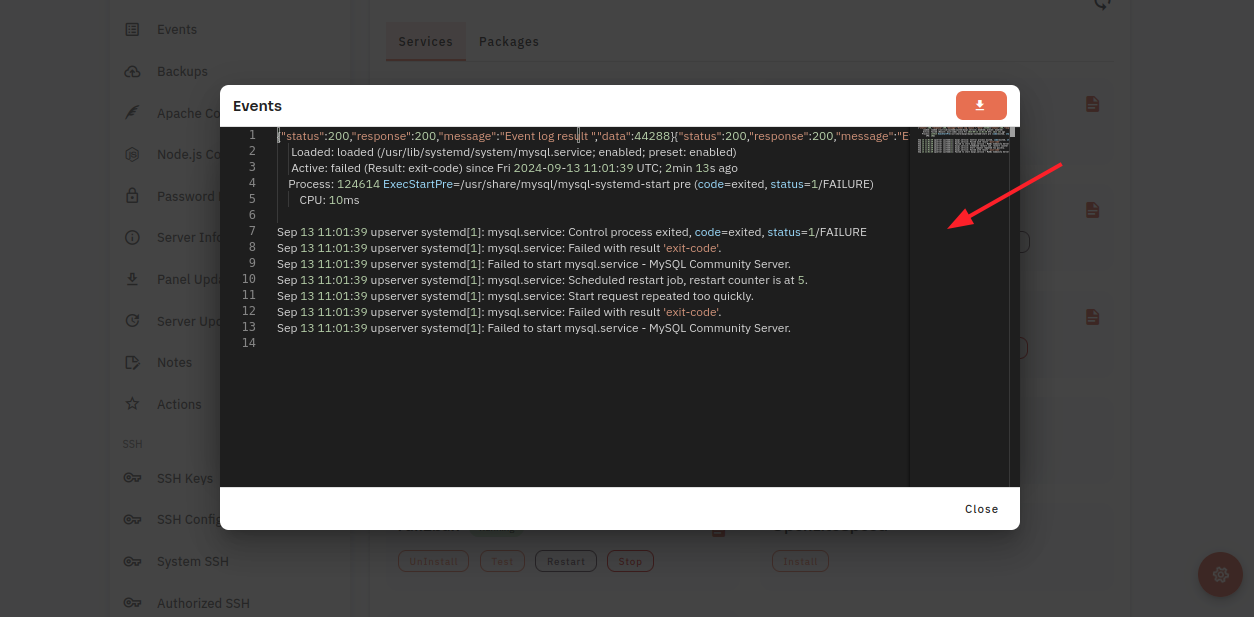
Here, you can see Sql Event data.
How to configure Nginx Software through the cloudpanzer website?
Testing, starting, and restarting Nginx software can be done using various commands and techniques depending on your operating system. Nginx is a popular web server and reverses proxy server, and the commands might slightly differ based on the environment.
Follow the steps below to configure PostgreSQL Software.
1: Once logged in, look for a "Server" and click on it.
2. Select the Software Option.
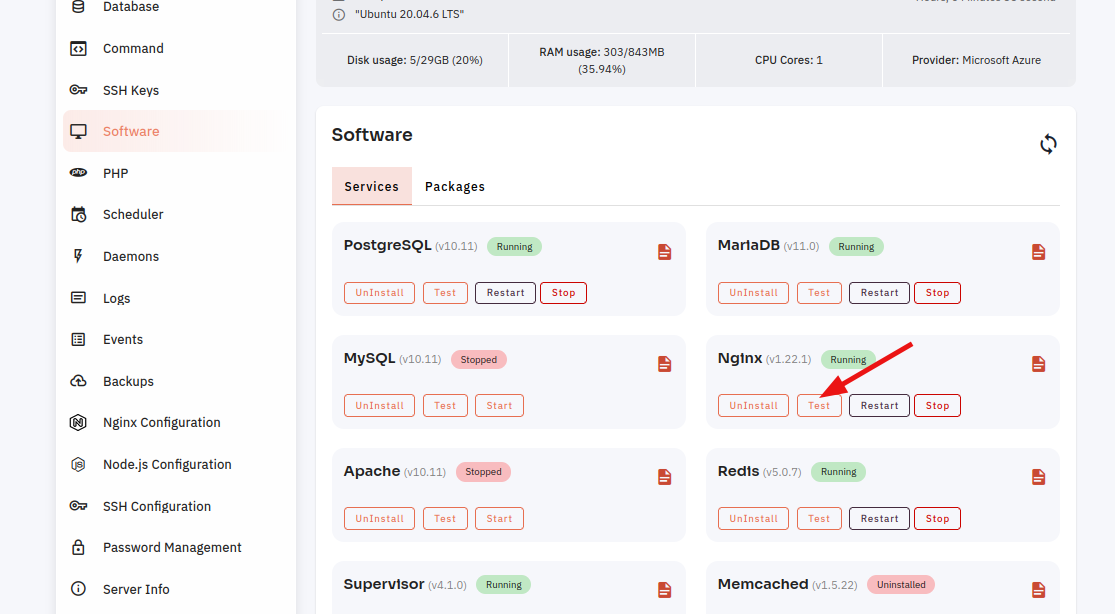
4. Open a dialog and click the "Text" button to test the Nginx software.
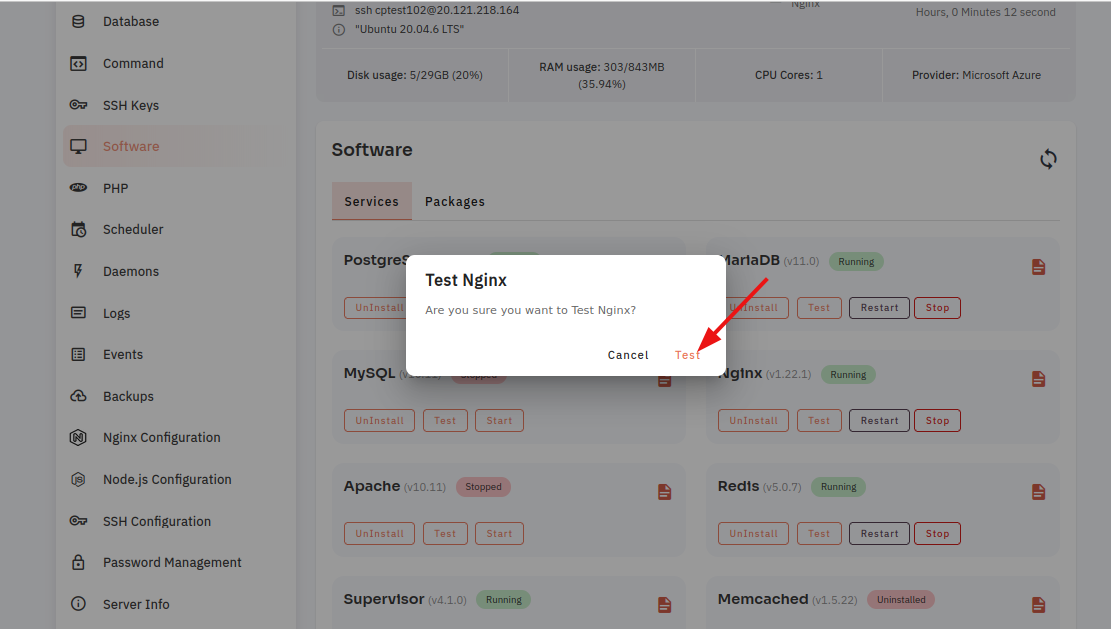
Here, you can see the Nginx Test successfully.
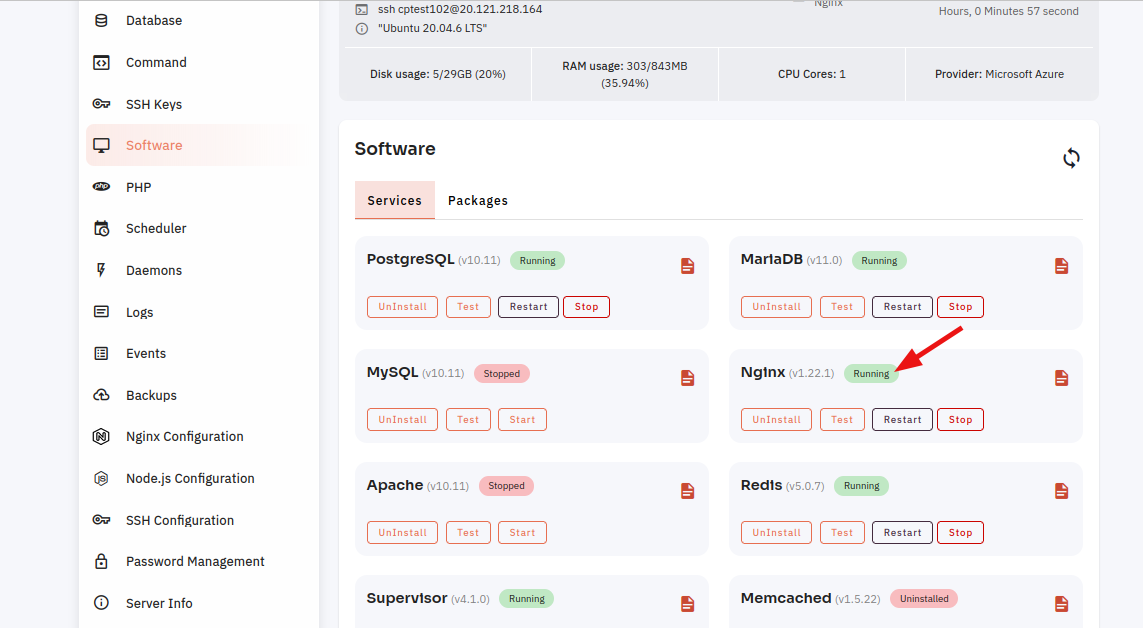
5. Select the Start option.
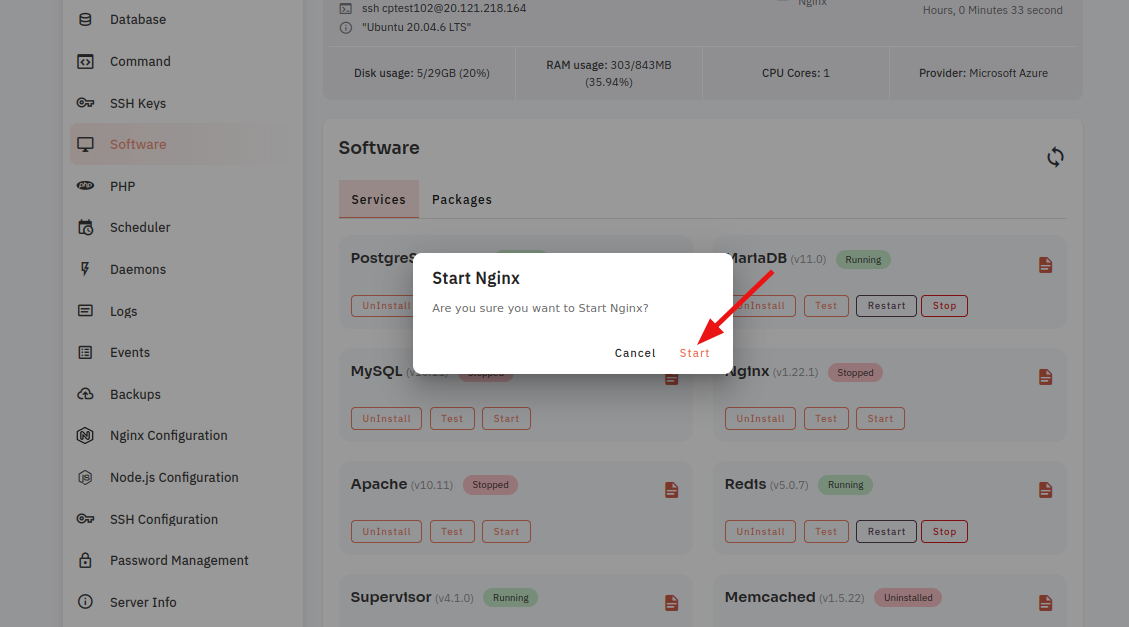
6. Open a Dialog and Click on the Start Button to start Nginx software.
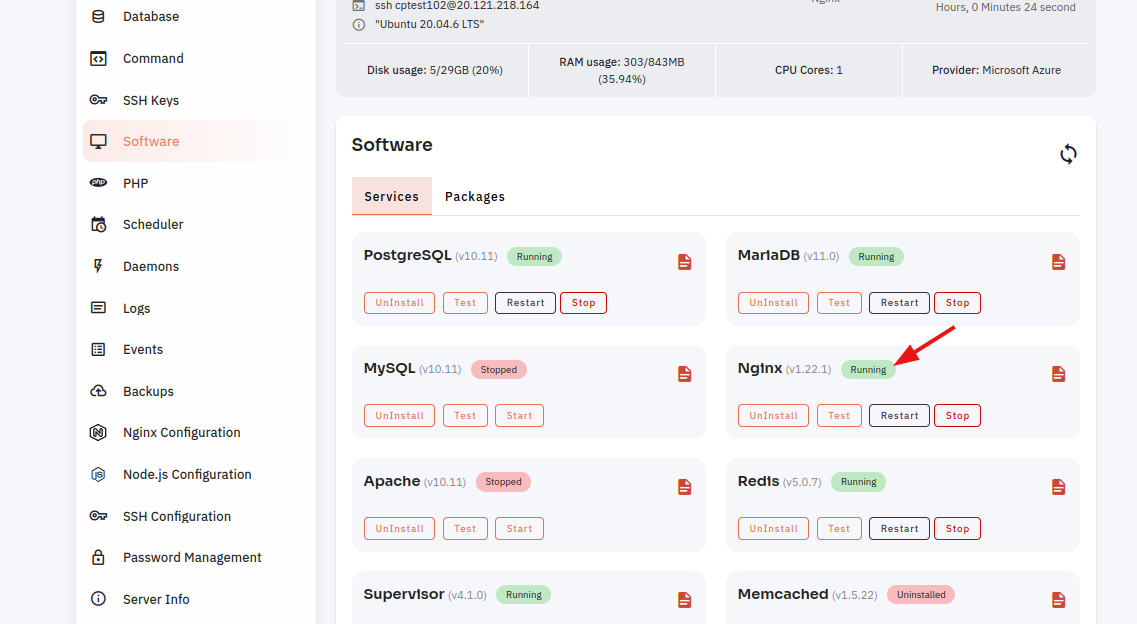
Here, you can see Nginx started successfully.
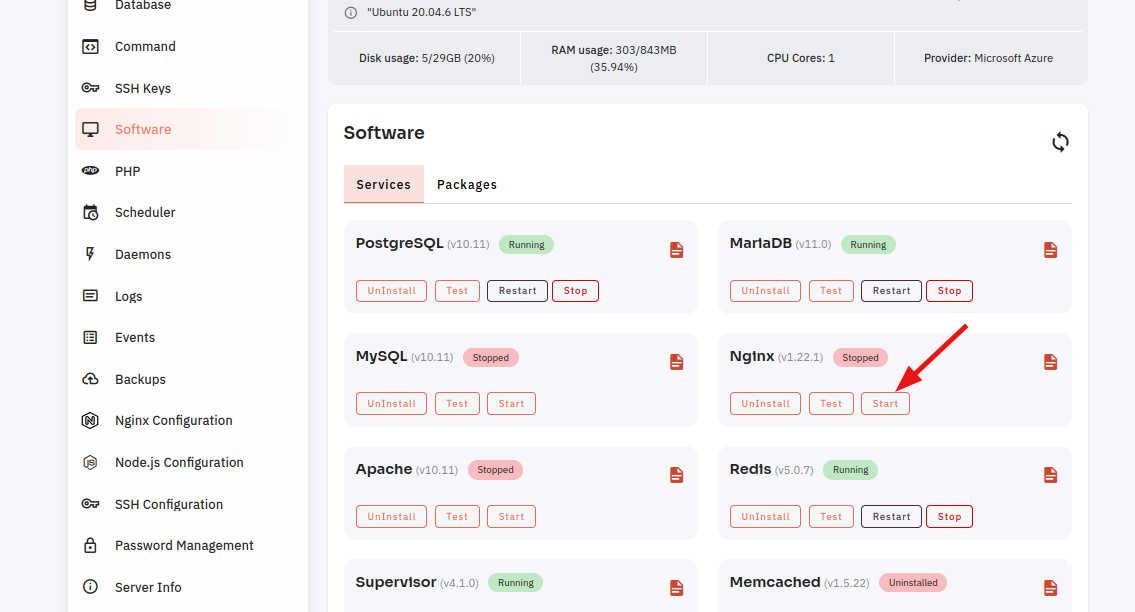
7. Select the Stop option.
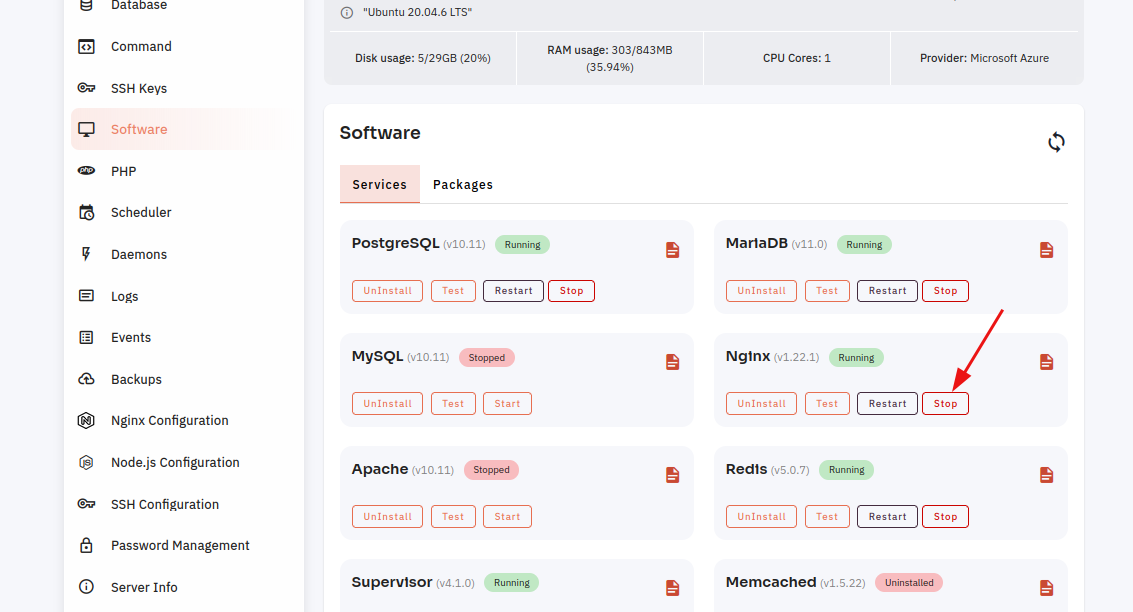
8. Open a dialog and click the stop button to stop the Nginx software.
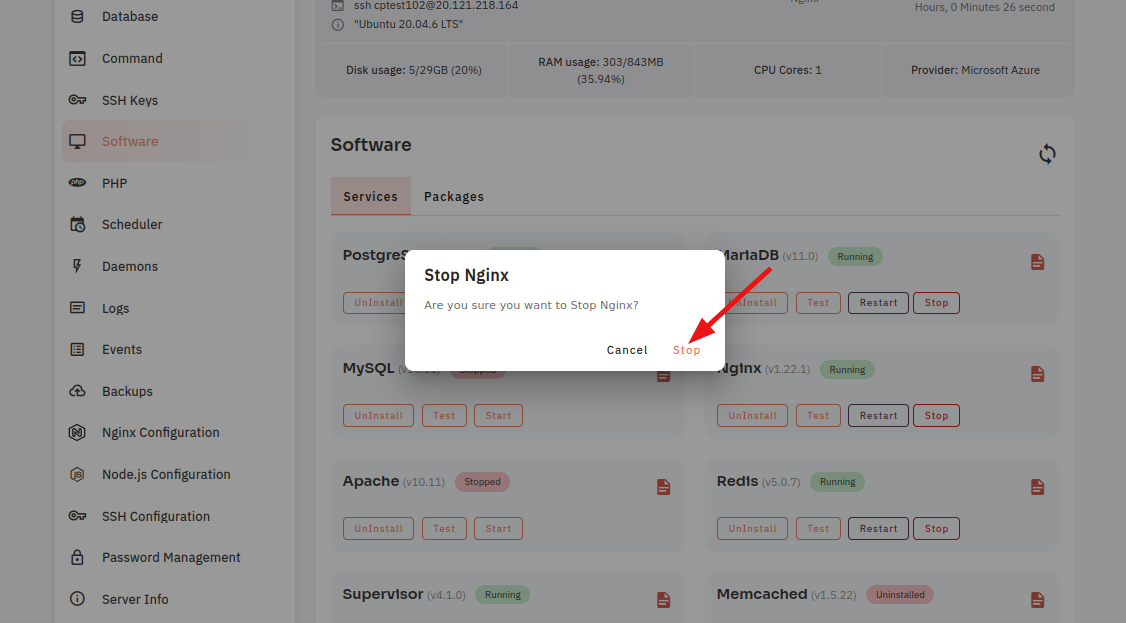
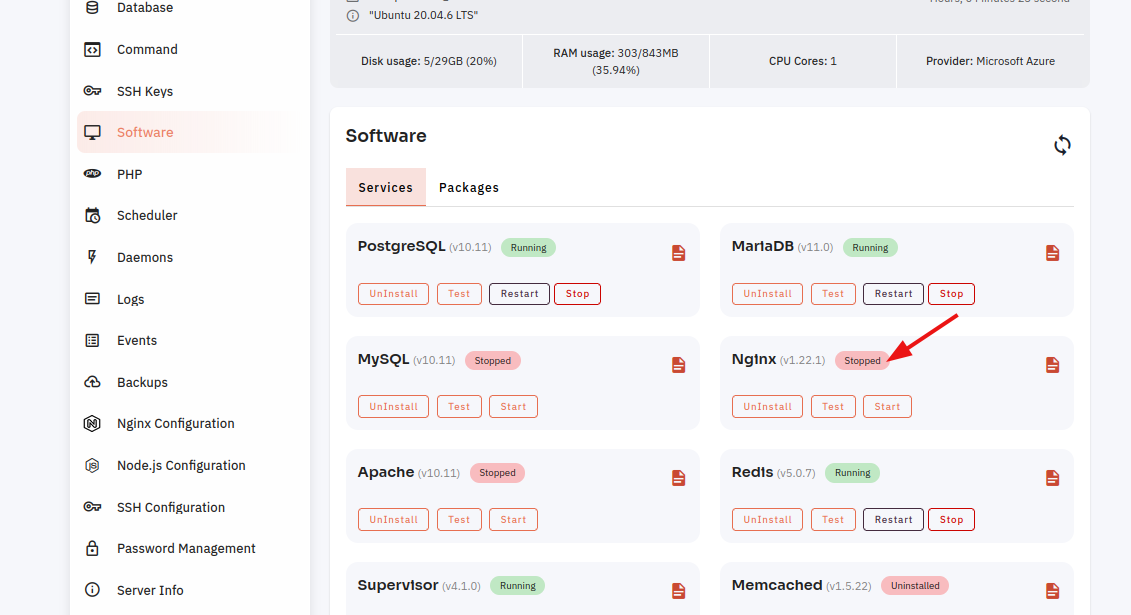
Here, you can see that Nginx Stopped successfully.
9. Select the Restart Option.
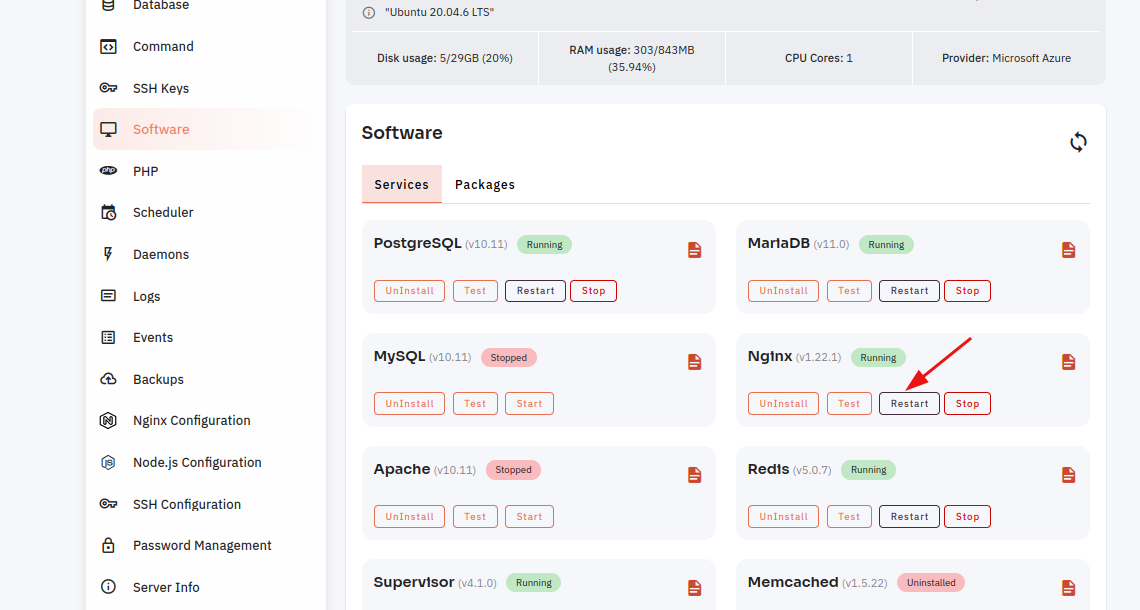
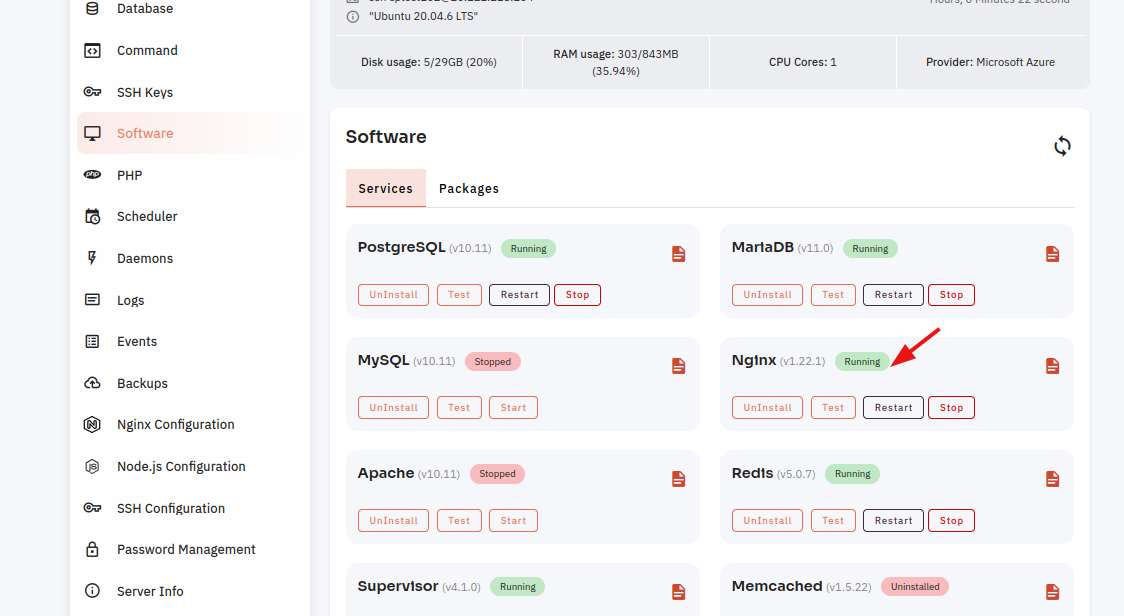
10. Open a dialog and click the restart button to restart the Nginx software.
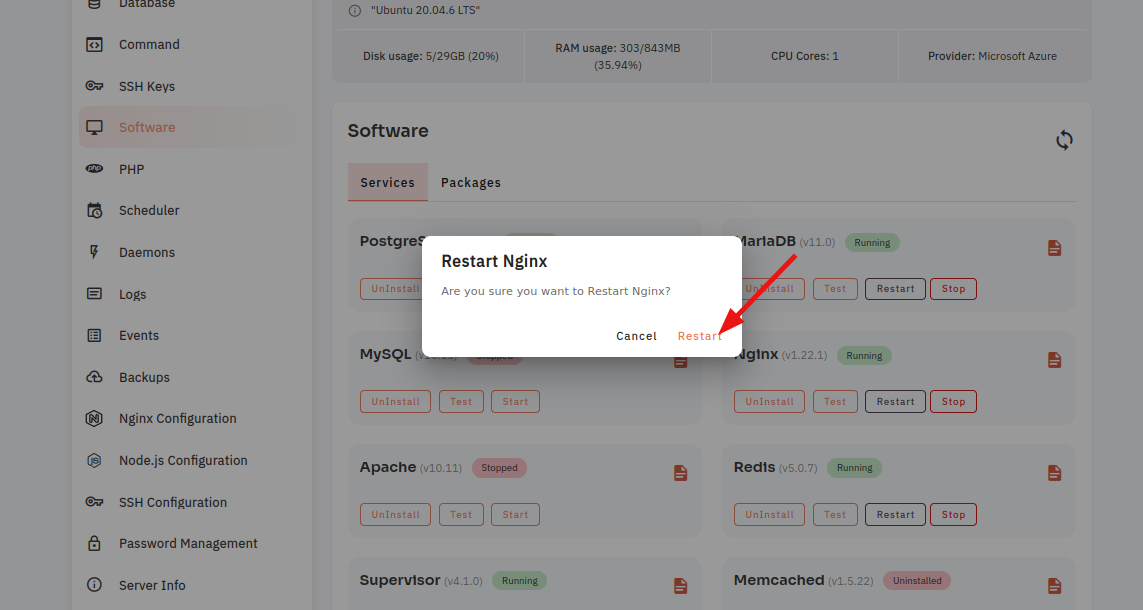
Here, you can see that Nginx restarted successfully.
11. Click on the Event Button.
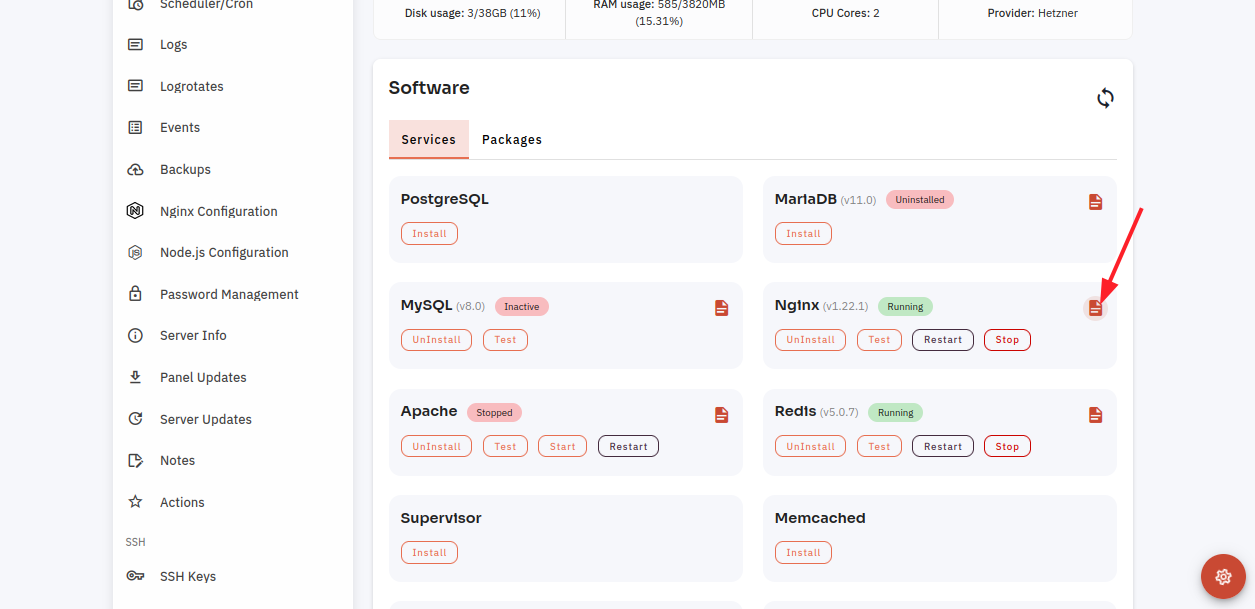
12. Click on the Eye Icon.
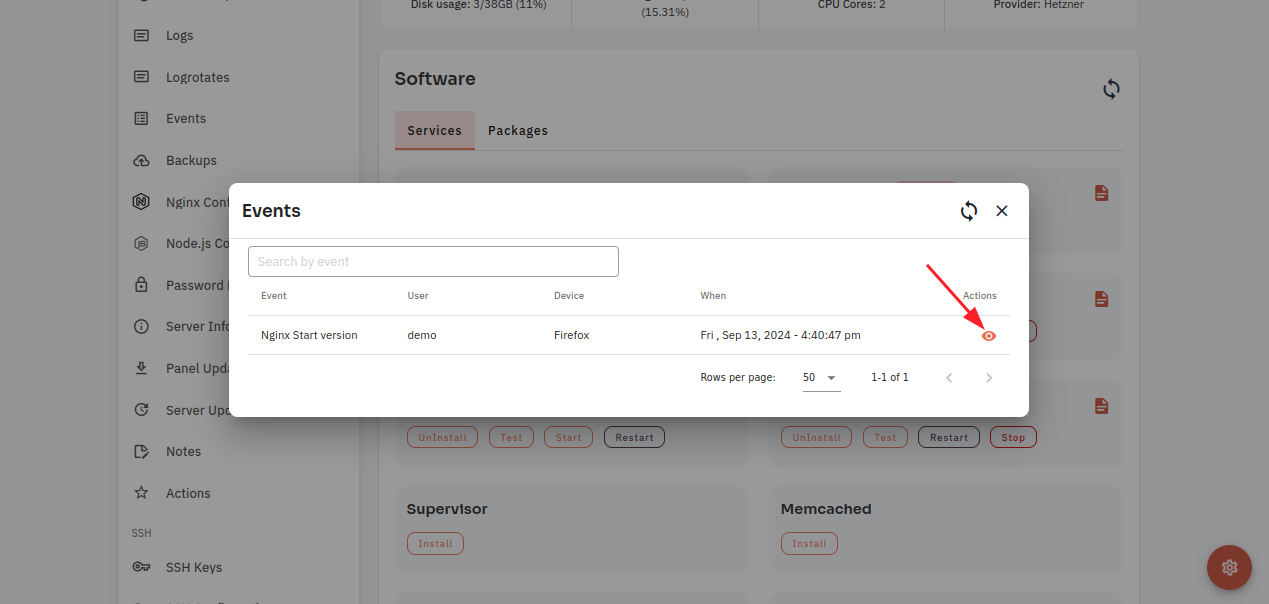
13. Click on the File icon.
Here, you can see Nginx Event data.
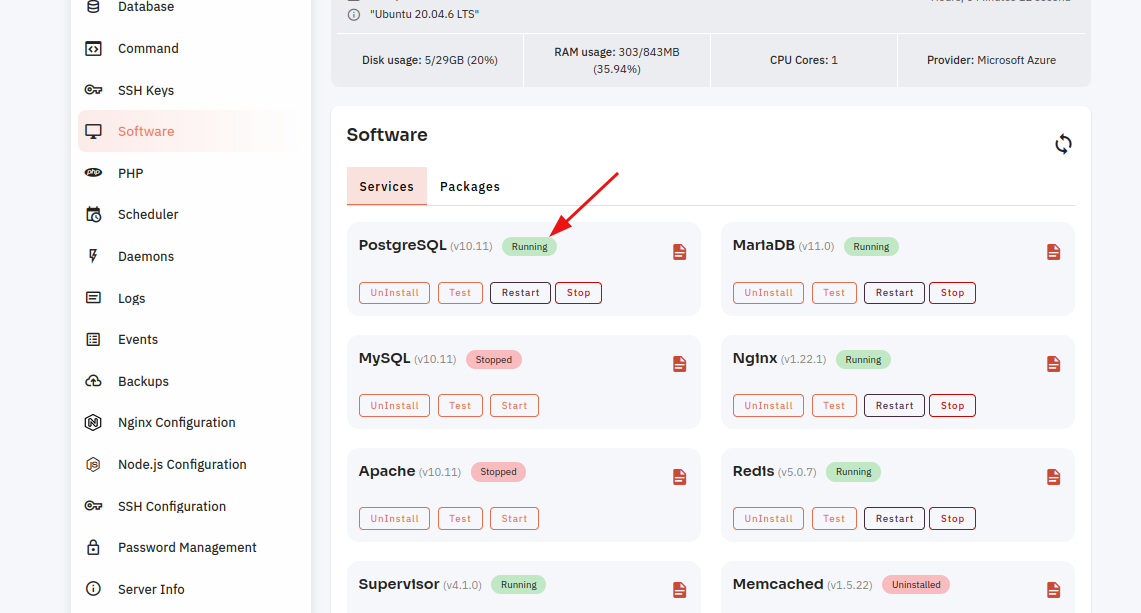
How to configure PostgreSQL Software through the cloudpanzer website?
Managing PostgreSQL involves several basic operations like starting, restarting, testing, and stopping the PostgreSQL server. These commands assume you're working in a Unix-like environment (Linux/macOS).
Managing PostgreSQL involves several basic operations like starting, restarting, testing, and stopping the PostgreSQL server. These commands assume you're working in a Unix-like environment (Linux/macOS).
Follow the steps below to configure PostgreSQL Software.
1: Once logged in, look for a "Server" and click on it.

2. Select the Software Option.
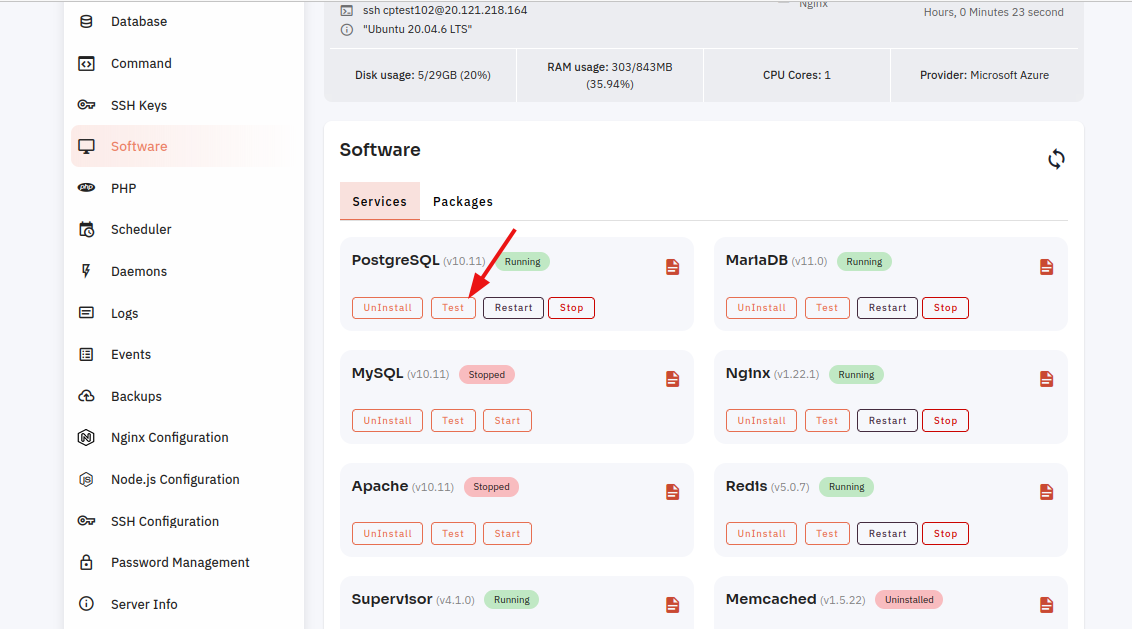
4. Open a dialog and click the "Text" button to test the PostgreSQL software.
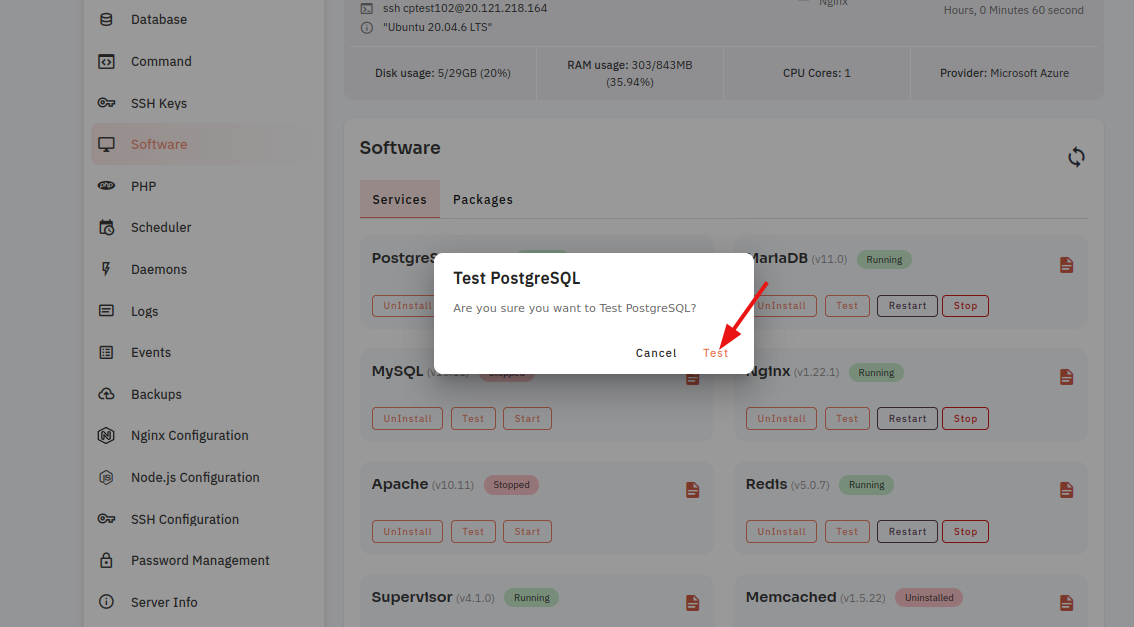
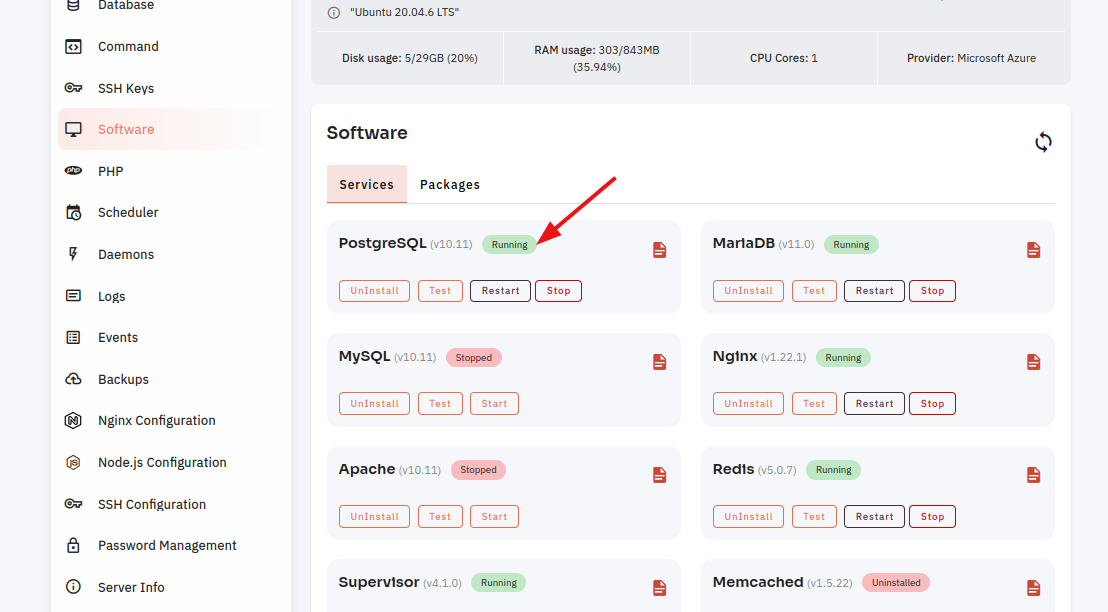
Here, you can see the PostgreSQL Test successfully.
5. Select the Start option.
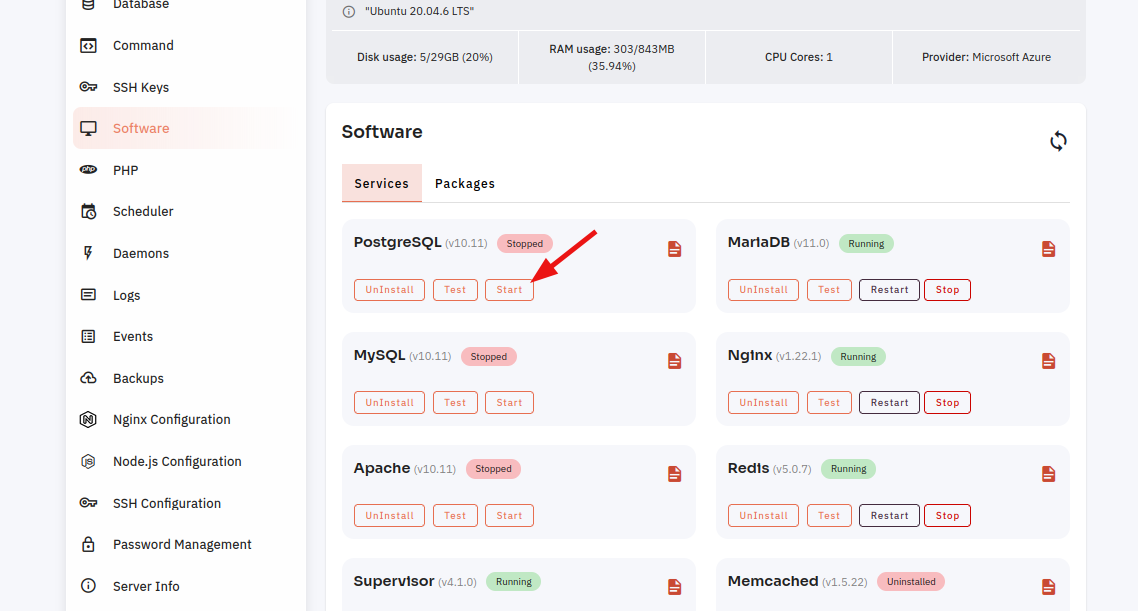
6. Open a Dialog and Click on the Start Button to start PostgreSQL software.
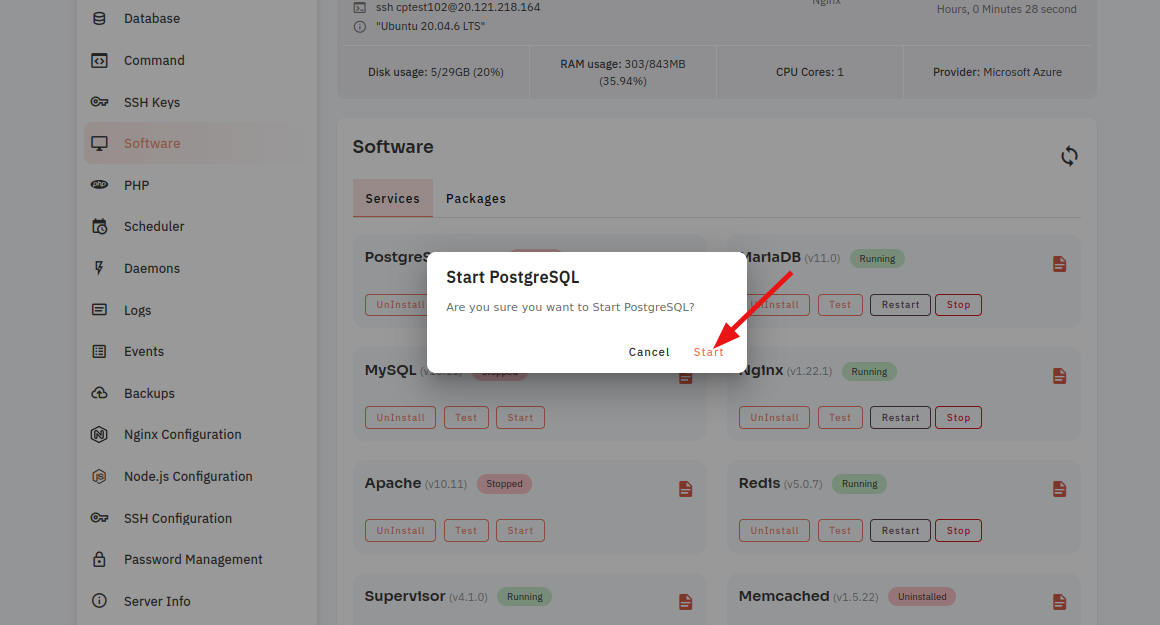
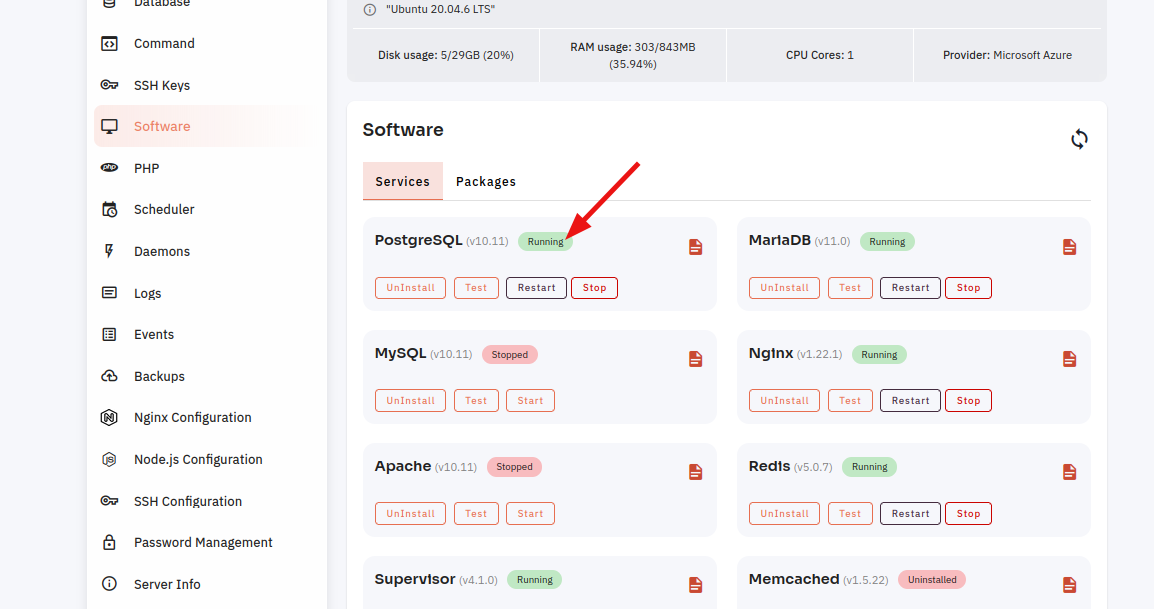
Here, you can see PostgreSQL started successfully.
7. Select the Stop option.
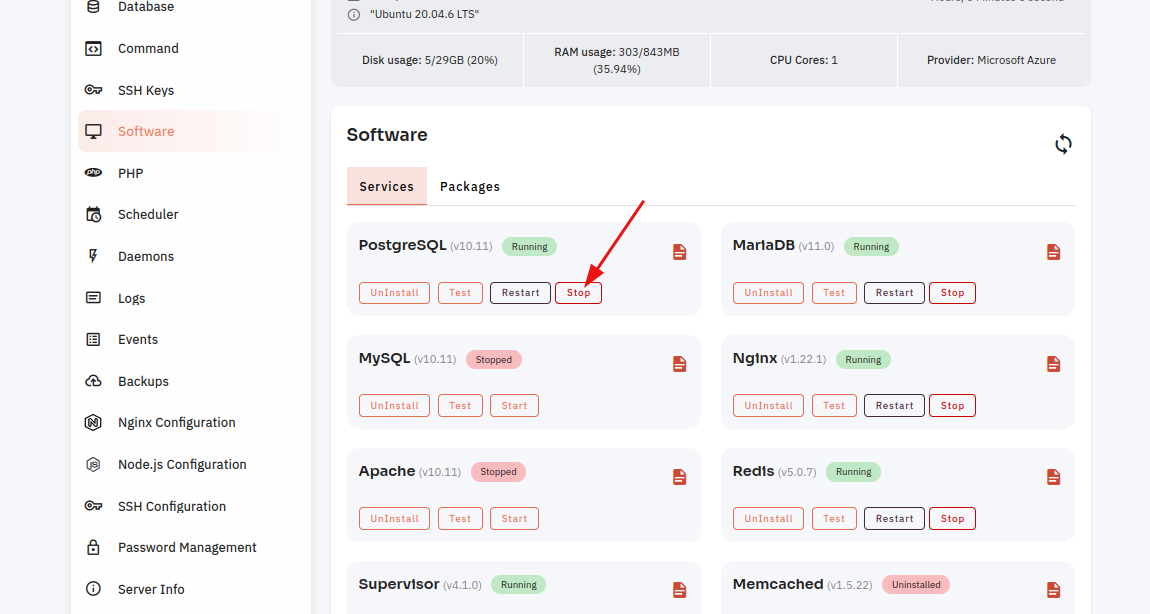
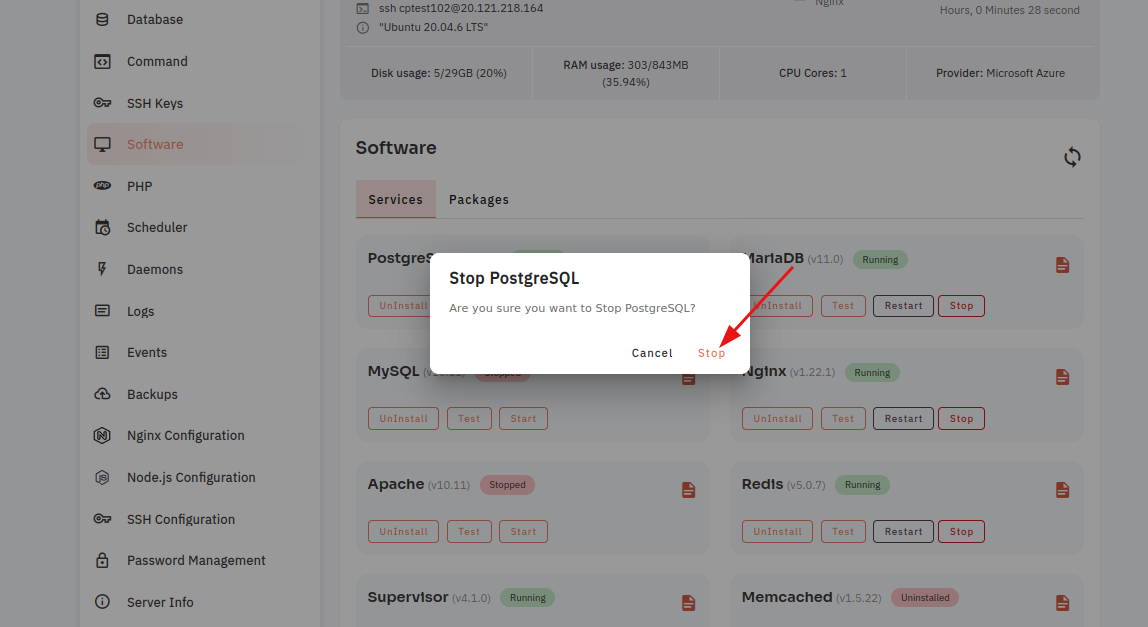
8. Open a dialog and click the stop button to stop the PostgreSQL software.
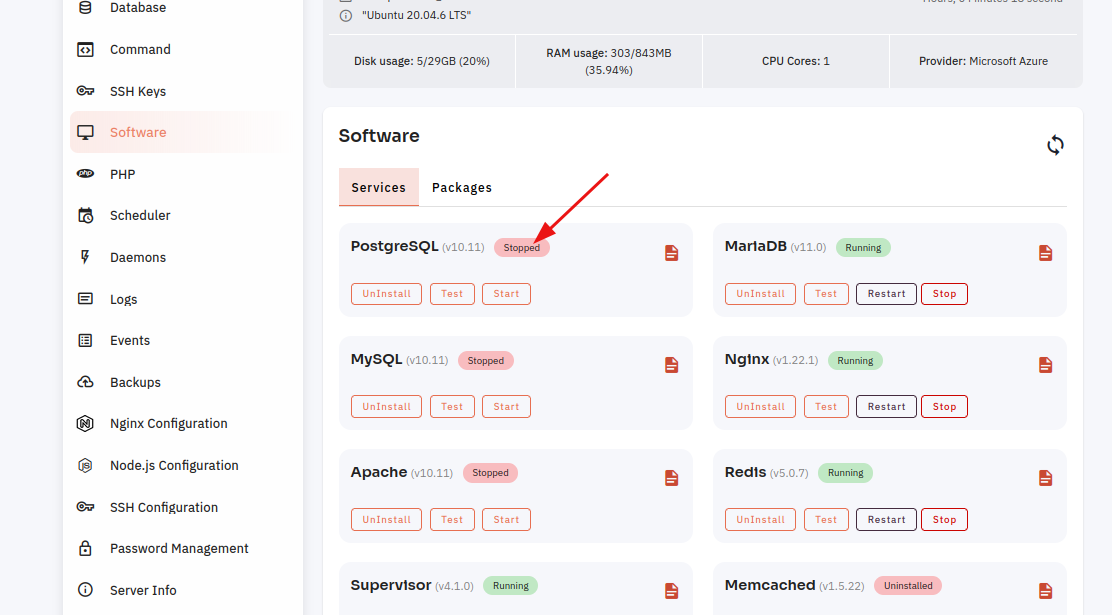
Here, you can see that PostgreSQL Stopped successfully.
9. Select the Restart Option.

10. Open a dialog and click the restart button to restart the PostgreSQL software.
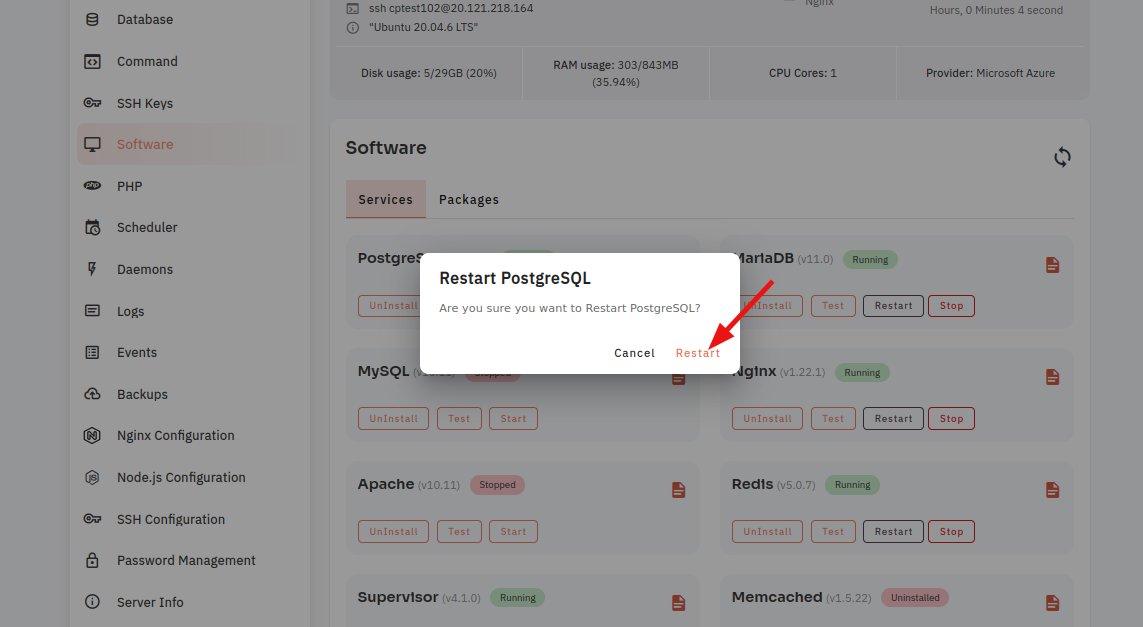
Here, you can see that PostgreSQL restarted successfully.
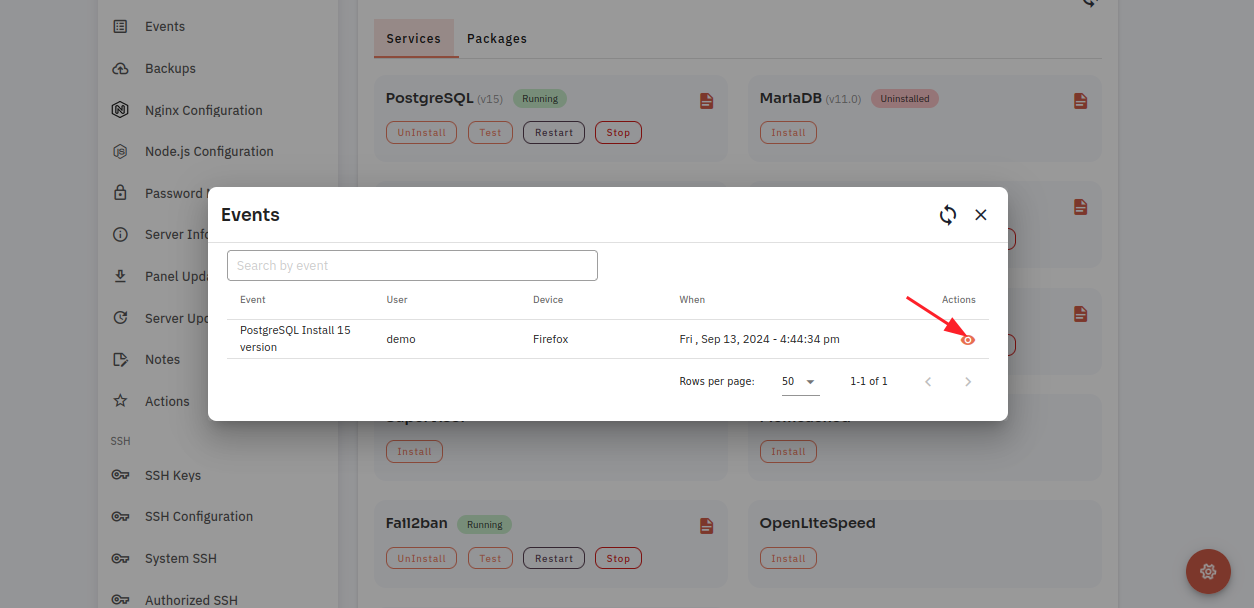
11. Click on the Event Button.
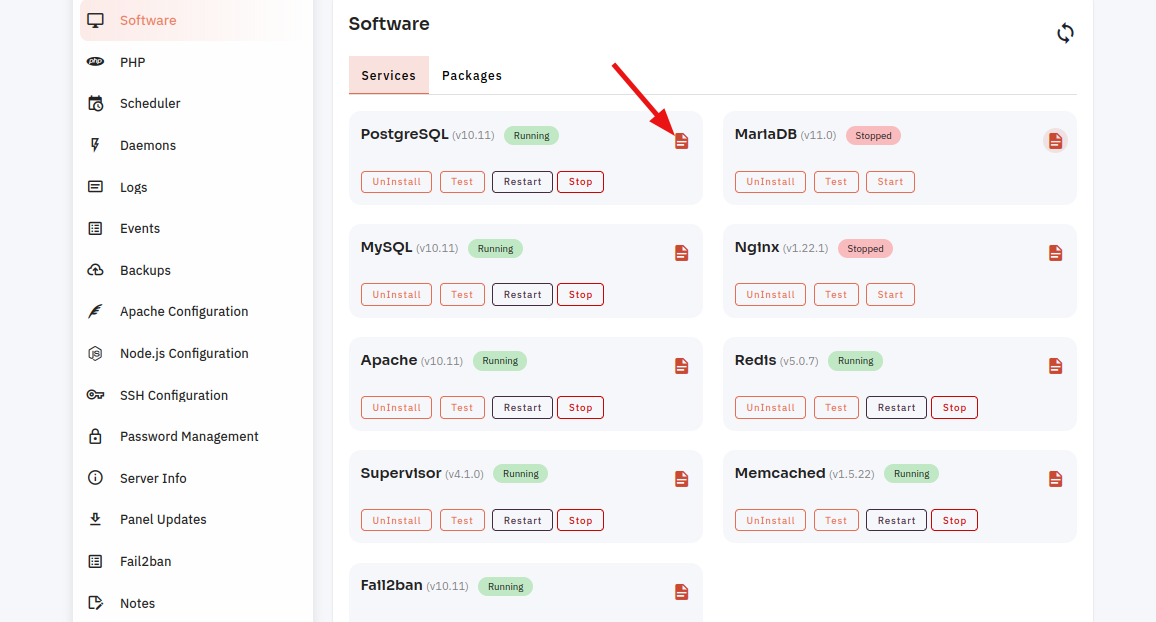
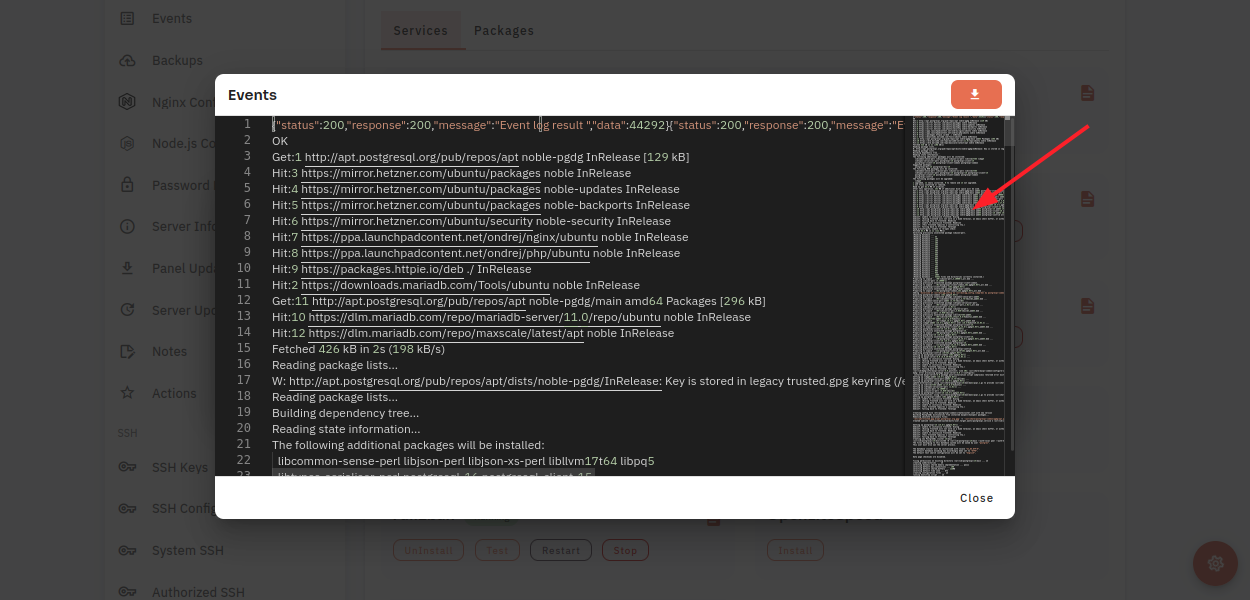
12. Click on the Eye icon.
13. Click on the File icon.
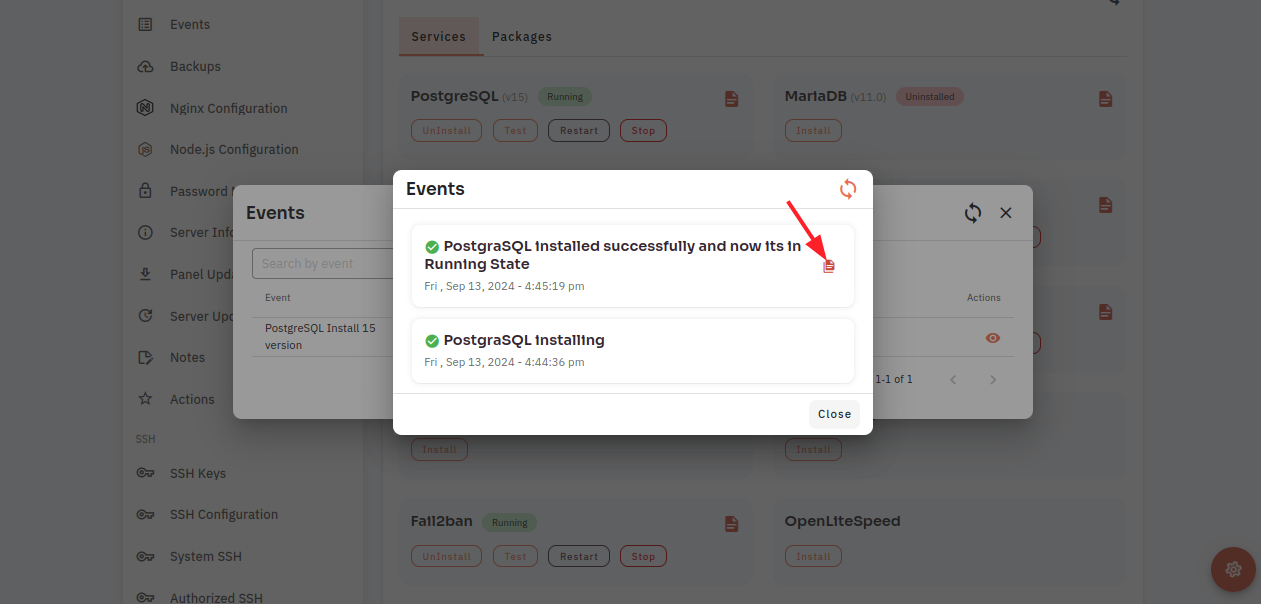
Here, you can see PostgreSQL Event data.
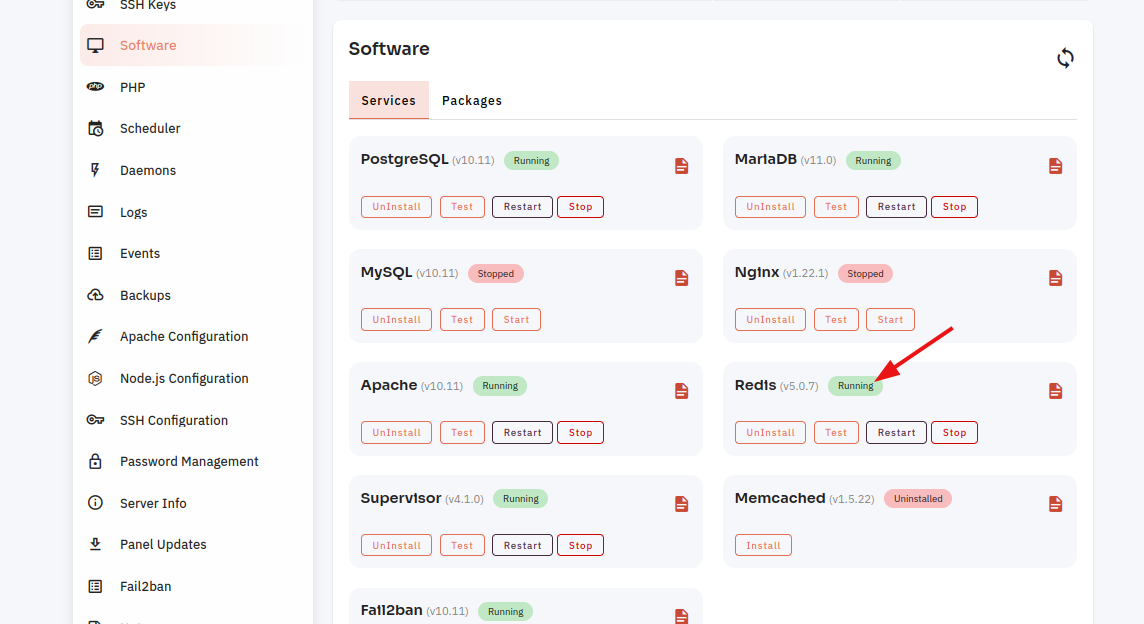
How to configure Redis Software through the cloudpanzer website?
To test, start, and restart Redis software, you'll need to follow some specific steps depending on your operating system. Redis is a popular in-memory data structure store, often used as a caching solution and for other real-time data processing purposes.
Follow the steps below to configure Redis Software.
1: Once logged in, look for a "Server" and click on it.

2. Select the Software Option.
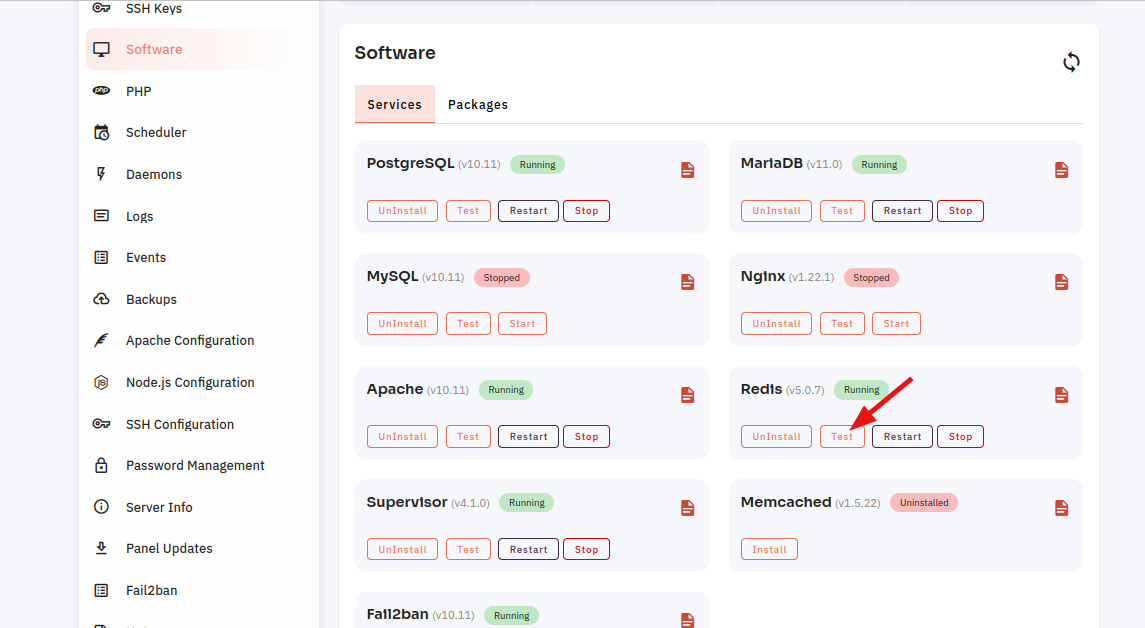
4. Open a dialog and click the "Text" button to test the Redis software.
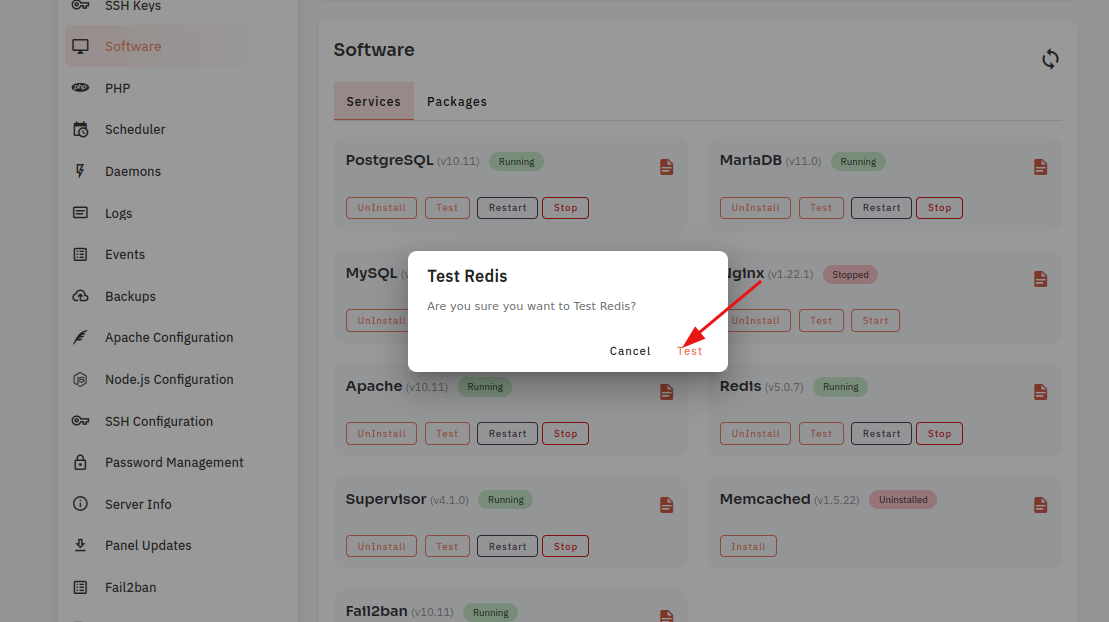
Here, you can see the Redis Test successfully.
6. Open a Dialog and Click on the Start Button to start Redis software.
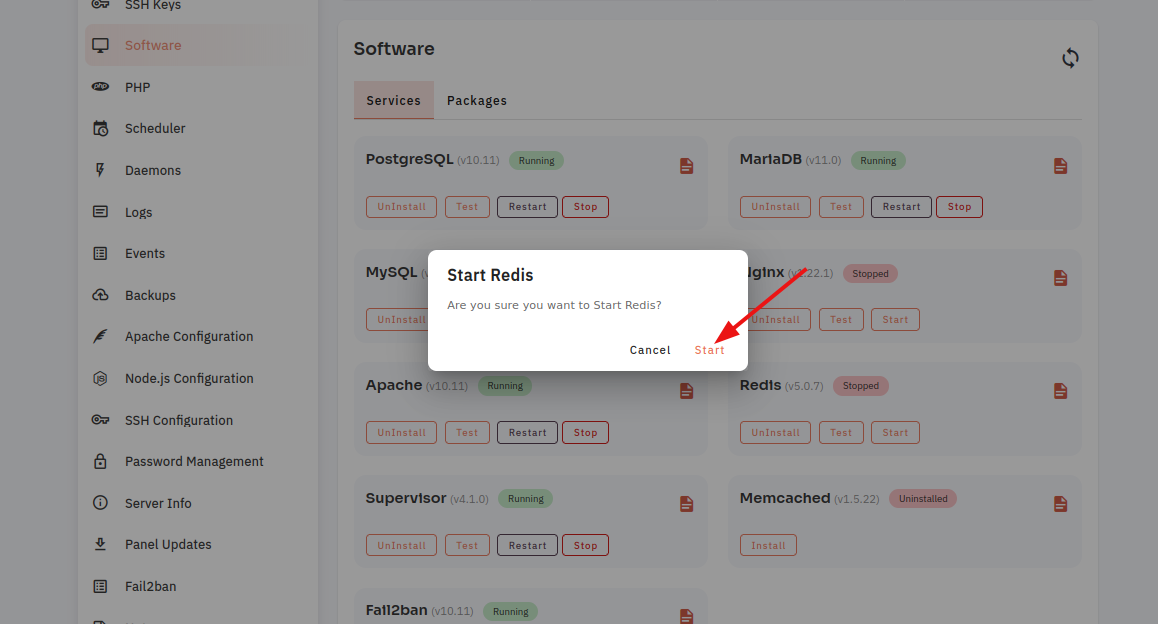
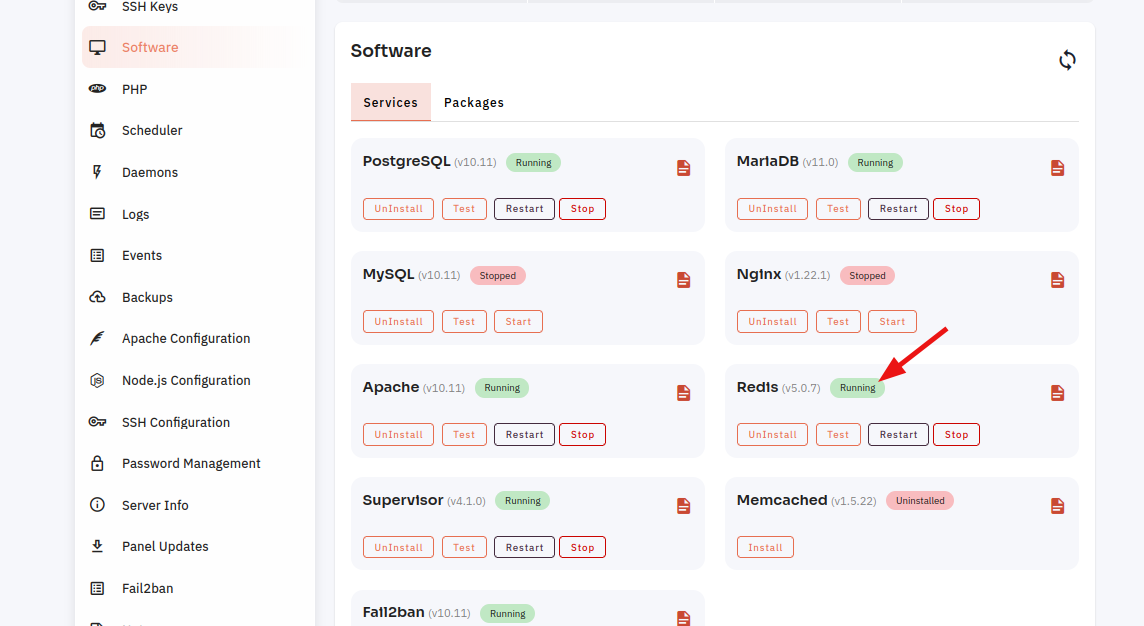
Here, you can see Redis started successfully.
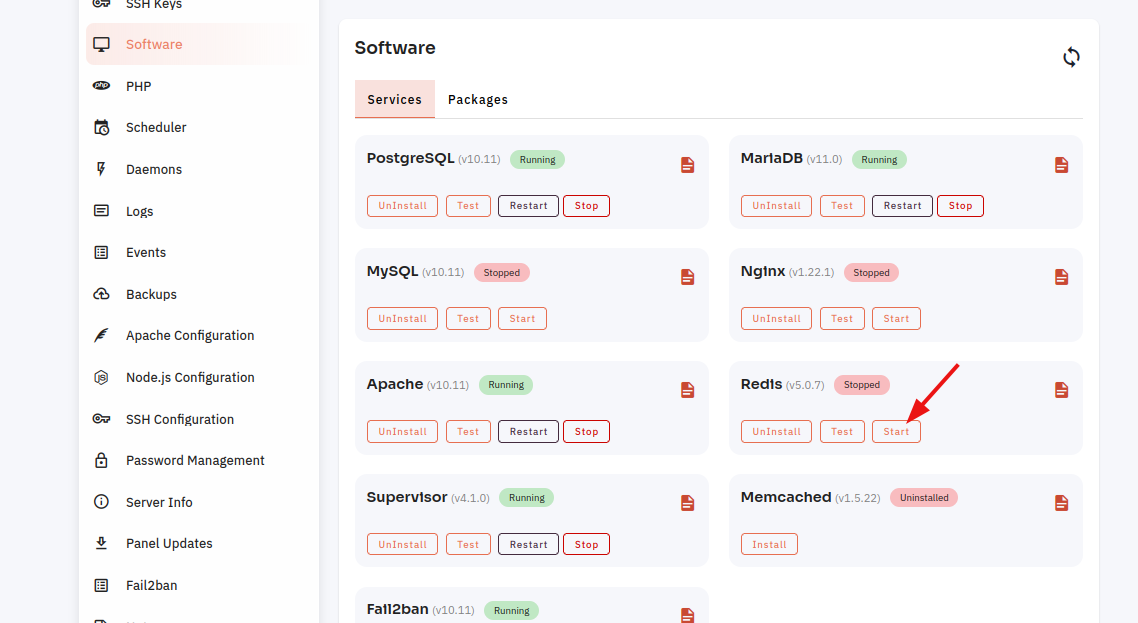
7. Select the Stop option.
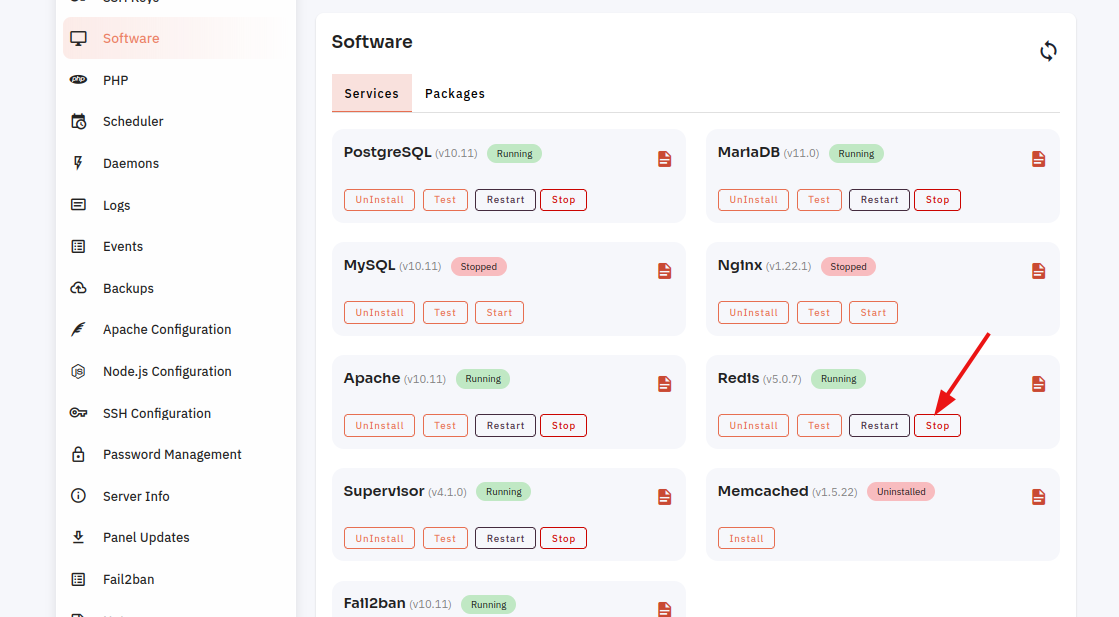
8. Open a dialog and click the stop button to stop the Redis software.
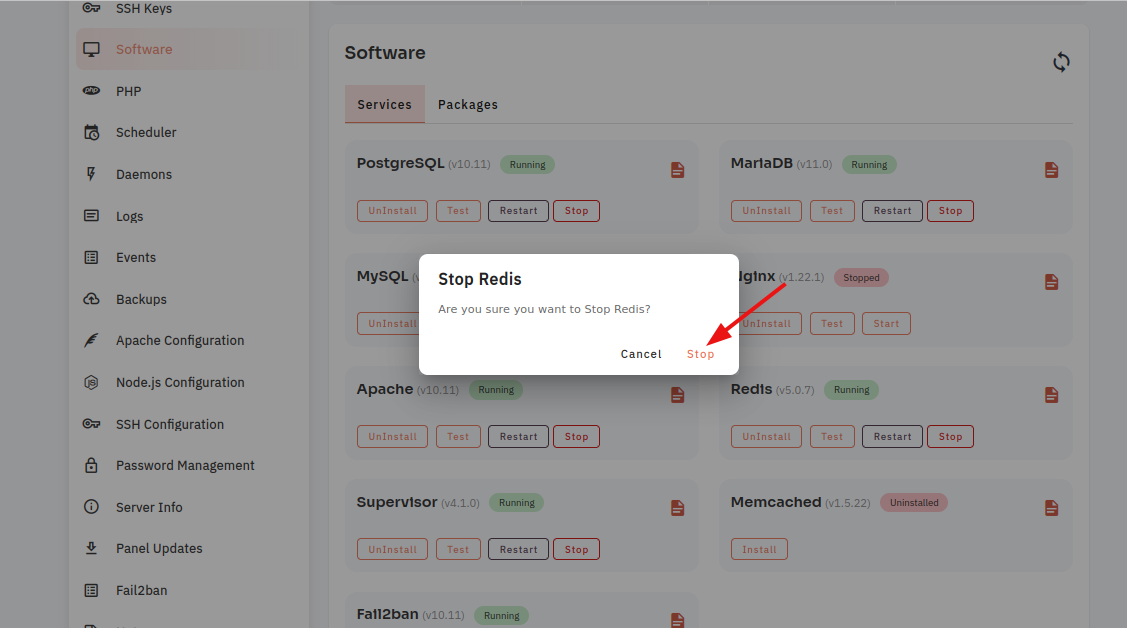
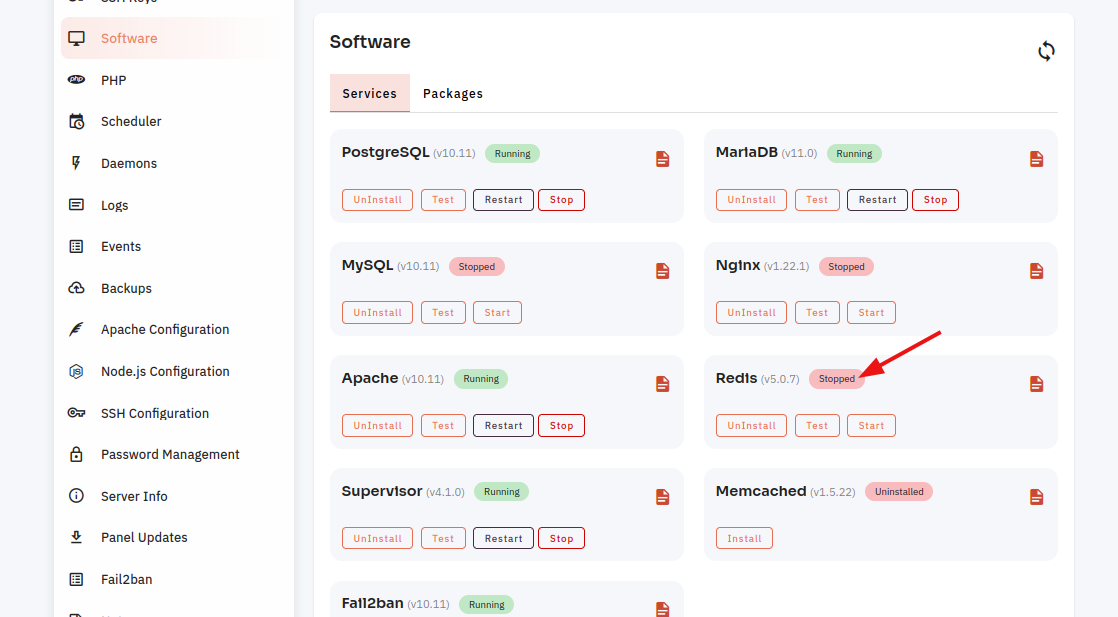
Here, you can see Redis Stopped successfully.
9. Select the Restart Option.
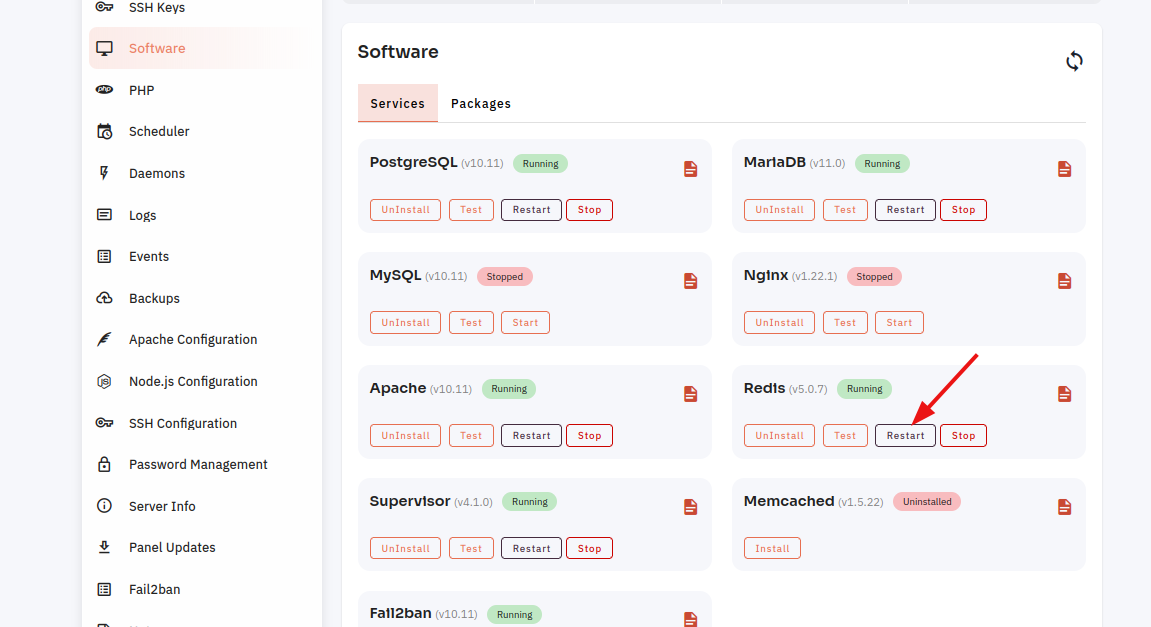
10. Open a dialog and click the restart button to restart the Redis software.
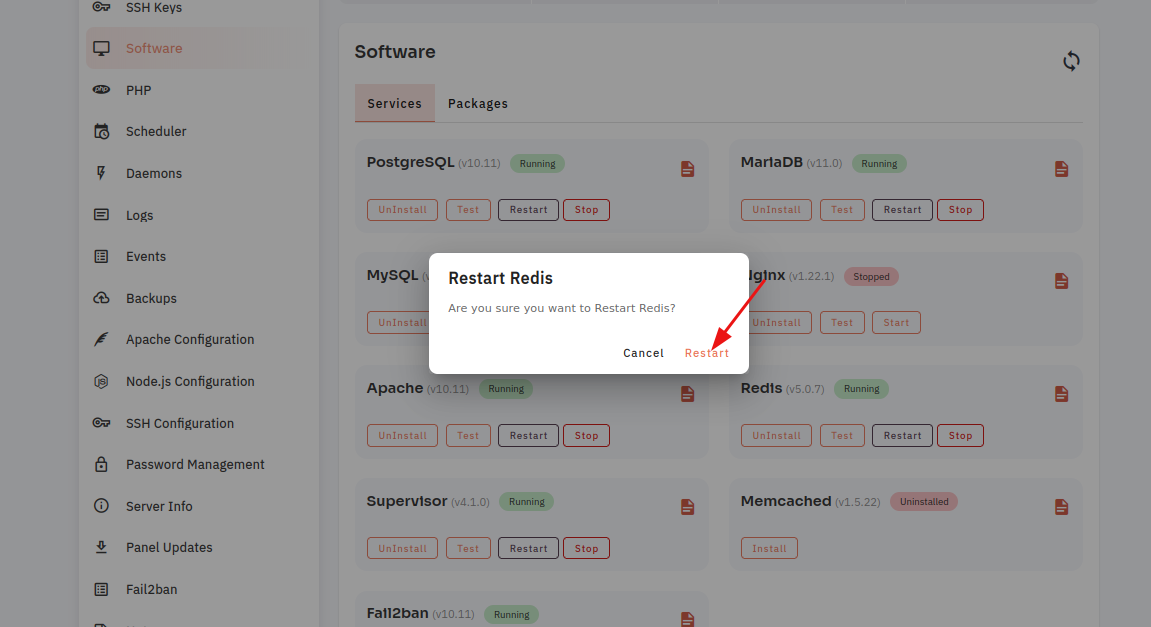
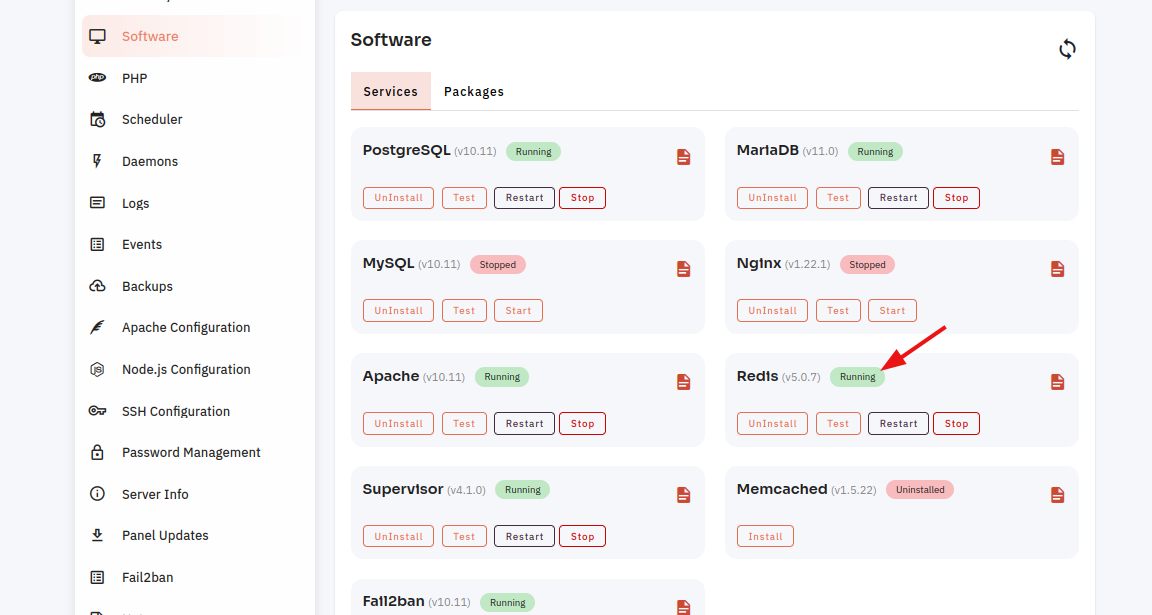
Here, you can see that Redis restarted successfully.
11. Click on the Event Button.
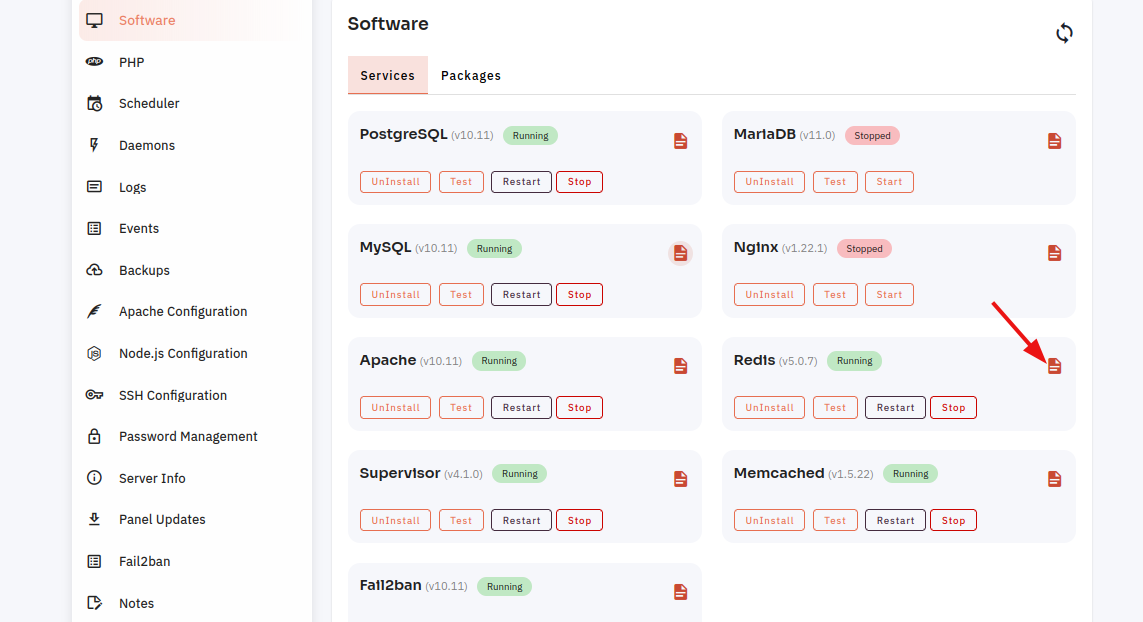
12. Click on the Eye Icon.
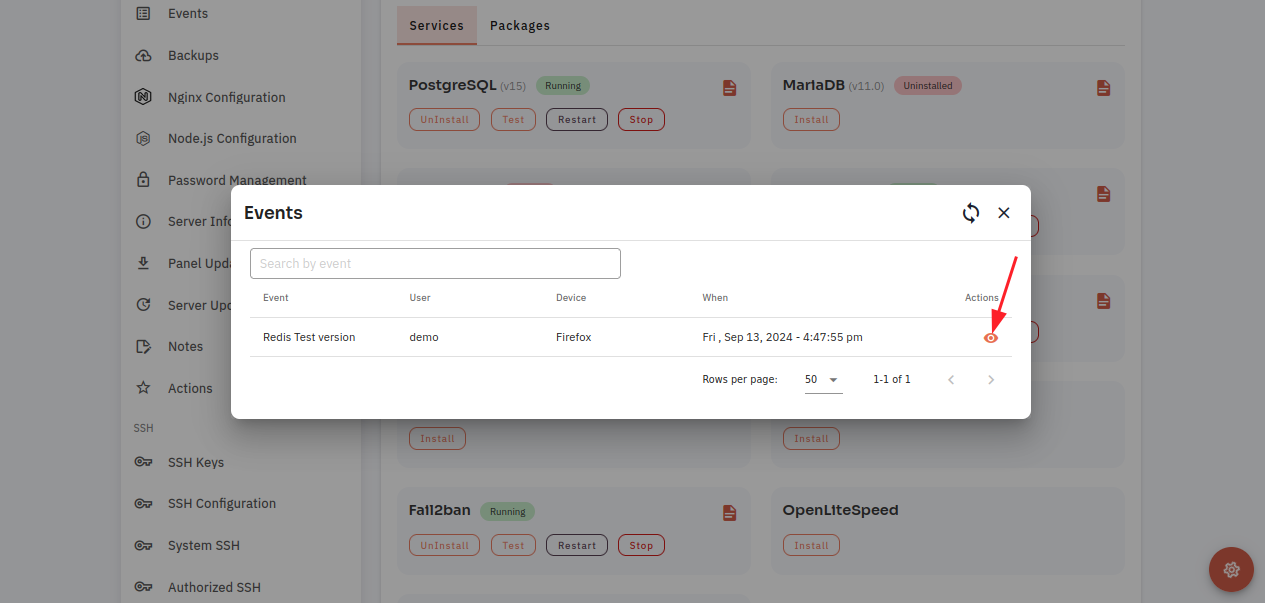
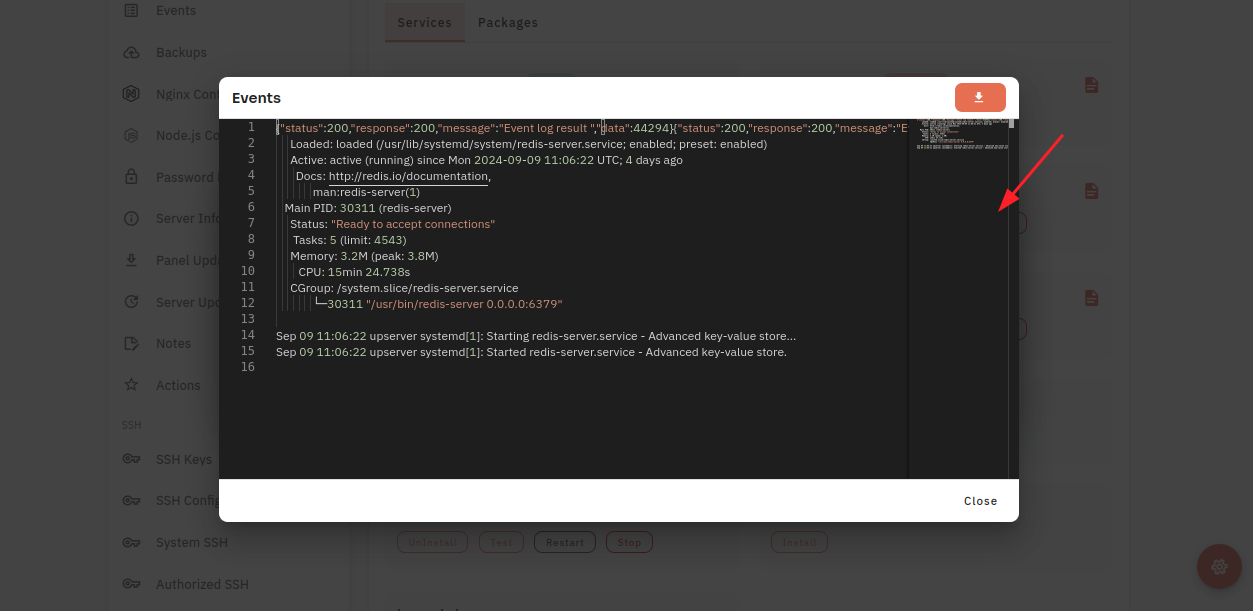
13. Click on the File Icon.
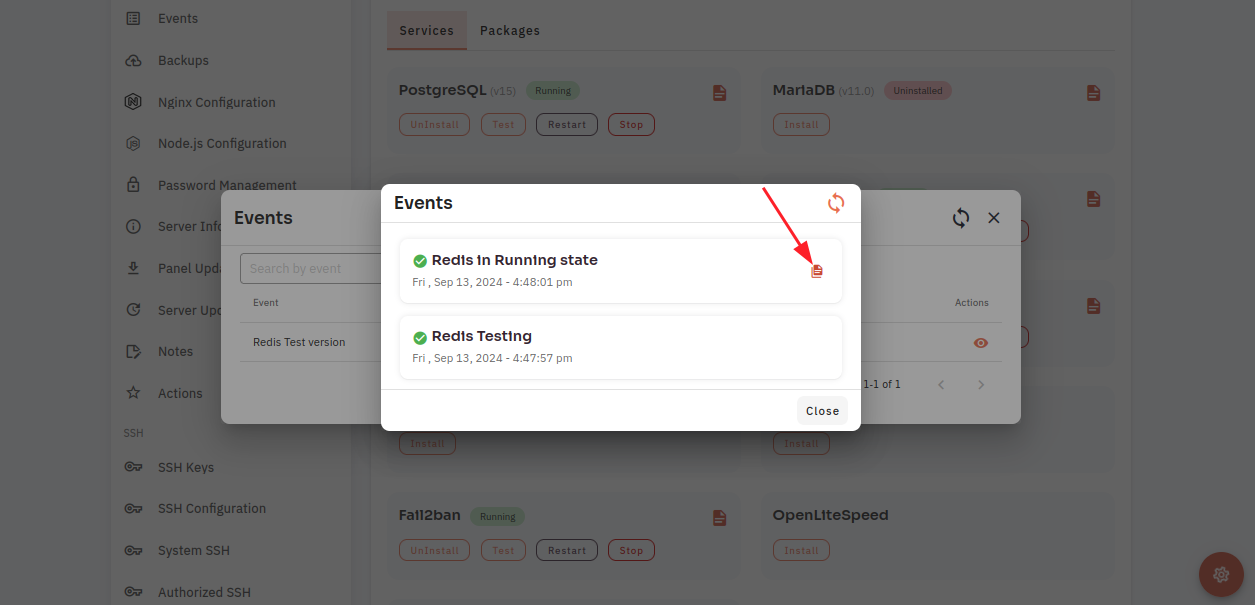
Here, you can see Redis Event data.
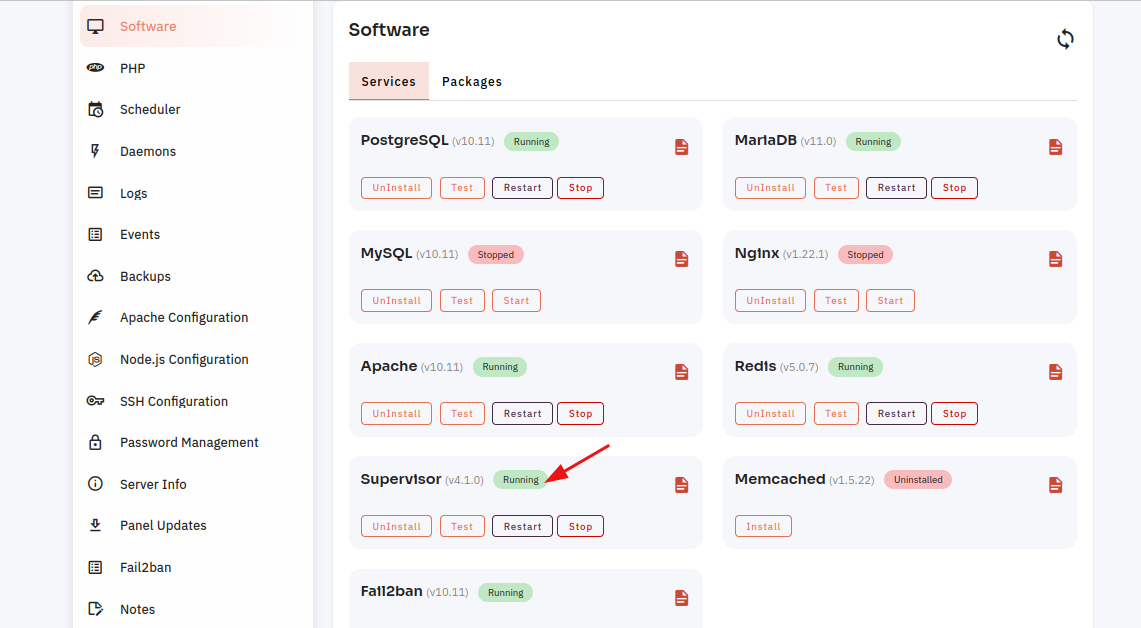
How to configure Supervisor Software through the cloudpanzer website?
Supervisor is a process control system used to manage and monitor processes on Unix-like operating systems. It's often used to control processes, restart them if they crash, and manage their lifecycle.
Follow the steps below to configure MariaDB Software.
1: Once logged in, look for a "Server" and click on it.
2. Select the Software Option.
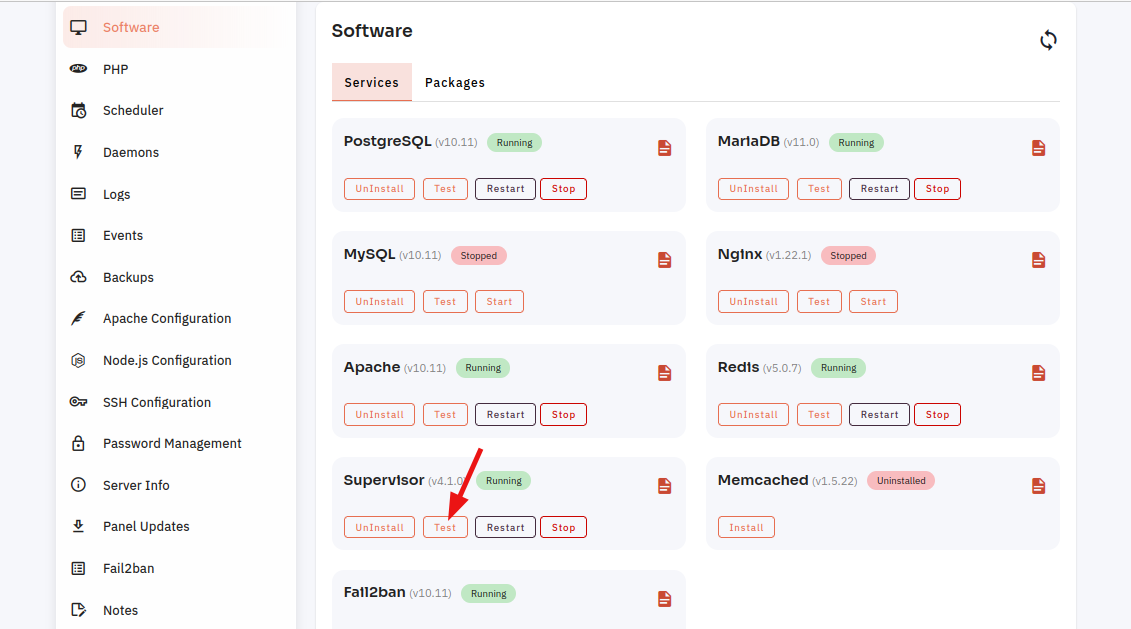
4. Open a dialog and click the "Text" button to test the Supervisor software.
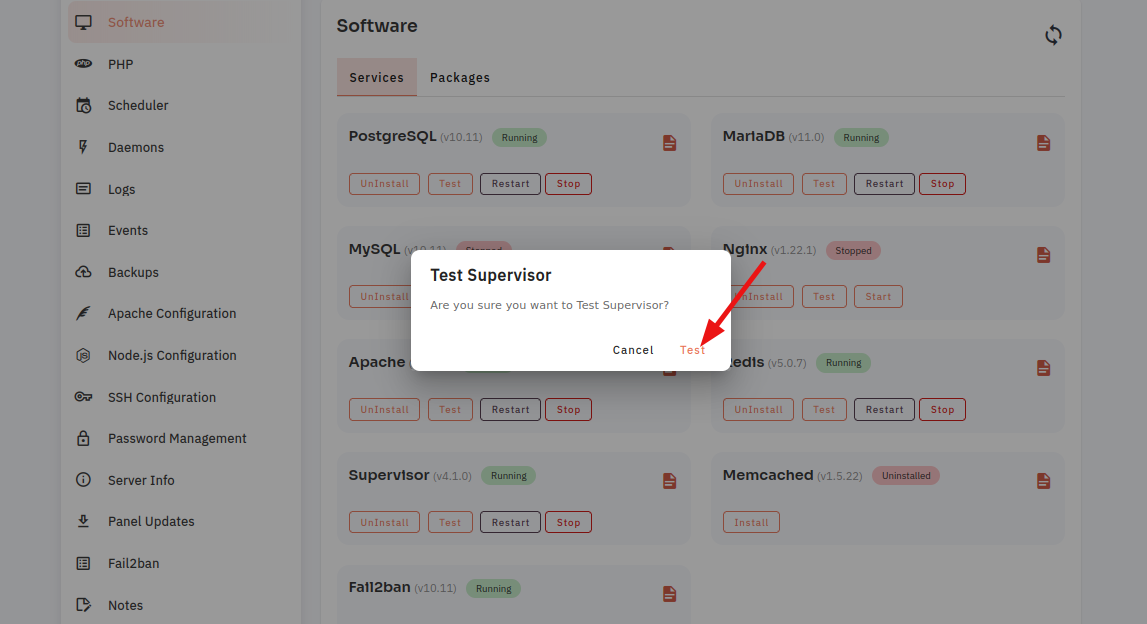
Here, you can see the Supervisor Test successfully.

5. Select the Start option.

6. Open a Dialog and Click on the Start Button to start Supervisor software.
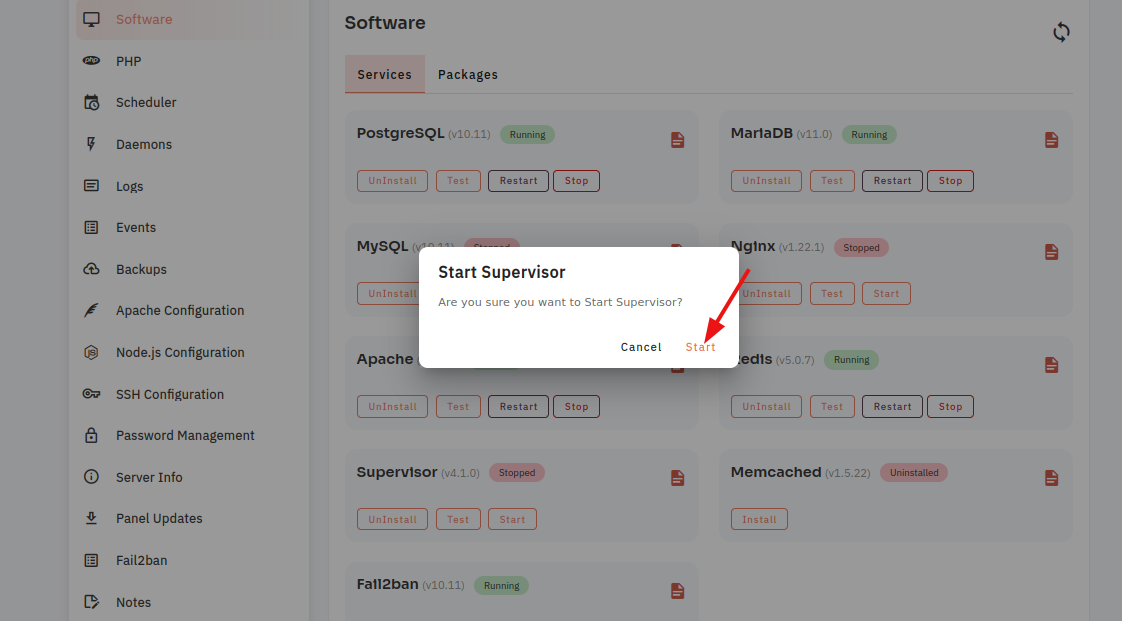
Here, you can see Supervisor started successfully.
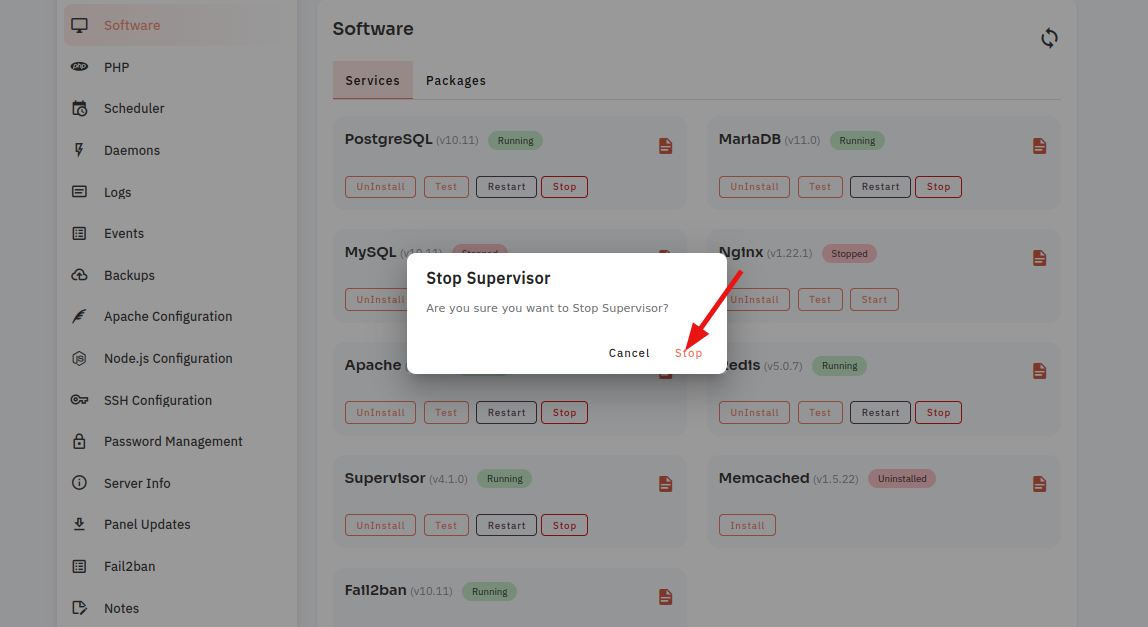
7. Select the Stop option.
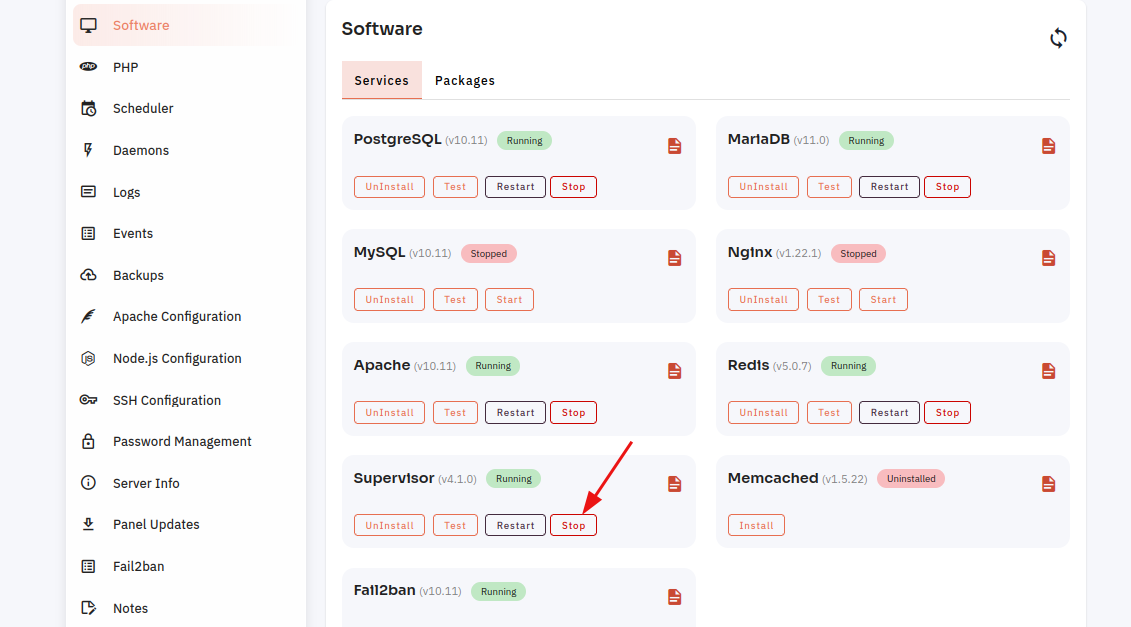
8. Open a dialog and click the stop button to stop the Supervisor software.
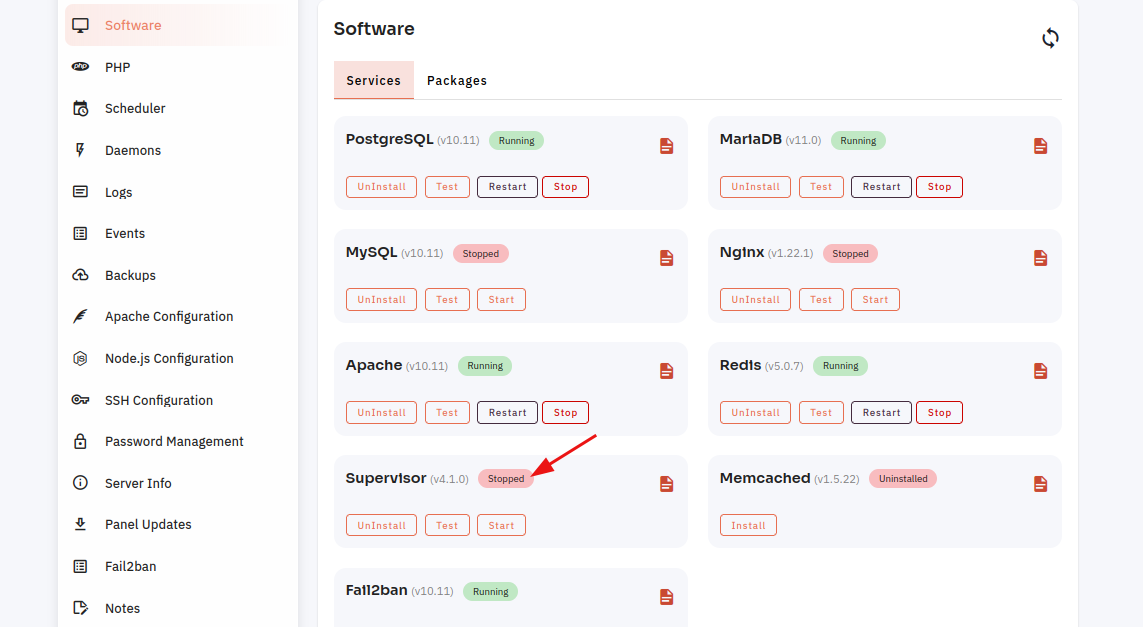
Here, you can see that Supervisor Stopped successfully.
9. Select the Restart Option.
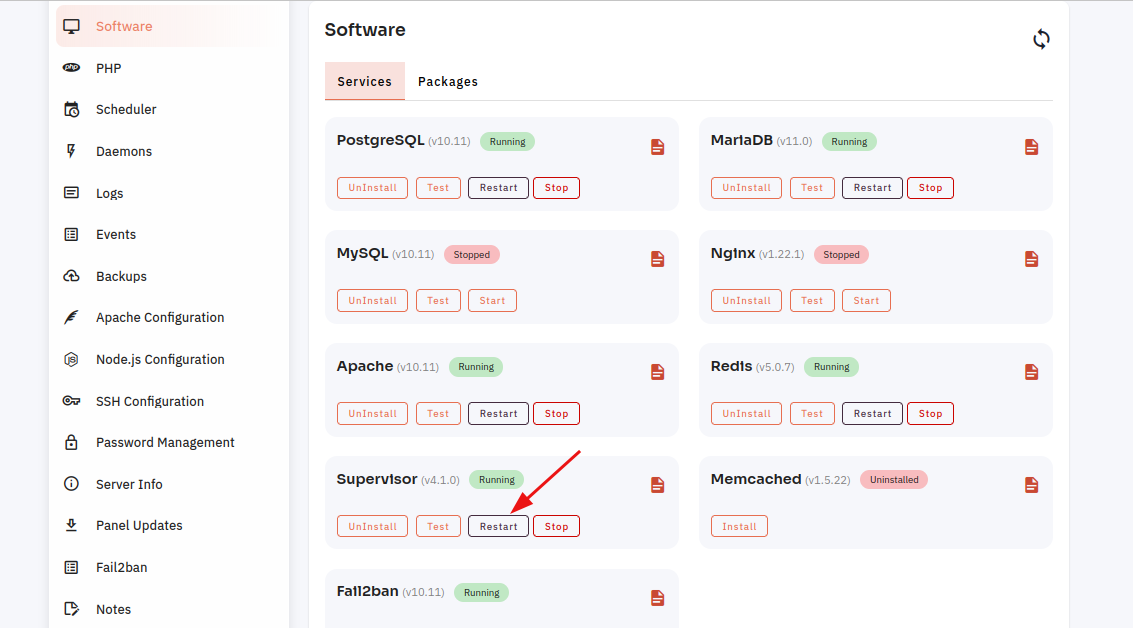
10. Open a dialog and click the restart button to restart the Supervisor software.
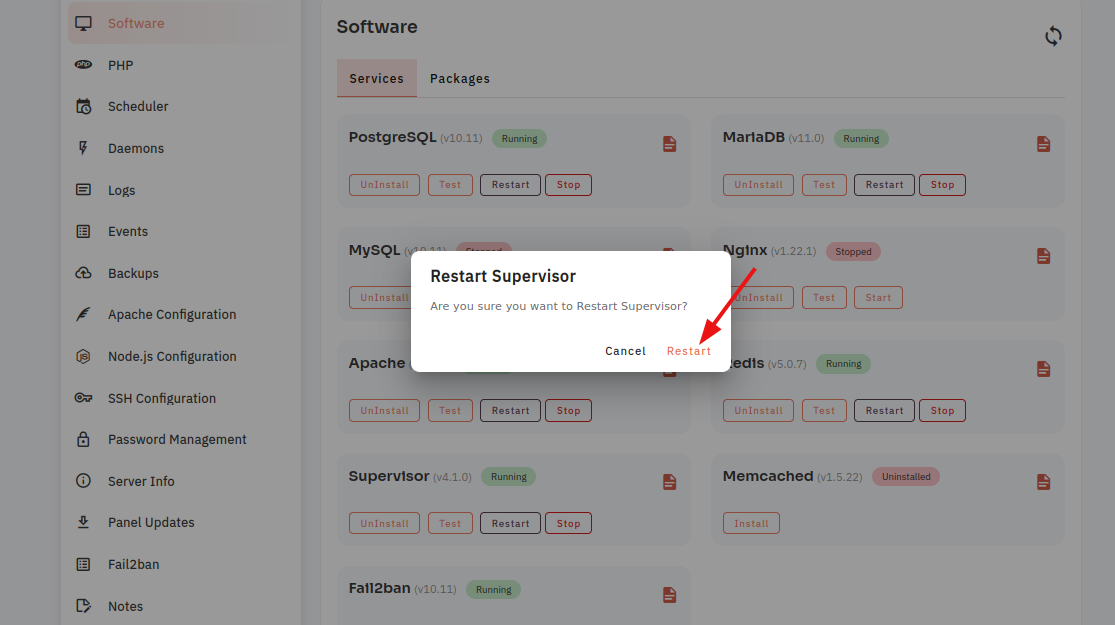
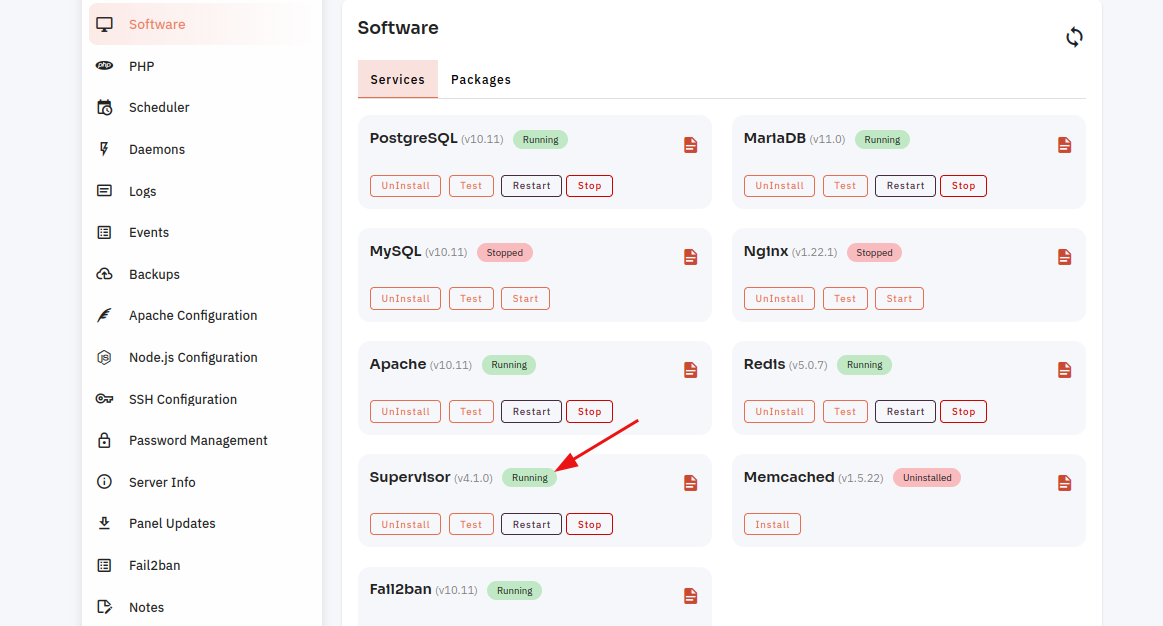
Here, you can see that the Supervisor restarted successfully.
11. Click on the Event Button.
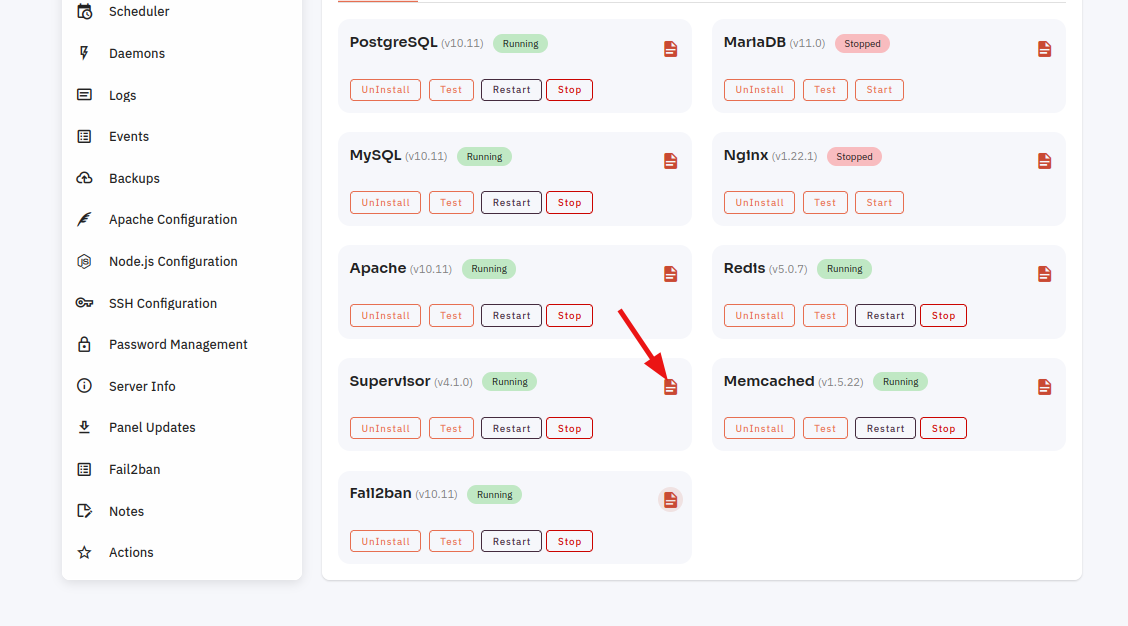
12. Click on the Event Button to Supervisor Event Data.
Here, you can see Supervisor Event data.
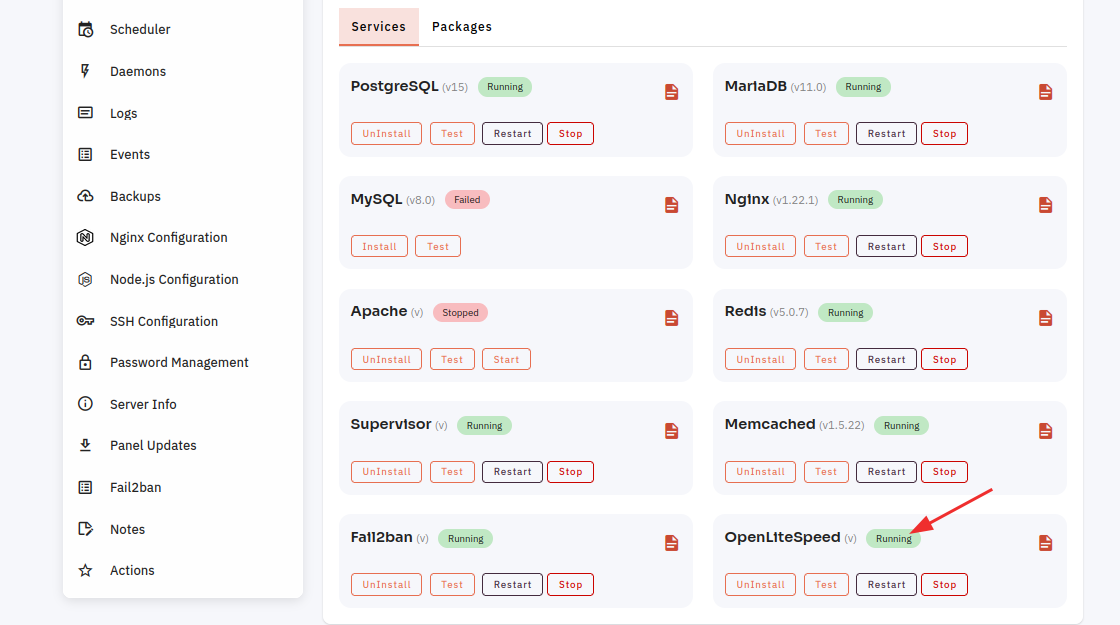
How to configure OpenLiteSpeed Software through the cloudpanzer website?
OpenLiteSpeed is a high-performance open-source web server that can be used to serve web content. To manage OpenLiteSpeed, you'll typically use the command-line interface (CLI) or a web-based control panel called the OpenLiteSpeed WebAdmin Console. Below are the basic commands and steps for starting, restarting, testing, and stopping OpenLiteSpeed.
Follow the steps below to configure OpenLiteSpeed Software.
1: Once logged in, look for a "Server" and click on it.

2. Select the Software Option.
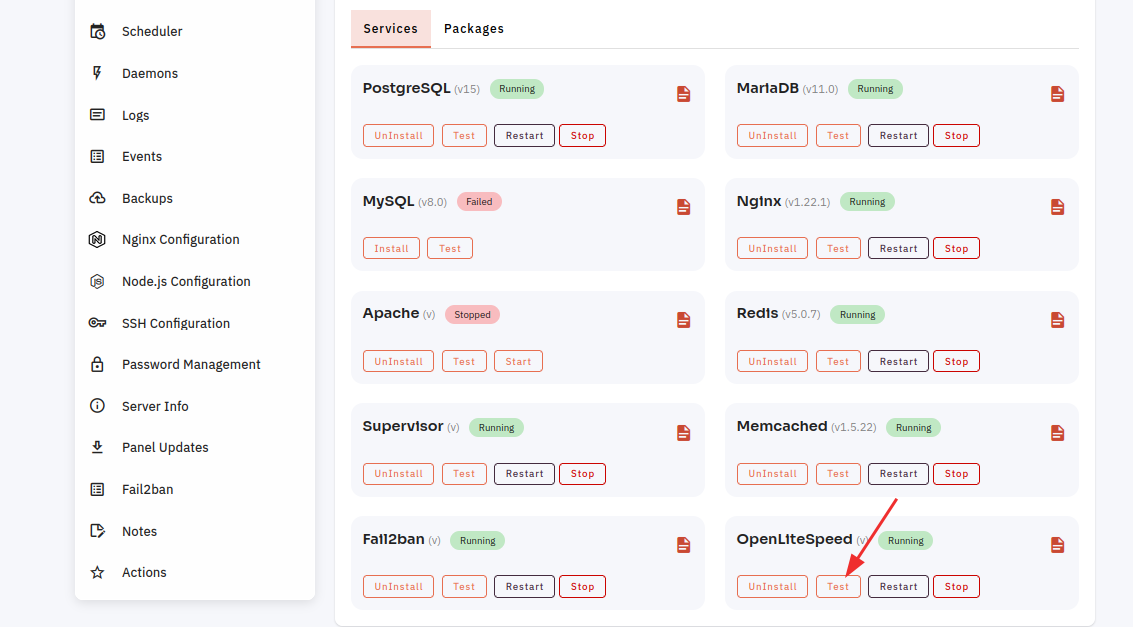
4. Open a dialog and click the "Text" button to test the OpenLiteSpeed software.

Here, you can see the OpenLiteSpeed Test successfully.
6. Open a Dialog and Click on the Start Button to start OpenLiteSpeed software.

Here, you can see Apache Started successfully.

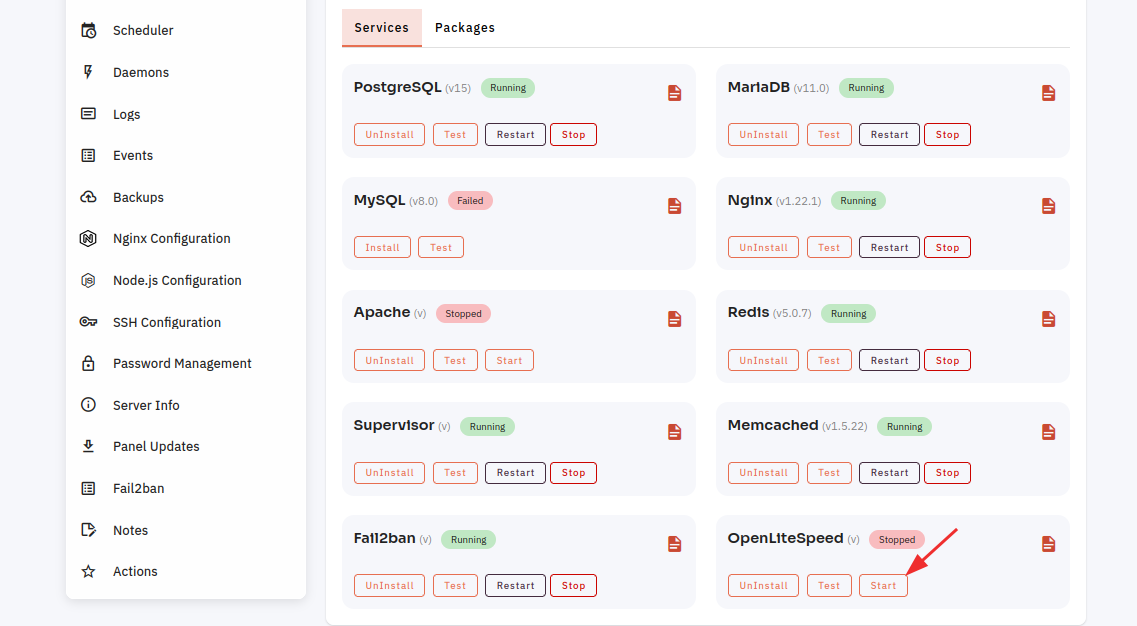
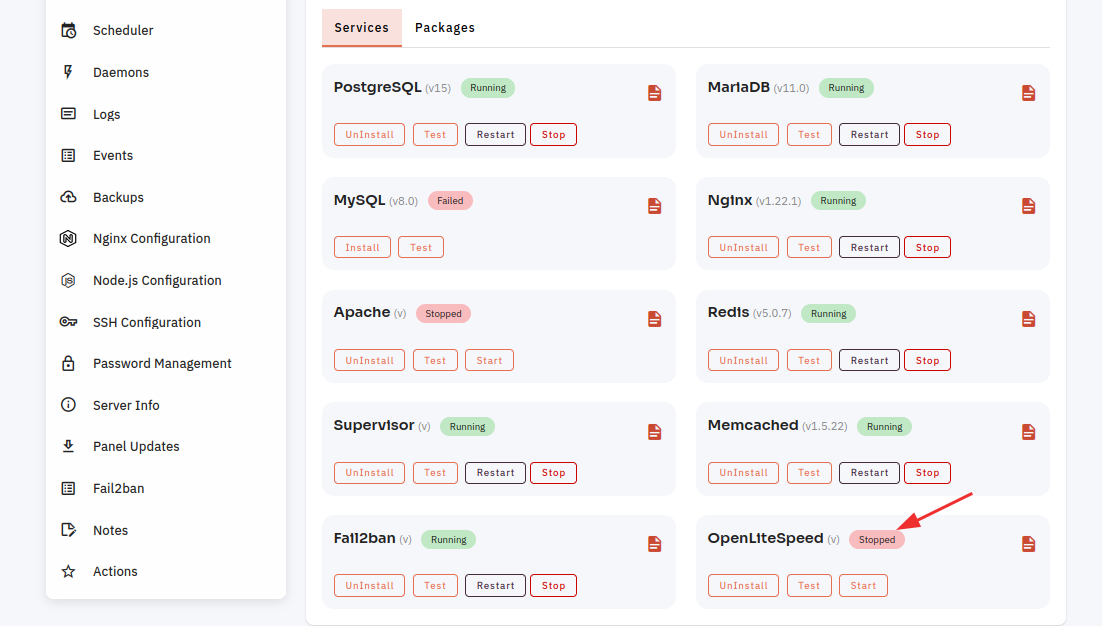
7. Select the Stop option.
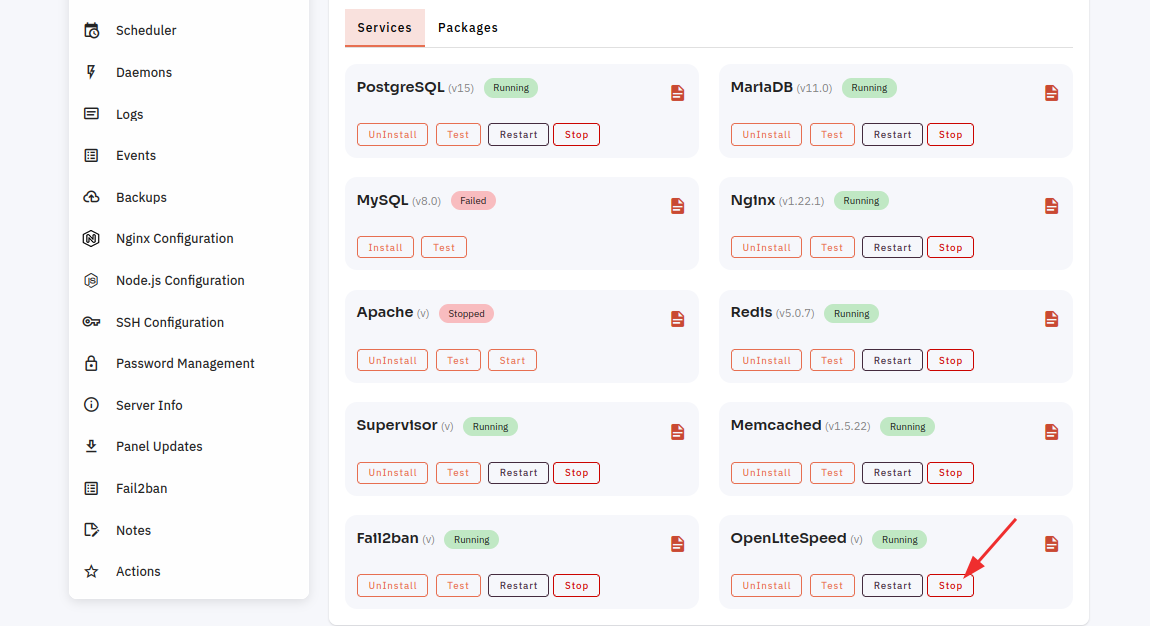
8. Open a dialog and click the stop button to stop the OpenLiteSpeed software.
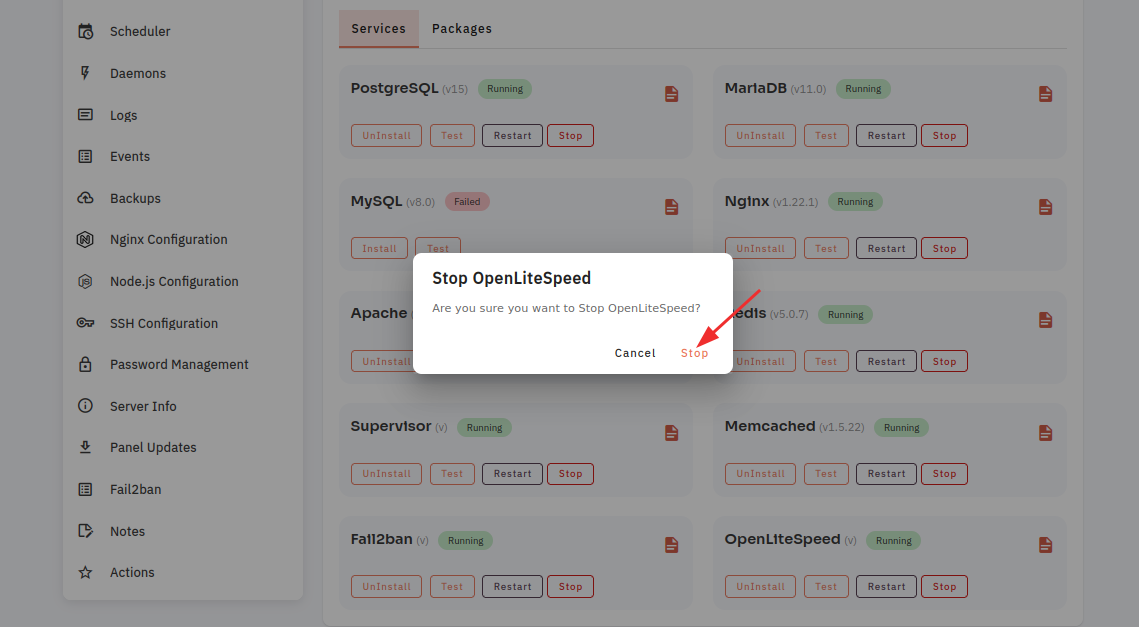
Here, you can see that OpenLiteSpeed Stopped successfully.
9. Select the Restart Option.
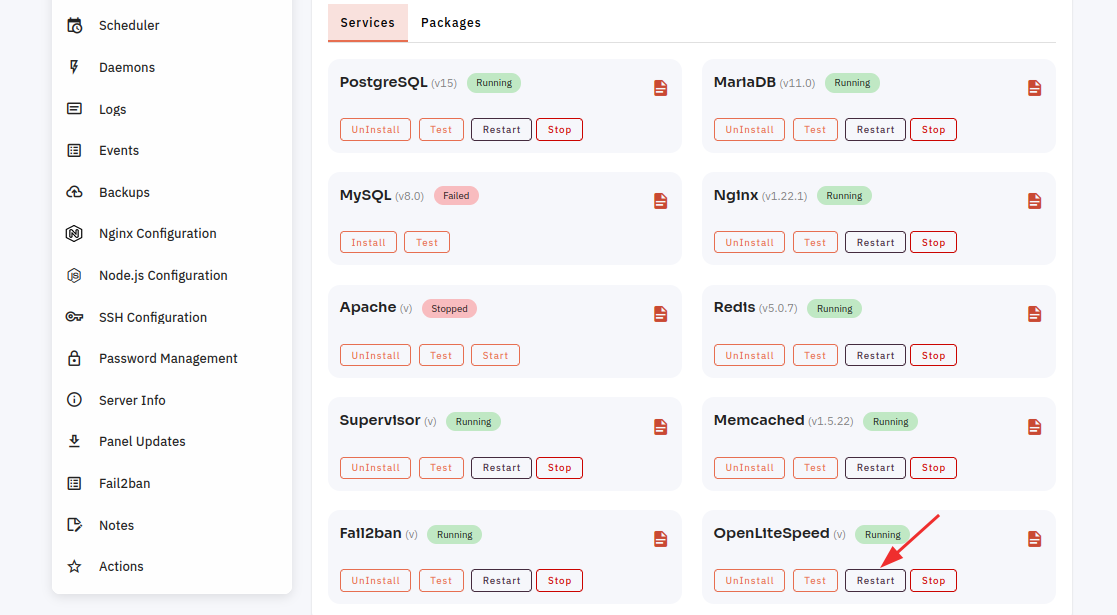
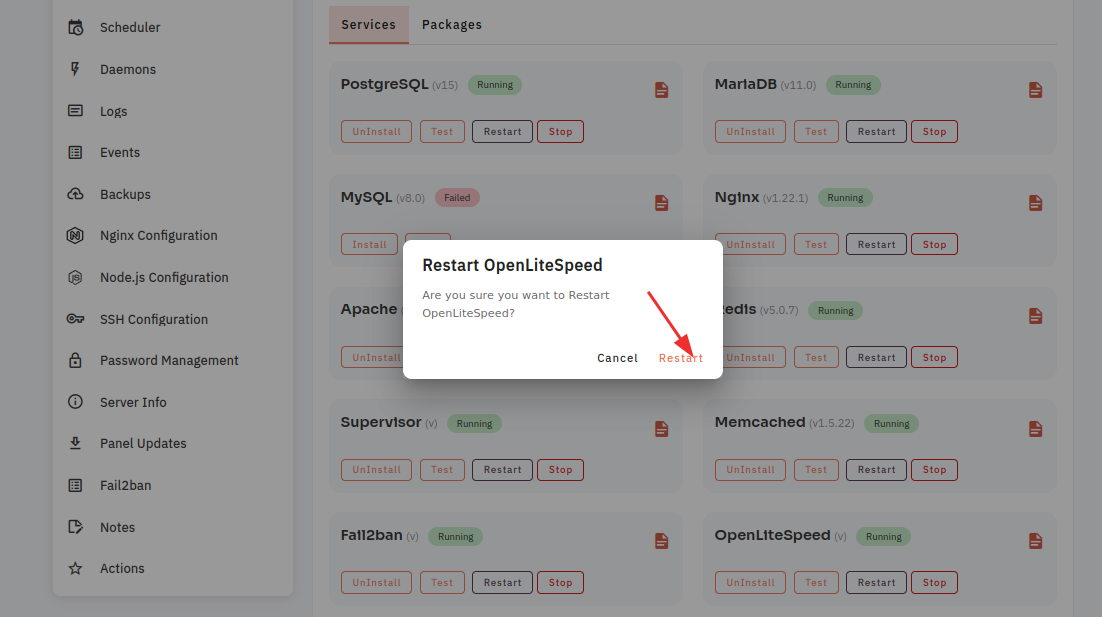
10. Open a dialog and click the restart button to restart the OpenLiteSpeed software.
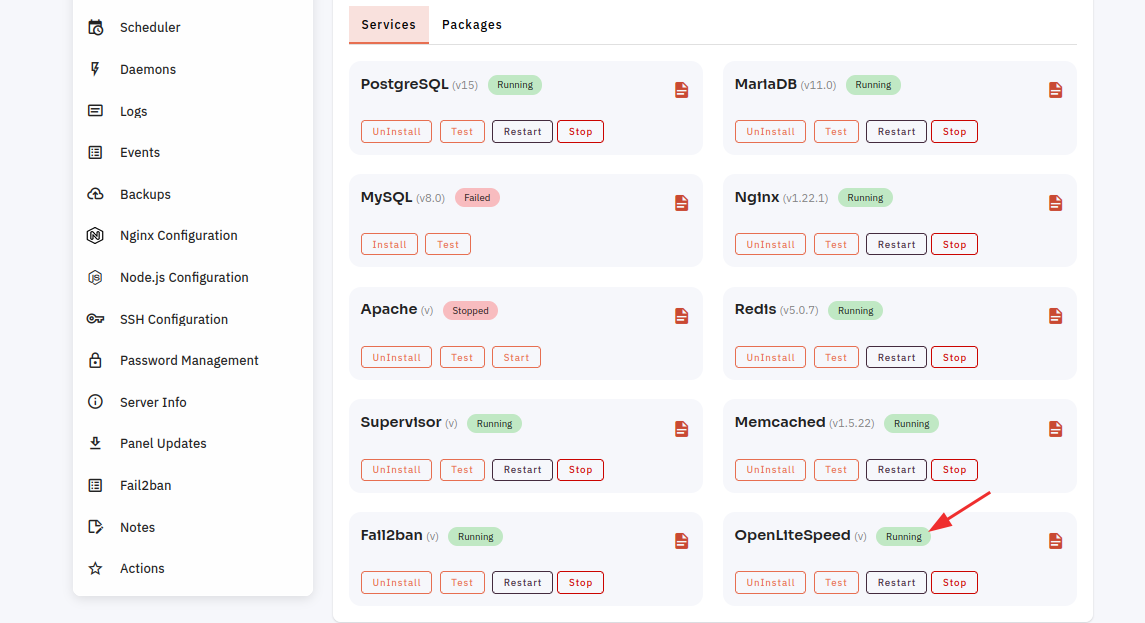
Here, you can see that OpenLiteSpeed restarted successfully.
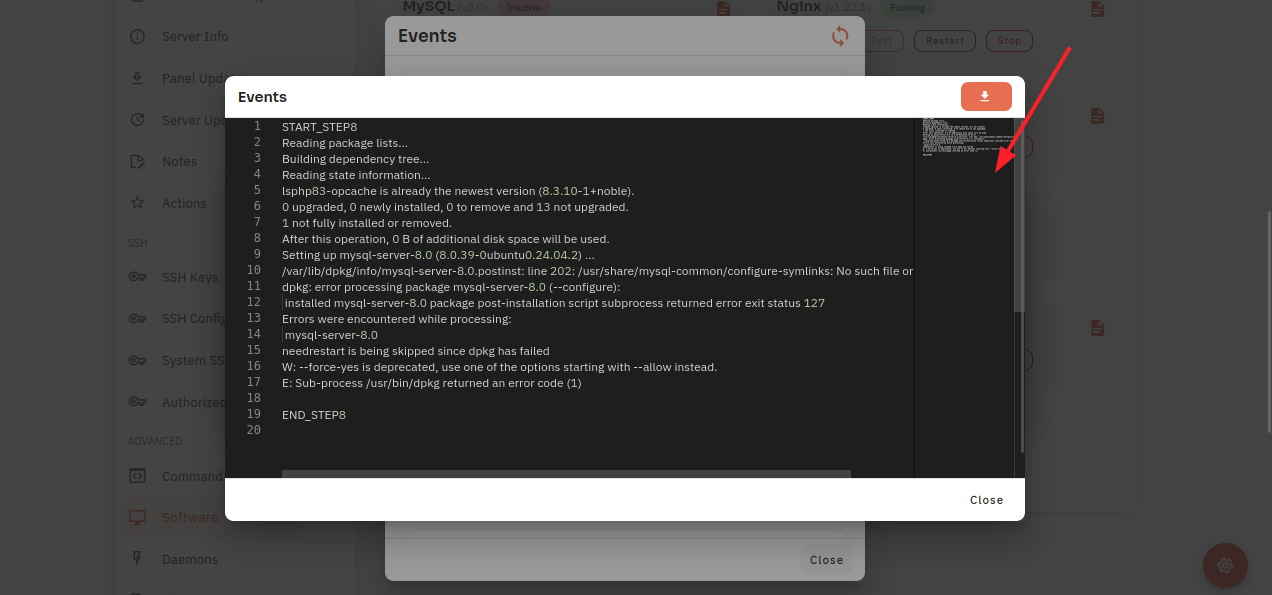
11. Click on the Event Button.
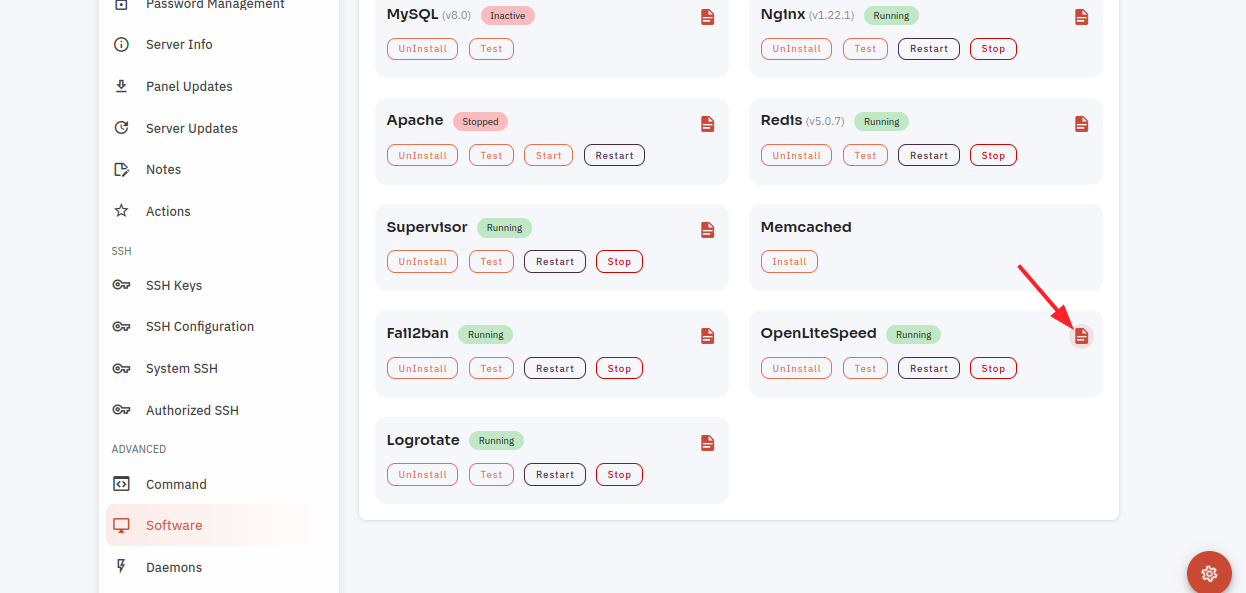
12. Click on the Eye Icon.
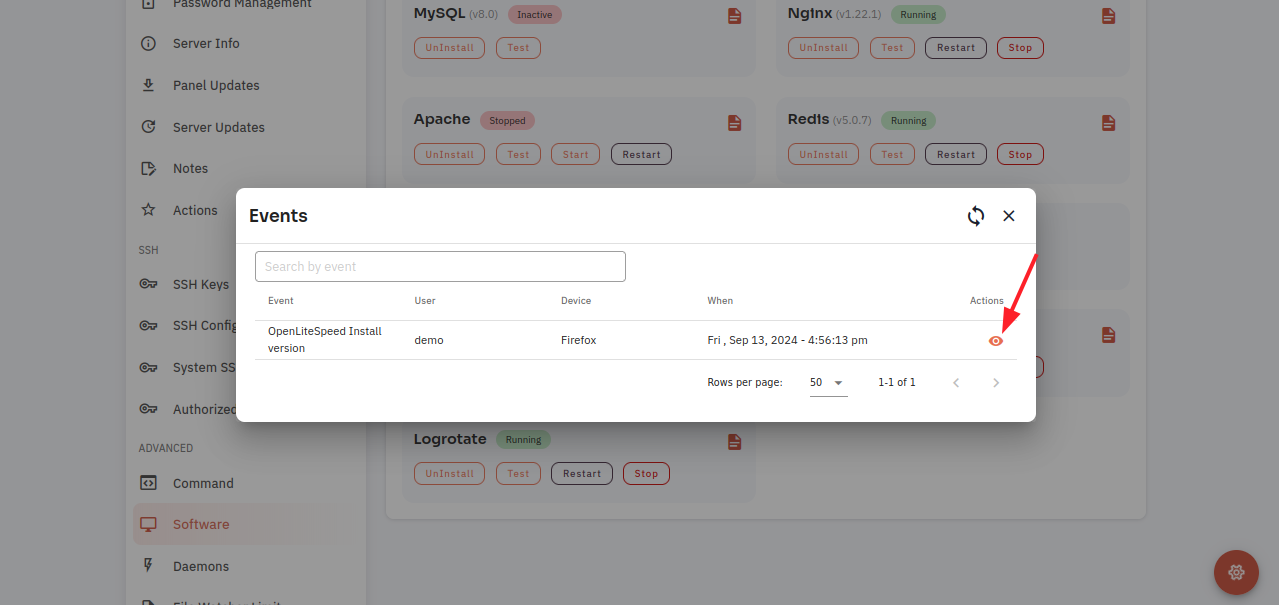
13. Click on the File Icon.
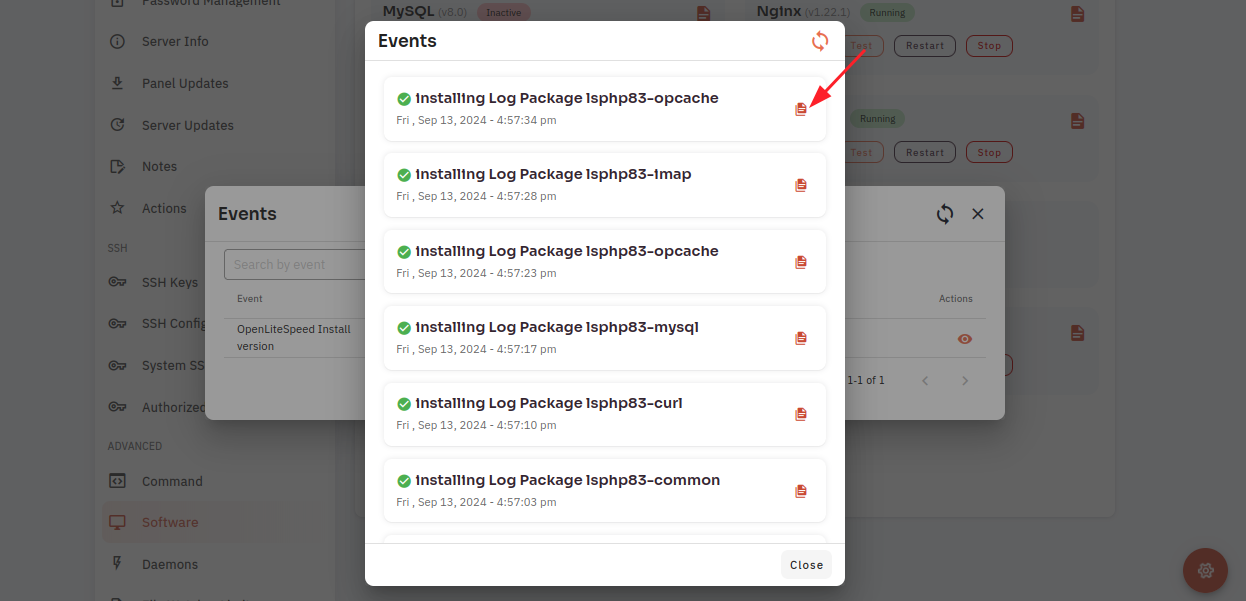
Here, you can see OpenLiteSpeed Event data.
How to configure Logrotate Software through the cloudpanzer website?
Logrotate is a utility in Unix-based operating systems used to manage and rotate log files. It helps prevent logs from consuming too much disk space by automatically archiving, compressing, deleting, or mailing old log files.
Follow the steps below to configure Logrotate Software.
1: Once logged in, look for a "Server" and click on it.
2. Select the Software Option.

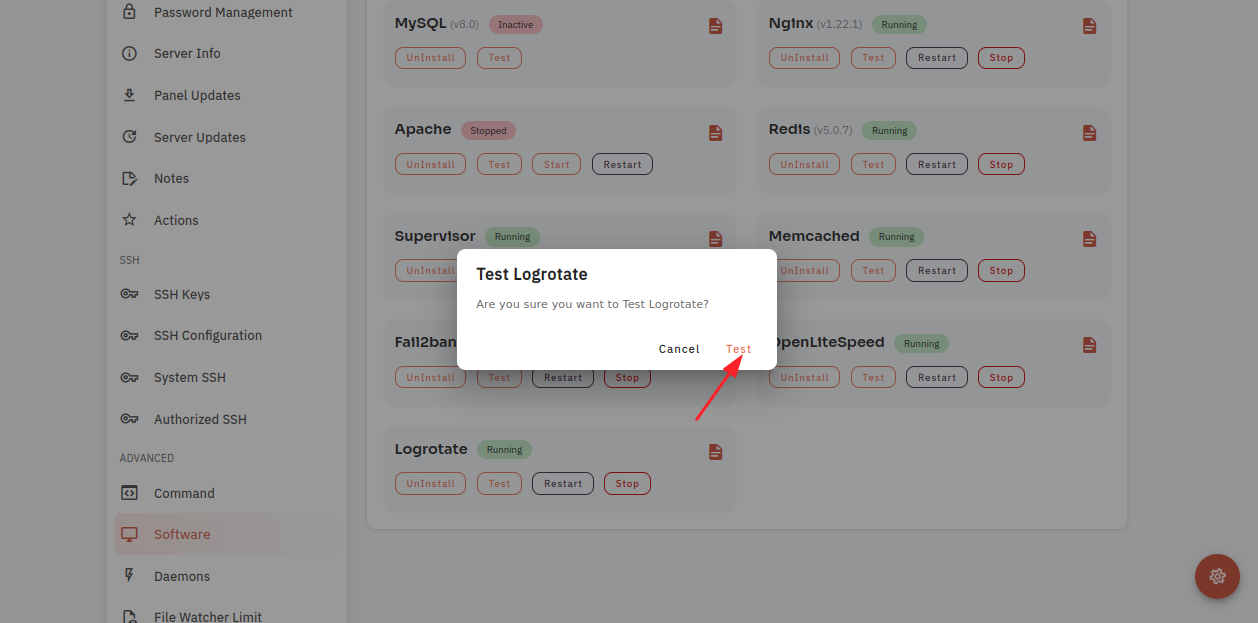
4. Open a dialog and click the "Text" button to test the logrotate software.
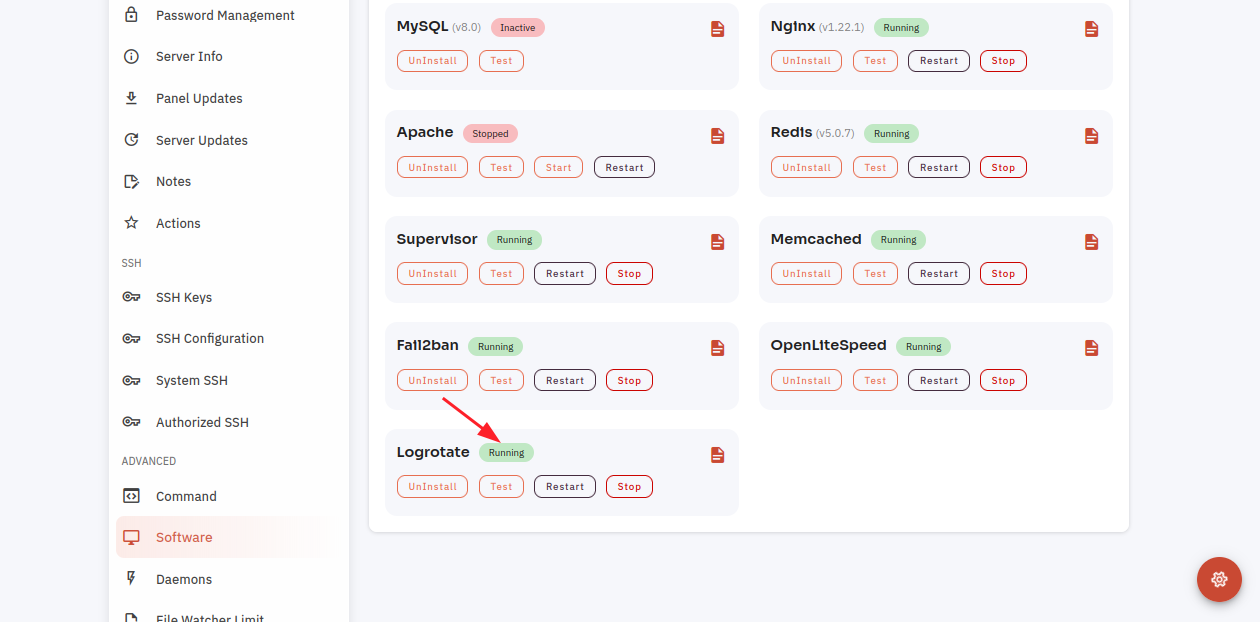
Here, you can see the Logrotate Test successfully.
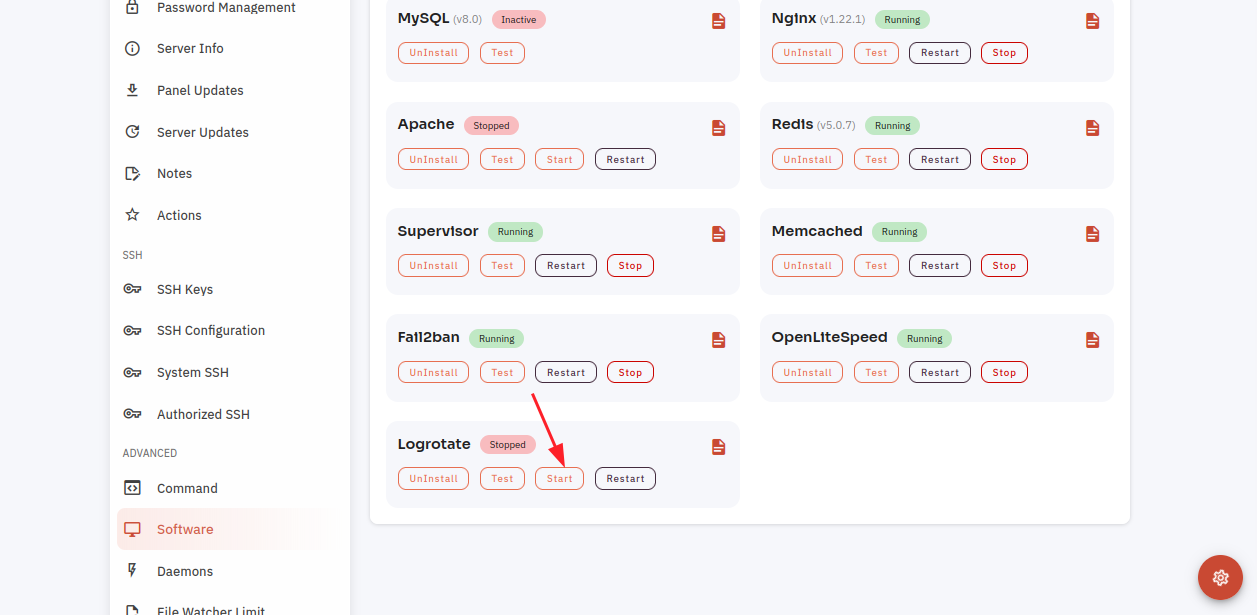
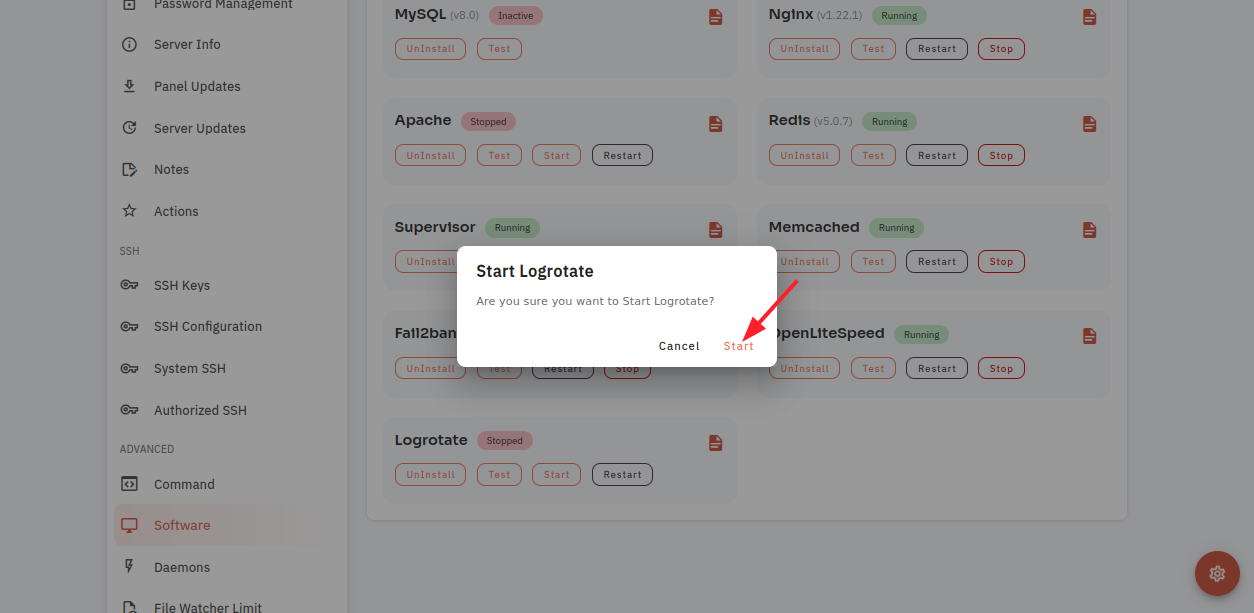
6. Open a Dialog and Click on the Start Button to start Logrotate software.
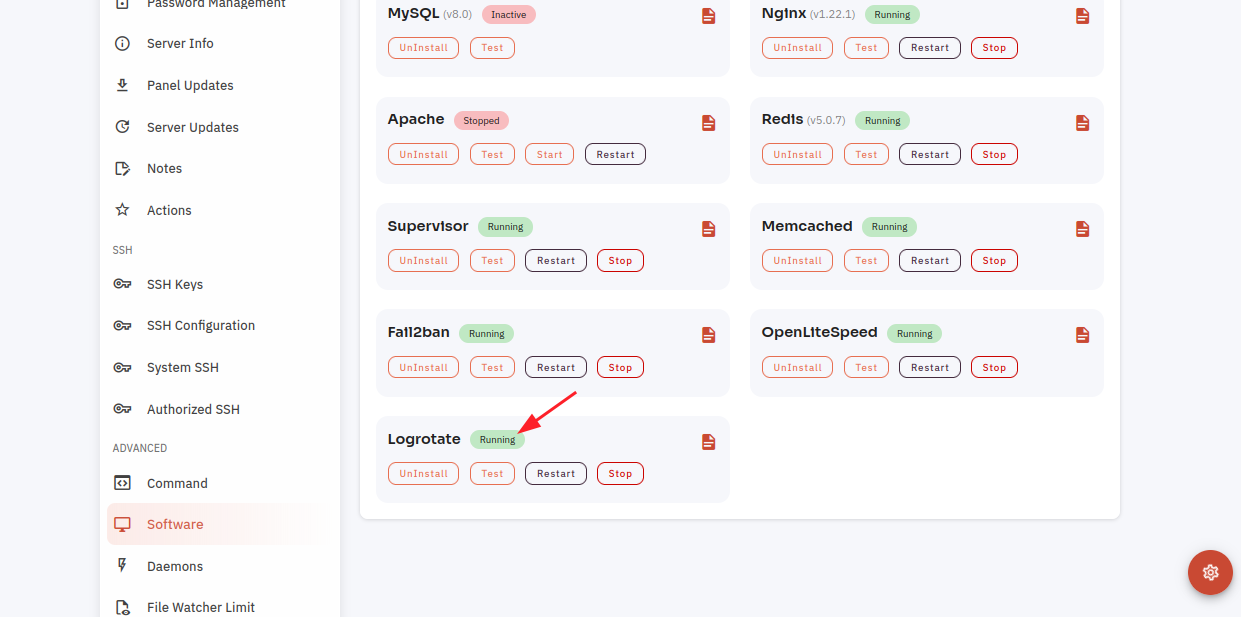
Here, you can see that logrotate started successfully.
7. Select the Stop option.
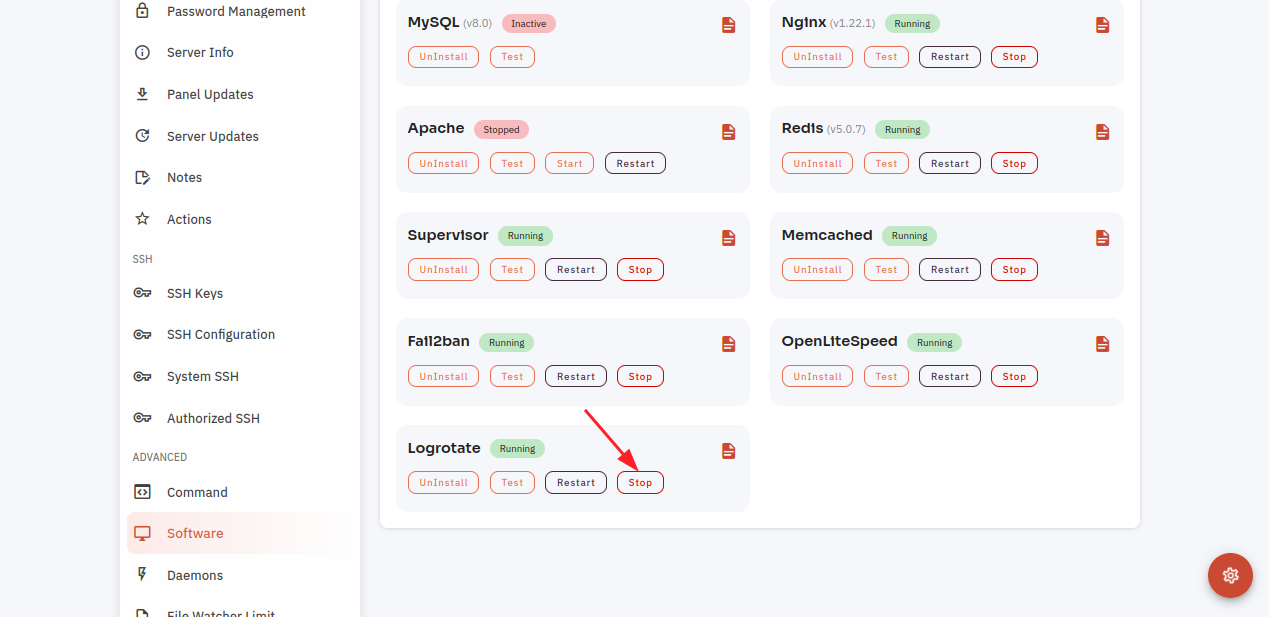
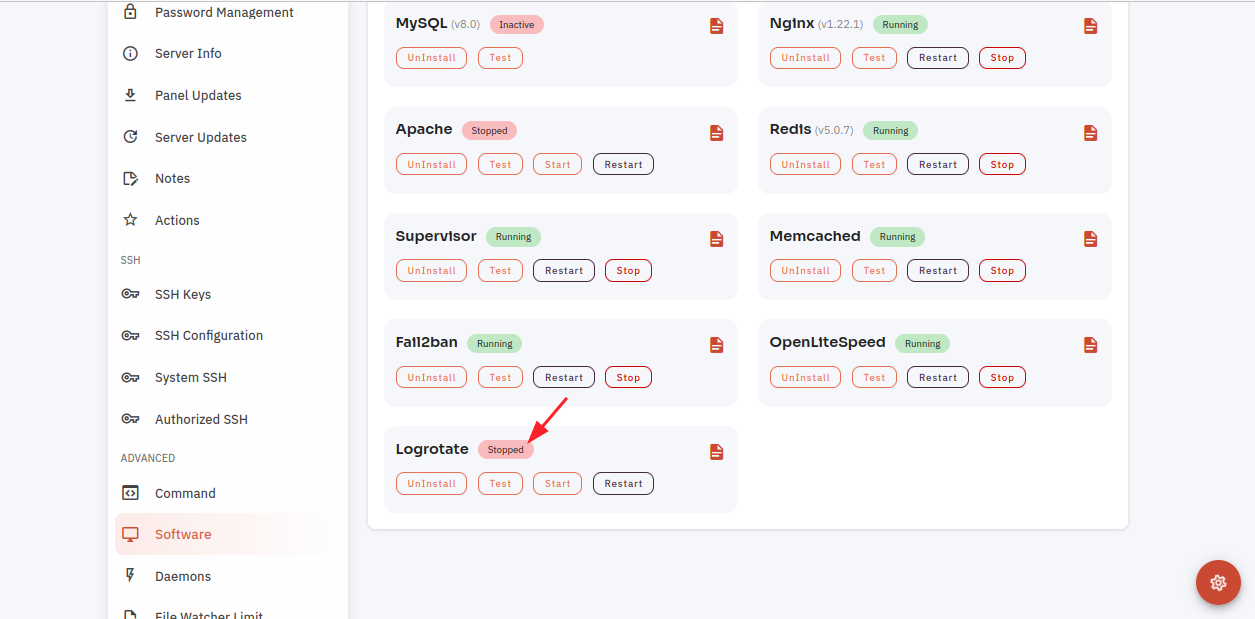
8. Open a dialog and click the stop button to stop the log rotate software.
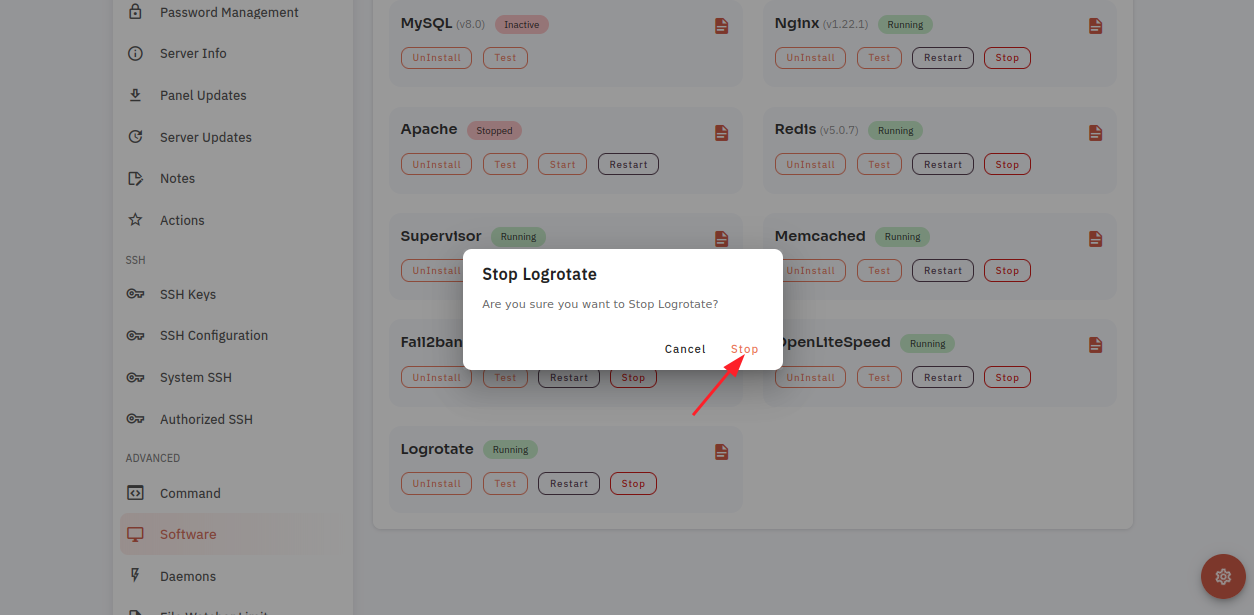
Here, you can see that the logrotate Stopped successfully.
9. Select the Restart Option.
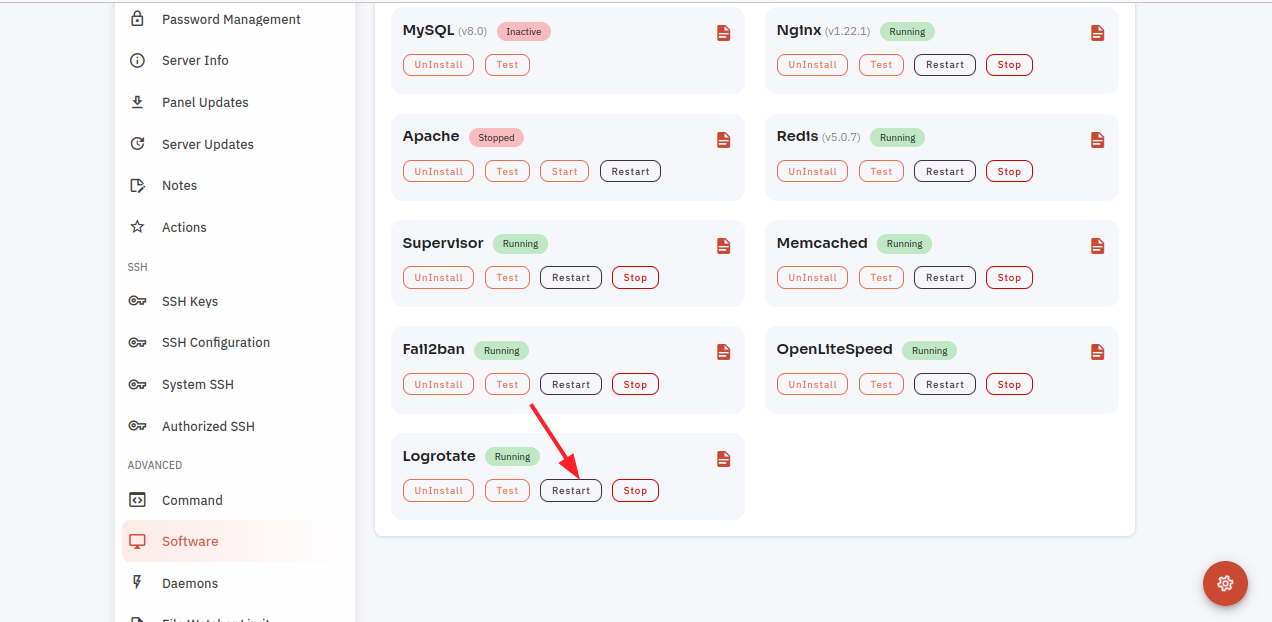
10. Open a dialog and click the restart button to restart the logrotate software.

Here, you can see that logrotate restarted successfully.

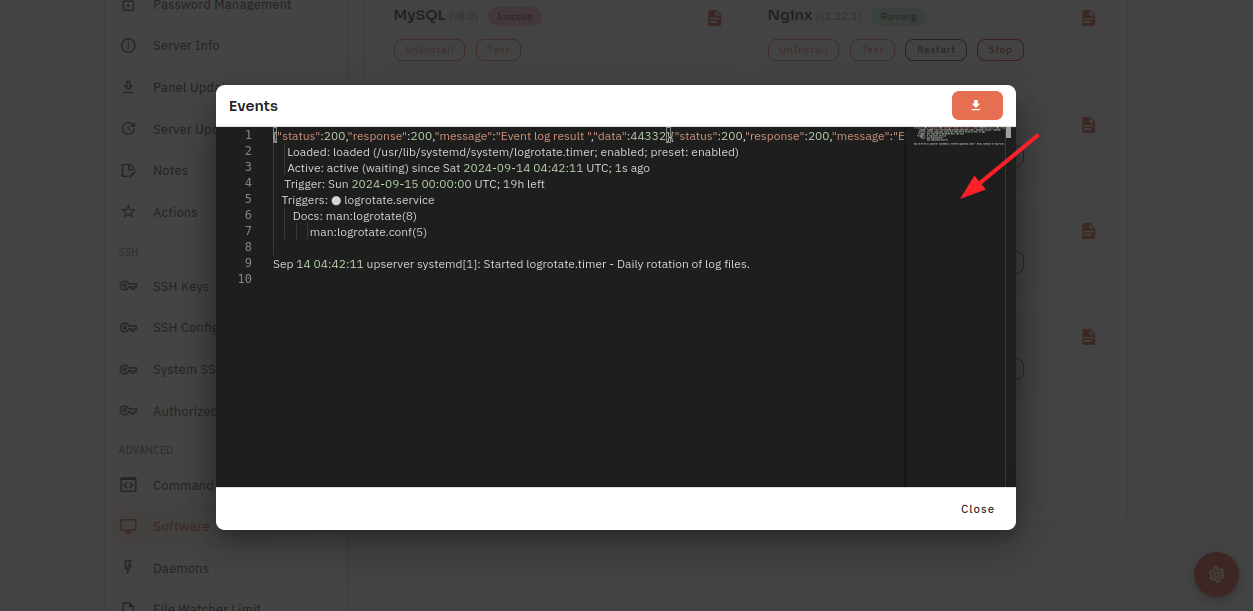
11. Click on the Event Button.
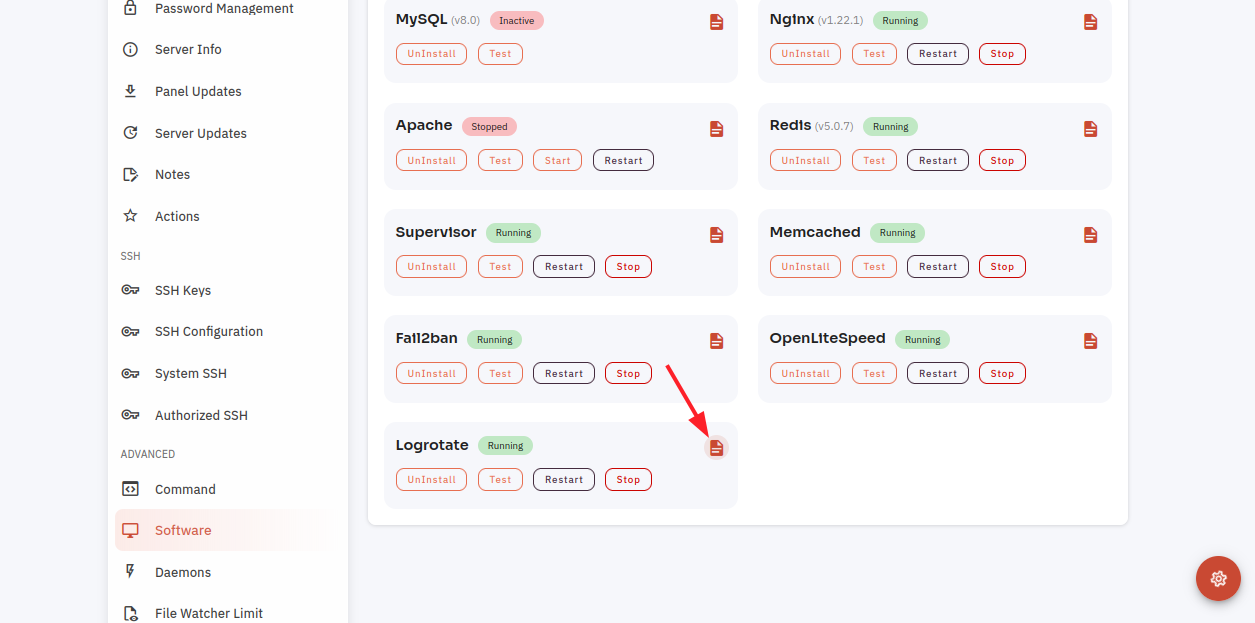
12. Click on the Eye icon.
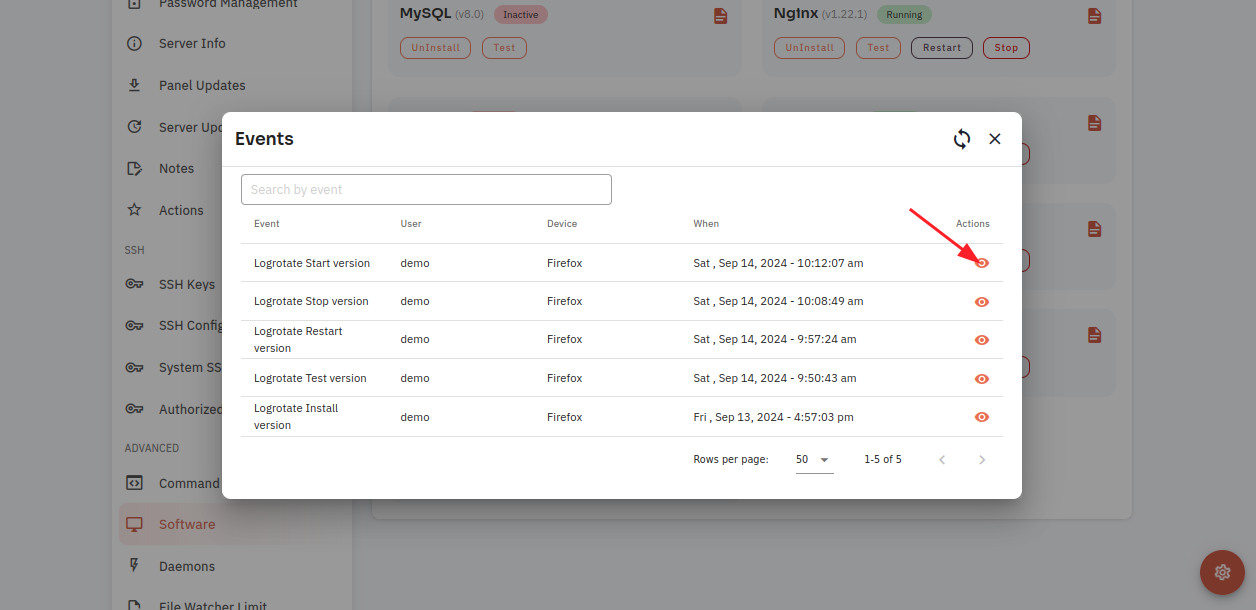
13. Click on the File icon.
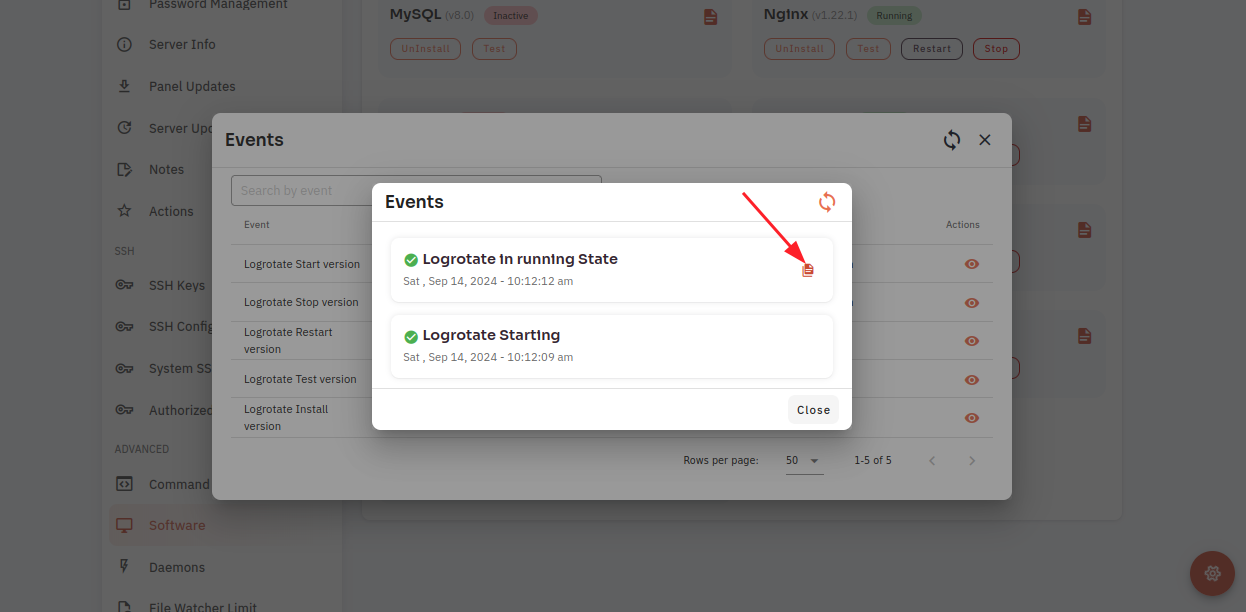
Here, you can see Logrotate Event data.