How to configure Apache Software through the cloudpanzer mobile application?
Follow the steps below to configure Apache Software.
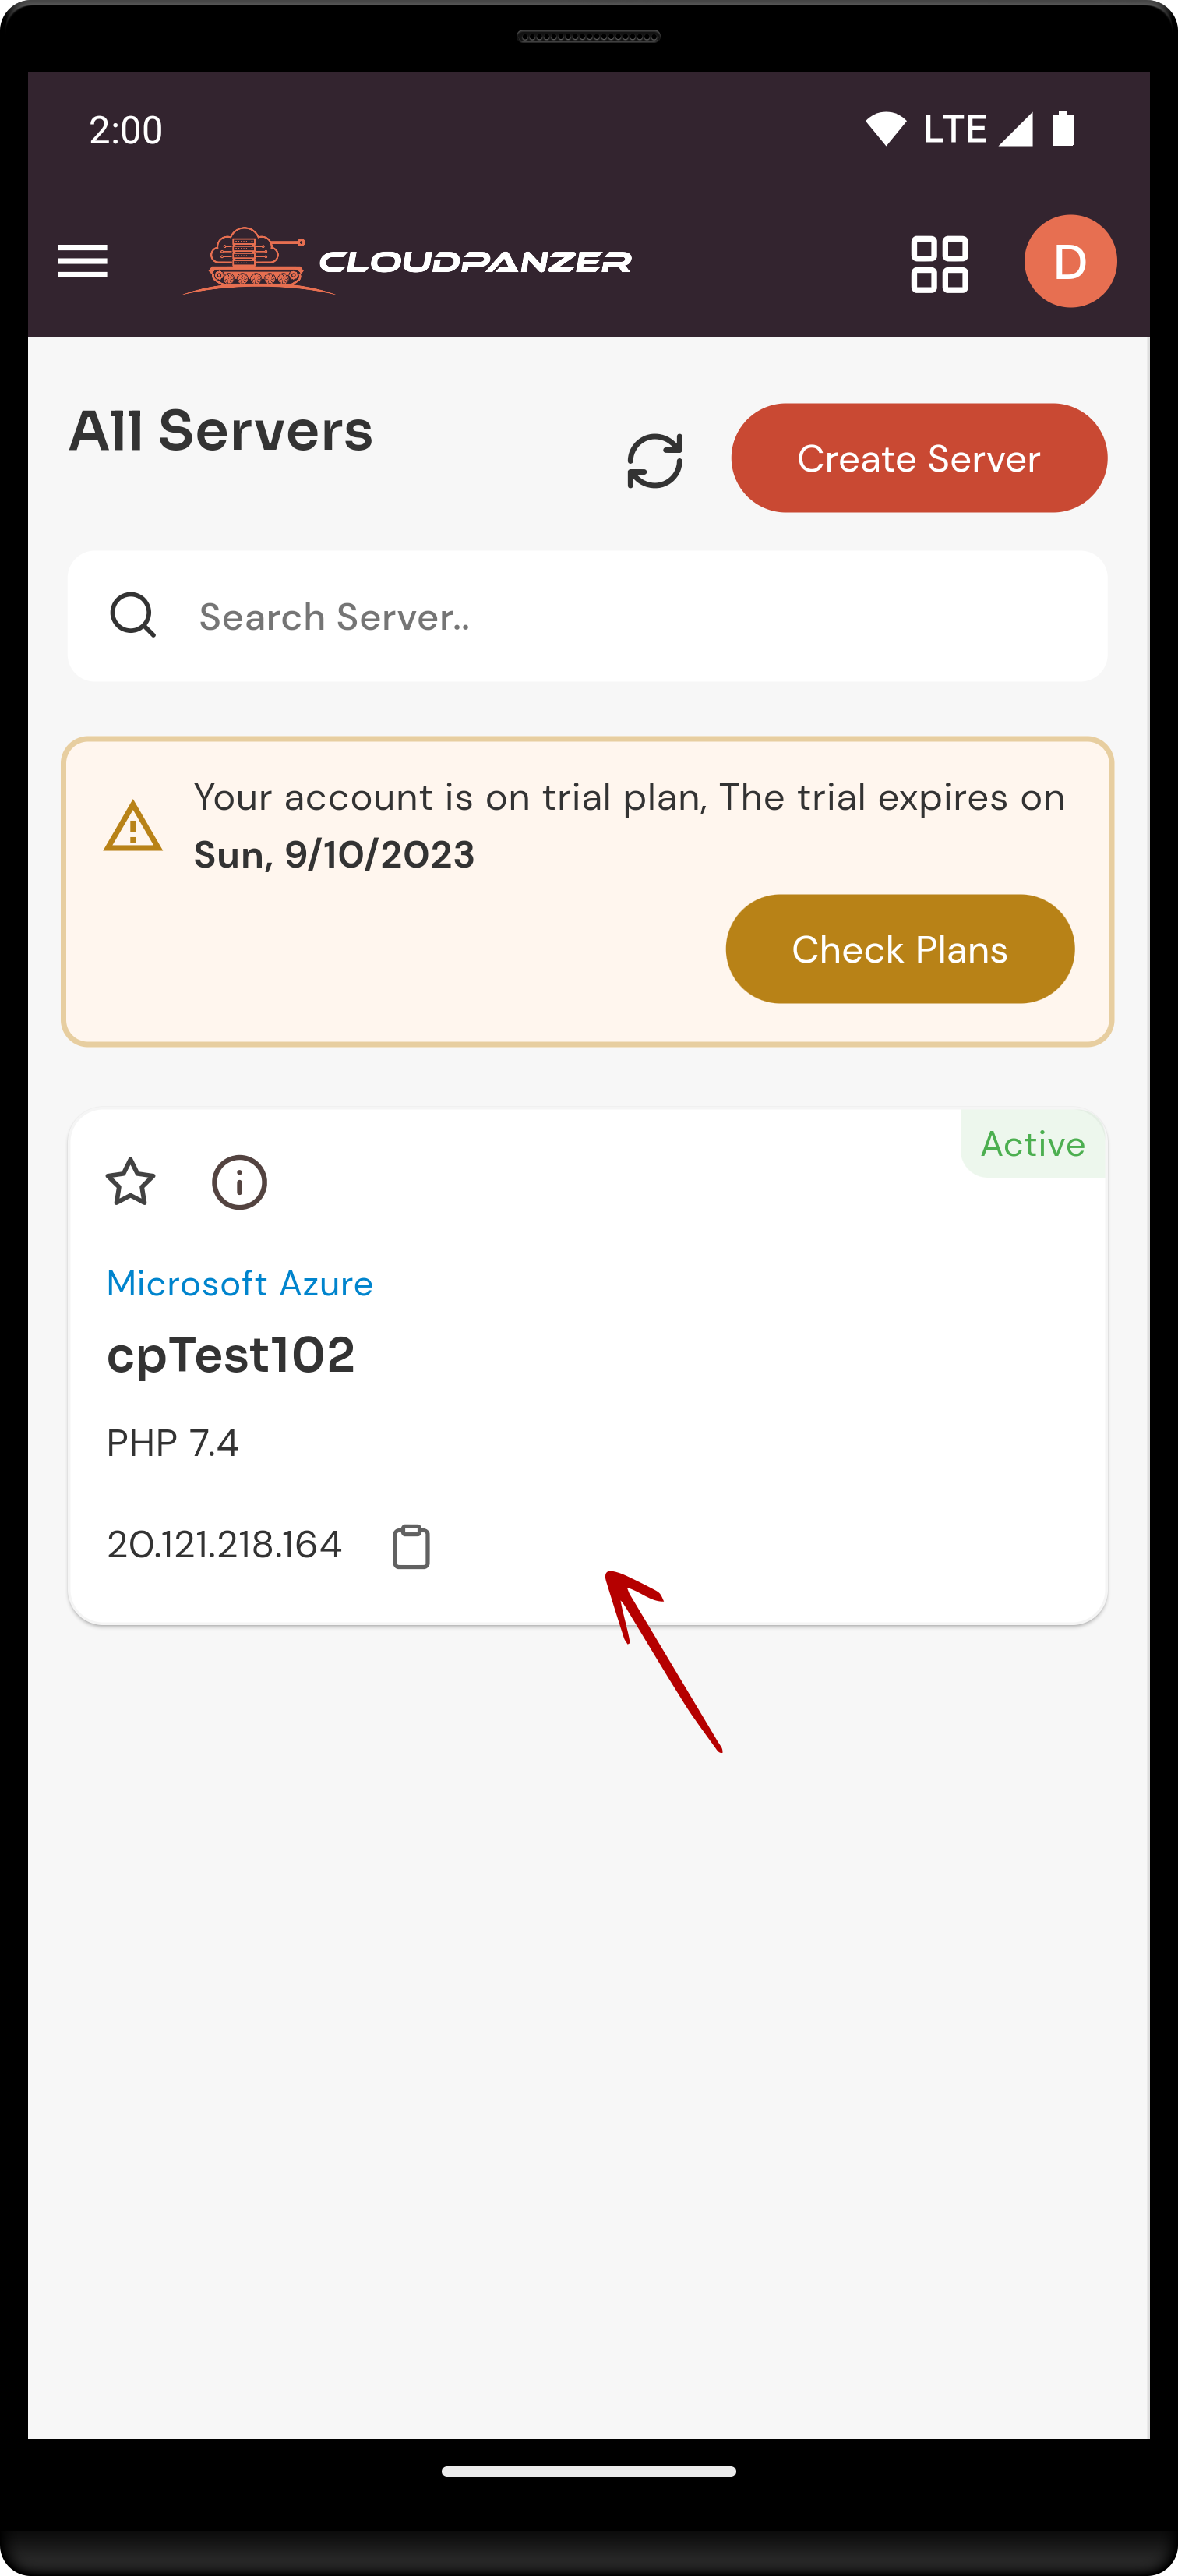
1: Once logged in, look for a "Server" and click on it.
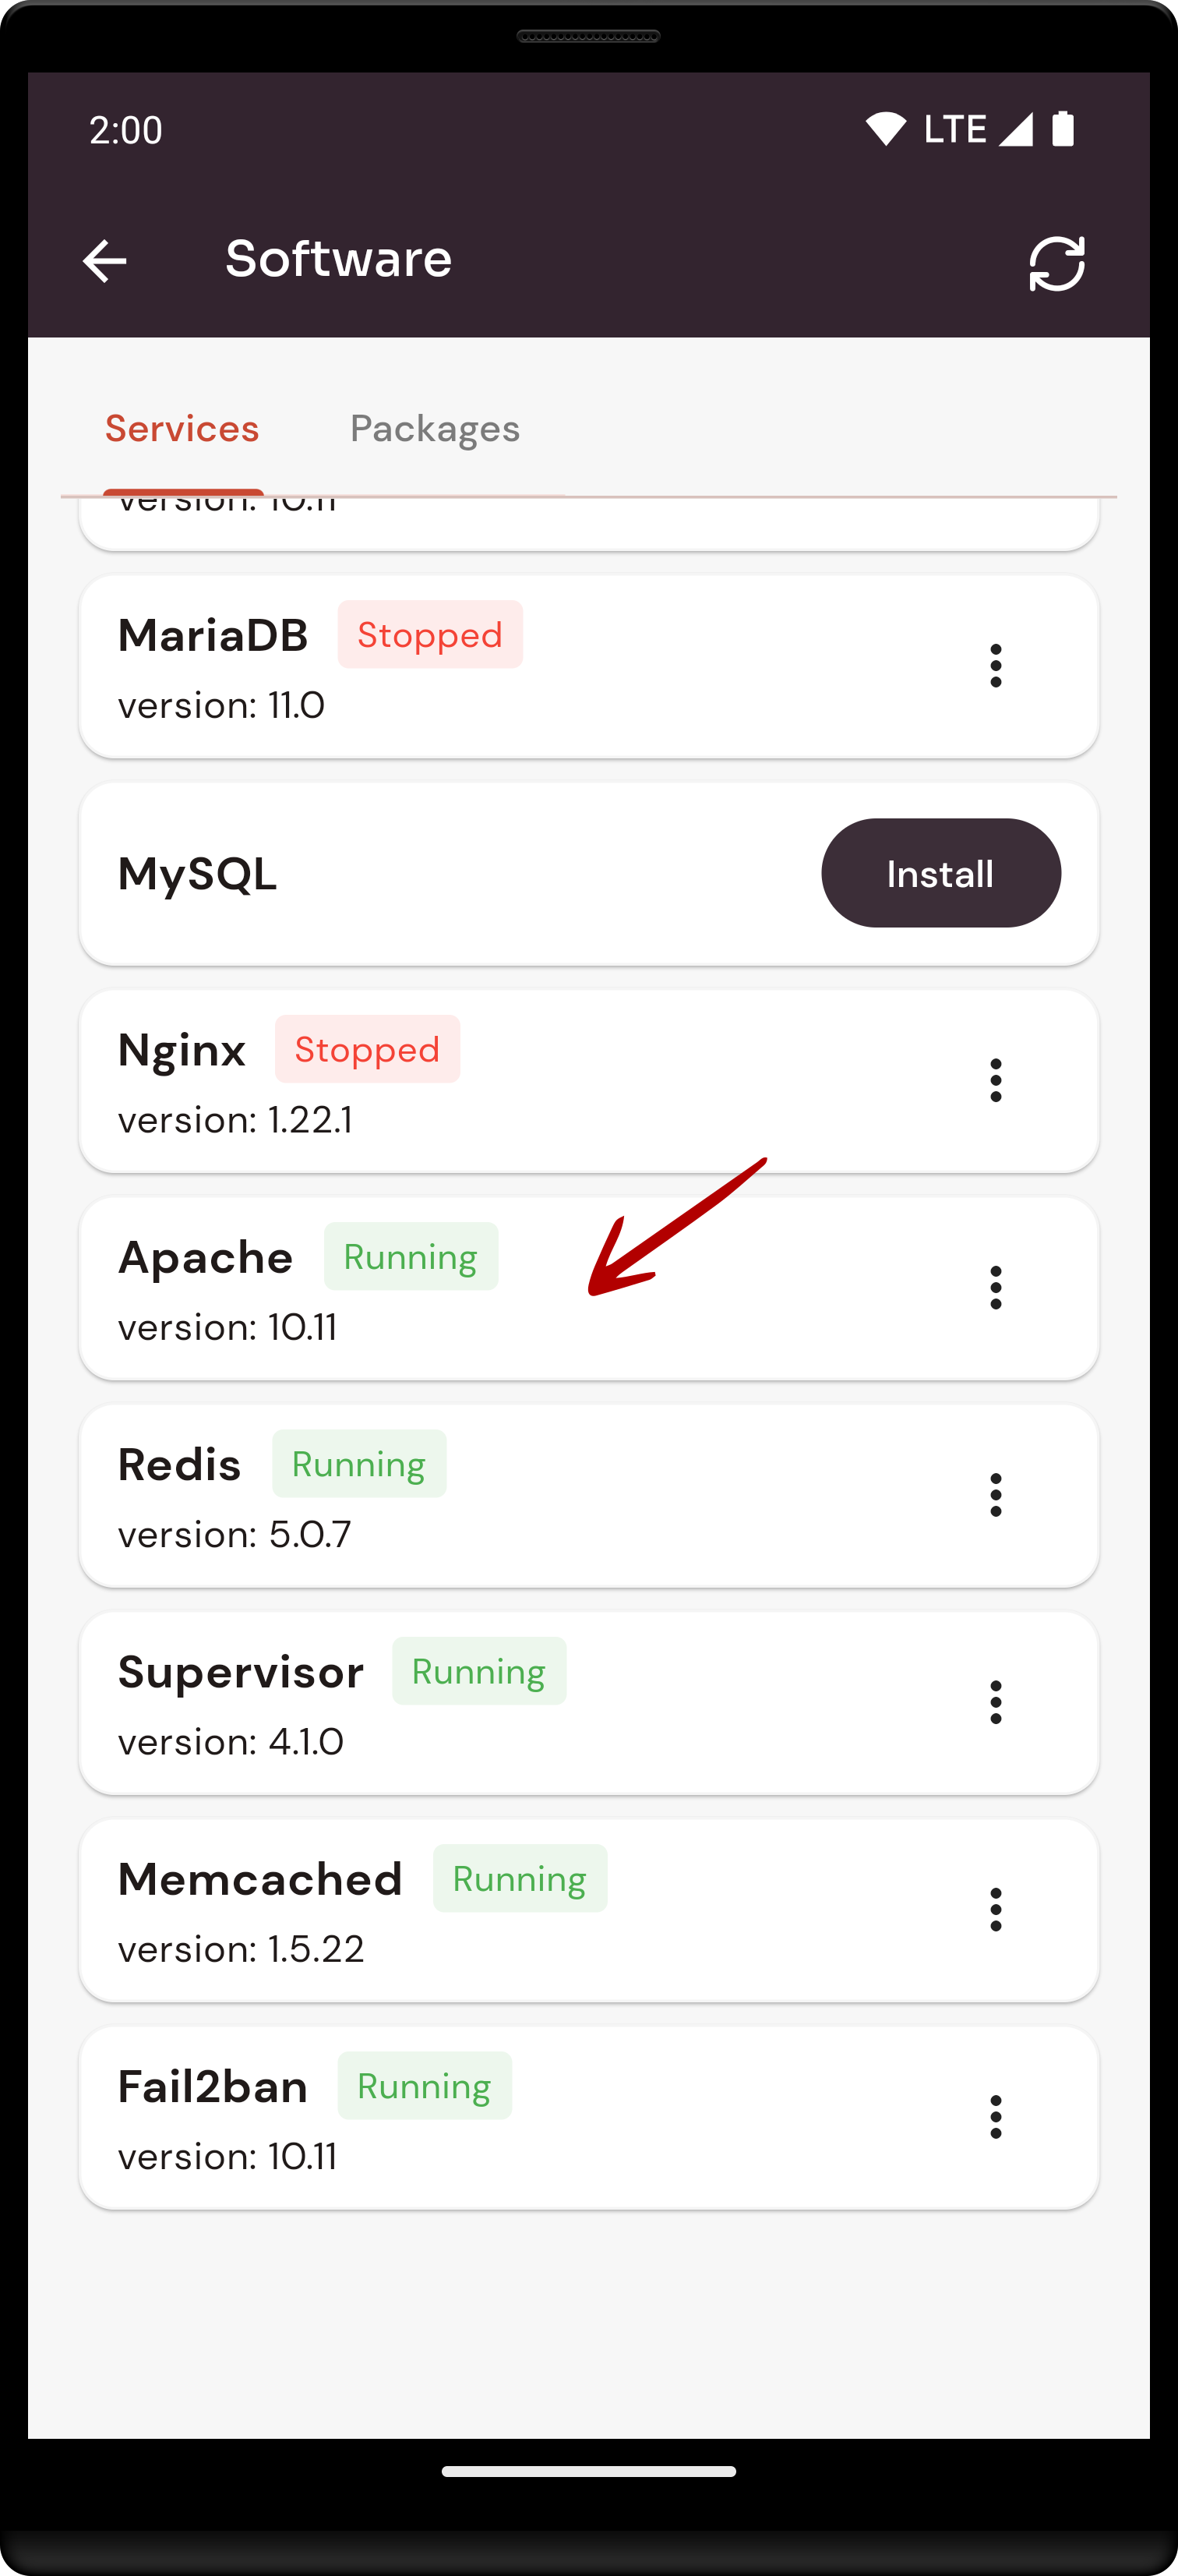
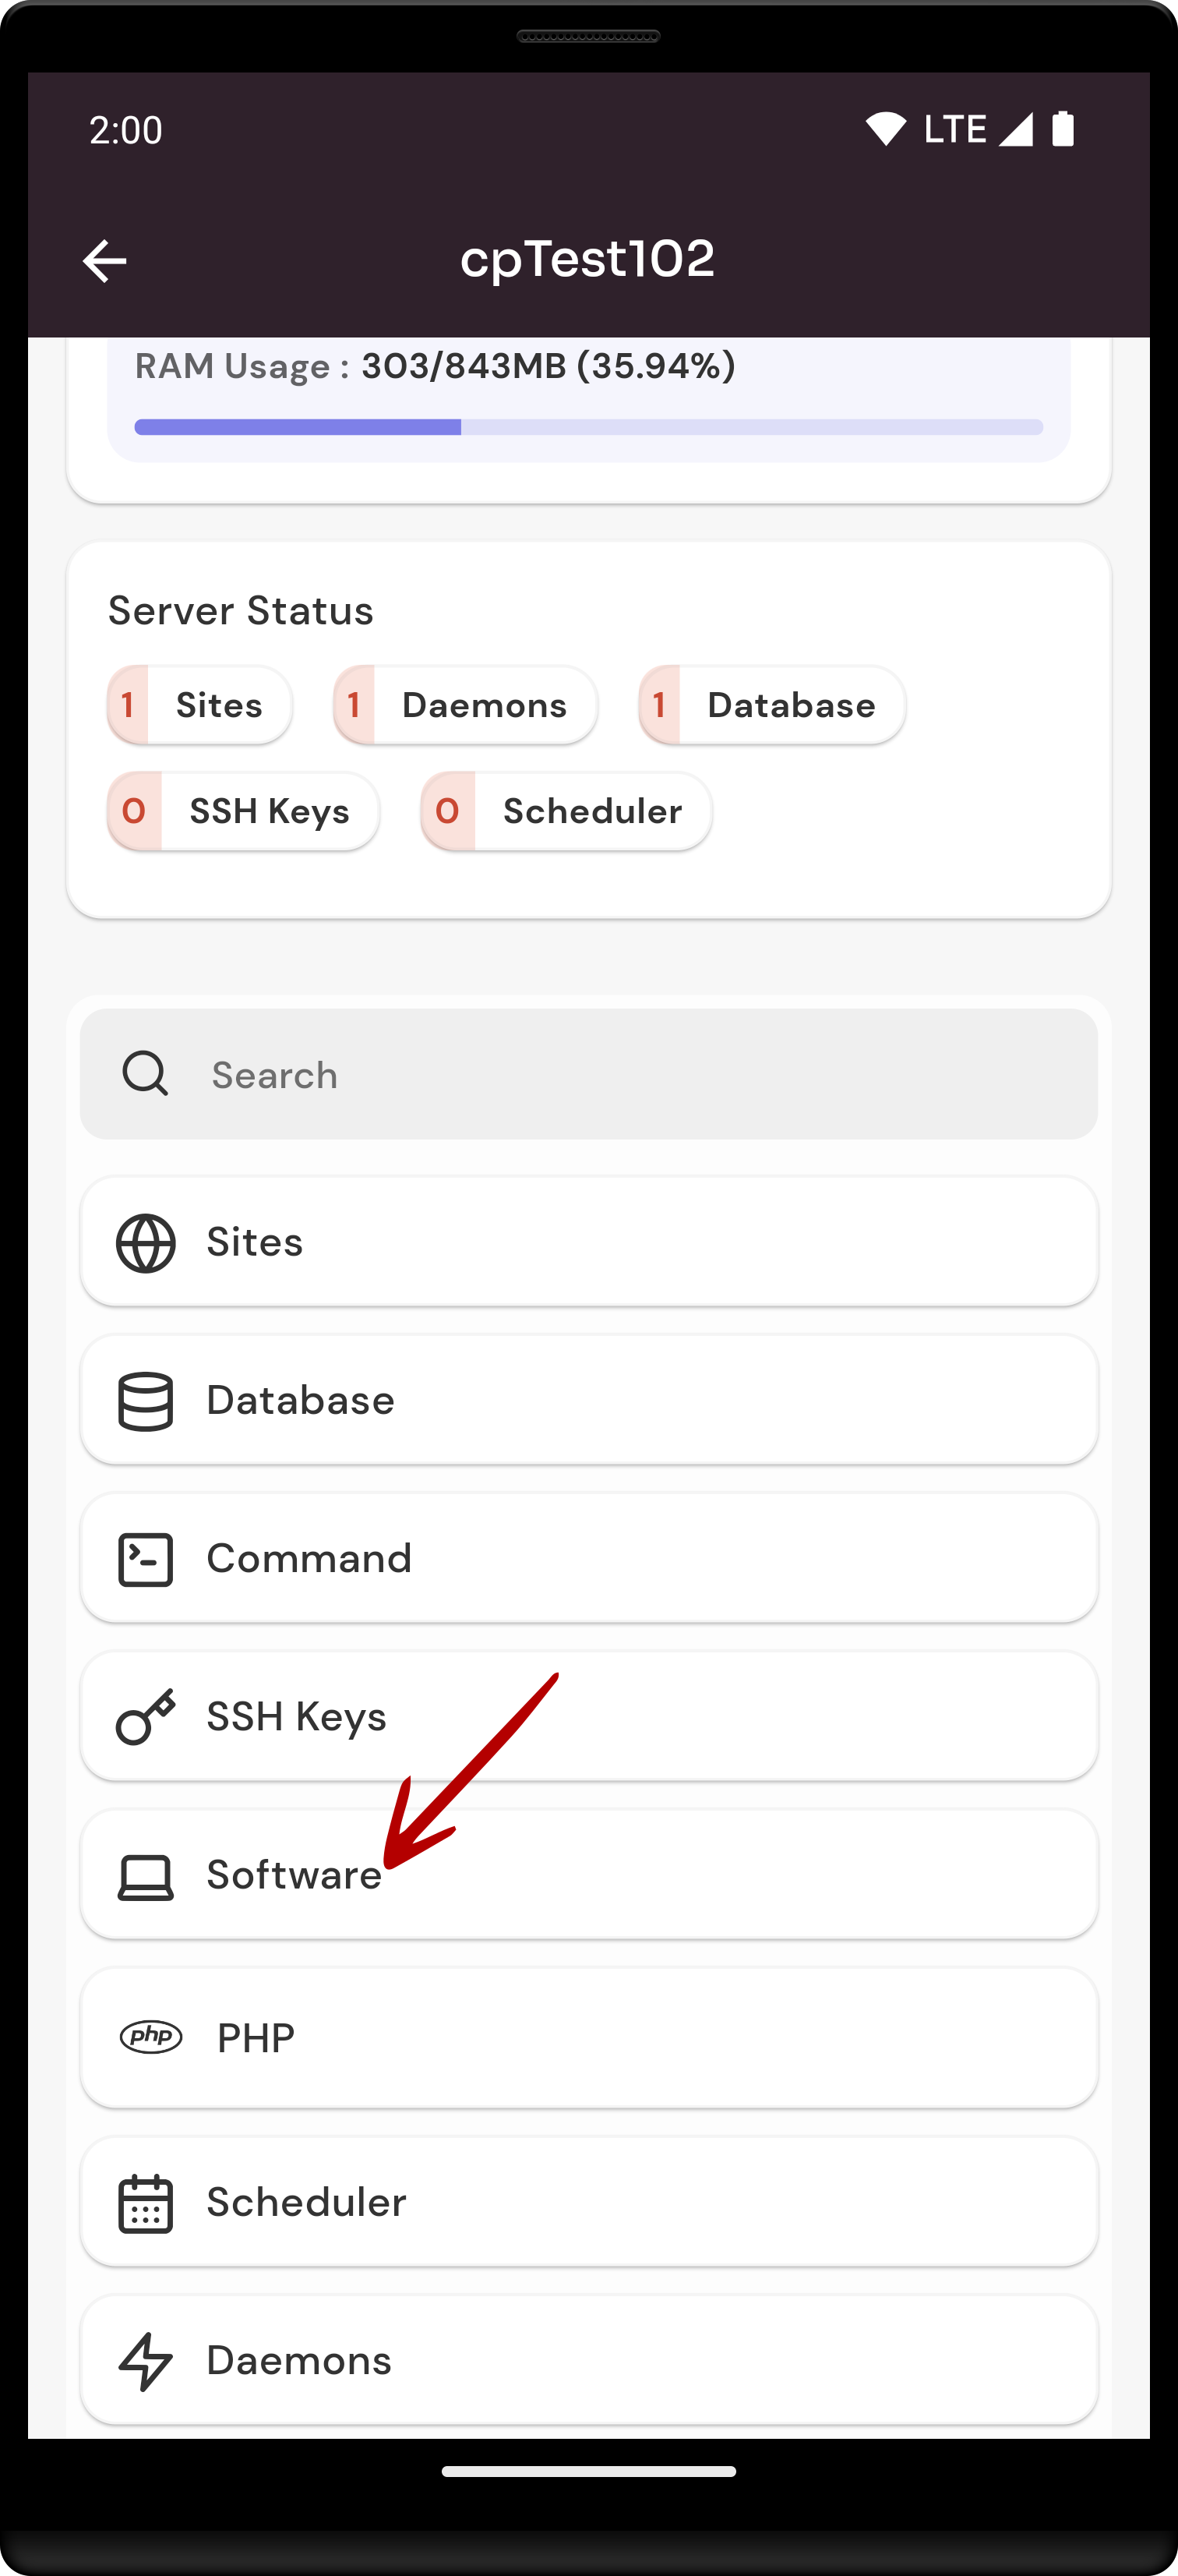
2. Select the Software Option.
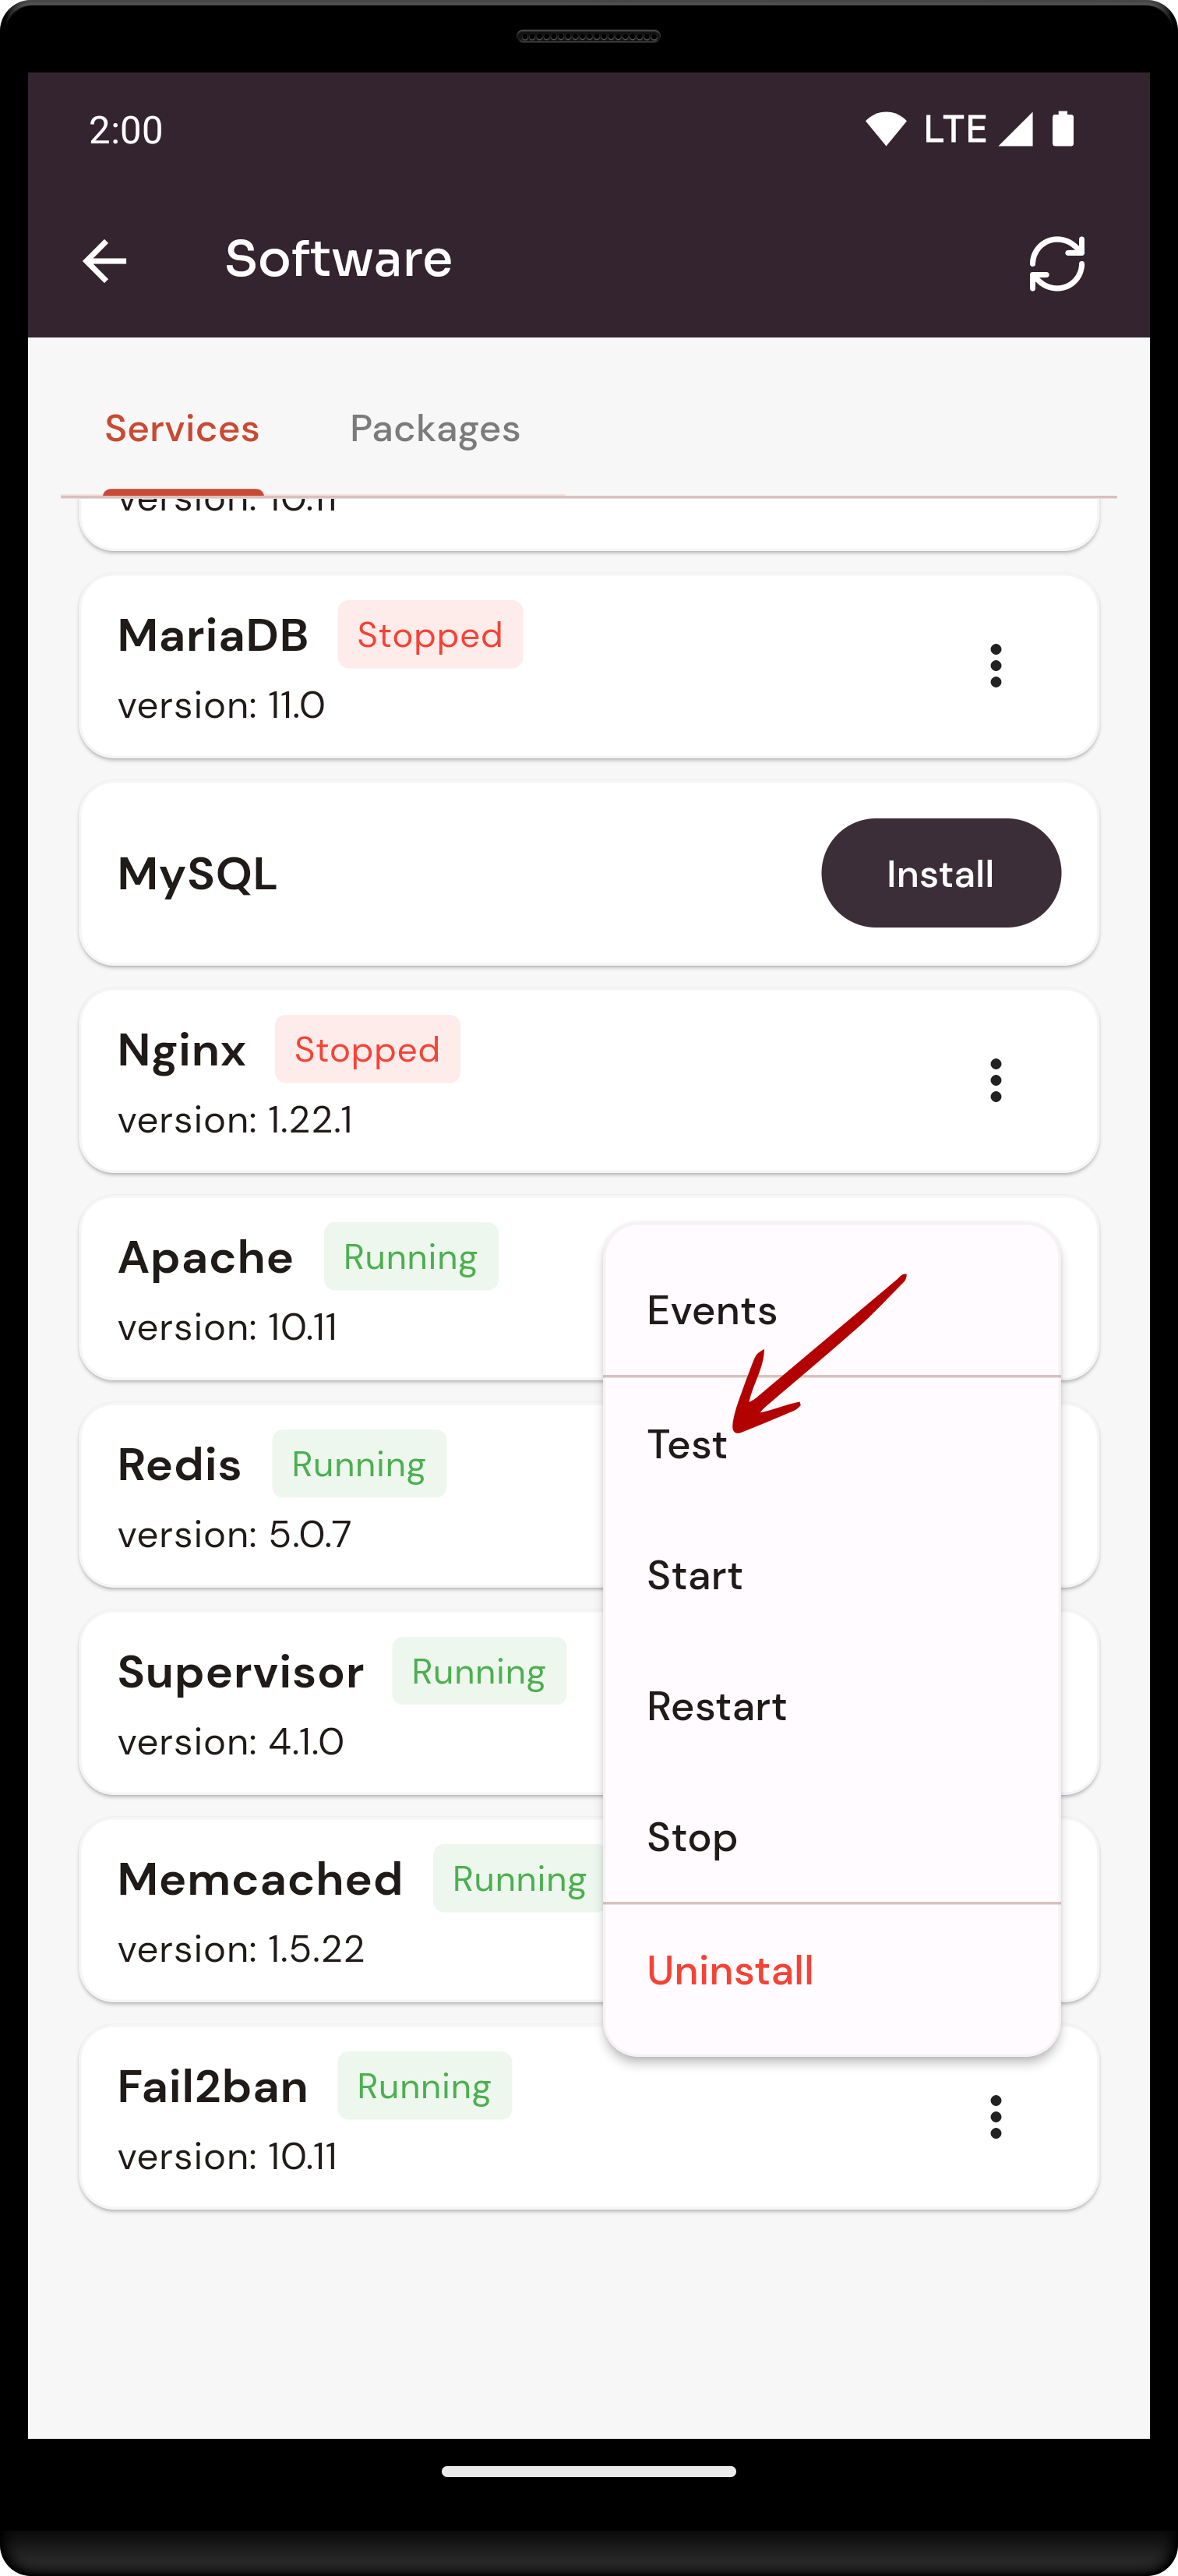
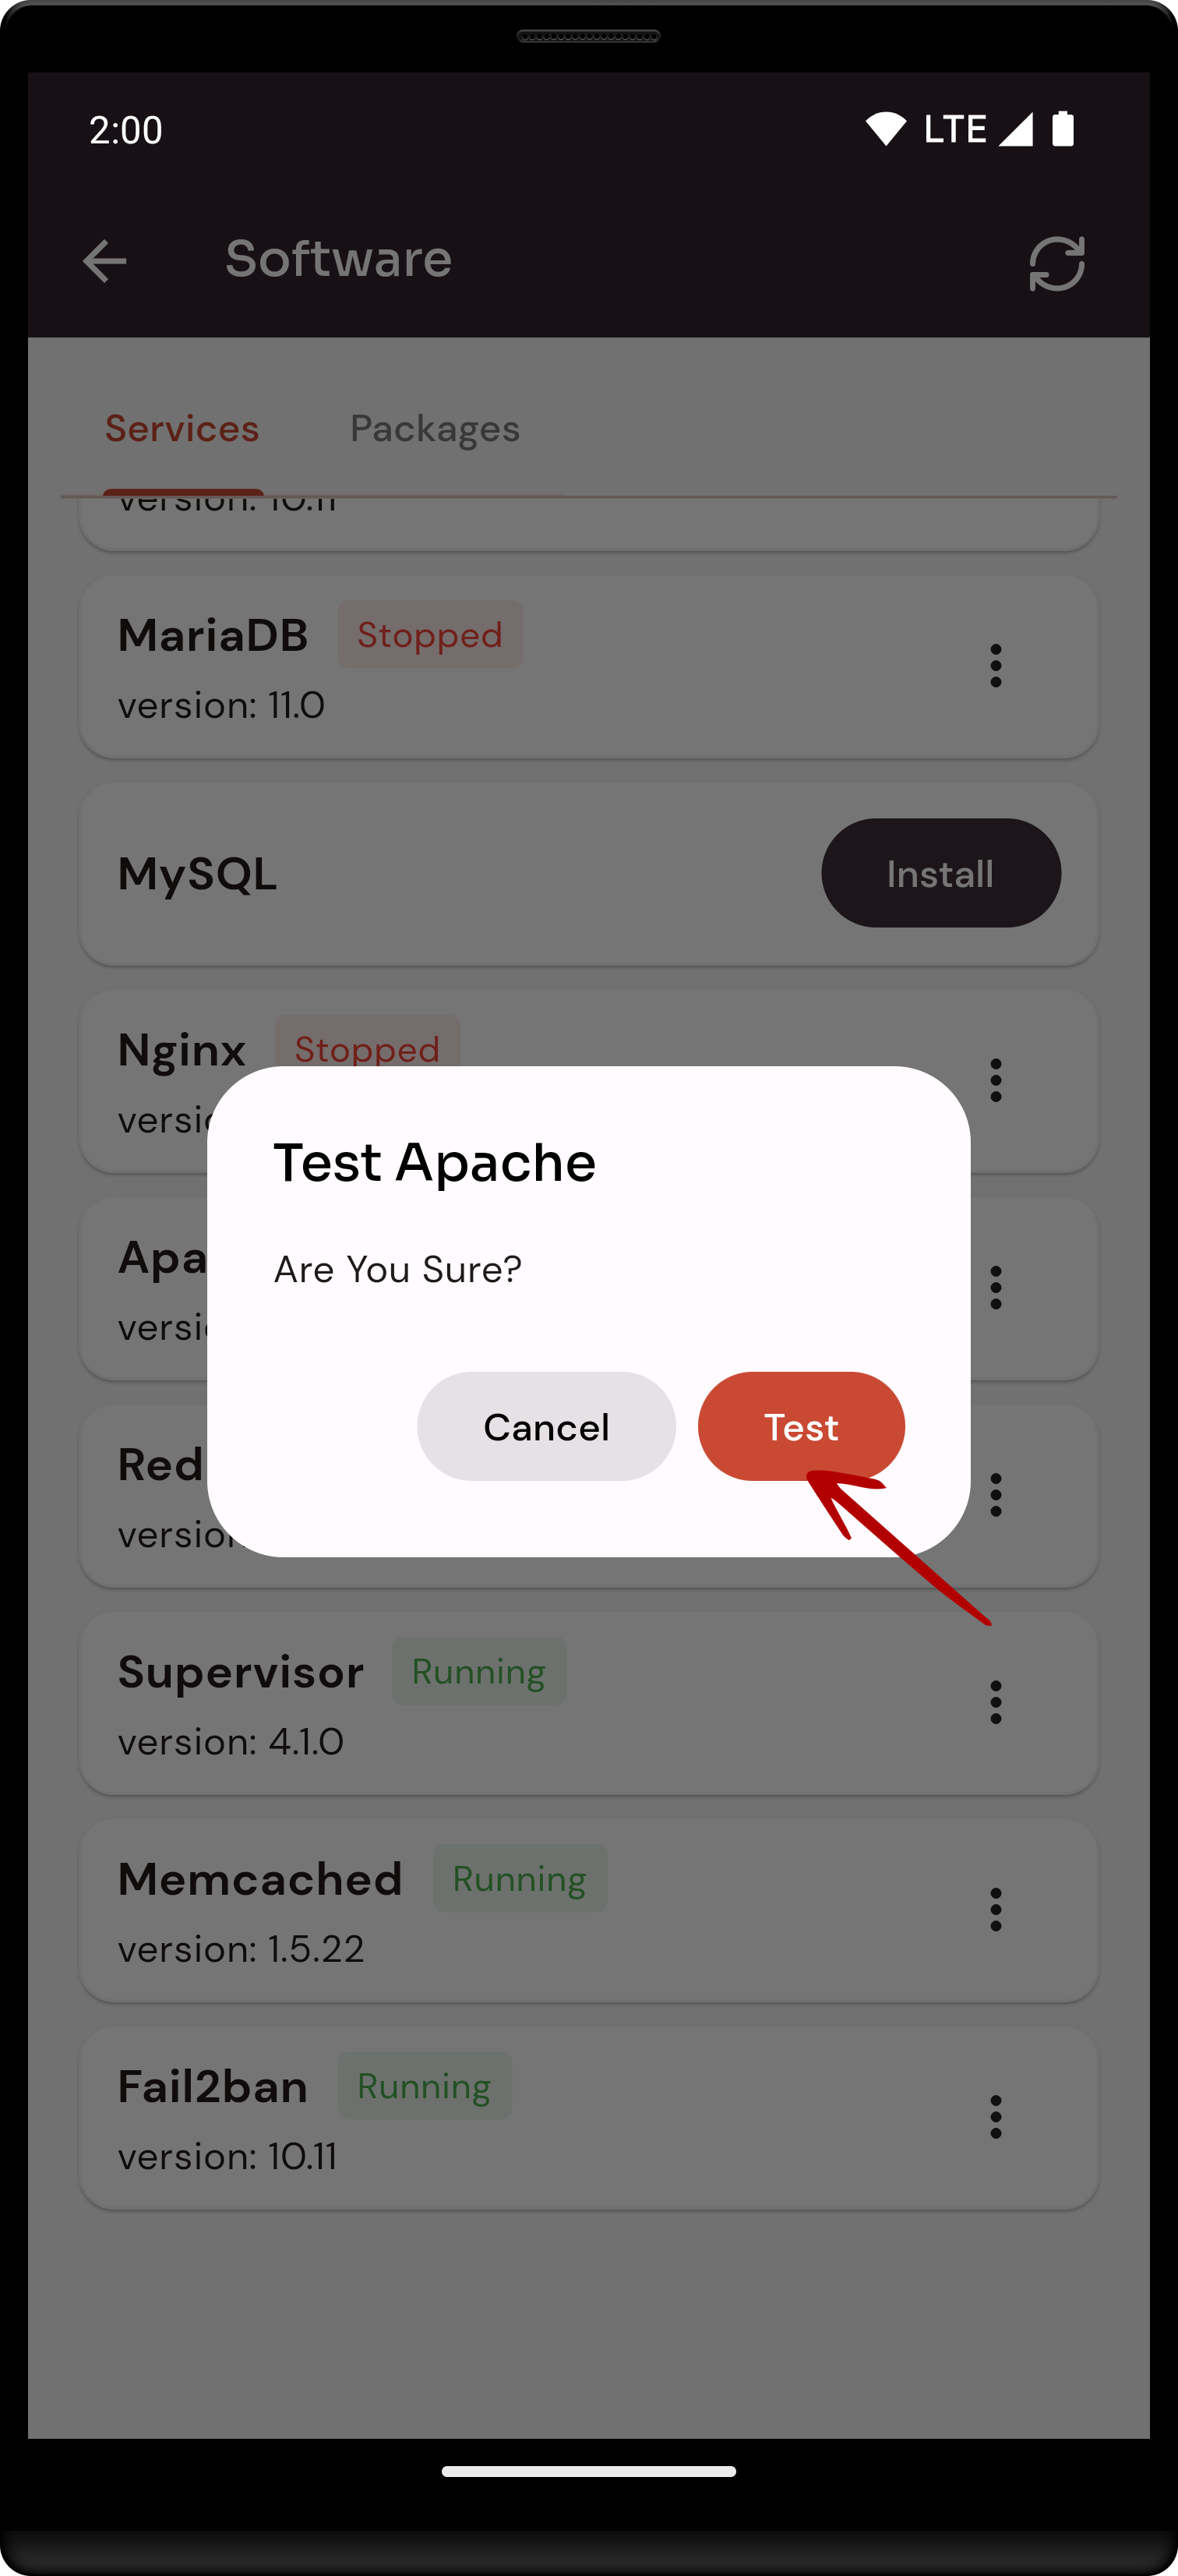
4. Open a dialog and click the "Text" button to test the Apache software.
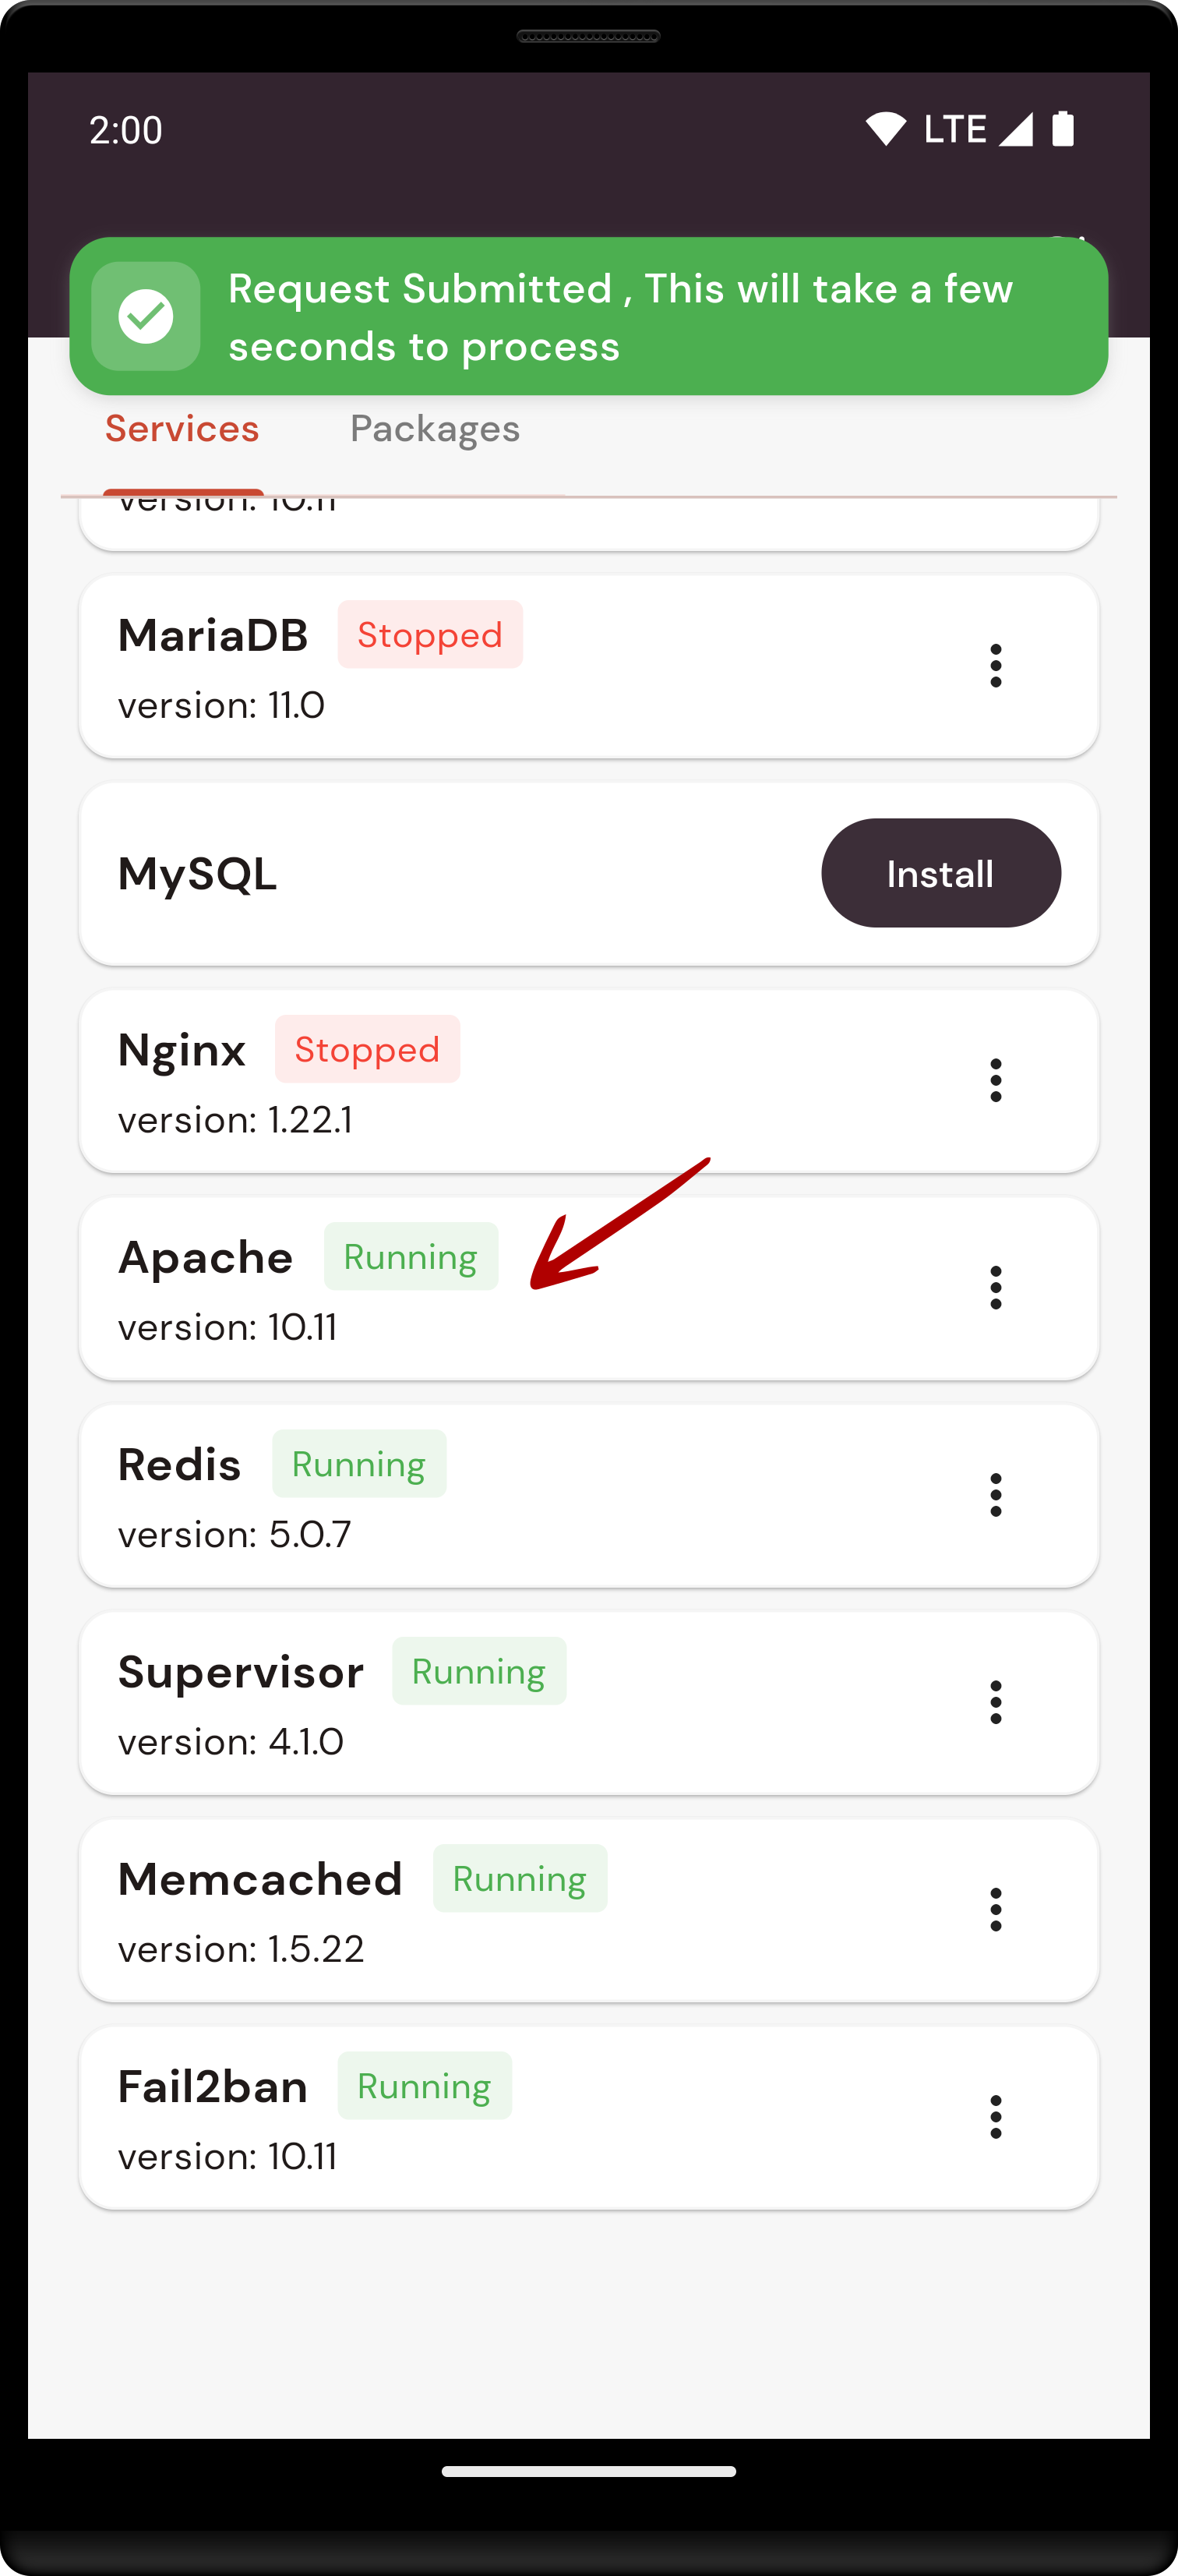
Here, you can see the Apache Test successfully.
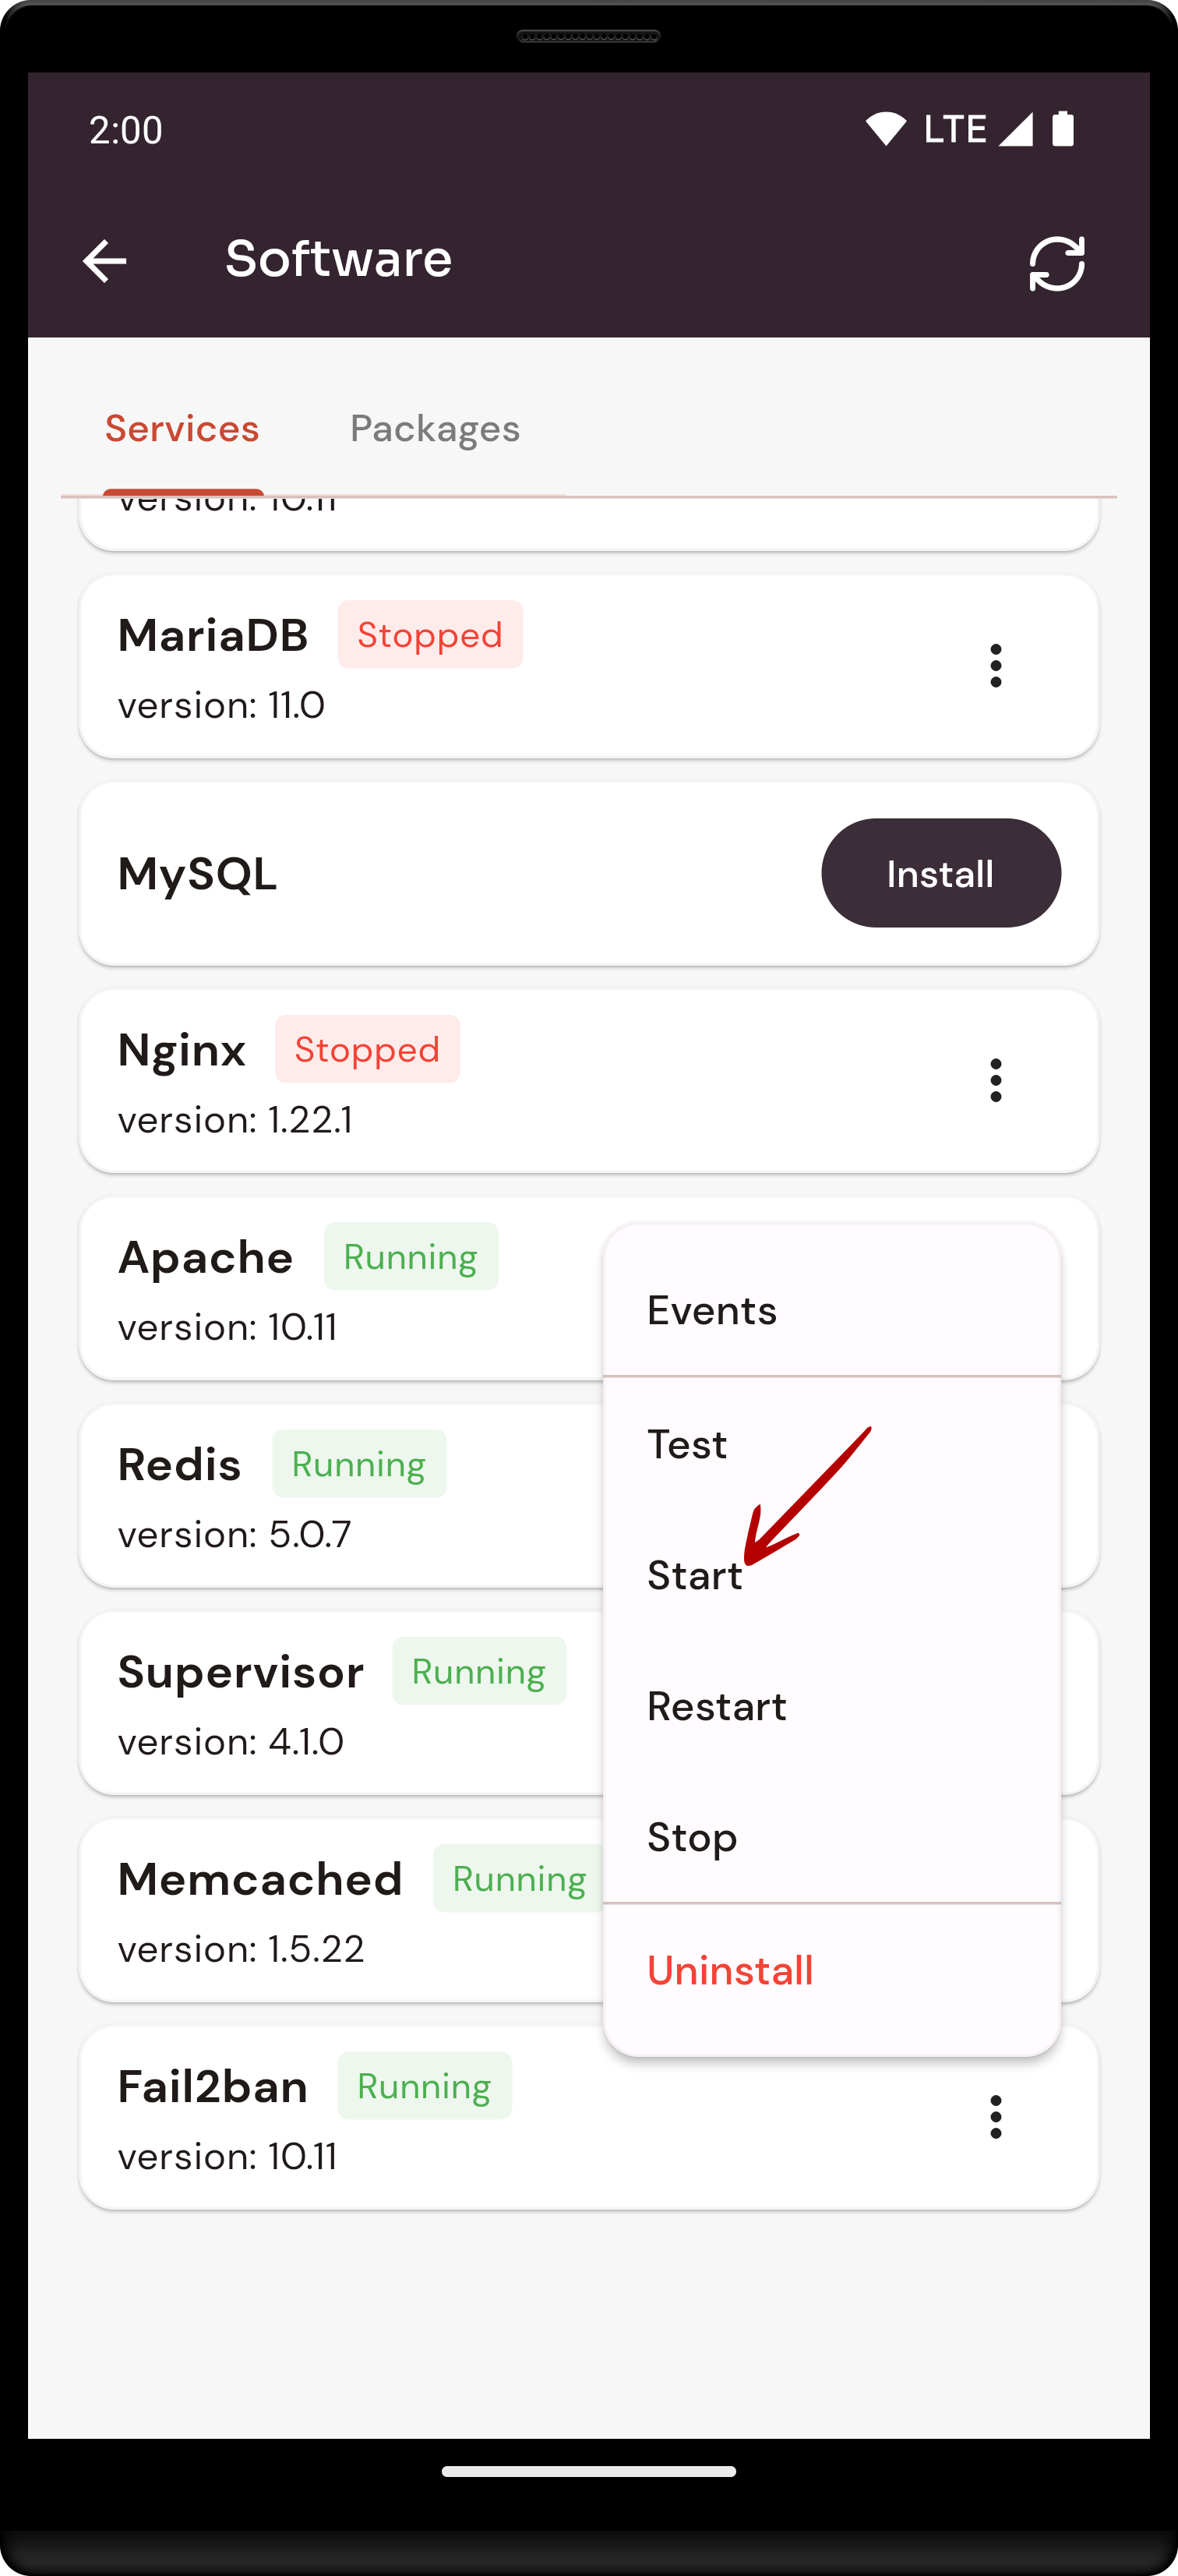
6. Open a Dialog and Click on the Start Button to start Apache software.

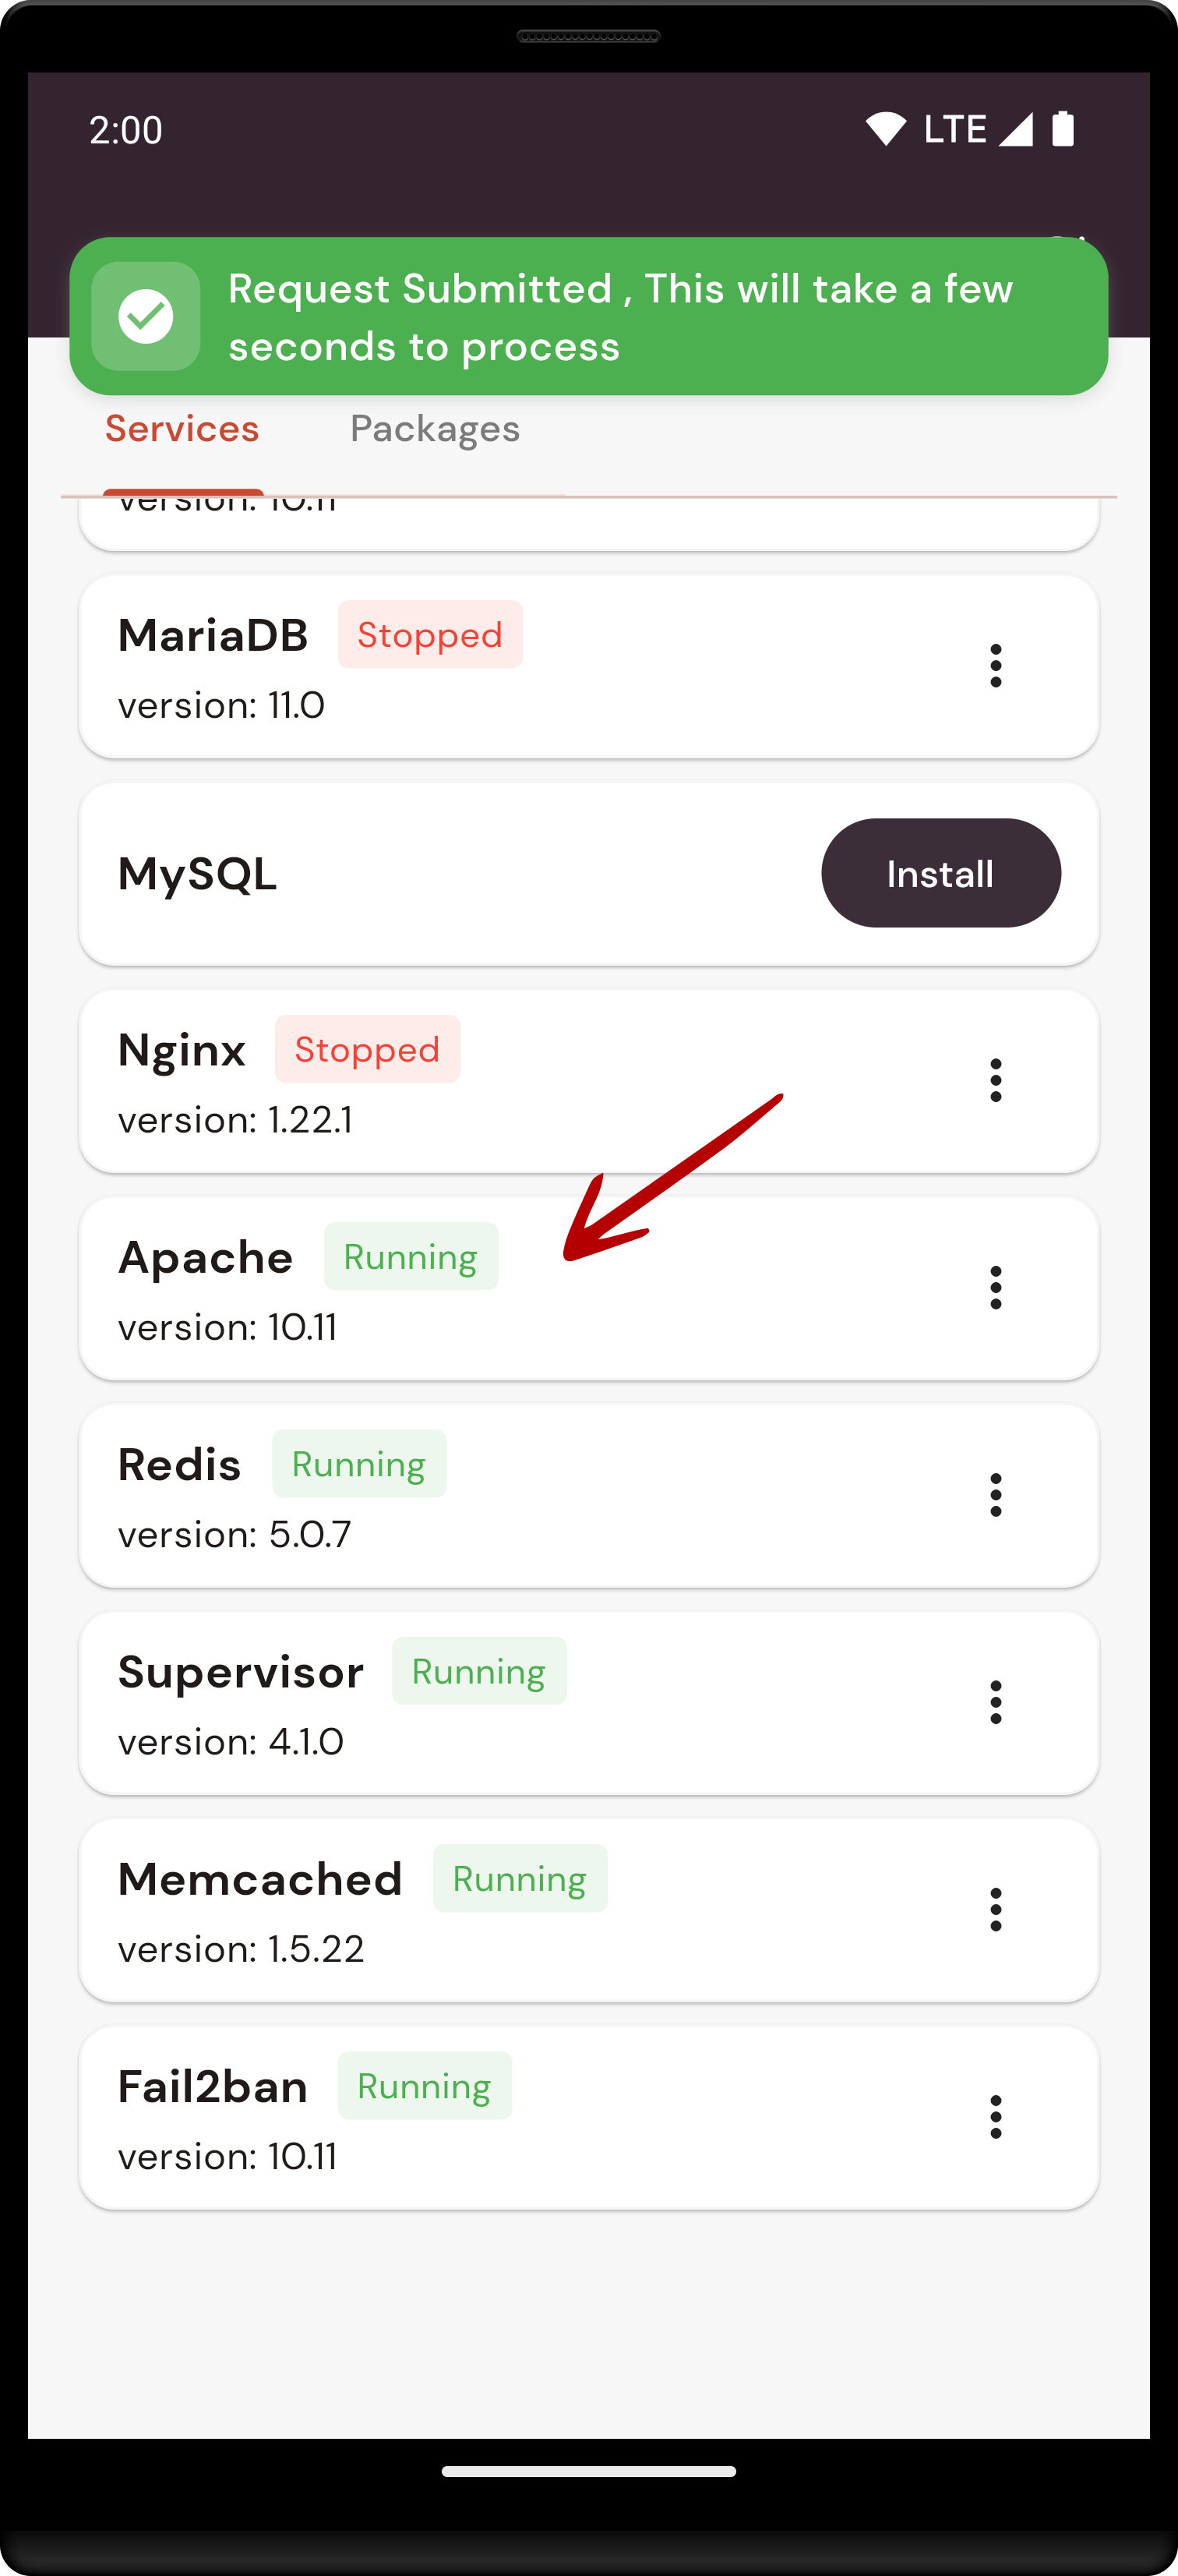
Here, you can see Apache Started successfully.
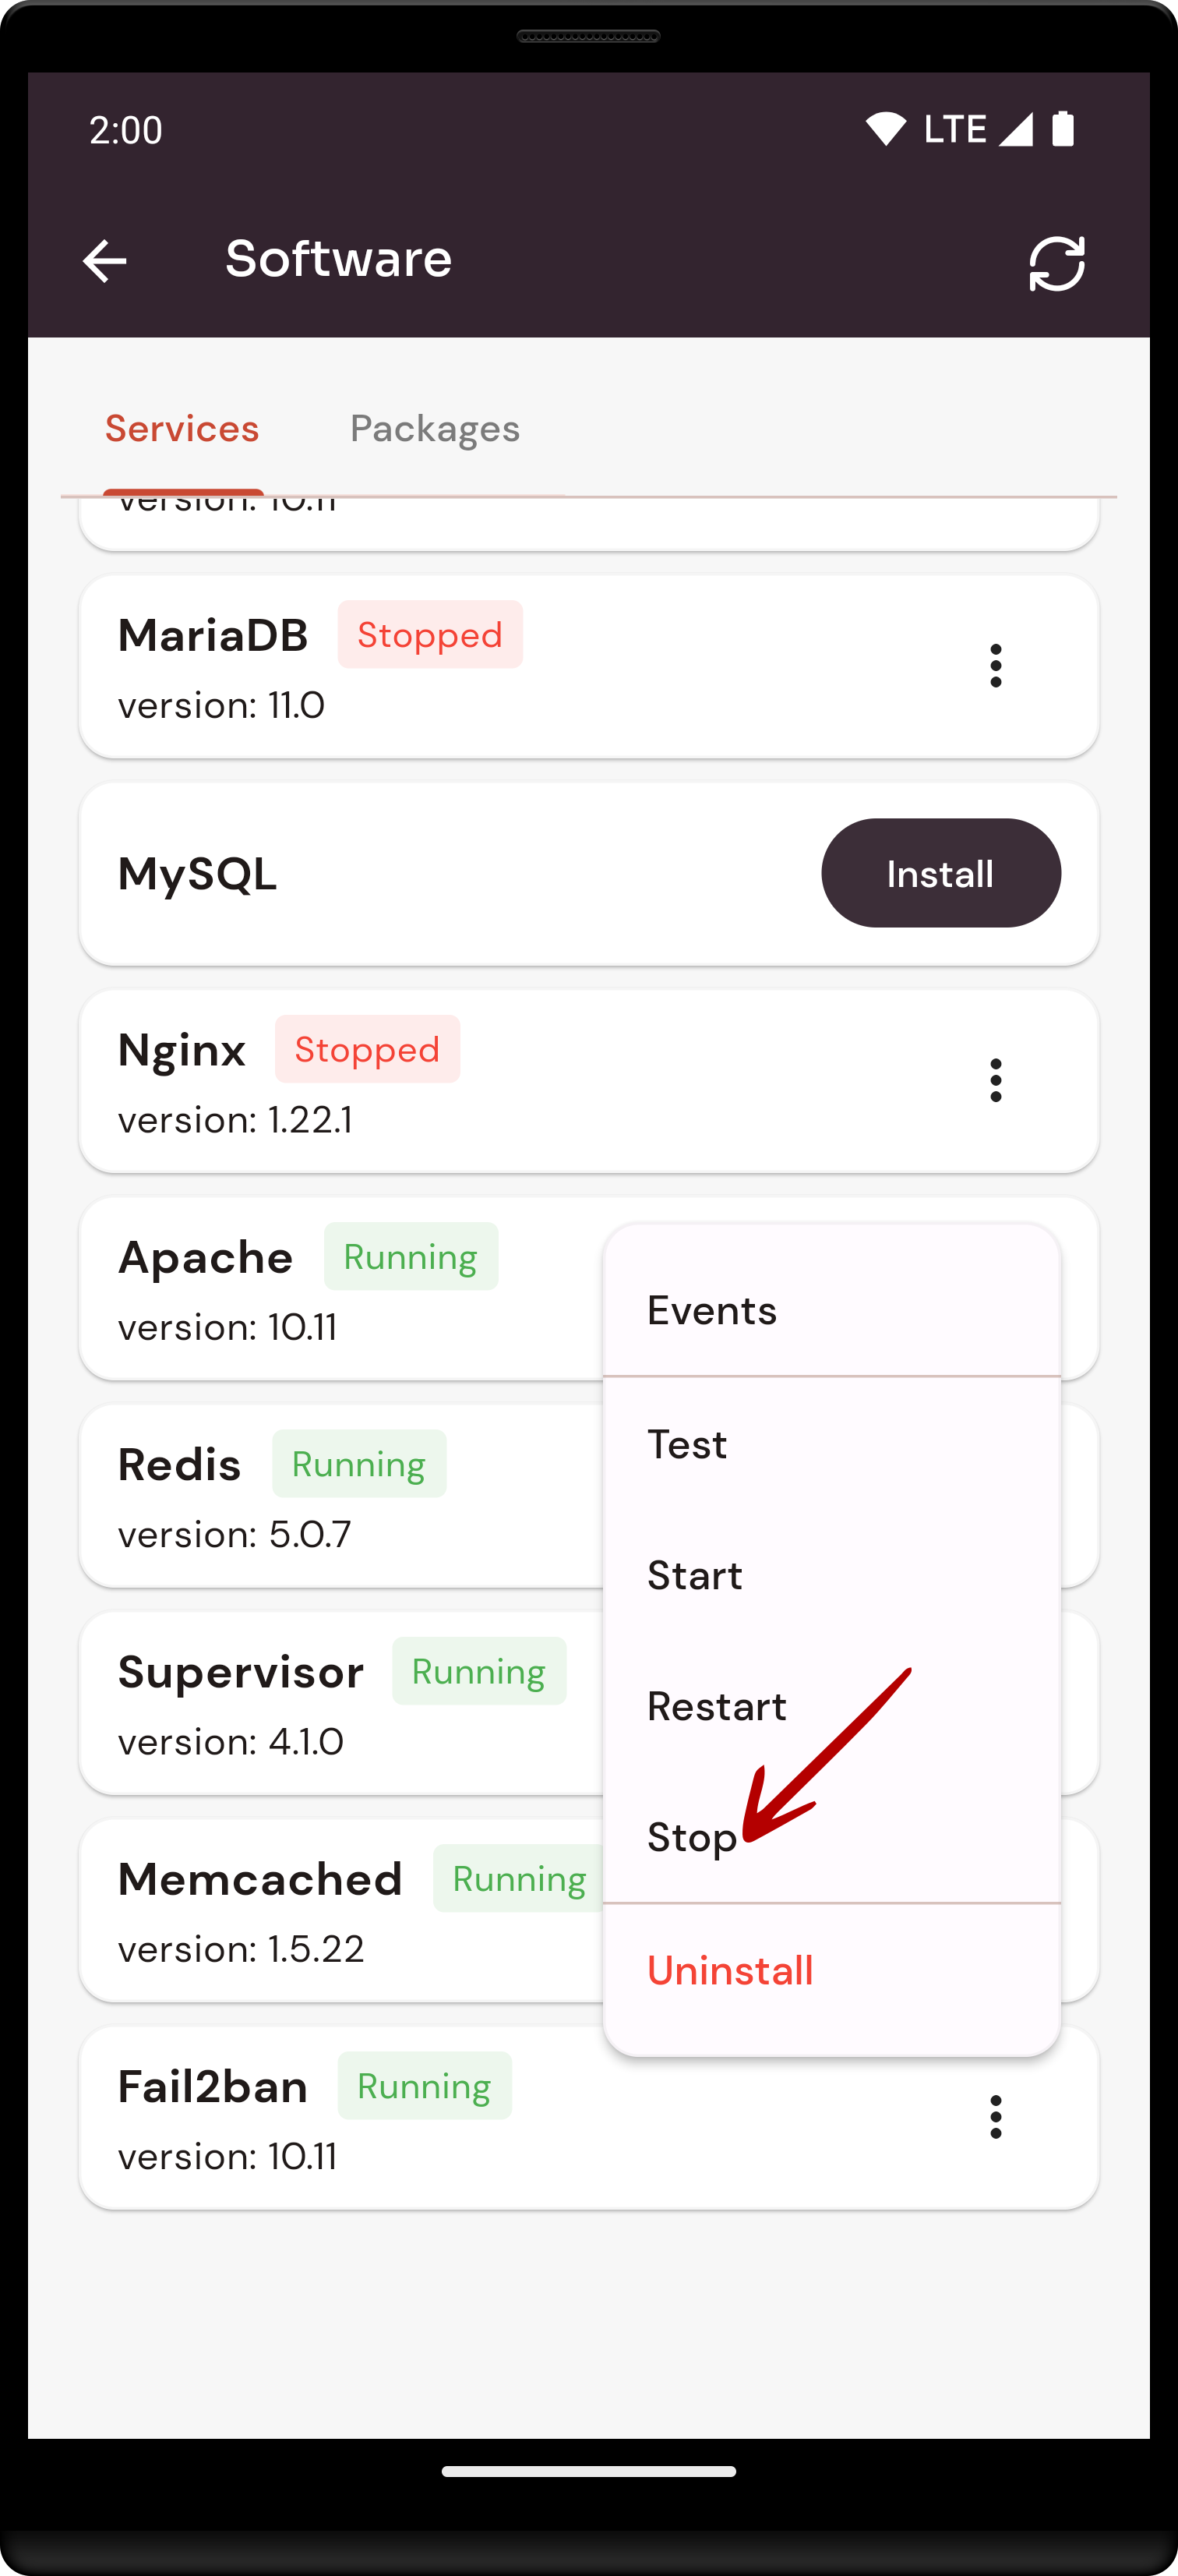
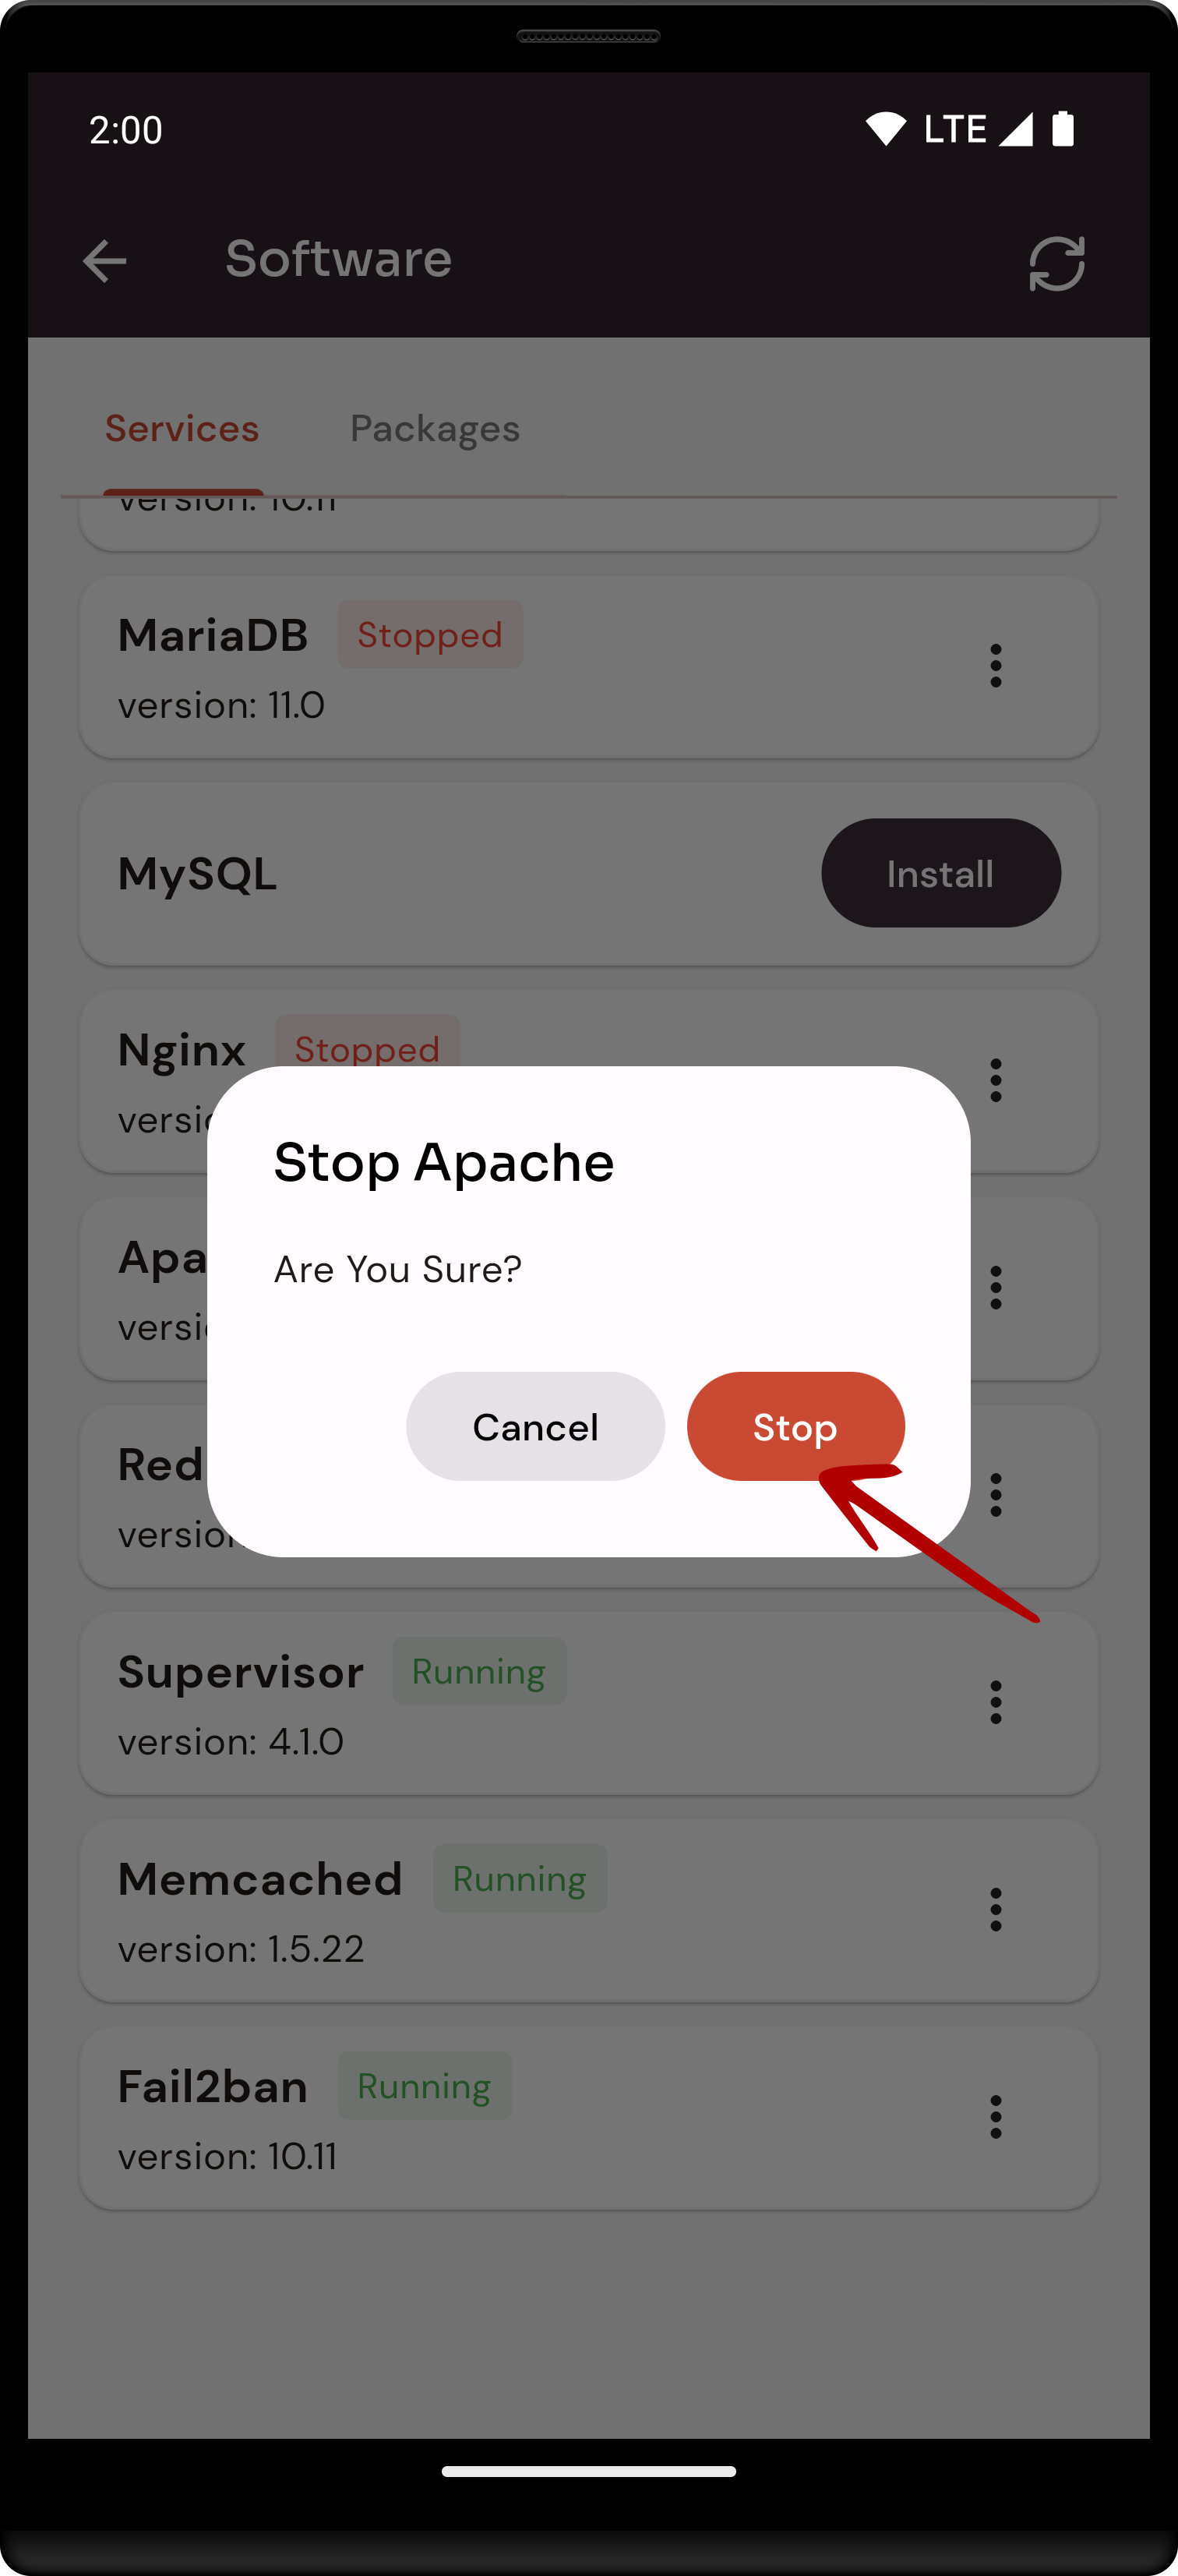
8. Open a dialog and click the stop button to stop the Apache software.
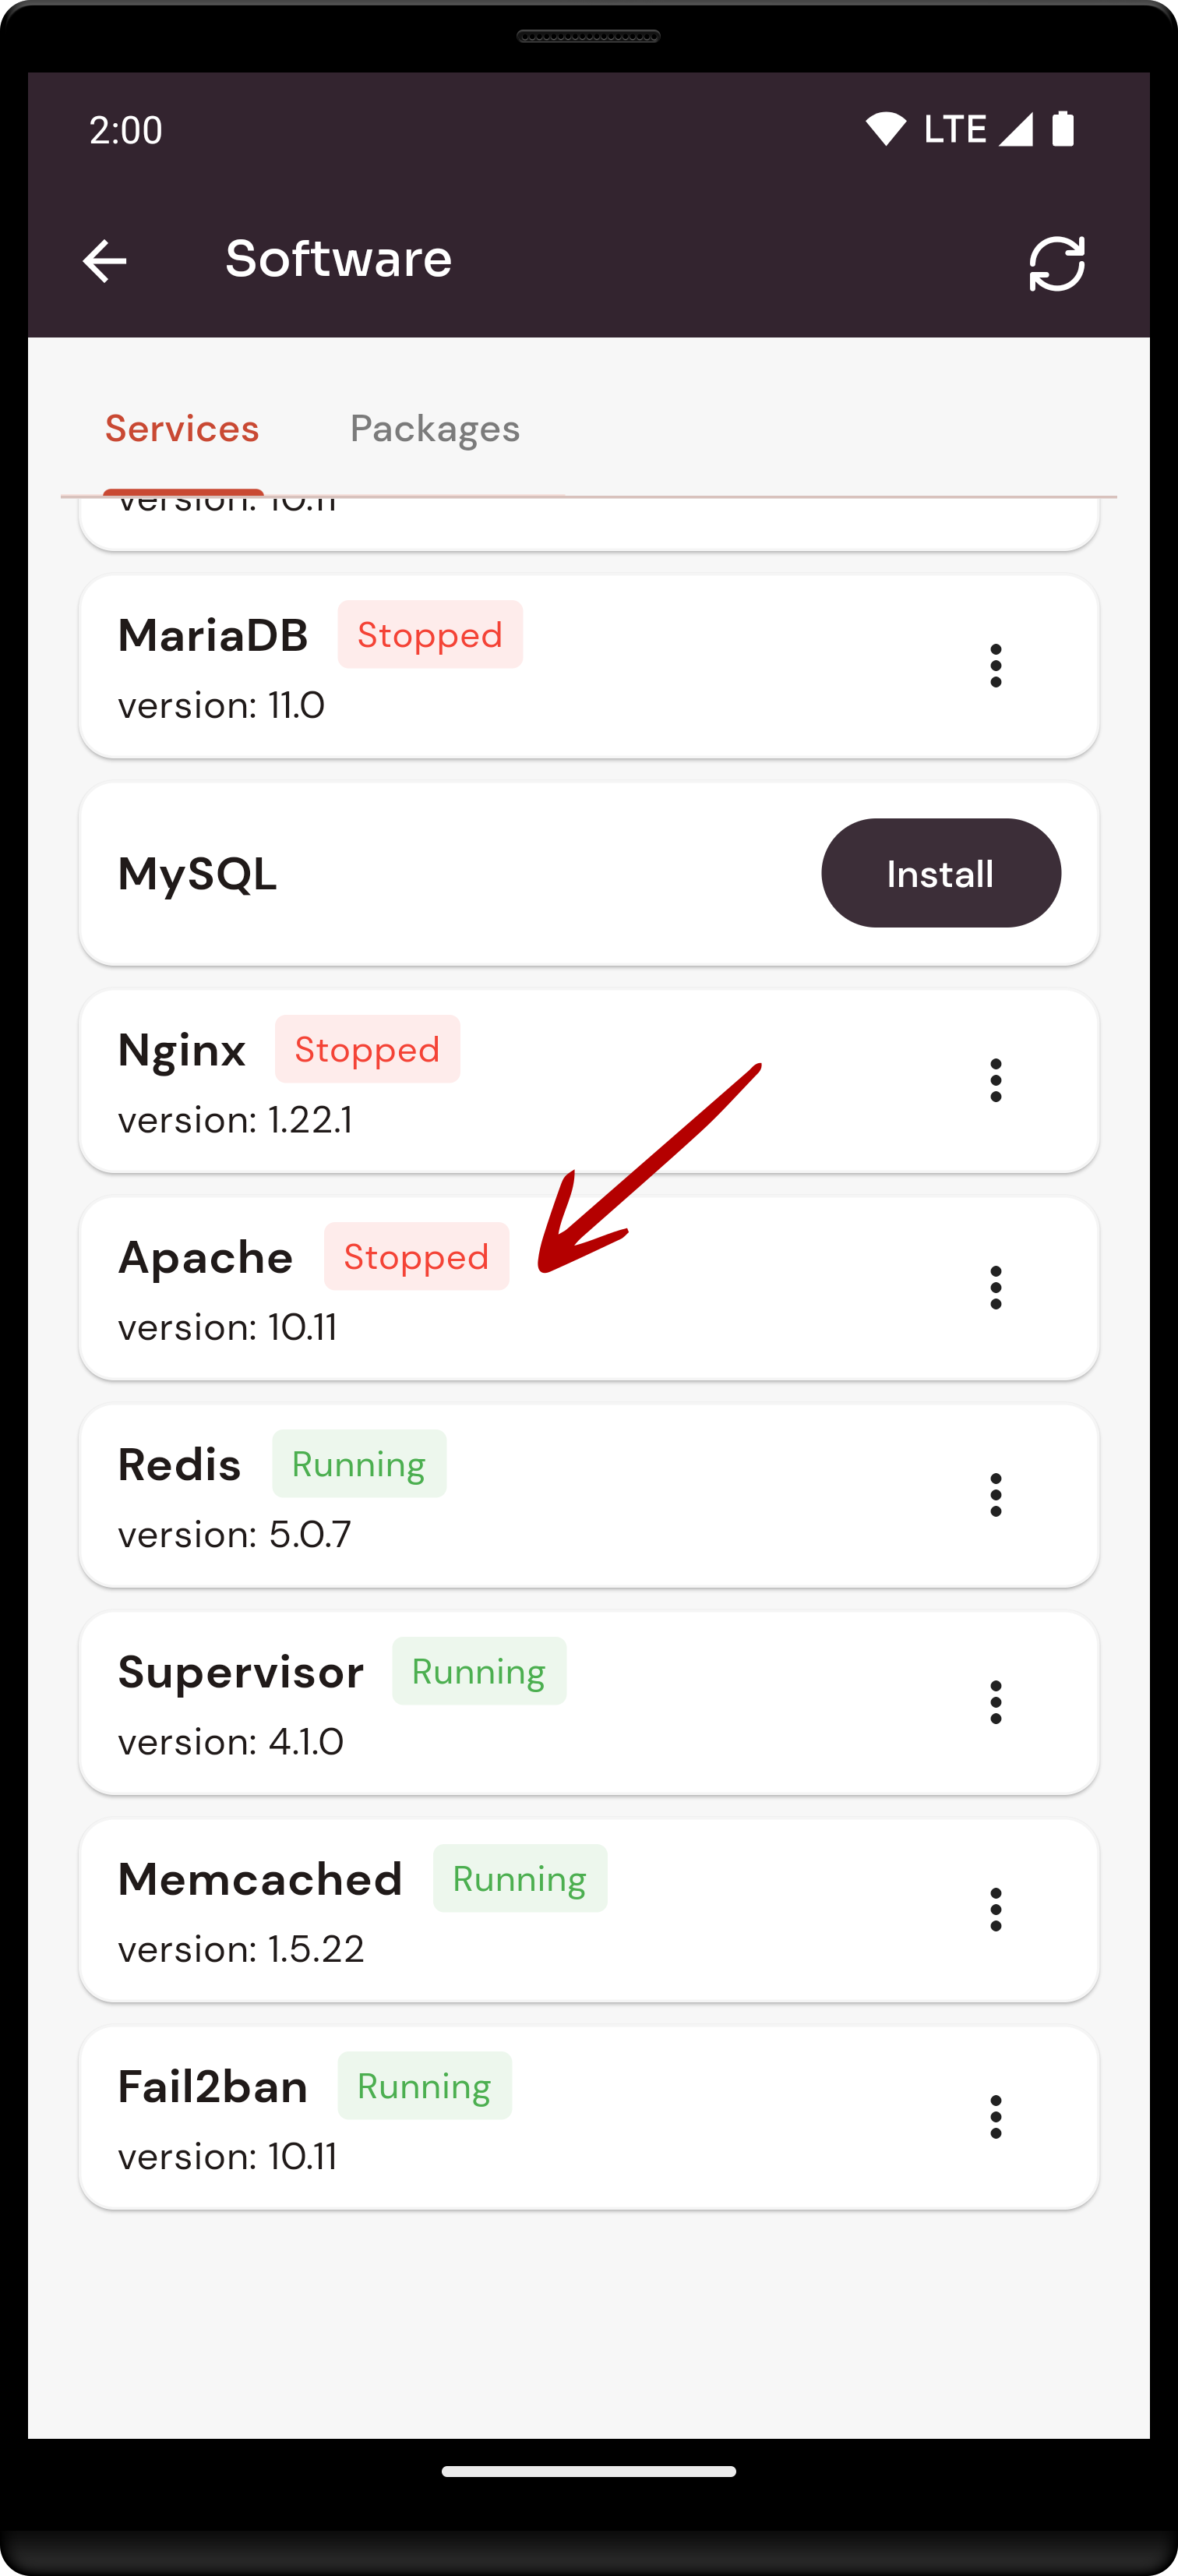
Here, you can see Apache Stopped successfully.
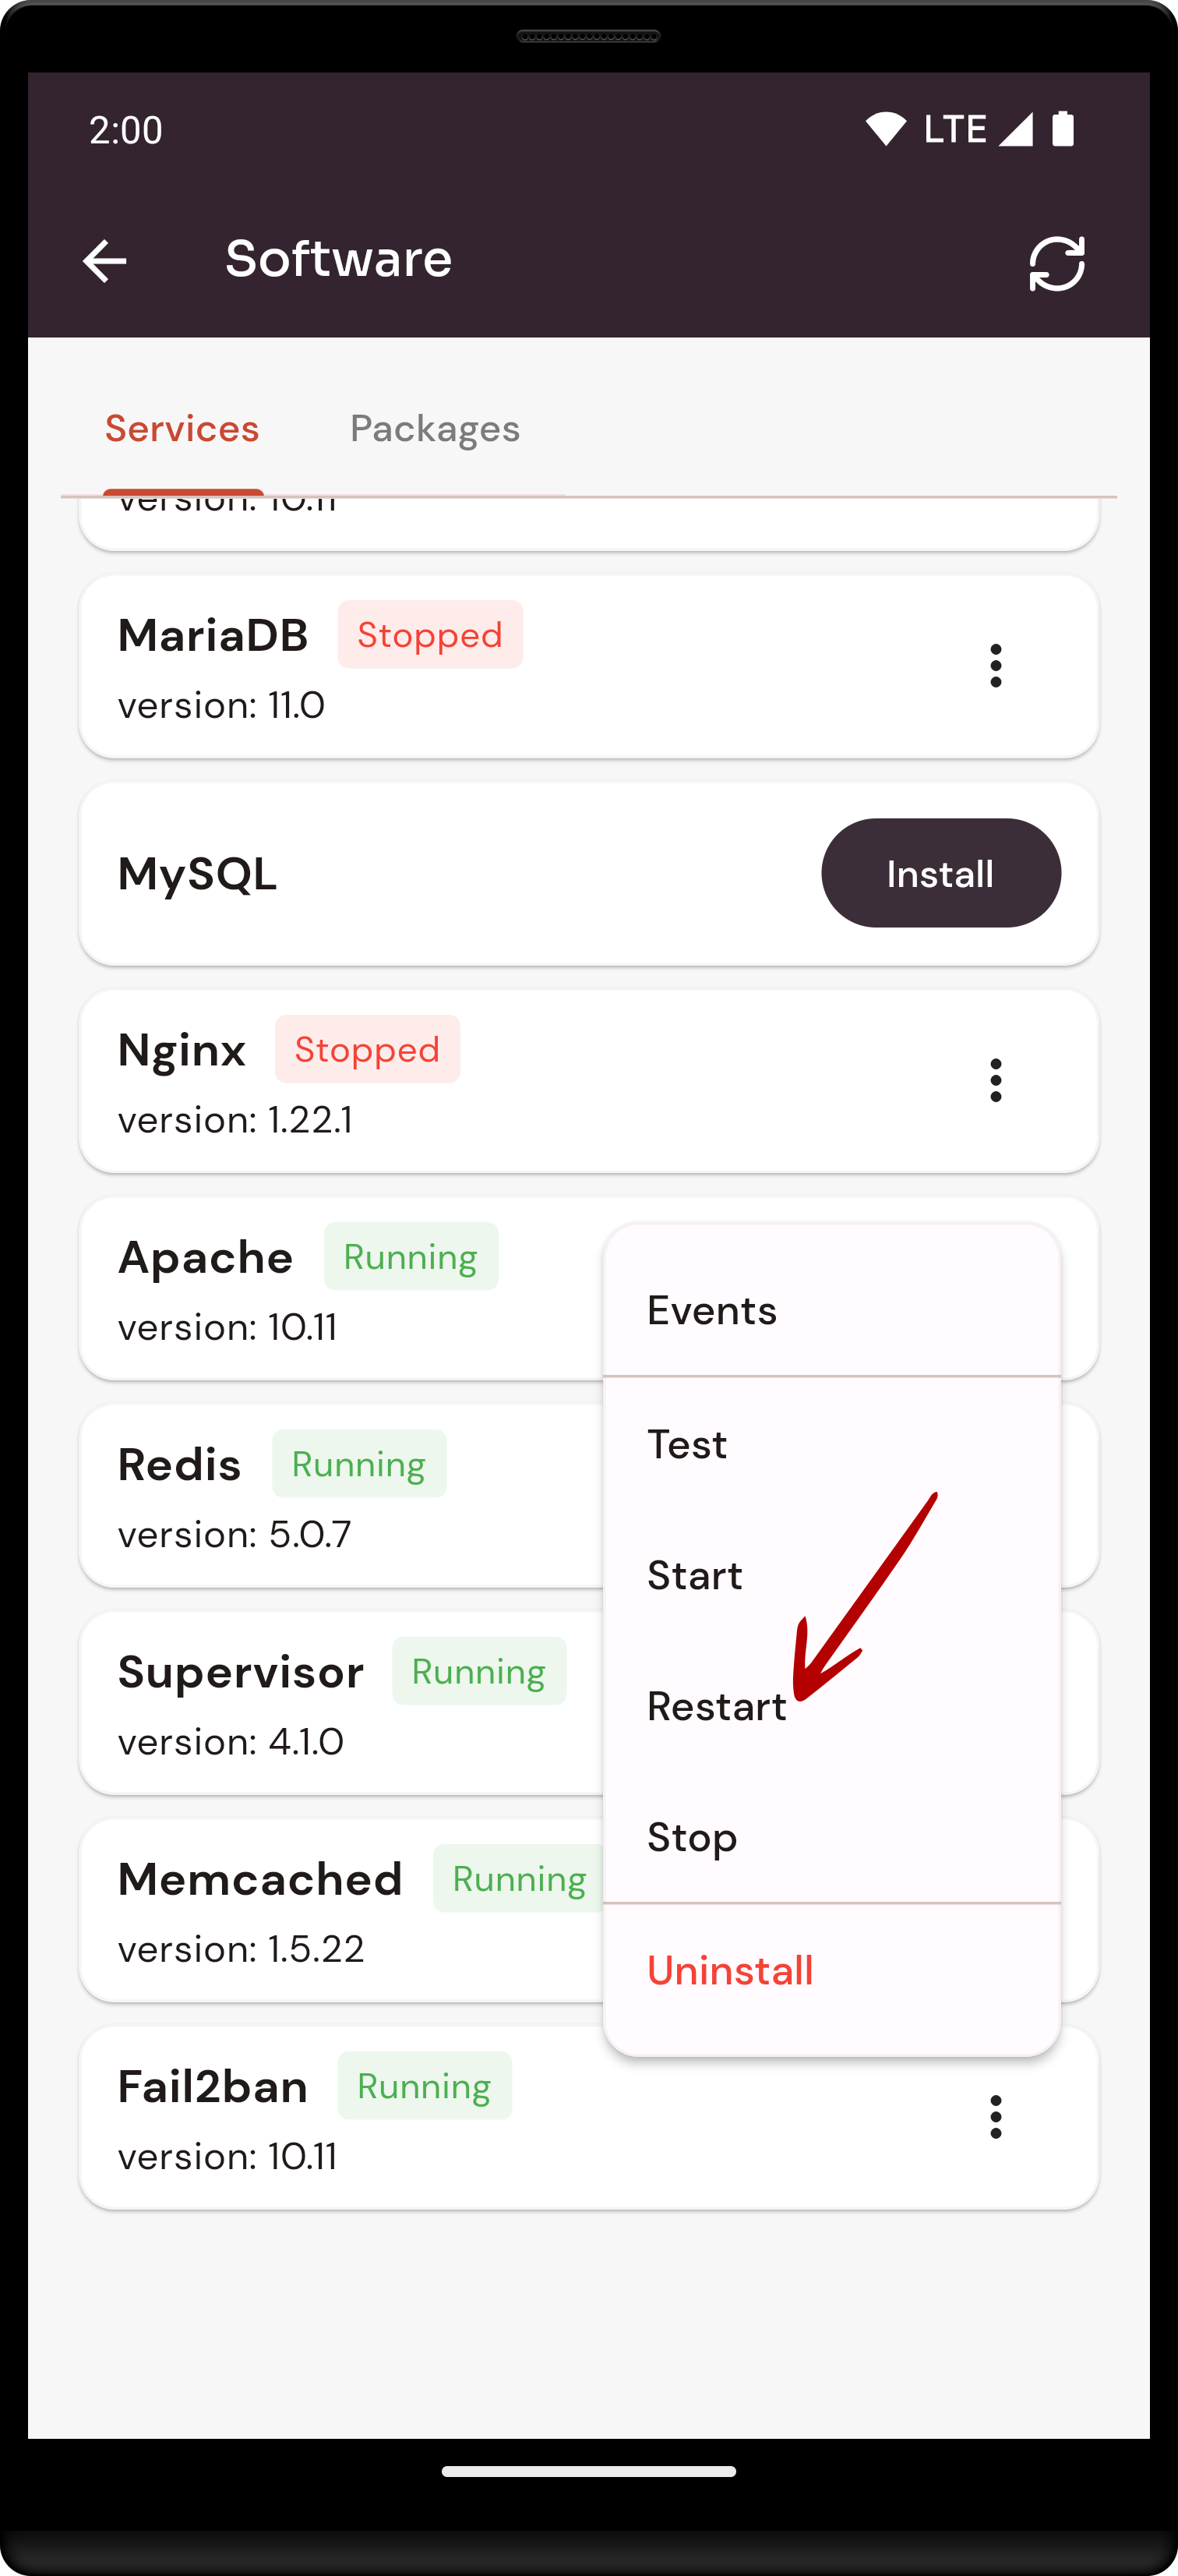
10. Open a dialog and click the restart button to restart the Apache software.
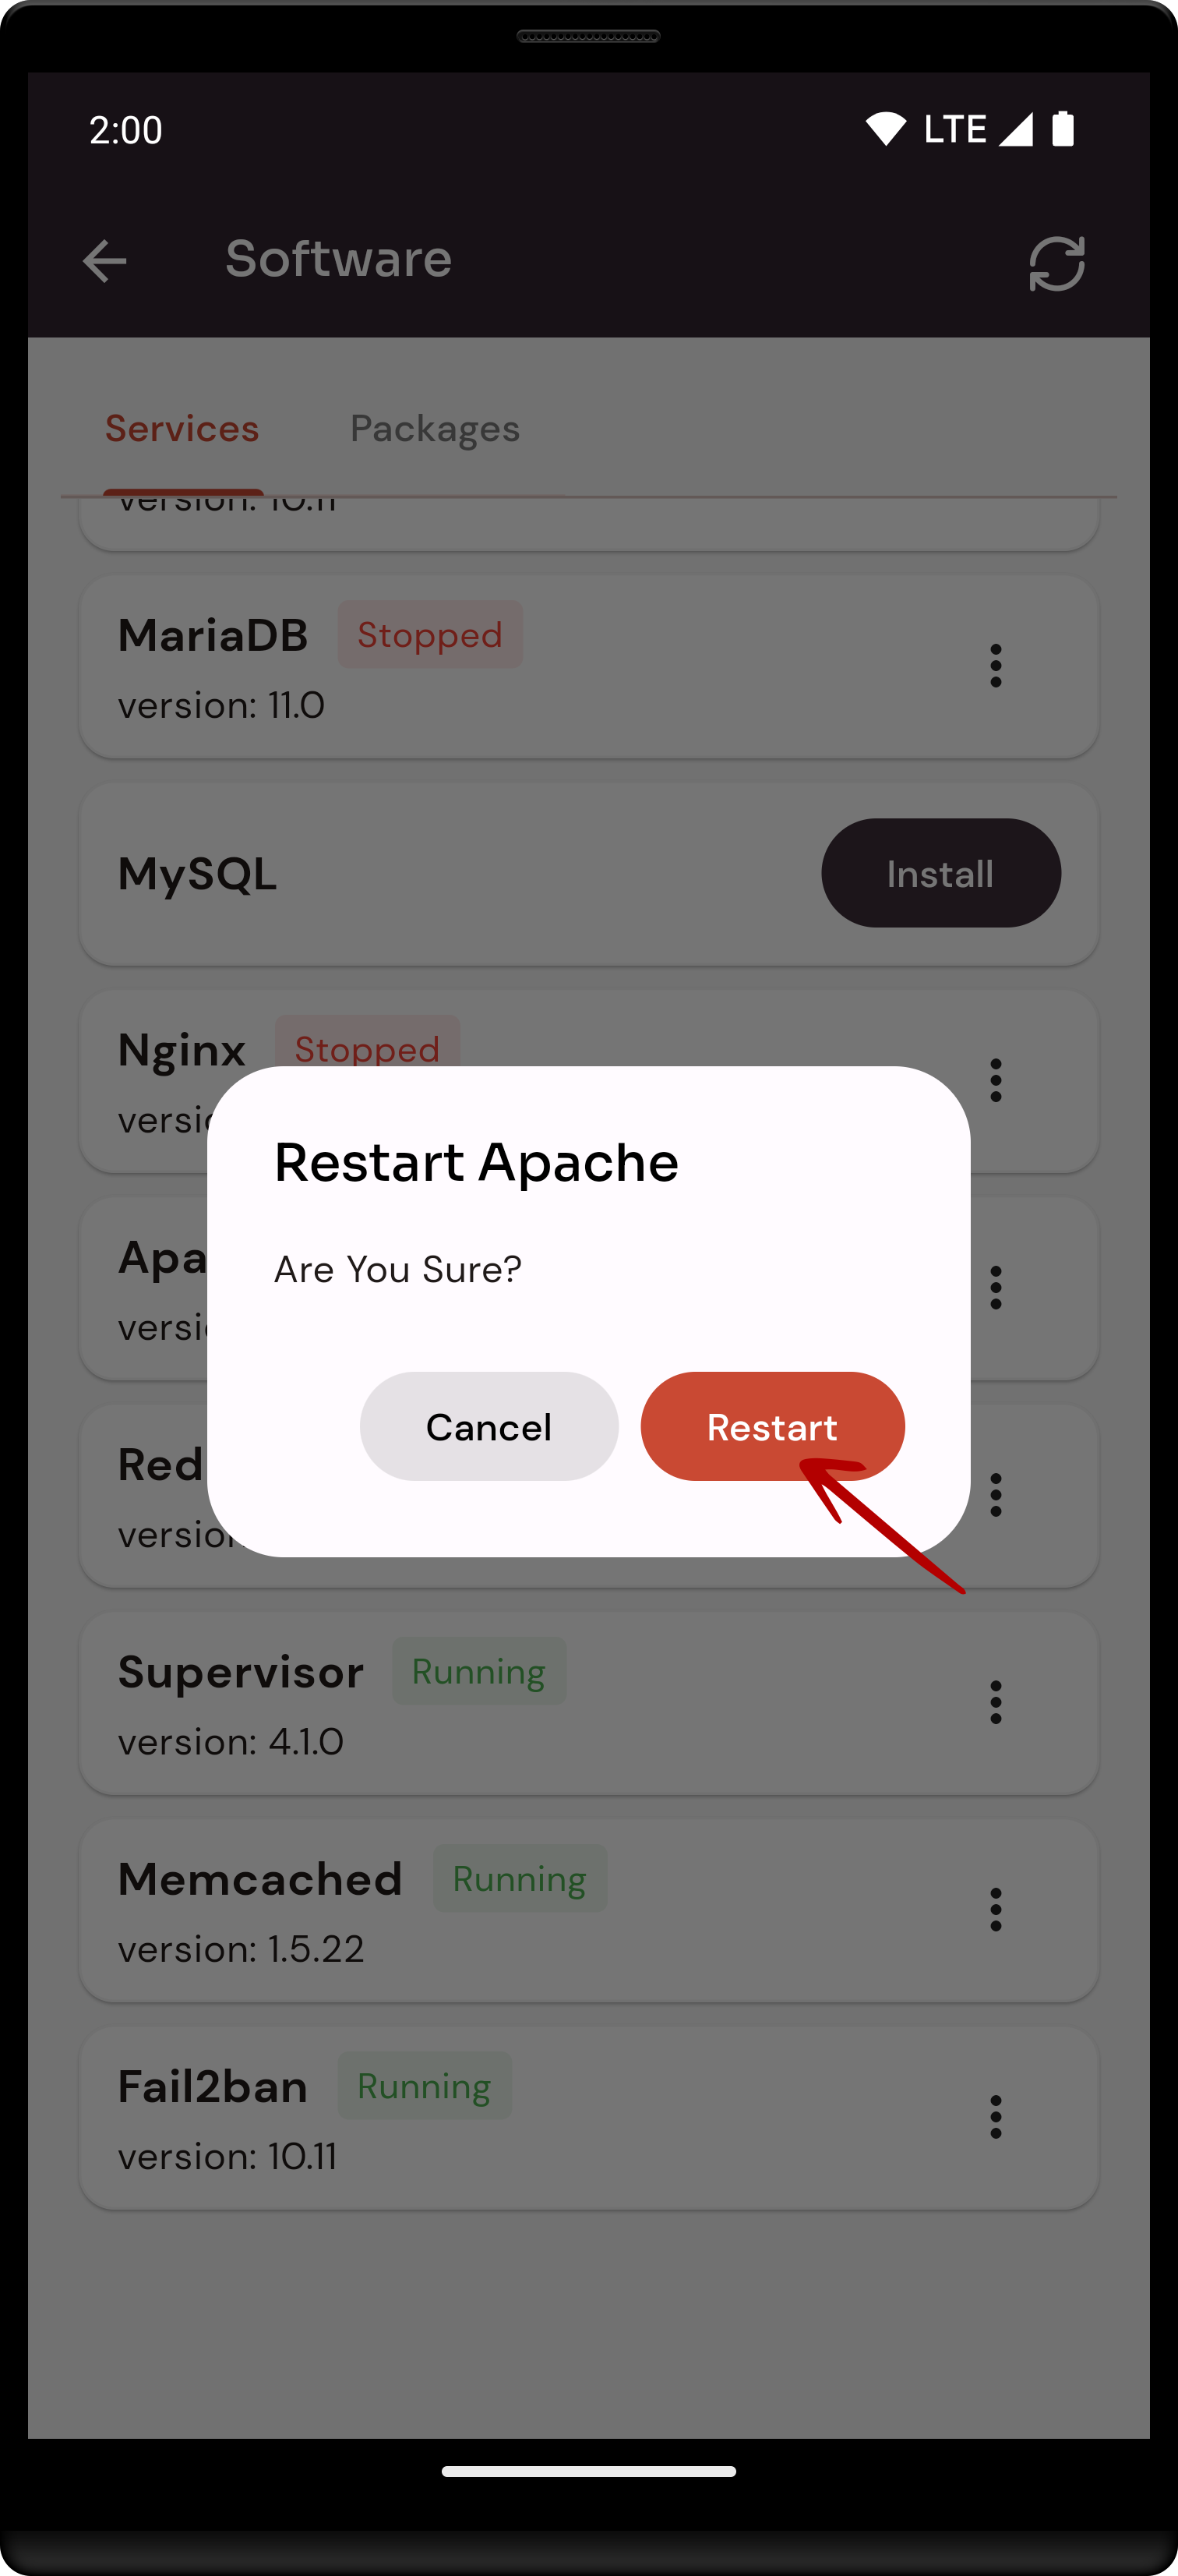
Here, you can see that Apache restarted successfully.