How to add Aliases on site through the cloudpanzer website?
Aliases, also known as redirects or redirections, allow you to set up multiple URLs that all point to the same page or content on your website. This can be useful for several reasons, including improving the user experience by providing users with multiple ways to access the same content and optimizing your website for search engines by using targeted keywords in your URLs.
Prerequisites :
You must have an Active Server and Active site. You can jump to the tutorial section if the above conditions are proper, Or first follow the links below to set up the prerequisites.
How to install a Server
How to Setup a Site
Tutorial :
You can watch the Video or Continue reading the post.
Follow the steps below to add aliases to the site.
Navigate to the site Dashboard (Use this link to view How to Navigate)
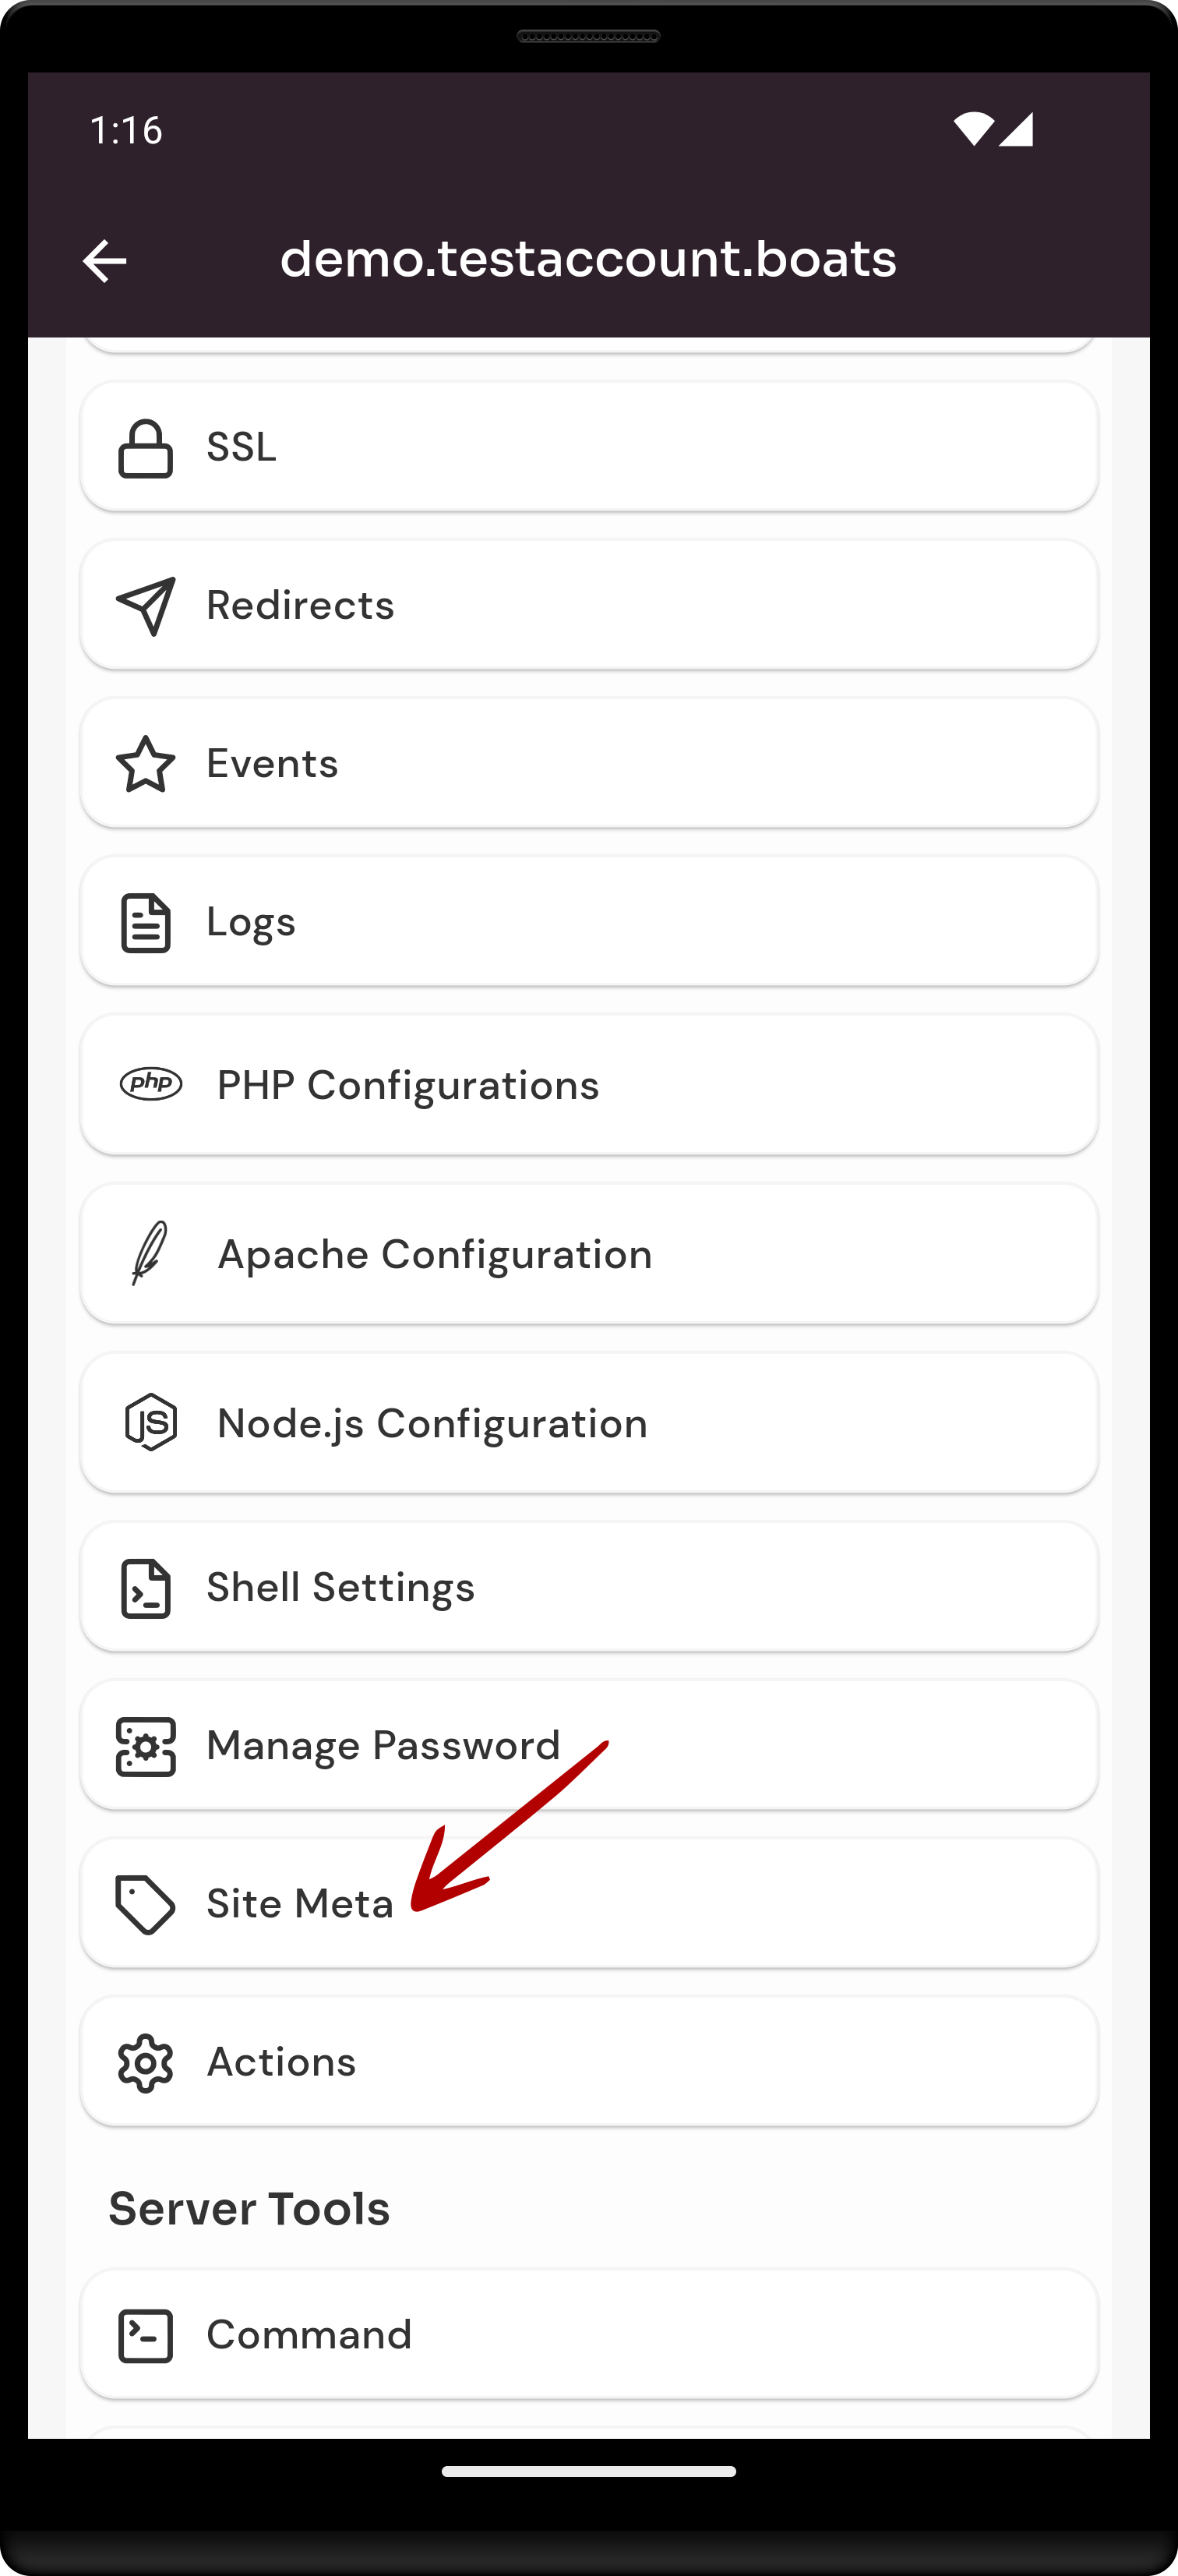
1. Select the Site Meta Option.
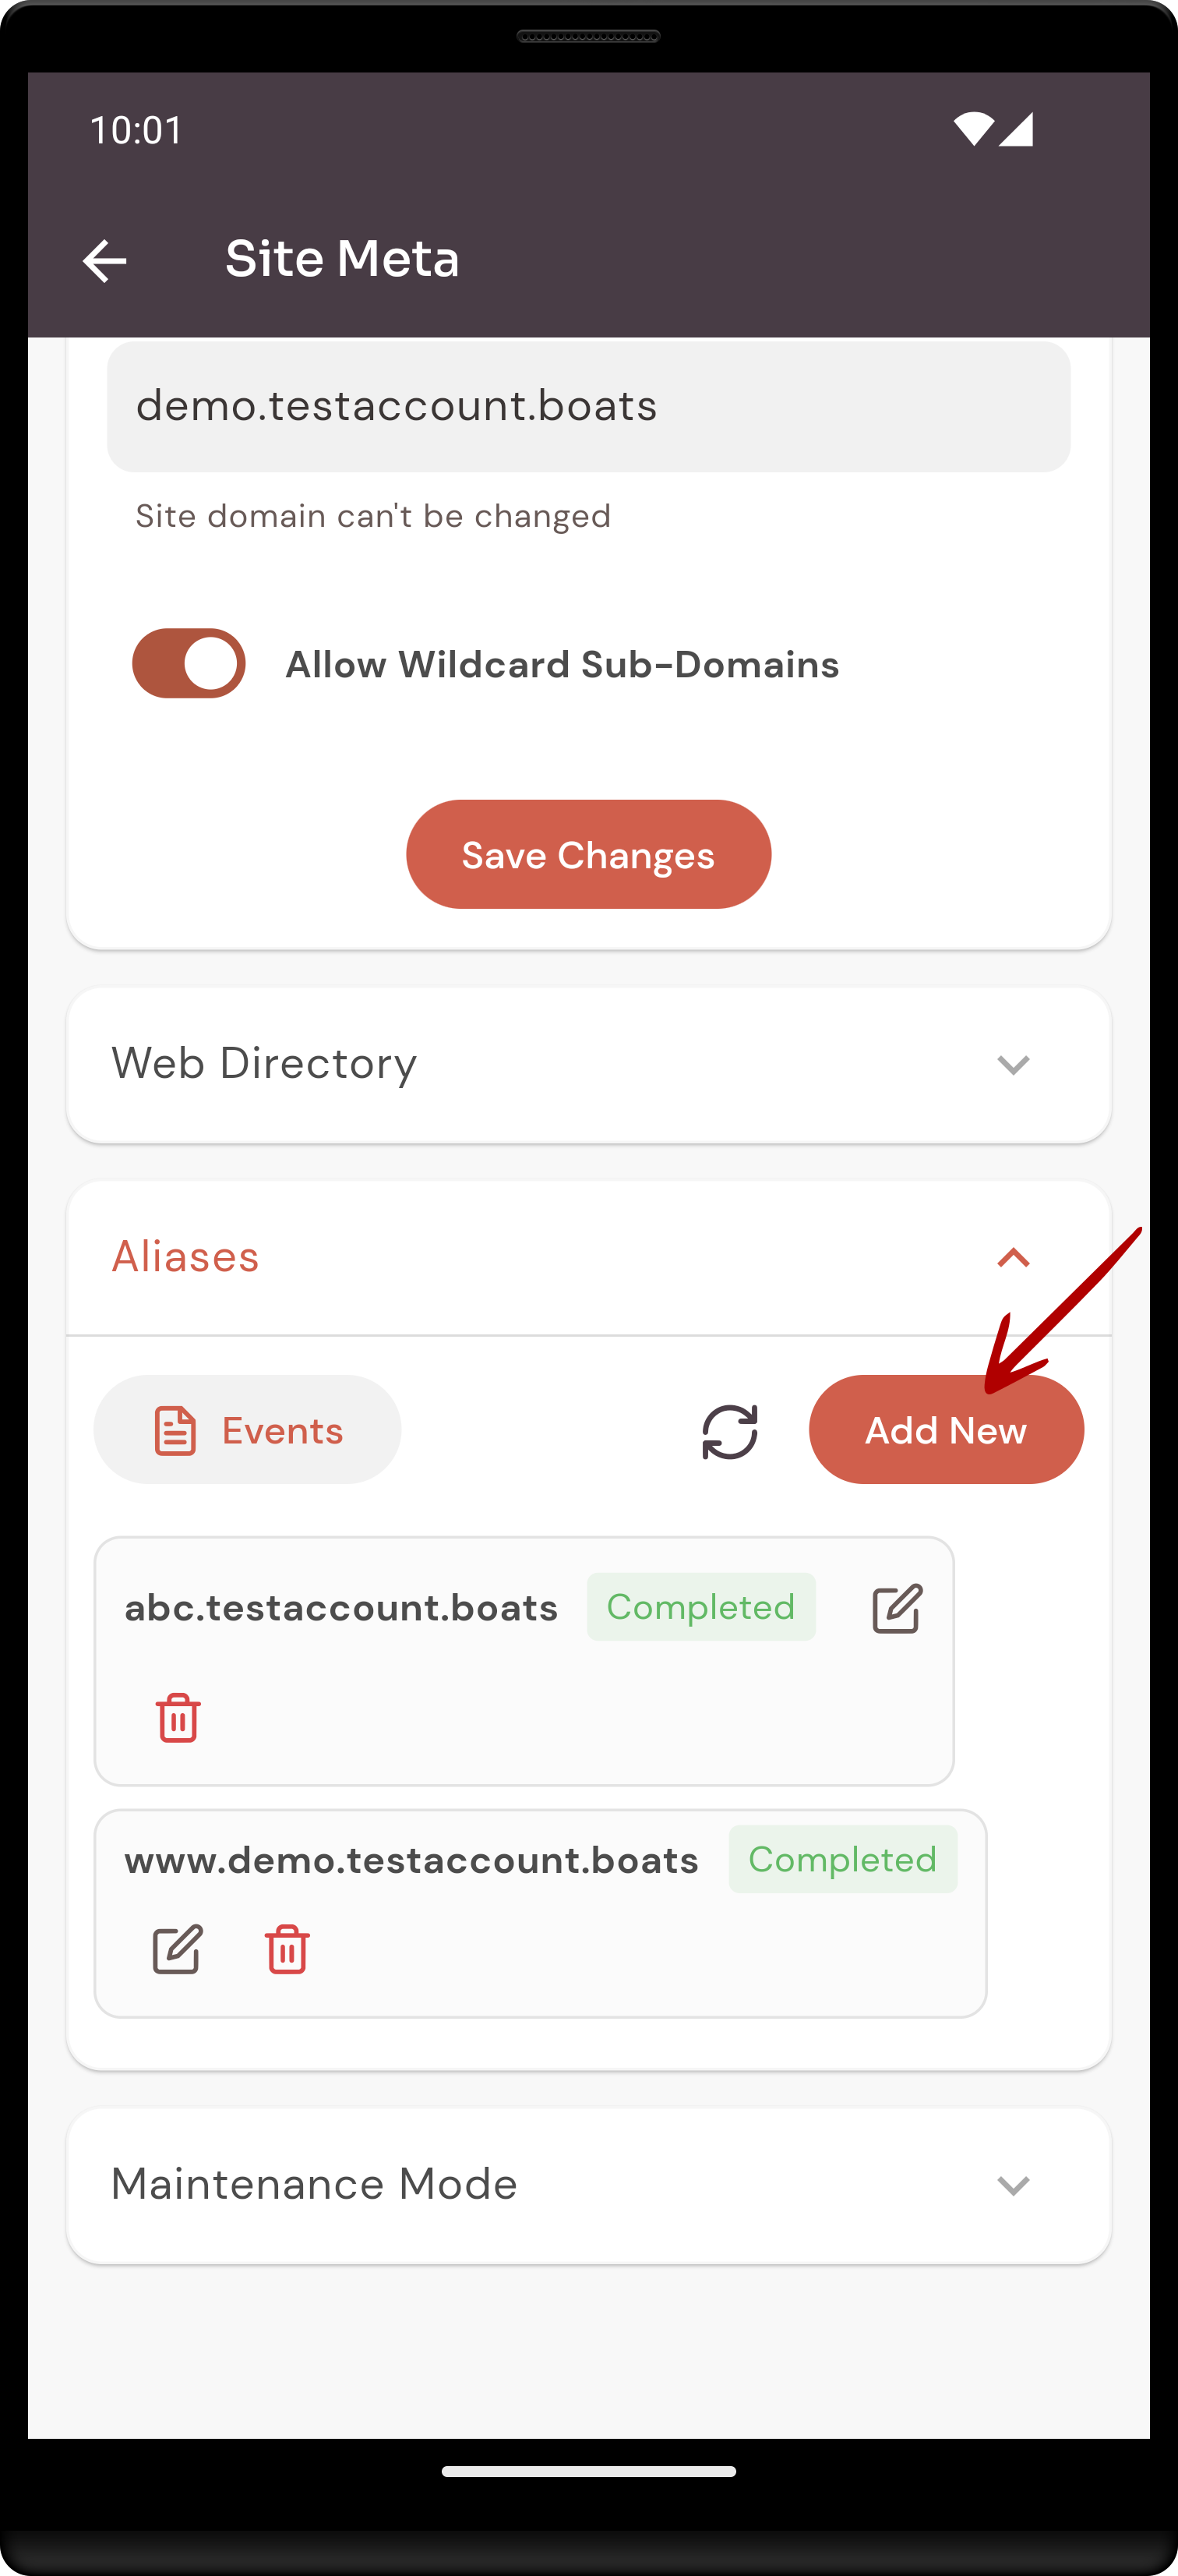
2. Select the aliases dropdown.

3. Click on the Add New Button.
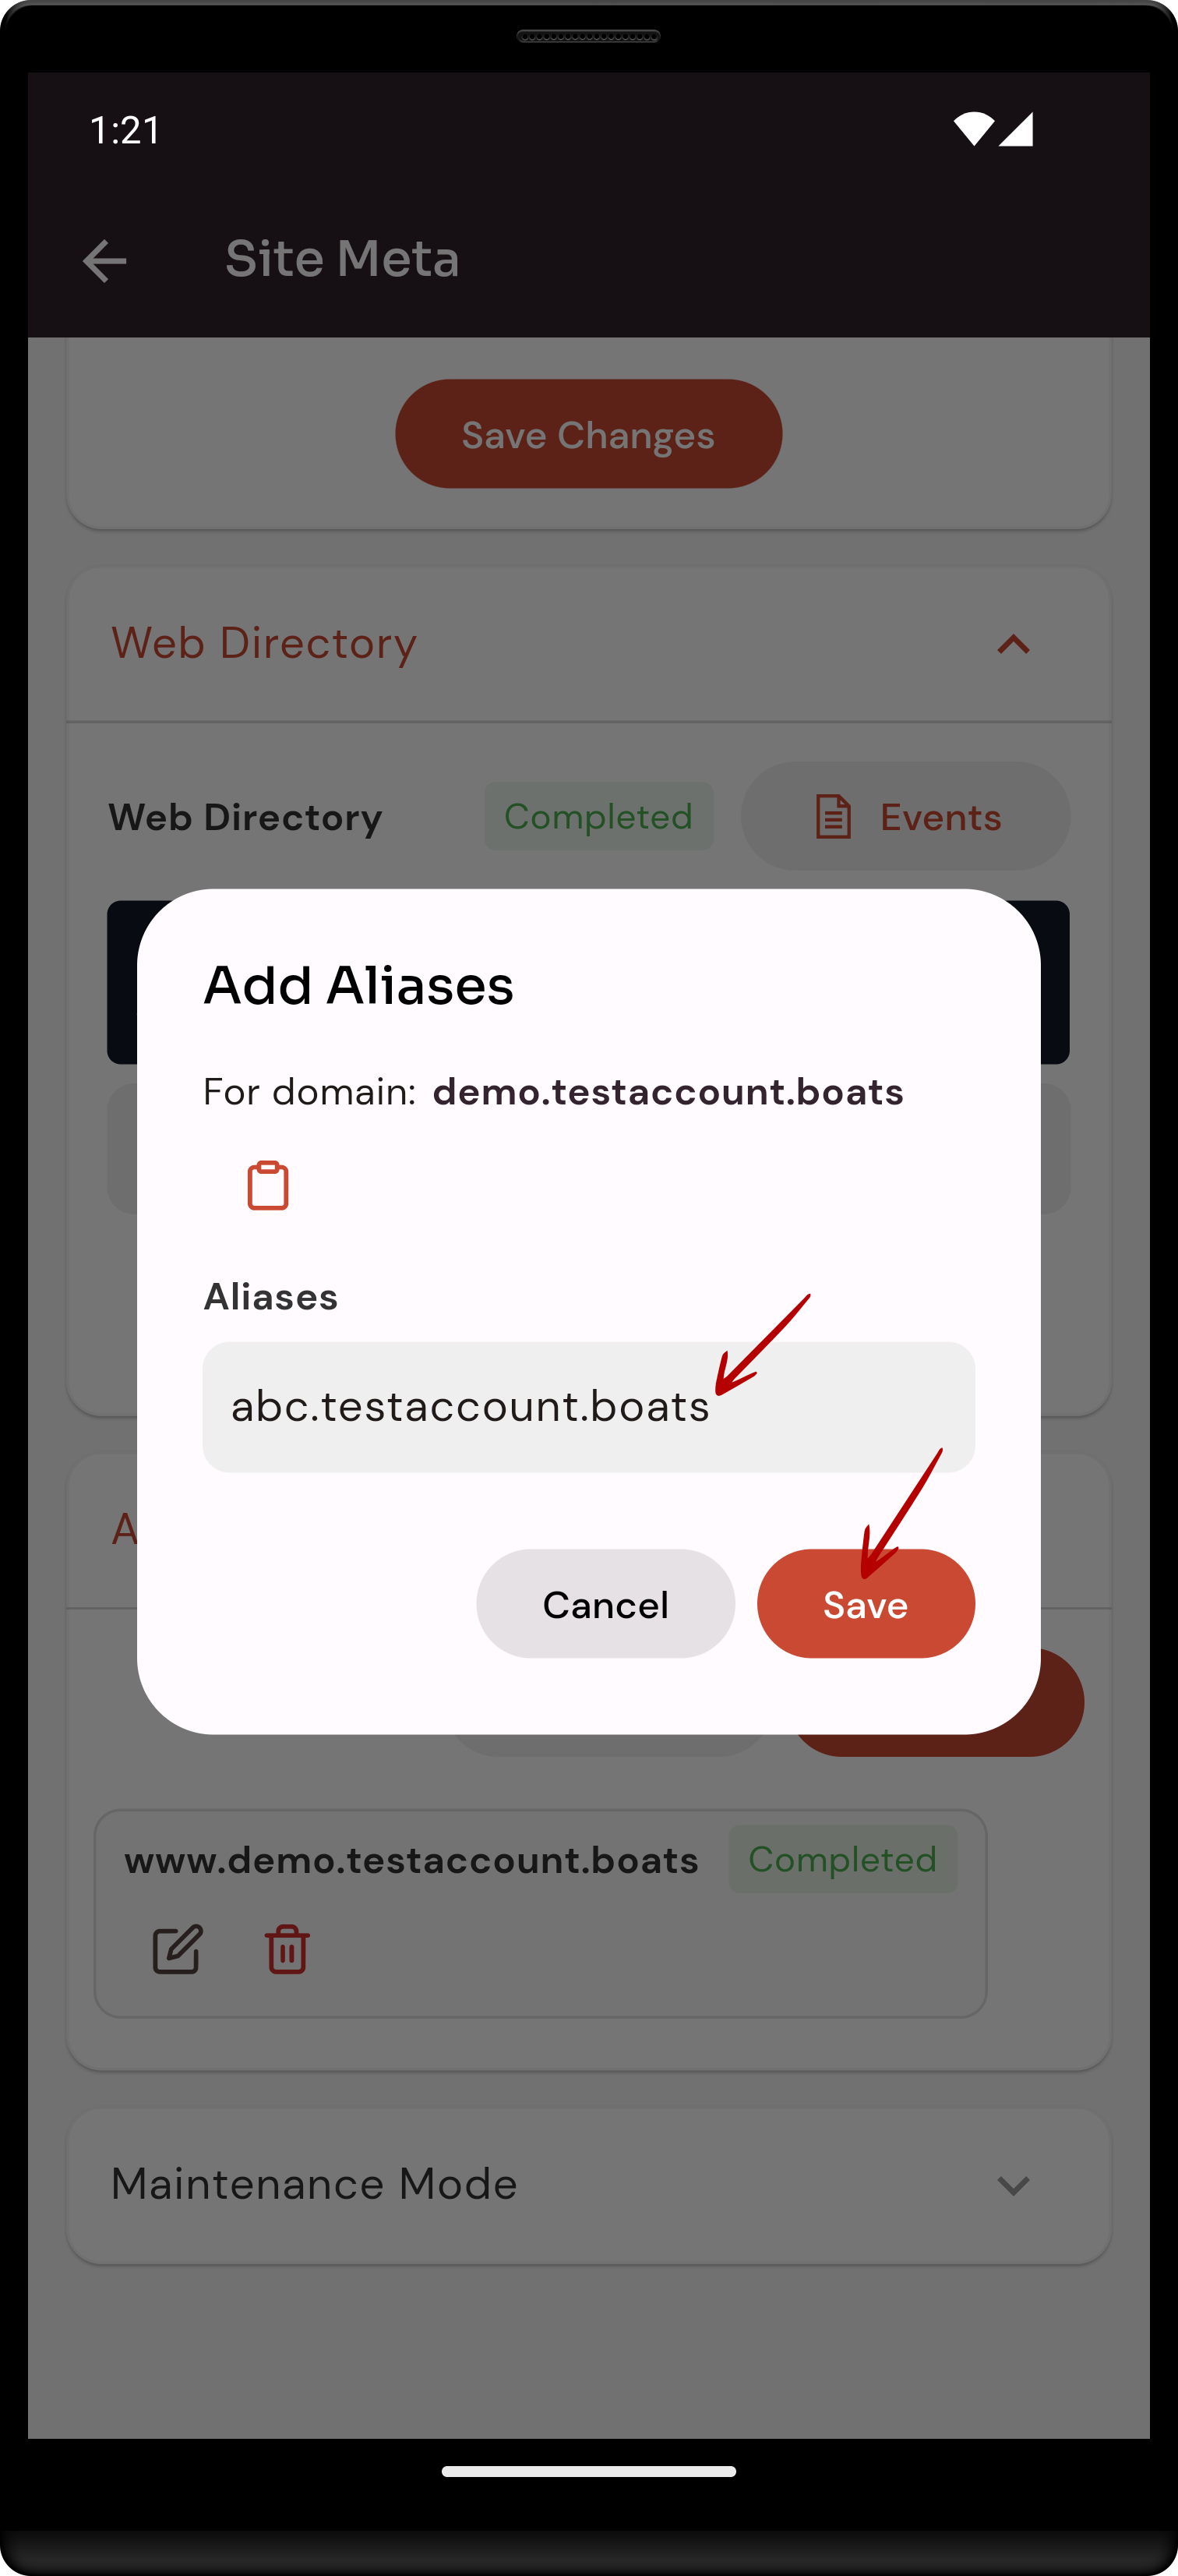
4. Enter the Domain name and Click on the Save Button.
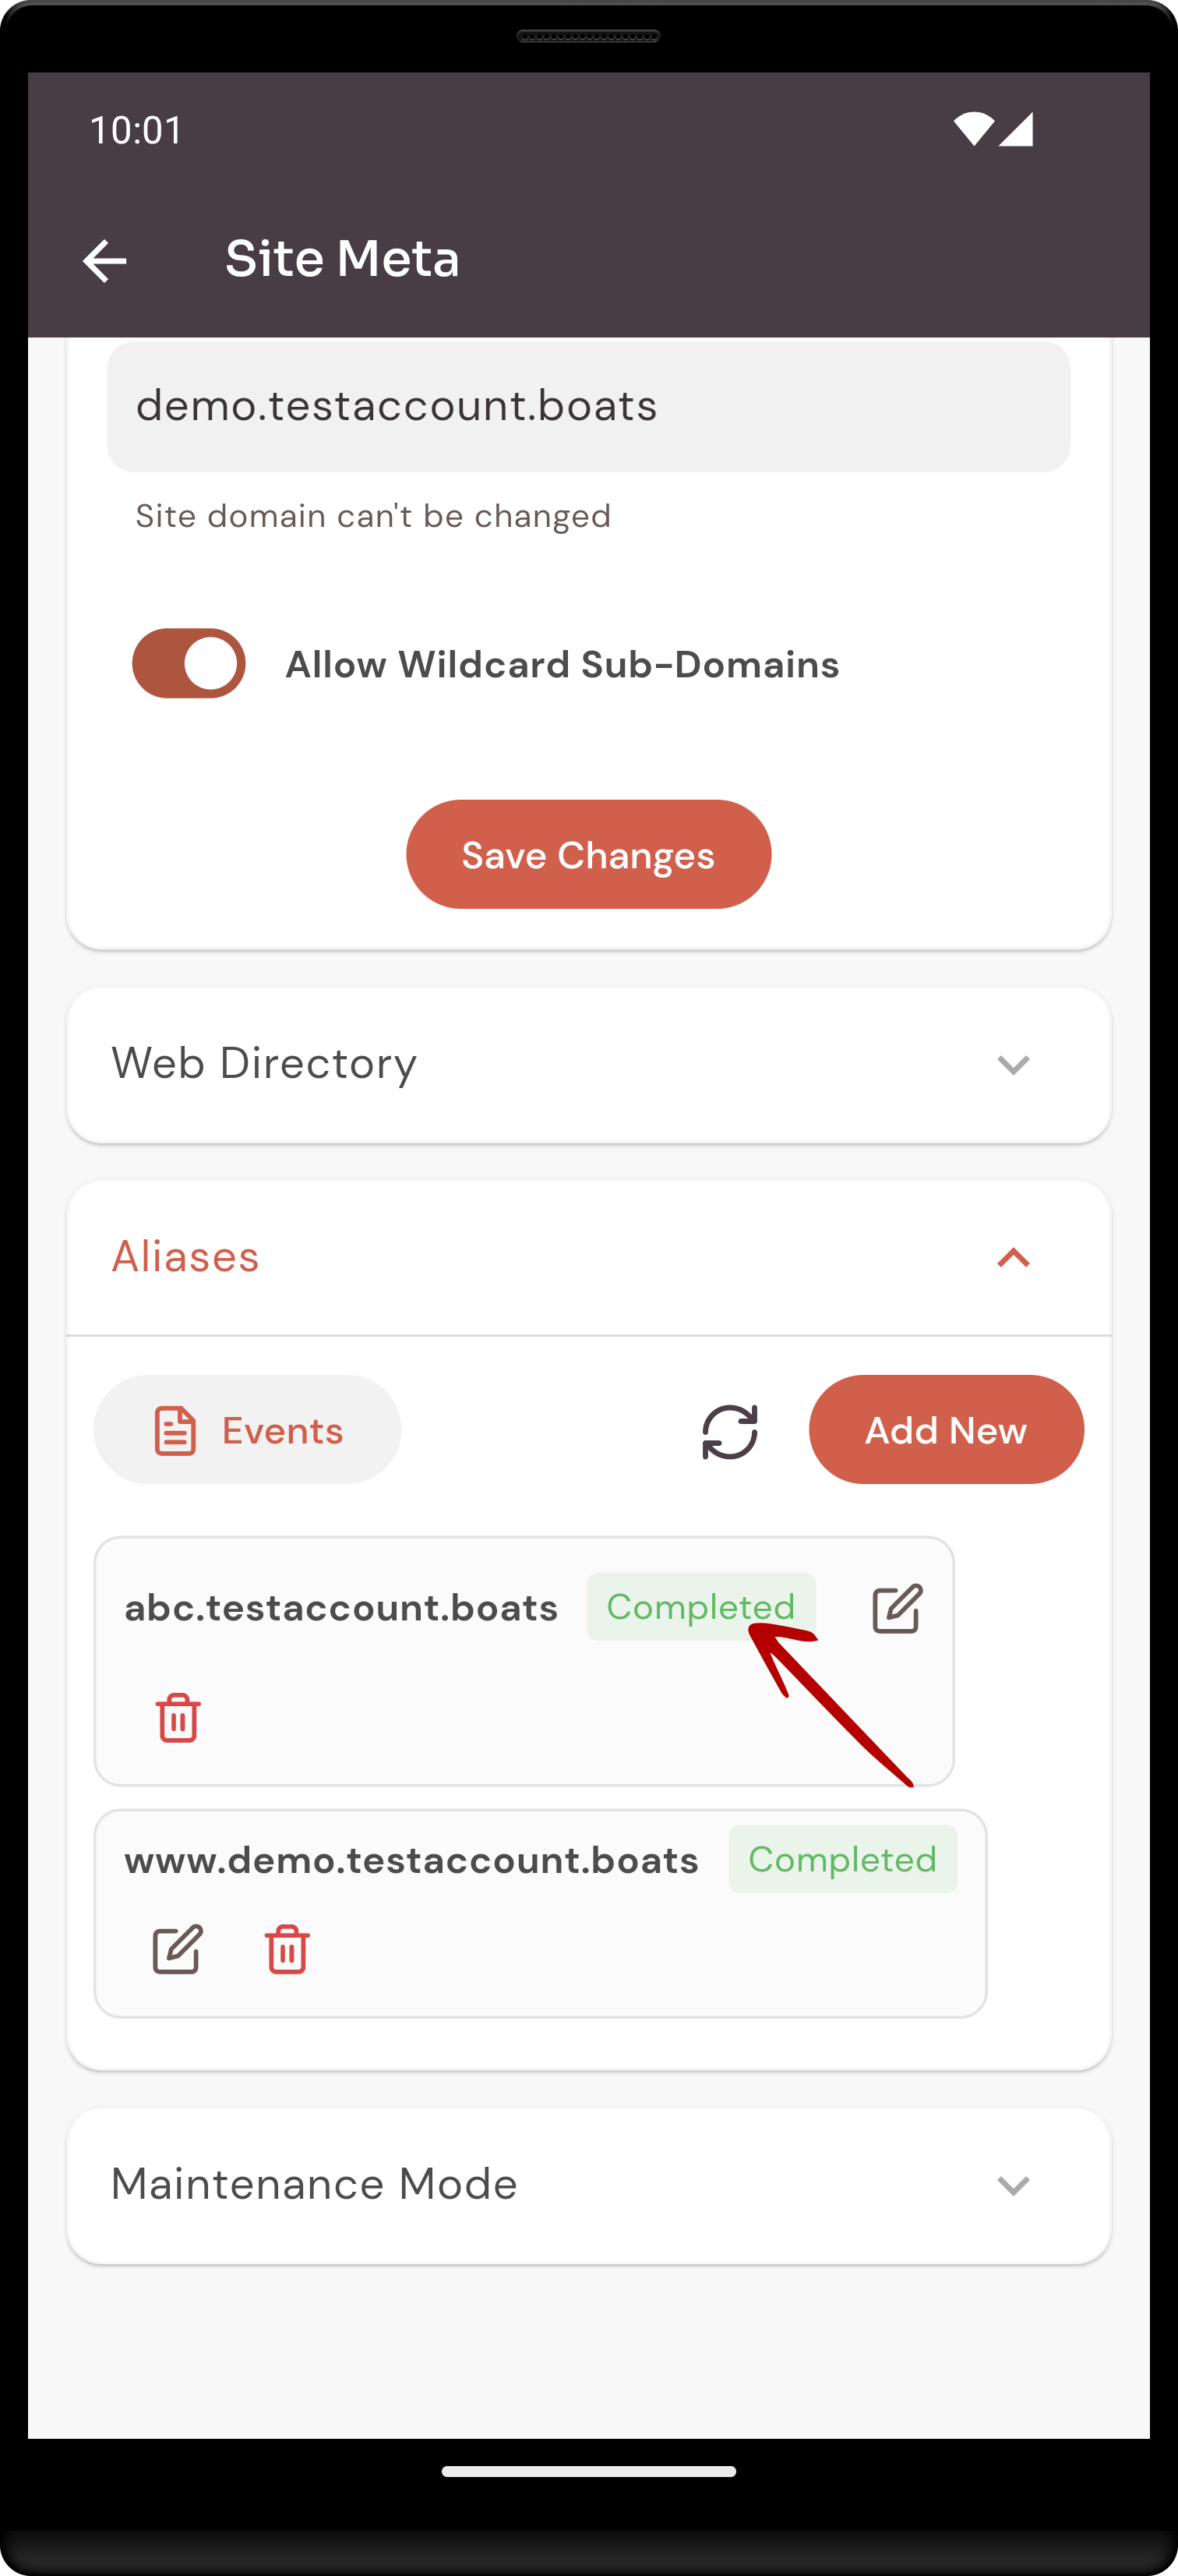
Here, you can see the Aliases added successfully.
No Comments